

Easy tomato growing tips are what every gardener, from novice to seasoned pro, craves! Let’s face it, there’s nothing quite like biting into a sun-ripened, juicy tomato fresh from your own backyard. But sometimes, those luscious red fruits seem to elude us, leaving us with spindly plants and disappointing yields.
The history of tomato cultivation is fascinating, stretching back to South America where they were initially considered ornamental rather than edible! Thankfully, tastes evolved, and now tomatoes are a staple in cuisines worldwide. But even with centuries of cultivation under our belts, achieving tomato-growing success can still feel like a challenge.
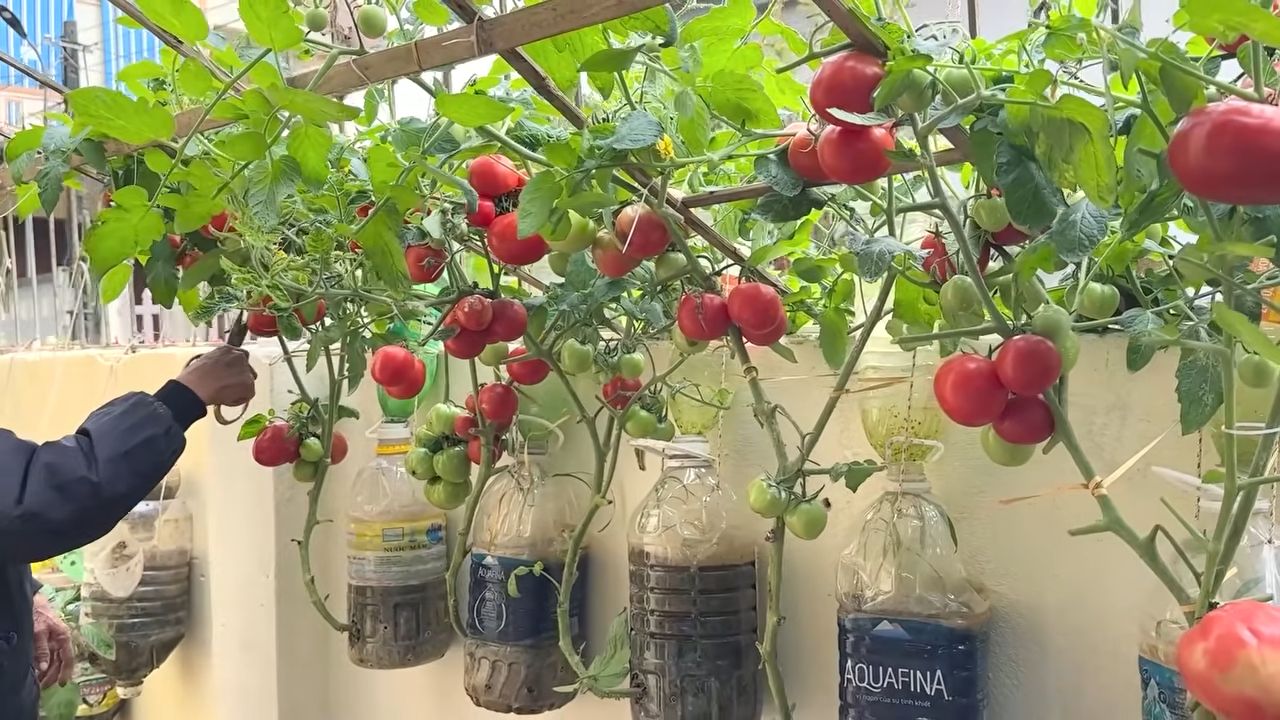
That’s where these DIY tricks and hacks come in! I’m going to share some of my favorite, tried-and-true methods for ensuring a bountiful tomato harvest. Whether you’re struggling with blossom end rot, pests, or simply want to maximize your yield, these easy tomato growing tips will empower you to grow the best tomatoes you’ve ever tasted. Imagine serving up salads bursting with flavor, making homemade sauces that are truly unforgettable, and sharing your homegrown bounty with friends and family. Let’s get started and turn your tomato dreams into a delicious reality!
Grow Tomatoes Like a Pro: My Foolproof DIY Guide
Hey there, fellow gardening enthusiasts! I’m so excited to share my tried-and-true method for growing the juiciest, most flavorful tomatoes you’ve ever tasted. Forget those bland, store-bought imposters – we’re talking sun-ripened perfection right from your own backyard (or balcony!). This guide is packed with all the tips and tricks I’ve learned over the years, so even if you’re a complete beginner, you’ll be harvesting a bumper crop in no time.
Choosing the Right Tomato Variety
Before we even think about planting, let’s talk tomatoes! There are literally hundreds of varieties, and picking the right one is crucial for success. Consider these factors:
* Your climate: Some varieties thrive in hot, humid conditions, while others prefer cooler temperatures. Check your local climate zone and choose accordingly.
* Available space: Determinate tomatoes are bush-like and grow to a certain size, making them ideal for containers or smaller gardens. Indeterminate tomatoes, on the other hand, are vining and can grow quite large, requiring staking or caging.
* Desired use: Are you planning on making sauces, slicing for sandwiches, or snacking on cherry tomatoes? Different varieties are better suited for different purposes.
* Disease resistance: Look for varieties labeled with letters like V, F, N, T, or A, which indicate resistance to common tomato diseases like Verticillium wilt, Fusarium wilt, Nematodes, Tobacco Mosaic Virus, and Alternaria.
Some of my personal favorites include:
* ‘Early Girl’: A reliable early producer, perfect for cooler climates.
* ‘Roma’: Ideal for making sauces and pastes.
* ‘Beefsteak’: Large and meaty, perfect for slicing.
* ‘Sungold’: Incredibly sweet and flavorful cherry tomato.
Getting Started: Seeds vs. Seedlings
You have two options: starting your tomatoes from seed or buying seedlings from a nursery.
* Starting from seed: This gives you more control over the variety and can be more cost-effective. However, it requires more time and effort. You’ll need to start your seeds indoors 6-8 weeks before the last expected frost.
* Buying seedlings: This is a quicker and easier option, especially for beginners. Just make sure to choose healthy-looking plants with sturdy stems and no signs of disease.
Phase 1: Starting Seeds Indoors (If Applicable)
If you’re going the seed route, here’s how to get started:
1. Gather your supplies: You’ll need seed starting trays or small pots, seed starting mix (not regular potting soil!), tomato seeds, a spray bottle, and a heat mat (optional, but helpful).
2. Sow the seeds: Moisten the seed starting mix and fill the trays or pots. Sow the seeds about ¼ inch deep and gently cover them with soil.
3. Water gently: Use a spray bottle to mist the soil. Avoid overwatering, which can lead to damping off (a fungal disease that kills seedlings).
4. Provide warmth: Place the trays or pots on a heat mat or in a warm location (around 70-75°F).
5. Provide light: Once the seedlings emerge, they’ll need plenty of light. Place them under grow lights or in a sunny window. If using a window, rotate the trays regularly to prevent the seedlings from leaning towards the light.
6. Water regularly: Keep the soil consistently moist, but not soggy.
7. Fertilize: Once the seedlings have their first set of true leaves (the leaves that look like miniature tomato leaves), start fertilizing them with a diluted liquid fertilizer.
8. Harden off the seedlings: About a week before you plan to transplant them outdoors, gradually acclimate the seedlings to outdoor conditions. Start by placing them outside for a few hours each day, gradually increasing the amount of time they spend outdoors. This will help them adjust to the sun, wind, and temperature changes.
Phase 2: Preparing the Planting Site
Whether you’re using seeds or seedlings, proper site preparation is key.
1. Choose a sunny location: Tomatoes need at least 6-8 hours of sunlight per day.
2. Prepare the soil: Tomatoes prefer well-drained soil that is rich in organic matter. Amend the soil with compost, aged manure, or other organic materials.
3. Test the soil pH: Tomatoes prefer a slightly acidic soil pH of 6.0-6.8. You can test the soil pH with a soil testing kit. If the soil is too acidic, add lime. If it’s too alkaline, add sulfur.
4. Add fertilizer: Incorporate a slow-release fertilizer into the soil before planting. Look for a fertilizer that is specifically formulated for tomatoes.
Phase 3: Planting Your Tomatoes
Now for the fun part!
1. Dig the holes: Dig holes that are deep enough to bury the bottom third of the tomato plant’s stem. This will encourage the plant to develop more roots, resulting in a stronger, healthier plant.
2. Plant deeply: Remove the bottom leaves from the stem and plant the tomato plant deeply in the hole.
3. Water thoroughly: Water the plants thoroughly after planting.
4. Add support: Install stakes, cages, or trellises to support the tomato plants. This will prevent the plants from falling over and keep the fruit off the ground.
5. Mulch: Apply a layer of mulch around the plants to help retain moisture, suppress weeds, and regulate soil temperature. Straw, hay, wood chips, or shredded leaves are all good options.
Phase 4: Ongoing Care and Maintenance
Growing great tomatoes requires consistent care throughout the season.
1. Water regularly: Tomatoes need consistent watering, especially during hot, dry weather. Water deeply and infrequently, rather than shallowly and frequently. Aim to water at the base of the plant to avoid wetting the foliage, which can lead to disease.
2. Fertilize regularly: Fertilize the plants every 2-3 weeks with a liquid fertilizer.
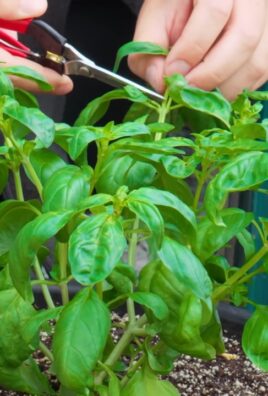
3. Prune: Pruning can help improve air circulation and sunlight penetration, which can reduce the risk of disease. Remove suckers (the small shoots that grow between the main stem and the branches) to encourage the plant to focus its energy on producing fruit.
4. Pest control: Keep an eye out for common tomato pests like aphids, tomato hornworms, and whiteflies. Handpick pests off the plants or use insecticidal soap or neem oil to control infestations.
5. Disease control: Monitor the plants for signs of disease, such as leaf spots, wilting, or fruit rot. Remove any infected leaves or fruit immediately. Use a fungicide if necessary.
6. Blossom-end rot prevention: Blossom-end rot is a common problem that causes the bottom of the tomato to rot. It’s usually caused by a calcium deficiency. To prevent blossom-end rot, ensure the soil is well-drained and water consistently. You can also add calcium to the soil by adding crushed eggshells or bone meal.
Dealing with Common Tomato Problems
Even with the best care, you might encounter some common tomato problems. Here’s how to handle them:
* Blossom-end rot: As mentioned above, this is usually caused by a calcium deficiency. Ensure consistent watering and add calcium to the soil.
* Tomato hornworms: These large green caterpillars can quickly defoliate a tomato plant. Handpick them off the plants or use Bacillus thuringiensis (Bt), a natural insecticide.
* Aphids: These small, sap-sucking insects can weaken plants. Spray them off with a strong stream of water or use insecticidal soap.
* Early blight: This fungal disease causes dark spots on the leaves. Remove infected leaves and use a fungicide.
* Fusarium wilt and Verticillium wilt: These soilborne diseases cause wilting and yellowing of the leaves. Choose disease-resistant varieties and practice crop rotation.
Harvesting Your Tomatoes
The moment you’ve been waiting for!
1. Harvest when ripe: Tomatoes are ripe when they are fully colored and slightly soft to the touch.
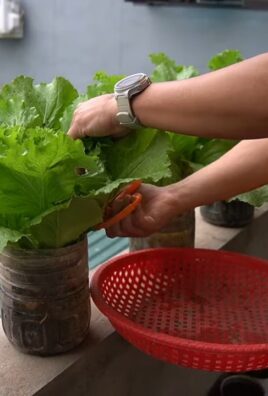
2. Gently twist or cut: Gently twist the tomato off the vine or use pruning shears to cut the stem just above the fruit.
3. Store properly: Store ripe tomatoes at room temperature. Avoid refrigerating them, as this can affect their flavor and texture.
Extra Tips for Tomato Success
* Companion planting: Plant basil near your tomatoes. Basil is said to improve the flavor of tomatoes and repel pests. Marigolds are also great for pest control.
* Water deeply and less frequently: This encourages deep root growth, making the plants more drought-tolerant.
* Don’t over-fertilize: Too much nitrogen can lead to lush foliage but fewer
Conclusion
So, there you have it! Transforming your tomato-growing game with this simple, yet incredibly effective DIY trick is not just about saving money; it’s about unlocking the full potential of your plants and reaping a harvest that’s bursting with flavor. We’ve shown you how to create a nutrient-rich environment that fosters strong root development, leading to healthier, more productive tomato plants.
Why is this a must-try? Because it addresses a fundamental need of tomato plants: consistent access to nutrients right where they need them most – at the roots. By burying organic matter directly beneath your plants, you’re creating a slow-release fertilizer system that feeds them throughout the growing season. This method reduces the need for frequent applications of synthetic fertilizers, promoting a more sustainable and environmentally friendly gardening practice. Plus, it’s incredibly easy to implement, even for beginner gardeners.
But don’t stop there! Experiment with different variations to find what works best for your soil and climate. Consider adding crushed eggshells for extra calcium to prevent blossom-end rot, a common problem in tomatoes. You could also incorporate banana peels for potassium, which is essential for fruit development. For those with acidic soil, a sprinkle of wood ash can help raise the pH level. Remember to research the specific needs of your tomato variety to tailor the DIY trick for optimal results.
We’re confident that this simple technique will revolutionize your tomato-growing experience. Imagine biting into a juicy, sun-ripened tomato that you grew yourself, knowing that you nurtured it with a natural and effective method. The satisfaction is unparalleled!
Now, it’s your turn to get your hands dirty and put this DIY trick to the test. We encourage you to try it out in your garden and share your results with us. Let us know what variations you experimented with, what challenges you faced, and, most importantly, what kind of bountiful harvest you achieved. Share your photos and stories in the comments below – we can’t wait to see your amazing tomato plants thriving! Let’s build a community of successful tomato growers, all thanks to this easy and effective DIY trick. Happy gardening!
Frequently Asked Questions (FAQ)
What exactly is the DIY trick you’re referring to?
The DIY trick involves burying organic matter, such as compost, aged manure, or even kitchen scraps, directly beneath your tomato plants when you transplant them. This creates a nutrient-rich reservoir that feeds the plants throughout the growing season.
What kind of organic matter should I use?
A variety of organic materials can be used. Compost is an excellent choice, providing a balanced mix of nutrients. Aged manure is also beneficial, but make sure it’s well-rotted to avoid burning the roots. Kitchen scraps like vegetable peels, coffee grounds, and eggshells can also be used, but bury them deeply to prevent attracting pests. Avoid using meat or dairy products, as they can attract unwanted animals and create unpleasant odors.
How much organic matter should I bury under each plant?
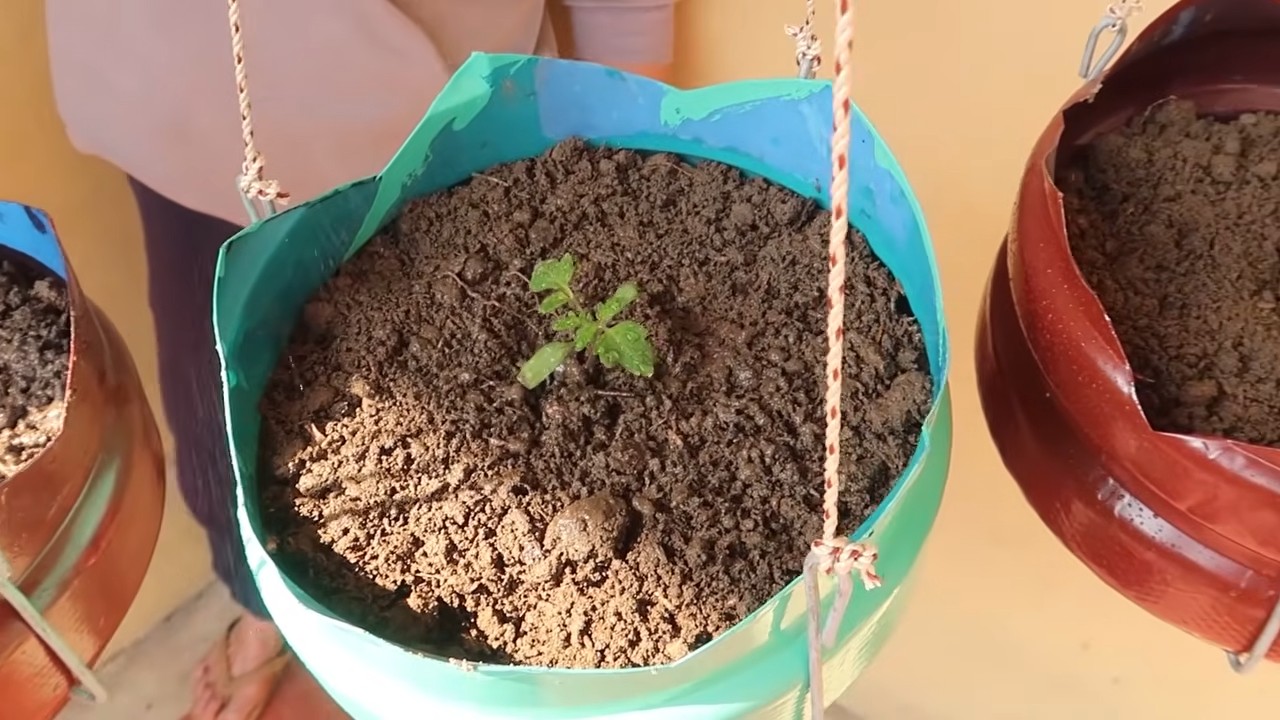
A good rule of thumb is to use about a handful or two of organic matter per plant. Dig a hole slightly larger than the root ball of your tomato seedling. Place the organic matter at the bottom of the hole, then cover it with a thin layer of soil before planting the seedling. This prevents the roots from directly contacting the organic matter, which could be too strong for them initially.
When is the best time to use this DIY trick?
The best time to implement this trick is when you transplant your tomato seedlings into the garden. This allows the roots to grow directly into the nutrient-rich zone as they develop.
Can I use this trick for other plants besides tomatoes?
Yes, this trick can be beneficial for other heavy-feeding plants like peppers, eggplants, and squash. However, be sure to research the specific nutrient needs of each plant to tailor the organic matter accordingly.
Will this DIY trick attract pests?
If you use the right kind of organic matter and bury it properly, it shouldn’t attract pests. Avoid using meat or dairy products, and make sure the organic matter is covered with a layer of soil. If you’re concerned about pests, you can also add a layer of diatomaceous earth around the base of the plant.
How often should I fertilize my tomato plants if I use this trick?
This DIY trick provides a slow-release source of nutrients, so you may not need to fertilize as frequently. However, it’s still a good idea to monitor your plants for signs of nutrient deficiencies, such as yellowing leaves or stunted growth. If you notice any deficiencies, you can supplement with a liquid fertilizer as needed.
What if I don’t have access to compost or aged manure?
If you don’t have access to compost or aged manure, you can use other organic materials like shredded leaves, grass clippings (untreated with herbicides), or even coffee grounds. Just make sure to bury them deeply and cover them with soil.
Can I use this trick in containers?
Yes, this trick can be used in containers as well. Just make sure to use a large enough container to accommodate the root system of the tomato plant. Add the organic matter to the bottom of the container before planting the seedling.
What if my tomato plants are already in the ground? Can I still use this trick?
While it’s best to implement this trick at planting time, you can still benefit from it even if your tomato plants are already in the ground. Carefully dig a small trench around the base of the plant, add the organic matter, and then cover it with soil. Be careful not to damage the roots of the plant.
How does this DIY trick help prevent blossom-end rot?
Blossom-end rot is often caused by a calcium deficiency in the developing fruit. By adding crushed eggshells to the organic matter, you’re providing a slow-release source of calcium that can help prevent this problem. Consistent watering is also crucial for preventing blossom-end rot, as it helps the plant absorb calcium from the soil.
Is this method considered organic?
Yes, using organic matter like compost and aged manure is a key component of organic gardening practices. This DIY trick promotes a natural and sustainable way to feed your tomato plants without relying on synthetic fertilizers.
What kind of soil is best for this DIY trick?
This trick works well in most soil types, but it’s especially beneficial in poor or sandy soils that are lacking in nutrients. Amending the soil with organic matter improves its structure, drainage, and water-holding capacity, creating a more favorable environment for tomato plants to thrive.
How long will the nutrients from the buried organic matter last?
The nutrients from the buried organic matter will gradually release over several weeks or even months, providing a sustained source of nourishment for your tomato plants throughout the growing season. The exact duration will depend on the type of organic matter used and the rate at which it decomposes.
What are the benefits of using this DIY trick compared to traditional fertilizers?
This DIY trick offers several advantages over traditional fertilizers. It provides a slow-release source of nutrients, which is less likely to burn the roots of the plant. It also improves the soil structure and water-holding capacity, creating a healthier environment for the plant to grow. Additionally, it’s a more sustainable and environmentally friendly option, as it reduces the need for synthetic fertilizers. And most importantly, it helps you grow delicious, healthy tomatoes!

Leave a Comment