

Easy melon growing methods are often shrouded in mystery, aren’t they? I remember my first attempt at growing melons – a sad, shriveled excuse for a watermelon that barely qualified as a snack! But don’t let that discourage you. For centuries, cultures around the globe, from ancient Egypt to the Far East, have prized melons for their sweetness and refreshing qualities. They were symbols of prosperity and even used as currency!
Now, you might be thinking, “I don’t have the time or space for a sprawling melon patch.” And that’s precisely why I’m so excited to share these DIY tricks and hacks with you. Imagine biting into a juicy, homegrown cantaloupe or watermelon, knowing you nurtured it from seed to fruit, even if you only have a small balcony or patio.
This article is your ultimate guide to unlocking the secrets of easy melon growing methods. We’ll debunk common myths, explore space-saving techniques, and reveal insider tips that will have you harvesting delicious melons in no time. Forget complicated gardening jargon; I’ll break it down into simple, actionable steps that anyone can follow. So, grab your gardening gloves, and let’s get ready to cultivate some sweet success!
Melonenanbau leicht gemacht: Dein DIY-Guide für eine reiche Ernte
Hey Gartenfreunde! Habt ihr euch jemals gefragt, wie man diese saftigen, süßen Melonen selbst anbauen kann? Ich war auch mal an diesem Punkt, und glaubt mir, es ist einfacher als ihr denkt! Mit ein paar Tricks und Kniffen könnt ihr schon bald eure eigenen, köstlichen Melonen ernten. In diesem Guide zeige ich euch, wie ihr das ganz einfach selbst hinbekommt. Los geht’s!
Die Vorbereitung: Der Schlüssel zum Erfolg
Bevor wir mit dem Pflanzen loslegen, müssen wir ein paar wichtige Vorbereitungen treffen. Das ist wie beim Kochen: Die richtigen Zutaten und die richtige Vorbereitung sind das A und O!
* Die richtige Melonensorte wählen: Es gibt unzählige Melonensorten, von Wassermelonen über Honigmelonen bis hin zu Cantaloupe-Melonen. Wählt eine Sorte, die zu eurem Klima und eurem Platzangebot passt. Kleinere Sorten wie ‘Sugar Baby’ Wassermelonen oder ‘Minnesota Midget’ Cantaloupe sind ideal für kleinere Gärten oder sogar für den Anbau in Töpfen. Informiert euch, welche Sorten in eurer Region gut gedeihen.
* Der perfekte Standort: Melonen lieben die Sonne! Sucht euch einen sonnigen Platz in eurem Garten aus, der mindestens 6-8 Stunden direkte Sonneneinstrahlung pro Tag bekommt. Außerdem sollte der Boden gut durchlässig sein. Staunässe ist der Tod jeder Melone!
* Bodenverbesserung: Melonen sind Starkzehrer, das heißt, sie brauchen viele Nährstoffe. Verbessert den Boden mit Kompost oder gut verrottetem Mist. Das sorgt für eine gute Grundlage und versorgt die Pflanzen mit allem, was sie brauchen. Ein leicht saurer bis neutraler pH-Wert (zwischen 6,0 und 7,0) ist ideal.
* Vorkultur oder Direktsaat: Ihr könnt Melonen entweder vorziehen oder direkt ins Beet säen. Die Vorkultur hat den Vorteil, dass die Pflanzen einen Vorsprung haben und schneller Früchte tragen. Die Direktsaat ist einfacher, aber die Pflanzen brauchen länger, um zu wachsen. Ich persönlich bevorzuge die Vorkultur, besonders in kühleren Regionen.
Schritt-für-Schritt-Anleitung: Melonen vorziehen
Wenn ihr euch für die Vorkultur entschieden habt, hier ist eine detaillierte Anleitung:
1. Aussaatgefäße vorbereiten: Verwendet kleine Töpfe oder Anzuchtschalen mit Anzuchterde. Füllt die Gefäße zu etwa zwei Dritteln mit Erde.
2. Samen säen: Legt 2-3 Samen pro Topf etwa 2-3 cm tief in die Erde. Bedeckt die Samen leicht mit Erde und gießt sie vorsichtig an.
3. Warm und feucht halten: Stellt die Töpfe an einen warmen, hellen Ort. Eine Temperatur von 20-25°C ist ideal für die Keimung. Haltet die Erde feucht, aber nicht nass. Eine Sprühflasche ist hier sehr hilfreich.
4. Keimung abwarten: Die Keimung dauert in der Regel 5-10 Tage. Sobald die ersten Keimlinge erscheinen, könnt ihr die schwächsten entfernen, sodass nur der stärkste Keimling pro Topf übrig bleibt.
5. Weiterkultivieren: Sobald die Pflanzen 2-3 echte Blätter haben, könnt ihr sie in größere Töpfe umtopfen. Verwendet dafür eine nährstoffreiche Blumenerde.
6. Abhärten: Bevor ihr die Melonen ins Freie pflanzt, müsst ihr sie abhärten. Das bedeutet, dass ihr sie langsam an die Bedingungen im Freien gewöhnt. Stellt die Pflanzen tagsüber für ein paar Stunden ins Freie und holt sie abends wieder rein. Steigert die Zeit im Freien jeden Tag, bis die Pflanzen den ganzen Tag draußen bleiben können.
Schritt-für-Schritt-Anleitung: Melonen ins Beet pflanzen
Nachdem die Eisheiligen (Mitte Mai) vorbei sind und keine Frostgefahr mehr besteht, können die Melonen ins Beet gepflanzt werden.
1. Beet vorbereiten: Lockert den Boden im Beet auf und entfernt Unkraut. Grabt ein Pflanzloch, das etwas größer ist als der Wurzelballen der Melonenpflanze.
2. Pflanzen einsetzen: Nehmt die Melonenpflanze vorsichtig aus dem Topf und setzt sie ins Pflanzloch. Achtet darauf, dass der Wurzelballen nicht beschädigt wird.
3. Mit Erde auffüllen: Füllt das Pflanzloch mit Erde auf und drückt die Erde leicht an.
4. Angießen: Gießt die Melonenpflanze gründlich an.
5. Mulchen: Mulcht den Boden um die Melonenpflanzen mit Stroh oder Holzhackschnitzeln. Das hält den Boden feucht, unterdrückt Unkraut und schützt die Früchte vor direktem Bodenkontakt.
6. Pflanzabstand beachten: Melonen brauchen Platz! Plant sie in einem Abstand von mindestens 60-90 cm zueinander. Bei größeren Sorten wie Wassermelonen solltet ihr sogar noch mehr Platz einplanen.
Die Pflege: Damit eure Melonen prächtig gedeihen
Die richtige Pflege ist entscheidend für eine reiche Melonenernte. Hier sind ein paar Tipps:
* Regelmäßig gießen: Melonen brauchen viel Wasser, besonders während der Fruchtbildung. Gießt regelmäßig, aber vermeidet Staunässe. Am besten gießt ihr morgens, damit die Blätter über den Tag abtrocknen können.
* Düngen: Düngt die Melonen regelmäßig mit einem organischen Dünger oder einem speziellen Melonendünger. Achtet darauf, dass der Dünger reich an Kalium ist, da Kalium die Fruchtbildung fördert.
* Unkraut entfernen: Haltet das Beet unkrautfrei, damit die Melonenpflanzen nicht um Nährstoffe konkurrieren müssen.
* Rankhilfe: Einige Melonensorten, besonders kleinere Sorten, können an einer Rankhilfe gezogen werden. Das spart Platz und sorgt für eine bessere Belüftung der Pflanzen.
* Fruchtansatz fördern: Um den Fruchtansatz zu fördern, könnt ihr die weiblichen Blüten von Hand bestäuben. Das ist besonders wichtig, wenn es wenig Bienen oder andere Bestäuber in eurem Garten gibt. Die weiblichen Blüten erkennt man an dem kleinen Fruchtansatz direkt hinter der Blüte. Nehmt einfach etwas Pollen von einer männlichen Blüte (die keine Fruchtansätze hat) und übertragt ihn auf die Narbe der weiblichen Blüte.
* Früchte schützen: Wenn die Melonen größer werden, solltet ihr sie vor direktem Bodenkontakt schützen. Legt sie auf ein Stück Holz, Stroh oder einen Stein. Das verhindert Fäulnis und sorgt für eine gleichmäßige Reifung.
Die Ernte: Der Lohn eurer Mühe
Die Erntezeit ist der schönste Teil! Aber wann sind die Melonen reif? Hier sind ein paar Anzeichen:
* Klopftest: Klopft leicht auf die Melone. Eine reife Melone klingt hohl.
* Stielansatz: Der Stielansatz einer reifen Melone ist trocken und rissig.
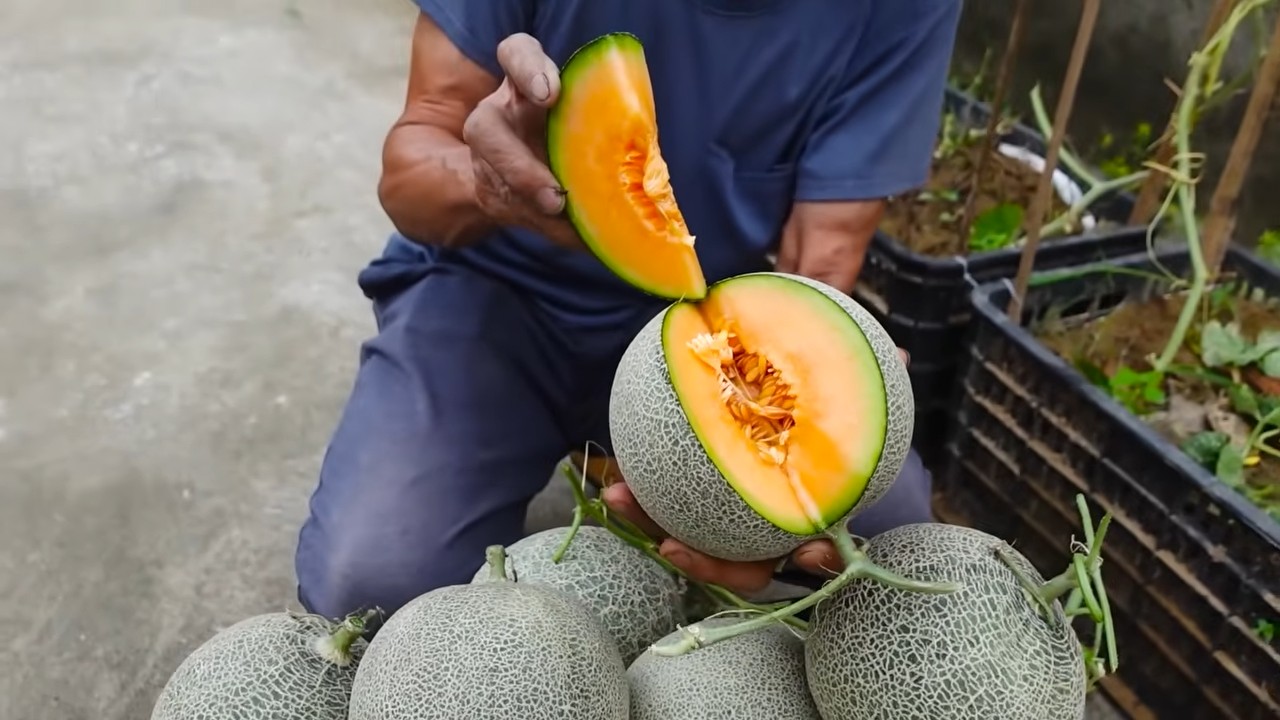
* Farbe: Die Farbe der Melone verändert sich. Wassermelonen werden dunkler, Honigmelonen gelber und Cantaloupe-Melonen bekommen ein netzartiges Muster.
* Duft: Reife Melonen duften aromatisch.
Wenn ihr euch unsicher seid, könnt ihr eine Melone probeweise ernten und probieren. Wenn sie süß und saftig ist, sind die anderen Melonen wahrscheinlich auch reif.
Schneidet die Melone vorsichtig vom Stiel ab und genießt eure selbstgezüchtete Köstlichkeit!
Häufige Probleme und Lösungen
Auch beim Melonenanbau kann es zu Problemen kommen. Hier sind ein paar häufige Probleme und wie ihr sie lösen könnt:
* Blattläuse: Blattläuse können die Blätter der Melonenpflanzen befallen. Bekämpft sie mit einem natürlichen Insektizid oder mit Nützlingen wie Marienkäfern.
* Echter Mehltau: Echter Mehltau ist eine Pilzkrankheit, die sich durch einen weißen Belag auf den Blättern äußert. Sorgt für eine gute Belüftung der Pflanzen und behandelt sie gegebenenfalls mit einem Fungizid.
* Fru

Conclusion
So, there you have it! Mastering these easy melon growing methods isn’t just about saving money or having bragging rights; it’s about connecting with nature, understanding the food you eat, and enjoying the unparalleled flavor of a truly homegrown melon. Forget those bland, store-bought melons that lack character and sweetness. With a little effort and these simple techniques, you can cultivate juicy, flavorful melons right in your own backyard, on your patio, or even in a container on your balcony.
The beauty of these methods lies in their adaptability. Whether you’re a seasoned gardener or a complete beginner, there’s a technique here that will work for you. From choosing the right variety for your climate to optimizing your soil and watering schedule, each step is designed to maximize your chances of success. And remember, gardening is a journey, not a destination. Don’t be discouraged if your first attempt isn’t perfect. Learn from your mistakes, adapt your approach, and keep experimenting.
Consider these variations to further personalize your melon growing experience:
* Vertical Gardening: If space is limited, try growing your melons vertically on a trellis or fence. This not only saves space but also improves air circulation, reducing the risk of disease. Choose smaller melon varieties for vertical growing, such as cantaloupes or personal-sized watermelons.
* Companion Planting: Enhance your melon patch by planting companion plants like marigolds, basil, or nasturtiums. These plants can help deter pests, attract beneficial insects, and even improve the flavor of your melons.
* Grafting: For advanced gardeners, grafting melon plants onto more vigorous rootstocks can improve disease resistance and increase yields. This technique requires some skill and practice, but the results can be well worth the effort.
* Different Varieties: Don’t limit yourself to just one type of melon. Experiment with different varieties to discover your favorites. Try growing honeydew, Crenshaw, or even specialty melons like Galia or Charentais. Each variety has its own unique flavor and texture.
* Hydroponics: For those looking for a more controlled environment, hydroponic melon growing can be a rewarding experience. This method involves growing melons in a nutrient-rich water solution without soil.
The most important thing is to get started! Don’t be afraid to experiment and find what works best for you. The reward of biting into a sweet, juicy melon that you grew yourself is an experience that you won’t soon forget.
We’re confident that these easy melon growing methods will empower you to cultivate your own delicious melons. We encourage you to give them a try and share your experiences with us. Post photos of your melon patch, share your tips and tricks, and let us know what varieties you’re growing. Together, we can create a community of melon enthusiasts and help each other grow the best melons possible! So, grab your seeds, get your hands dirty, and get ready to enjoy the sweet taste of success! Happy gardening!
Frequently Asked Questions (FAQ)
What are the easiest melon varieties to grow for beginners?
For beginners, cantaloupes and smaller watermelon varieties like Sugar Baby are generally the easiest to grow. They tend to be more forgiving and mature relatively quickly. Honeydew melons can also be a good option, but they may require a slightly longer growing season. Look for varieties that are specifically bred for your climate and growing conditions. Seed packets and plant labels will often provide this information. Consider starting with disease-resistant varieties to minimize potential problems.
How much sunlight do melons need to grow successfully?
Melons are sun-loving plants and require at least 6-8 hours of direct sunlight per day to thrive. Insufficient sunlight can result in smaller, less flavorful melons. Choose a planting location that receives full sun throughout the day. If you’re growing melons in containers, make sure to place them in a sunny spot. You may need to rotate the containers periodically to ensure that all sides of the plant receive adequate sunlight.
What type of soil is best for growing melons?
Melons prefer well-drained, fertile soil that is rich in organic matter. Amend your soil with compost or well-rotted manure before planting to improve its fertility and drainage. The ideal soil pH for melons is between 6.0 and 6.8. You can test your soil pH using a soil testing kit and adjust it accordingly. Avoid planting melons in heavy clay soil, as this can lead to root rot. If you have clay soil, amend it with plenty of organic matter to improve its drainage.
How often should I water my melon plants?
Melons need consistent watering, especially during hot, dry weather. Water deeply and regularly, aiming to keep the soil consistently moist but not waterlogged. Avoid overhead watering, as this can promote fungal diseases. Instead, water at the base of the plant using a soaker hose or drip irrigation system. As the melons begin to ripen, you can reduce watering slightly to concentrate the sugars and improve their flavor.
How do I know when my melons are ripe?
Determining when a melon is ripe can be tricky, but there are a few telltale signs to look for. For cantaloupes, the stem should slip easily from the vine with a gentle tug. The skin should also turn a golden color and have a fragrant aroma. For watermelons, look for a dull thud when you tap the melon. The tendril closest to the melon should also be brown and dry. The underside of the melon, where it rests on the ground, should turn a creamy yellow color. Honeydew melons are ripe when the skin turns a pale yellow color and the blossom end is slightly soft to the touch.
What are some common pests and diseases that affect melon plants, and how can I prevent them?
Common pests that affect melon plants include aphids, squash bugs, and cucumber beetles. These pests can be controlled with insecticidal soap, neem oil, or by handpicking them off the plants. Common diseases include powdery mildew, downy mildew, and fusarium wilt. These diseases can be prevented by providing good air circulation, avoiding overhead watering, and using disease-resistant varieties. Crop rotation can also help to prevent soilborne diseases.
Can I grow melons in containers?
Yes, you can grow melons in containers, but you’ll need to choose a large container (at least 20 gallons) and select smaller melon varieties. Make sure the container has good drainage and use a high-quality potting mix. Water and fertilize regularly, as container-grown plants tend to dry out and deplete nutrients more quickly. You may also need to provide support for the vines, such as a trellis or stake.
How can I improve the sweetness of my melons?
Several factors can influence the sweetness of melons. First, choose a variety that is known for its sweetness. Second, provide your plants with plenty of sunlight and water. Third, fertilize regularly with a balanced fertilizer. Fourth, reduce watering slightly as the melons begin to ripen to concentrate the sugars. Finally, harvest your melons at the peak of ripeness.
What is the best way to store harvested melons?
Store harvested melons in a cool, dry place. Whole melons can be stored at room temperature for a few days, but they will last longer in the refrigerator. Cut melons should be stored in an airtight container in the refrigerator and consumed within a few days.
How can I save seeds from my melons for next year?
To save seeds from your melons, allow the melon to fully ripen on the vine. Scoop out the seeds and rinse them thoroughly to remove any pulp. Spread the seeds out on a paper towel to dry completely. Once the seeds are dry, store them in an airtight container in a cool, dark place. Be aware that seeds from hybrid varieties may not produce plants that are true to type.


Leave a Comment