

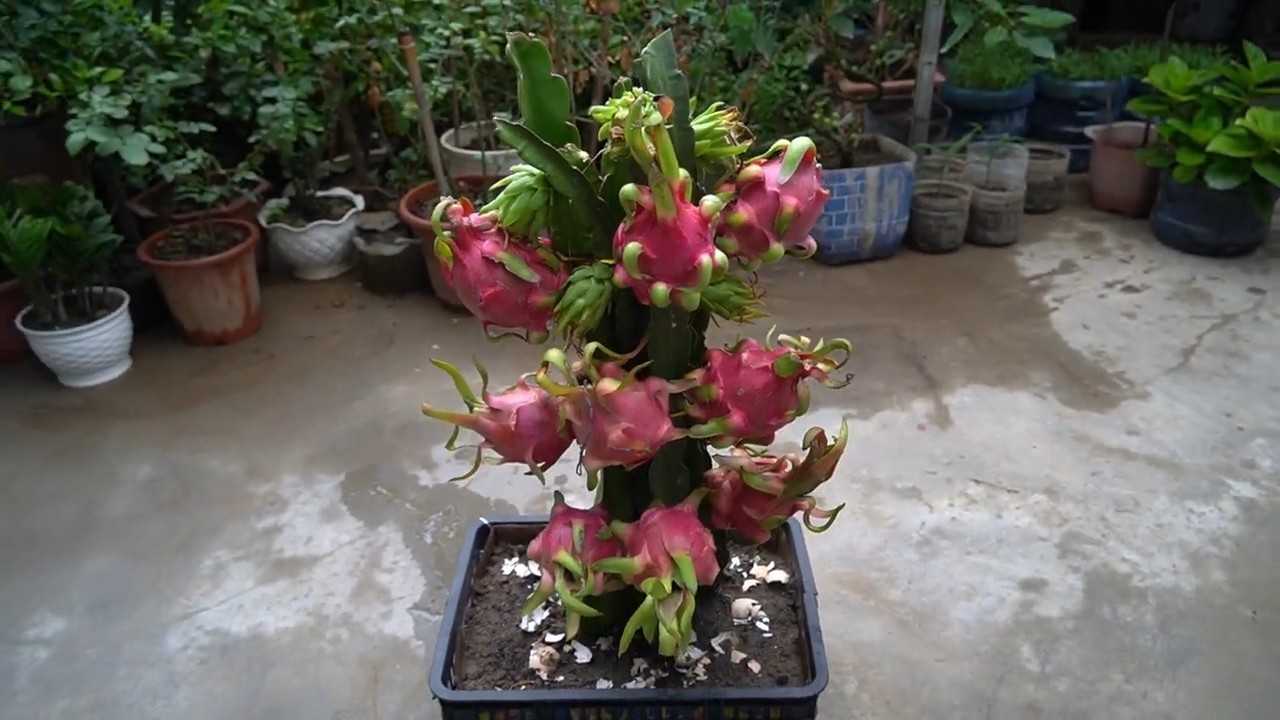
Dragon fruit cutting propagation might sound intimidating, but trust me, it’s an incredibly rewarding and surprisingly simple way to expand your exotic fruit garden! Have you ever looked at a vibrant dragon fruit in the grocery store and thought, “I wish I could grow that!”? Well, now you can, and you don’t need a fancy greenhouse or years of experience. This DIY guide will walk you through every step, from selecting the perfect cutting to nurturing it into a thriving, fruit-bearing plant.
The dragon fruit, also known as pitaya, has a rich history rooted in Central and South America, where it was a staple food for centuries. Its cultivation has since spread globally, becoming a symbol of exotic beauty and delicious flavor. But beyond its aesthetic appeal and taste, growing your own dragon fruit is about more than just having fresh fruit; it’s about connecting with nature, learning new skills, and enjoying the satisfaction of nurturing something from a simple cutting to a flourishing plant.
In today’s world, where sustainability and self-sufficiency are increasingly important, learning dragon fruit cutting propagation is a valuable skill. It allows you to bypass expensive nursery plants and create new dragon fruit vines from existing ones, saving you money and reducing your environmental impact. Plus, who wouldn’t want to impress their friends and family with their ability to grow such a unique and beautiful fruit right in their own backyard? Let’s dive in and unlock the secrets to successful dragon fruit propagation!
Drachenfrucht-Vermehrung: Dein DIY-Leitfaden für den Anbau zu Hause
Hey Pflanzenfreunde! Habt ihr euch jemals von der exotischen Schönheit und dem köstlichen Geschmack der Drachenfrucht verzaubern lassen? Ich schon! Und was noch besser ist: Man kann diese faszinierende Frucht ganz einfach zu Hause vermehren. In diesem Artikel zeige ich euch Schritt für Schritt, wie ihr aus einem einfachen Steckling eine blühende Drachenfruchtpflanze zieht. Lasst uns loslegen!
Was du für die Drachenfrucht-Vermehrung brauchst
Bevor wir mit dem eigentlichen Prozess beginnen, stelle sicher, dass du alle notwendigen Materialien zur Hand hast. Das spart Zeit und Frust!
* Ein gesunder Drachenfrucht-Steckling: Das ist das A und O! Sucht nach einem etwa 20-30 cm langen Steckling von einer gesunden, etablierten Pflanze. Er sollte kräftig, grün und frei von Krankheiten oder Schädlingsbefall sein. Am besten fragt ihr einen Freund oder Bekannten, der bereits eine Drachenfruchtpflanze hat, nach einem Steckling.
* Ein scharfes, sauberes Messer oder eine Gartenschere: Hygiene ist wichtig, um Infektionen zu vermeiden. Desinfiziert euer Werkzeug vor dem Gebrauch mit Alkohol.
* Bewurzelungshormon (optional, aber empfohlen): Bewurzelungshormon fördert die Wurzelbildung und erhöht die Erfolgsrate. Ihr findet es in jedem Gartencenter.
* Ein Topf mit guter Drainage: Wählt einen Topf, der etwas größer ist als der Steckling. Die Drainage ist entscheidend, da Drachenfrüchte keine Staunässe vertragen.
* Kaktus- oder Sukkulentenerde: Diese Erde ist gut durchlässig und bietet die idealen Bedingungen für das Wurzelwachstum. Normale Blumenerde ist oft zu feucht.
* Wasser: Klares, sauberes Wasser zum Befeuchten der Erde.
* Ein sonniger Standort: Drachenfrüchte lieben die Sonne! Sucht einen Platz, an dem der Steckling mindestens 6 Stunden direktes Sonnenlicht pro Tag bekommt.
* Eine Rankhilfe (später): Drachenfrüchte sind Kletterpflanzen und benötigen eine Rankhilfe, sobald sie größer werden. Ein Pfahl, ein Spalier oder ein anderer stabiler Gegenstand eignen sich gut.
Schritt-für-Schritt-Anleitung zur Drachenfrucht-Vermehrung
Jetzt, wo wir alles vorbereitet haben, können wir mit der eigentlichen Vermehrung beginnen. Keine Sorge, es ist einfacher als es aussieht!
1. Den Steckling vorbereiten:
* Sucht euch einen gesunden Trieb an der Mutterpflanze aus.
* Schneidet mit dem desinfizierten Messer oder der Schere einen etwa 20-30 cm langen Steckling ab. Achtet darauf, einen sauberen Schnitt zu machen.
* Lasst den Steckling an einem trockenen, schattigen Ort für 5-7 Tage trocknen. Dieser Schritt ist wichtig, damit die Schnittfläche verheilen kann und das Risiko von Fäulnis minimiert wird. Die Schnittfläche sollte sich leicht verhärten.
2. Bewurzelungshormon auftragen (optional):
* Wenn ihr Bewurzelungshormon verwendet, taucht das untere Ende des Stecklings in das Pulver oder die Flüssigkeit. Schüttelt überschüssiges Hormon ab.
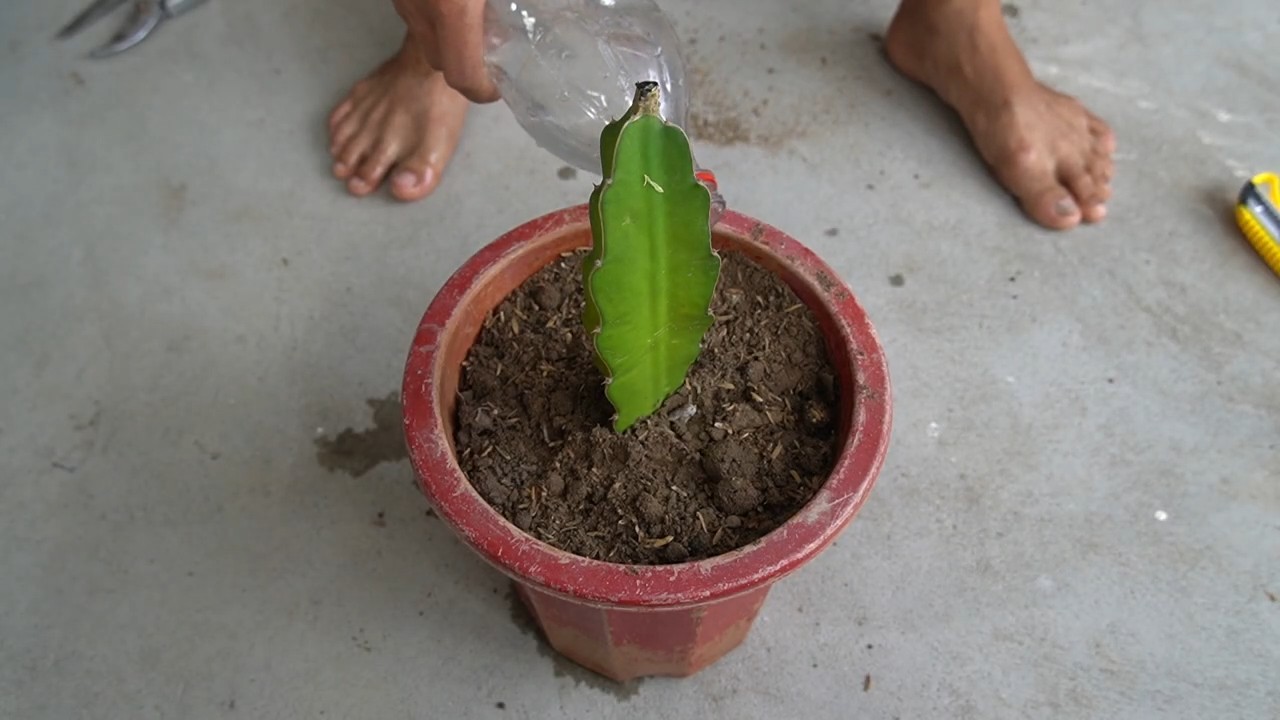
3. Den Steckling einpflanzen:
* Füllt den Topf mit Kaktus- oder Sukkulentenerde.
* Macht ein Loch in die Erde, das tief genug ist, um das untere Ende des Stecklings aufzunehmen.
* Setzt den Steckling vorsichtig in das Loch und füllt es mit Erde auf. Drückt die Erde leicht an, um den Steckling zu stabilisieren. Achtet darauf, dass der Steckling nicht zu tief in der Erde steckt.
4. Bewässern und platzieren:
* Gießt den Steckling vorsichtig, bis die Erde leicht feucht ist. Vermeidet Staunässe!
* Stellt den Topf an einen sonnigen Standort.
5. Geduld haben:
* Die Wurzelbildung kann einige Wochen dauern. Gießt den Steckling nur, wenn die Erde trocken ist. Überwässerung ist der häufigste Fehler bei der Drachenfrucht-Vermehrung.
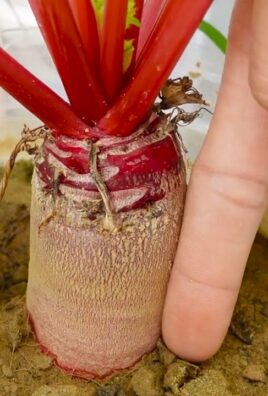
* Überprüft regelmäßig, ob sich Wurzeln bilden. Ihr könnt den Steckling vorsichtig aus dem Topf ziehen, um dies zu überprüfen. Wenn ihr Widerstand spürt, bedeutet das, dass sich Wurzeln gebildet haben.
6. Umtopfen (wenn nötig):
* Sobald der Steckling gut verwurzelt ist und neue Triebe bildet, könnt ihr ihn in einen größeren Topf umtopfen.
7. Rankhilfe anbringen:
* Drachenfrüchte sind Kletterpflanzen und benötigen eine Rankhilfe. Sobald die Pflanze größer wird, befestigt sie an einem Pfahl, einem Spalier oder einem anderen stabilen Gegenstand.
Pflege deiner jungen Drachenfruchtpflanze
Herzlichen Glückwunsch! Du hast erfolgreich einen Drachenfrucht-Steckling bewurzelt. Jetzt ist es wichtig, die Pflanze richtig zu pflegen, damit sie gesund wächst und Früchte trägt.
* Bewässerung: Drachenfrüchte sind relativ trockenheitsresistent. Gießt sie nur, wenn die Erde trocken ist. Im Winter benötigen sie noch weniger Wasser.
* Düngung: Düngt die Pflanze während der Wachstumsperiode (Frühling und Sommer) alle 2-4 Wochen mit einem ausgewogenen Dünger für Kakteen oder Sukkulenten.
* Sonnenlicht: Drachenfrüchte lieben die Sonne! Stellt sicher, dass die Pflanze mindestens 6 Stunden direktes Sonnenlicht pro Tag bekommt.
* Temperatur: Drachenfrüchte bevorzugen warme Temperaturen. Sie vertragen keinen Frost. Wenn ihr in einer Region mit kalten Wintern lebt, müsst ihr die Pflanze ins Haus holen.
* Beschneidung: Beschneidet die Pflanze regelmäßig, um sie in Form zu halten und die Fruchtbildung zu fördern. Entfernt abgestorbene oder beschädigte Triebe.
* Schädlingsbekämpfung: Achtet auf Schädlinge wie Wollläuse oder Spinnmilben. Bekämpft sie bei Bedarf mit einem geeigneten Insektizid.
Häufige Probleme und Lösungen
Auch bei der Drachenfrucht-Vermehrung können Probleme auftreten. Hier sind einige häufige Probleme und wie ihr sie lösen könnt:
* Steckling fault: Das häufigste Problem ist Fäulnis, die durch Überwässerung verursacht wird. Stellt sicher, dass die Erde gut durchlässig ist und gießt den Steckling nur, wenn die Erde trocken ist. Wenn der Steckling fault, schneidet den faulen Teil ab und lasst den Rest trocknen, bevor ihr ihn erneut einpflanzt.
* Keine Wurzelbildung: Manchmal dauert es einfach länger, bis sich Wurzeln bilden. Habt Geduld und stellt sicher, dass der Steckling genügend Sonnenlicht bekommt. Ihr könnt auch versuchen, die Luftfeuchtigkeit um den Steckling zu erhöhen, indem ihr ihn mit einer Plastiktüte abdeckt (achtet aber auf Belüftung, um Schimmelbildung zu vermeiden).
* Gelbe Blätter: Gelbe Blätter können ein Zeichen für Überwässerung, Nährstoffmangel oder zu wenig Sonnenlicht sein. Passt die Bewässerung und Düngung entsprechend an und stellt sicher, dass die Pflanze genügend Sonnenlicht bekommt.
* Schädlinge: Achtet auf Schädlinge wie Wollläuse oder Spinnmilben. Bekämpft sie bei Bedarf mit einem geeigneten Insektizid.
Geduld ist der Schlüssel
Die Drachenfrucht-Vermehrung erfordert Geduld. Es kann einige Wochen oder sogar Monate dauern, bis sich Wurzeln bilden und die Pflanze zu wachsen beginnt. Aber lasst euch nicht entmutigen! Mit der richtigen Pflege und etwas Geduld werdet ihr bald eure eigene Drachenfruchtpflanze haben.
Wann trägt meine Drachenfruchtpflanze Früchte?
Drachenfruchtpflanzen, die aus Stecklingen gezogen wurden, können in der Regel innerhalb von 1-2 Jahren Früchte tragen. Pflanzen, die aus Samen gezogen wurden, benötigen oft 5-7 Jahre, um Früchte zu tragen. Die Fruchtbildung hängt auch von den Umweltbedingungen und der Pflege ab.
Zusätzliche Tipps für den Erfolg
*
Conclusion
So, there you have it! Propagating dragon fruit from cuttings is not just a cost-effective way to expand your collection of this exotic fruit; it’s a deeply rewarding experience that connects you to the plant’s life cycle. Forget expensive nursery plants – with a little patience and these simple steps, you can easily cultivate your own thriving dragon fruit vines.
Why is this DIY trick a must-try? Because it empowers you to take control of your garden, offering a sustainable and budget-friendly alternative to purchasing mature plants. Imagine the satisfaction of harvesting your own dragon fruit, knowing you nurtured it from a simple cutting. Plus, it’s a fantastic way to share the joy of gardening with friends and family – gifting them cuttings from your own successful propagation efforts.
But the beauty of dragon fruit propagation lies in its adaptability. Feel free to experiment with different rooting mediums. While we’ve highlighted the effectiveness of well-draining soil mixes, some gardeners have found success with perlite or even just water propagation, although the transition to soil can be trickier with the latter. Consider trying different cutting sizes as well. While larger cuttings generally have a higher success rate, smaller cuttings can also root if given the right conditions.
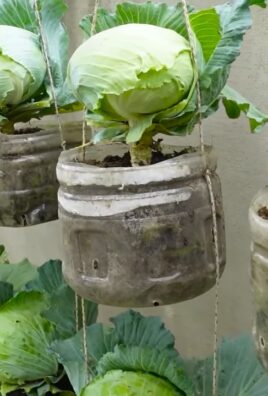
Don’t be afraid to get creative with your support structures. While a simple trellis works wonders, you can also use repurposed materials like old ladders or even sturdy tree branches to create a unique and visually appealing support system for your growing dragon fruit vines. Remember, dragon fruit are climbing cacti, so they need something to latch onto as they grow.
And speaking of variations, consider the different varieties of dragon fruit available. From the vibrant pink flesh of the Hylocereus costaricensis to the sweet white flesh of the Hylocereus undatus, each variety offers a unique flavor profile and visual appeal. Propagating different varieties from cuttings allows you to diversify your dragon fruit harvest and enjoy a wider range of flavors.
We wholeheartedly encourage you to embark on this dragon fruit cutting propagation journey. It’s a simple yet profound way to connect with nature, learn about plant growth, and ultimately, enjoy the delicious fruits of your labor.
Once you’ve successfully propagated your dragon fruit cuttings, we’d love to hear about your experience! Share your tips, tricks, and photos in the comments below. Let’s build a community of dragon fruit enthusiasts and learn from each other’s successes and challenges. Your insights could be invaluable to other aspiring dragon fruit growers. So, grab your pruning shears, prepare your rooting medium, and get ready to witness the magic of dragon fruit propagation! Happy growing!
Frequently Asked Questions (FAQ)
What is the best time of year to propagate dragon fruit cuttings?
The ideal time to propagate dragon fruit cuttings is during the warmer months, typically spring or early summer. This is when the plant is actively growing and the warmer temperatures and longer days promote faster rooting. However, with proper care and controlled environments (like a greenhouse or indoor setup with grow lights), you can attempt propagation at other times of the year, although the success rate might be lower. Avoid propagating during the coldest winter months when the plant is dormant.
How long does it take for dragon fruit cuttings to root?
Rooting time can vary depending on several factors, including the variety of dragon fruit, the size of the cutting, the rooting medium, and the environmental conditions. Generally, you can expect to see roots developing within 2-4 weeks. However, it can sometimes take longer, up to 6-8 weeks, for some cuttings to establish a strong root system. Be patient and avoid disturbing the cuttings too frequently, as this can hinder root development.
What type of soil is best for rooting dragon fruit cuttings?
Dragon fruit cuttings thrive in well-draining soil. A mix of perlite, peat moss, and coco coir is ideal. You can also use a cactus or succulent potting mix. The key is to ensure the soil doesn’t retain too much moisture, which can lead to rot. Adding some coarse sand or gravel to the mix can further improve drainage. Avoid using heavy clay soils, as they tend to compact and suffocate the roots.
How often should I water dragon fruit cuttings during propagation?
Water dragon fruit cuttings sparingly during propagation. The goal is to keep the soil slightly moist but not waterlogged. Overwatering is a common mistake that can lead to root rot. Water only when the top inch of soil feels dry to the touch. Use a spray bottle to mist the cuttings and the surrounding soil to maintain humidity. Once the cuttings have developed roots, you can gradually increase the watering frequency.
What kind of light do dragon fruit cuttings need during propagation?
Dragon fruit cuttings need bright, indirect light during propagation. Avoid placing them in direct sunlight, as this can scorch the cuttings. A location near a window with filtered sunlight is ideal. If you don’t have access to natural light, you can use grow lights to provide the necessary illumination. Aim for 12-14 hours of light per day.
How do I know if my dragon fruit cutting has successfully rooted?
The most obvious sign of successful rooting is the appearance of new growth. You may see small leaves or shoots emerging from the cutting. You can also gently tug on the cutting to see if it resists being pulled out of the soil. If it feels firmly anchored, it has likely developed roots. Avoid pulling too hard, as you could damage the delicate root system.
Can I propagate dragon fruit cuttings in water?
Yes, you can propagate dragon fruit cuttings in water, but it’s not the preferred method. While cuttings will often develop roots in water, the roots tend to be more fragile and less adapted to soil. When you eventually transplant the water-rooted cutting to soil, it may experience transplant shock and struggle to adapt. If you choose to propagate in water, use a clean container and change the water every few days to prevent algae growth. Once the roots are a few inches long, carefully transplant the cutting to a well-draining soil mix.
What are some common problems when propagating dragon fruit cuttings and how can I fix them?
One common problem is root rot, which is caused by overwatering. To prevent root rot, ensure the soil is well-draining and avoid overwatering. If you suspect root rot, remove the cutting from the soil, trim away any rotten roots, and replant it in fresh, well-draining soil. Another common problem is dehydration, which can cause the cutting to shrivel and dry out. To prevent dehydration, mist the cutting regularly and maintain humidity. If the cutting is already dehydrated, you can try placing it in a plastic bag to create a humid environment. Finally, pests can sometimes attack dragon fruit cuttings. Inspect the cuttings regularly for signs of pests and treat them with an appropriate insecticide if necessary.
How big should the dragon fruit cutting be?
A good size for a dragon fruit cutting is typically between 10-15 inches long. This provides enough stem for root development and enough stored energy to support the cutting during the rooting process. However, smaller cuttings can also be successful, especially if they are taken from healthy, vigorous plants. Avoid using very small cuttings, as they may not have enough energy to root.
What do I do after the dragon fruit cutting has rooted?
Once your dragon fruit cutting has developed a strong root system, it’s time to transplant it to a larger pot or directly into the ground. Choose a location that receives plenty of sunlight and has well-draining soil. Provide a sturdy support structure for the vine to climb on. Water regularly, especially during dry periods. Fertilize the plant with a balanced fertilizer every few months to promote healthy growth and fruit production. With proper care, your dragon fruit plant will thrive and eventually reward you with delicious, exotic fruit.
Leave a Comment