

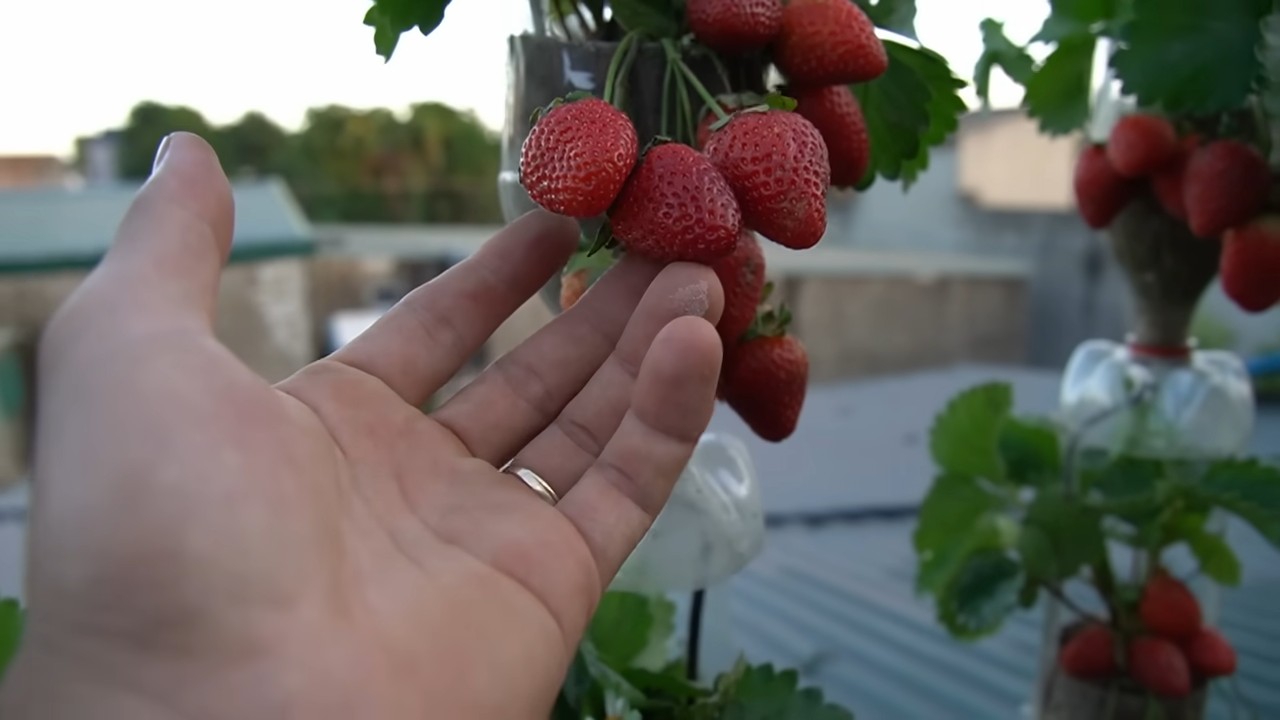
DIY Vertical Strawberry Garden: Imagine plucking juicy, sun-ripened strawberries right from your own backyard, even if you only have a tiny balcony or patio! Forget sprawling garden beds and back-breaking weeding. This isn’t just a gardening project; it’s a delicious revolution in how we grow our food, especially in urban spaces.
The concept of vertical gardening has roots stretching back centuries, from the Hanging Gardens of Babylon to more modern iterations like green walls in urban architecture. But the beauty of a DIY vertical strawberry garden lies in its accessibility and adaptability. It’s about taking control of your food source, reducing your carbon footprint, and adding a touch of vibrant green to your life.
Why do you need this DIY trick? Well, let’s face it, traditional gardening can be intimidating. Space constraints, soil quality, and pest control can feel overwhelming. But a vertical strawberry garden simplifies everything. It maximizes space, minimizes weeding, and elevates your strawberries away from ground-dwelling pests. Plus, it’s incredibly rewarding to watch your little plants thrive and produce those sweet, red berries. I’m excited to share this easy and fun project that will bring fresh strawberries to your table all season long. Get ready to create your own stunning and productive DIY Vertical Strawberry Garden!
DIY Vertikaler Erdbeergarten: Dein eigener Erdbeerhimmel!
Hallo liebe Gartenfreunde! Habt ihr auch so wenig Platz, aber trotzdem Lust auf frische, saftige Erdbeeren aus dem eigenen Garten? Dann habe ich genau das Richtige für euch: einen vertikalen Erdbeergarten! Das ist nicht nur platzsparend, sondern auch ein echter Hingucker auf dem Balkon, der Terrasse oder sogar im Garten. Und das Beste: Es ist super einfach selbst zu bauen! Lasst uns loslegen!
Was du brauchst: Die Materialliste
Bevor wir anfangen, sollten wir sicherstellen, dass wir alles beisammen haben. Hier ist eine Liste der Materialien, die du für deinen vertikalen Erdbeergarten benötigst:
* Ein PVC-Rohr: Ich empfehle ein Rohr mit einem Durchmesser von mindestens 15 cm. Die Länge hängt davon ab, wie hoch dein Garten werden soll. Denk daran, dass du das Rohr später noch bepflanzen musst, also wähle eine Länge, die du gut erreichen kannst.
* Ein kleineres PVC-Rohr: Dieses Rohr dient zur Bewässerung und sollte einen Durchmesser von etwa 5 cm haben. Es muss etwas länger sein als das große Rohr.
* Endkappe für das große PVC-Rohr: Damit der Boden geschlossen ist und die Erde nicht herausfällt.
* Bohrmaschine mit Lochsäge: Für die Pflanzlöcher im großen Rohr. Die Größe der Löcher sollte etwa 8-10 cm im Durchmesser betragen, damit die Erdbeerpflanzen genug Platz haben.
* Bohrmaschine mit kleinem Bohrer: Für die Bewässerungslöcher im kleinen Rohr.
* Gartenvlies: Um das kleine Rohr zu umwickeln, damit die Erde nicht in die Bewässerungslöcher gelangt.
* Kabelbinder oder Draht: Zum Befestigen des Gartenvlieses am kleinen Rohr.
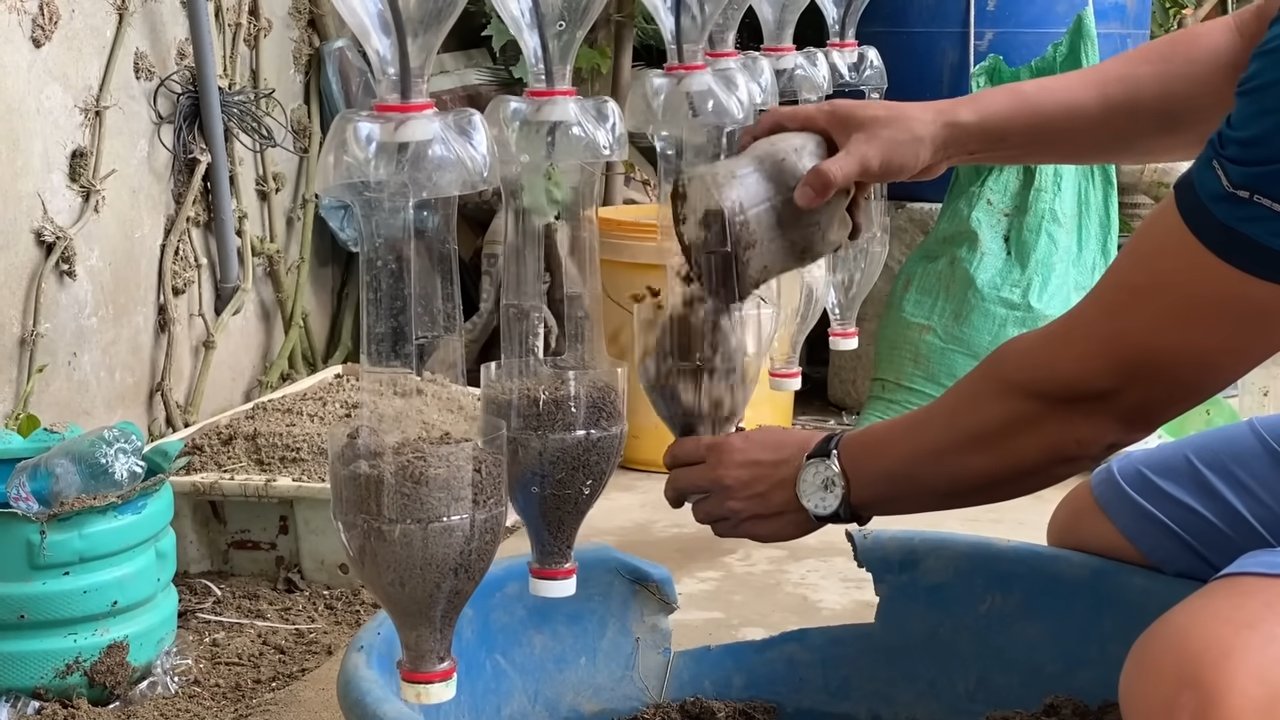
* Erde: Am besten eine spezielle Erdbeererde, die ist nährstoffreich und sorgt für eine gute Drainage.
* Erdbeerpflanzen: Wähle am besten junge, gesunde Pflanzen. Ich empfehle verschiedene Sorten, damit du die ganze Saison über ernten kannst.
* Optional: Kies oder Blähton für die Drainage am Boden des großen Rohrs.
* Optional: Farbe oder Sprühfarbe, um das PVC-Rohr zu verschönern.
* Optional: Eine Säge, falls du das PVC-Rohr kürzen musst.
* Handschuhe: Um deine Hände sauber zu halten.
* Schutzbrille: Beim Bohren immer wichtig!
* Maßband oder Zollstock: Zum Ausmessen der Abstände.
* Stift oder Marker: Zum Anzeichnen der Löcher.
Schritt-für-Schritt-Anleitung: So baust du deinen Erdbeergarten
Jetzt geht es ans Eingemachte! Folge diesen Schritten, um deinen eigenen vertikalen Erdbeergarten zu bauen:
1. Vorbereitung des großen PVC-Rohrs:
* Reinigen: Zuerst solltest du das große PVC-Rohr gründlich reinigen, um Staub und Schmutz zu entfernen.
* Anzeichnen der Löcher: Mit einem Maßband und einem Stift markierst du die Stellen, an denen du die Pflanzlöcher bohren möchtest. Achte darauf, dass die Löcher gleichmäßig verteilt sind und genügend Abstand zueinander haben (etwa 20-25 cm). Versetze die Löcher in jeder Reihe leicht, damit die Pflanzen nicht direkt übereinander liegen. Das sorgt für eine bessere Belüftung und mehr Licht für alle Pflanzen.
* Bohren der Löcher: Mit der Bohrmaschine und der Lochsäge bohrst du nun die Pflanzlöcher. Trage dabei unbedingt eine Schutzbrille! Achte darauf, dass du nicht zu viel Druck ausübst, damit das PVC-Rohr nicht reißt.
* Optional: Verschönern: Wenn du möchtest, kannst du das PVC-Rohr jetzt mit Farbe oder Sprühfarbe verschönern. Lass die Farbe gut trocknen, bevor du weitermachst.
2. Vorbereitung des kleinen PVC-Rohrs (Bewässerungsrohr):
* Bohren der Bewässerungslöcher: Mit der Bohrmaschine und einem kleinen Bohrer bohrst du nun viele kleine Löcher in das kleine PVC-Rohr. Die Löcher sollten gleichmäßig über die gesamte Länge des Rohrs verteilt sein. Achte darauf, dass die Löcher nicht zu groß sind, damit die Erde nicht hineingespült wird.
* Umwickeln mit Gartenvlies: Umwickle das kleine PVC-Rohr mit Gartenvlies. Das Vlies verhindert, dass Erde in die Bewässerungslöcher gelangt und diese verstopft. Befestige das Vlies mit Kabelbindern oder Draht.
3. Zusammenbau des Erdbeergartens:
* Endkappe anbringen: Setze die Endkappe auf das untere Ende des großen PVC-Rohrs.
* Drainage einfüllen (optional): Fülle eine Schicht Kies oder Blähton auf den Boden des großen PVC-Rohrs. Das sorgt für eine gute Drainage und verhindert Staunässe.
* Bewässerungsrohr einsetzen: Stelle das kleine PVC-Rohr in die Mitte des großen PVC-Rohrs. Es sollte etwas über den Rand des großen Rohrs hinausragen.
* Erde einfüllen: Fülle nun die Erde in das große PVC-Rohr. Achte darauf, dass das Bewässerungsrohr zentriert bleibt. Klopfe die Erde leicht fest, damit sie sich setzt.
4. Bepflanzung:
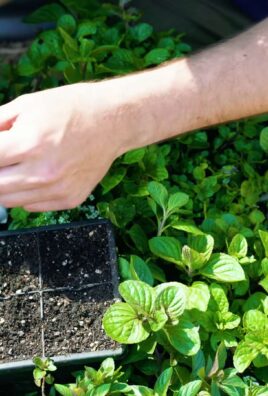
* Erdbeerpflanzen einsetzen: Setze die Erdbeerpflanzen vorsichtig in die Pflanzlöcher. Achte darauf, dass die Wurzeln gut mit Erde bedeckt sind.
* Angießen: Gieße die Erdbeerpflanzen nach dem Einsetzen gründlich an.
Pflege deines vertikalen Erdbeergartens
Damit deine Erdbeerpflanzen gut gedeihen und du eine reiche Ernte hast, solltest du folgende Tipps beachten:
* Bewässerung: Gieße deine Erdbeerpflanzen regelmäßig, besonders an heißen Tagen. Am besten gießt du direkt in das kleine PVC-Rohr, damit das Wasser gleichmäßig verteilt wird. Achte darauf, dass die Erde immer leicht feucht ist, aber nicht zu nass.
* Düngung: Dünge deine Erdbeerpflanzen regelmäßig mit einem speziellen Erdbeerdünger. Befolge dabei die Anweisungen auf der Verpackung.
* Sonneneinstrahlung: Erdbeeren lieben die Sonne! Stelle deinen vertikalen Erdbeergarten an einen sonnigen Standort, an dem die Pflanzen mindestens 6 Stunden Sonne pro Tag bekommen.
* Schutz vor Schädlingen: Kontrolliere deine Erdbeerpflanzen regelmäßig auf Schädlinge wie Schnecken oder Blattläuse. Bei Bedarf kannst du biologische Schädlingsbekämpfungsmittel einsetzen.
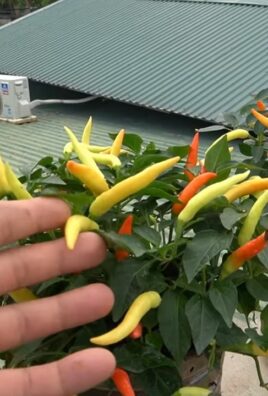
* Ernte: Ernte deine Erdbeeren, sobald sie reif sind. Reife Erdbeeren sind leuchtend rot und lassen sich leicht vom Stiel lösen.
Zusätzliche Tipps und Tricks
* Sortenwahl: Wähle verschiedene Erdbeersorten, die zu unterschiedlichen Zeiten reifen. So kannst du die ganze Saison über Erdbeeren ernten.
* Drainage: Achte auf eine gute Drainage, um Staunässe zu vermeiden.
* Windschutz: Wenn dein Balkon oder deine Terrasse sehr windig ist, solltest du deinen vertikalen Erdbeergarten vor Wind schützen.
* Überwinterung: Erdbeerpflanzen sind winterhart, aber du solltest sie im Winter vor Frost schützen. Du kannst den vertikalen Erdbeergarten mit Vlies abdecken oder ihn an einen geschützten Ort stellen.
* Kreativität: Sei kreativ bei der Gestaltung deines vertikalen Erdbeergartens! Du kannst das PVC-Rohr bemalen, mit Mosaiken verzieren oder mit anderen Pflanzen kombinieren.
Ich hoffe, diese Anleitung hilft dir dabei, deinen eigenen vertikalen Erdbeergarten zu bauen. Viel Spaß beim Gärtnern und Naschen! Und denk daran: Selbstgemacht schmeckt am besten!
Conclusion
Creating your own DIY vertical strawberry garden isn’t just a fun project; it’s a game-changer for anyone who loves fresh, homegrown strawberries. Imagine stepping outside your door and plucking ripe, juicy berries whenever the craving strikes. No more trips to the grocery store, no more questionable origins – just pure, unadulterated strawberry goodness grown with your own two hands. This method maximizes space, making it perfect for apartment dwellers, those with small balconies, or anyone looking to add a touch of green to their lives. Plus, the elevated design minimizes pests and keeps your precious strawberries clean and off the ground, reducing the risk of rot and disease.
But the benefits extend beyond convenience and yield. Building a vertical strawberry garden is an incredibly rewarding experience. It connects you to the natural world, provides a sense of accomplishment, and offers a sustainable way to enjoy your favorite fruit. It’s also a fantastic project to involve children in, teaching them about gardening, responsibility, and where their food comes from.
Don’t be afraid to experiment with different materials and designs. While we’ve outlined a simple and effective method, the possibilities are endless. You could use repurposed pallets, stacked planters, or even hanging baskets to create a unique and visually stunning strawberry display. Consider adding companion plants like basil or marigolds to deter pests and attract pollinators. For those in colder climates, choose a location that receives ample sunlight and consider using a frost blanket during the winter months to protect your plants. You can also explore different strawberry varieties to find the ones that thrive best in your region and suit your taste preferences. Everbearing varieties will provide a continuous harvest throughout the growing season, while June-bearing varieties offer a larger crop all at once.
The key to a successful DIY vertical strawberry garden is proper planning and consistent care. Ensure your plants receive adequate sunlight, water, and nutrients. Regularly check for pests and diseases, and take action promptly to prevent them from spreading. With a little effort and attention, you’ll be rewarded with a bountiful harvest of delicious strawberries that you can enjoy fresh, in jams, desserts, or however your heart desires.
So, what are you waiting for? Gather your materials, unleash your creativity, and embark on this exciting gardening adventure. We’re confident that you’ll be thrilled with the results. And once you’ve created your own vertical strawberry oasis, we encourage you to share your experience with us! Post photos of your garden, share your tips and tricks, and let us know what worked best for you. Together, we can inspire others to embrace the joy of homegrown strawberries and create a community of passionate gardeners. This **DIY vertical strawberry garden** is more than just a project; it’s an investment in your health, happiness, and connection to nature.
FAQ
What are the best strawberry varieties to grow in a vertical garden?
The best strawberry varieties for a vertical garden are generally those that are compact and produce well in containers. Everbearing varieties, such as Albion, Quinault, and Seascape, are excellent choices because they produce fruit throughout the growing season. June-bearing varieties, like Chandler and Honeoye, are also suitable, but they will produce a larger crop all at once, typically in June. Day-neutral varieties, such as Tristar, are another good option as they are less sensitive to day length and produce fruit consistently throughout the season. Consider your local climate and growing conditions when selecting your varieties. Research which varieties are known to thrive in your area for the best results.
How often should I water my vertical strawberry garden?
Watering frequency depends on several factors, including the weather, the type of container you’re using, and the soil mix. Generally, you should water your vertical strawberry garden when the top inch of soil feels dry to the touch. During hot, dry weather, this may mean watering daily, while in cooler, wetter weather, you may only need to water every few days. Ensure that your containers have adequate drainage to prevent waterlogging, which can lead to root rot. When watering, water deeply until water drains out of the bottom of the container. This ensures that the roots are thoroughly hydrated. Consider using a soaker hose or drip irrigation system for more efficient watering.
What type of soil is best for growing strawberries in a vertical garden?
Strawberries thrive in well-draining, slightly acidic soil with a pH between 5.5 and 6.5. A good soil mix for a vertical strawberry garden would be a combination of potting soil, compost, and perlite or vermiculite. The potting soil provides a good base, the compost adds nutrients and improves drainage, and the perlite or vermiculite helps to aerate the soil and prevent compaction. Avoid using garden soil, as it can be too heavy and may contain pests or diseases. You can also purchase a pre-made potting mix specifically formulated for strawberries.
How much sunlight do strawberries need in a vertical garden?
Strawberries need at least 6-8 hours of direct sunlight per day to produce a good crop of fruit. Choose a location for your vertical strawberry garden that receives ample sunlight throughout the day. If you live in a particularly hot climate, you may want to provide some afternoon shade to prevent the plants from overheating. If you don’t have access to enough natural sunlight, you can supplement with grow lights.
How do I fertilize my vertical strawberry garden?
Strawberries are heavy feeders and benefit from regular fertilization. Use a balanced fertilizer specifically formulated for strawberries, such as a 10-10-10 or 12-12-12 fertilizer. Follow the instructions on the fertilizer package for application rates. You can also use organic fertilizers, such as compost tea or fish emulsion. Fertilize your strawberries every 2-4 weeks during the growing season. Avoid over-fertilizing, as this can lead to excessive foliage growth and reduced fruit production.
How do I protect my strawberries from pests and diseases in a vertical garden?
Vertical gardens naturally offer some protection from ground-dwelling pests, but you still need to be vigilant. Common strawberry pests include aphids, spider mites, and slugs. Inspect your plants regularly for signs of infestation and take action promptly. You can use insecticidal soap or neem oil to control aphids and spider mites. Handpick slugs or use slug bait. Common strawberry diseases include gray mold, leaf spot, and root rot. Ensure good air circulation around your plants to prevent fungal diseases. Remove any infected leaves or fruit promptly. Avoid overwatering, as this can contribute to root rot. Consider using a copper fungicide to prevent fungal diseases.
Can I grow strawberries in a vertical garden indoors?
Yes, you can grow strawberries in a vertical garden indoors, but you will need to provide them with adequate light and ventilation. Use grow lights to supplement natural sunlight, providing at least 12-14 hours of light per day. Ensure good air circulation to prevent fungal diseases. You may also need to hand-pollinate the flowers, as there will be no bees or other pollinators indoors. Choose a self-pollinating strawberry variety for best results.
How do I overwinter my strawberry plants in a vertical garden?
In colder climates, you will need to protect your strawberry plants from freezing temperatures during the winter. If your vertical garden is portable, you can move it to a sheltered location, such as a garage or shed. Alternatively, you can cover the plants with a layer of straw or burlap to insulate them from the cold. Water the plants sparingly during the winter, only when the soil is dry to the touch. In the spring, remove the protective covering and resume regular watering and fertilizing.
Leave a Comment