

DIY stainless steel polish – sounds intimidating, right? But trust me, it’s easier than you think, and the results are absolutely dazzling! Forget those expensive, chemical-laden cleaners from the store. I’m going to show you how to whip up a powerful, eco-friendly polish using ingredients you probably already have in your kitchen.
For generations, resourceful homemakers have relied on simple, natural solutions to keep their homes sparkling. Before the age of mass-produced cleaning products, things like vinegar, baking soda, and olive oil were the go-to for everything from scrubbing floors to polishing silverware. This tradition of resourcefulness is not only budget-friendly but also kinder to our planet.
Why should you ditch the store-bought stuff and embrace a DIY stainless steel polish? Well, for starters, many commercial polishes contain harsh chemicals that can irritate your skin and pollute the air. Plus, they can be surprisingly expensive! My simple DIY method is not only safer and cheaper, but it’s also incredibly effective at removing fingerprints, smudges, and water spots, leaving your stainless steel appliances looking brand new. I’ll guide you through the process step-by-step, so you can achieve a professional-level shine without breaking the bank or harming the environment. Let’s get started!
DIY Stainless Steel Polish: Shine Like New!
Hey there, fellow DIY enthusiasts! Are you tired of dull, smudged stainless steel appliances? I know I was! Store-bought stainless steel cleaners can be expensive and often leave streaks. So, I decided to experiment and create my own DIY stainless steel polish. And guess what? It works like a charm! Plus, it’s super affordable and uses ingredients you probably already have in your pantry. Let’s get started!
What You’ll Need
Before we dive into the polishing process, let’s gather our supplies. This is a simple recipe, so the list is short and sweet:
* White Vinegar: This is our main cleaning agent. Vinegar’s acidity helps cut through grease and grime.
* Olive Oil: This adds a protective layer and gives your stainless steel that beautiful shine.
* Spray Bottle: For easy application of the vinegar.
* Two Microfiber Cloths: One for cleaning and one for polishing. Microfiber is key to avoiding scratches.
* Optional: Lemon Essential Oil: A few drops can add a pleasant scent and boost the cleaning power.
Step-by-Step Instructions: Polishing Your Stainless Steel
Alright, let’s get down to business! Follow these steps carefully to achieve a streak-free, sparkling finish on your stainless steel appliances.
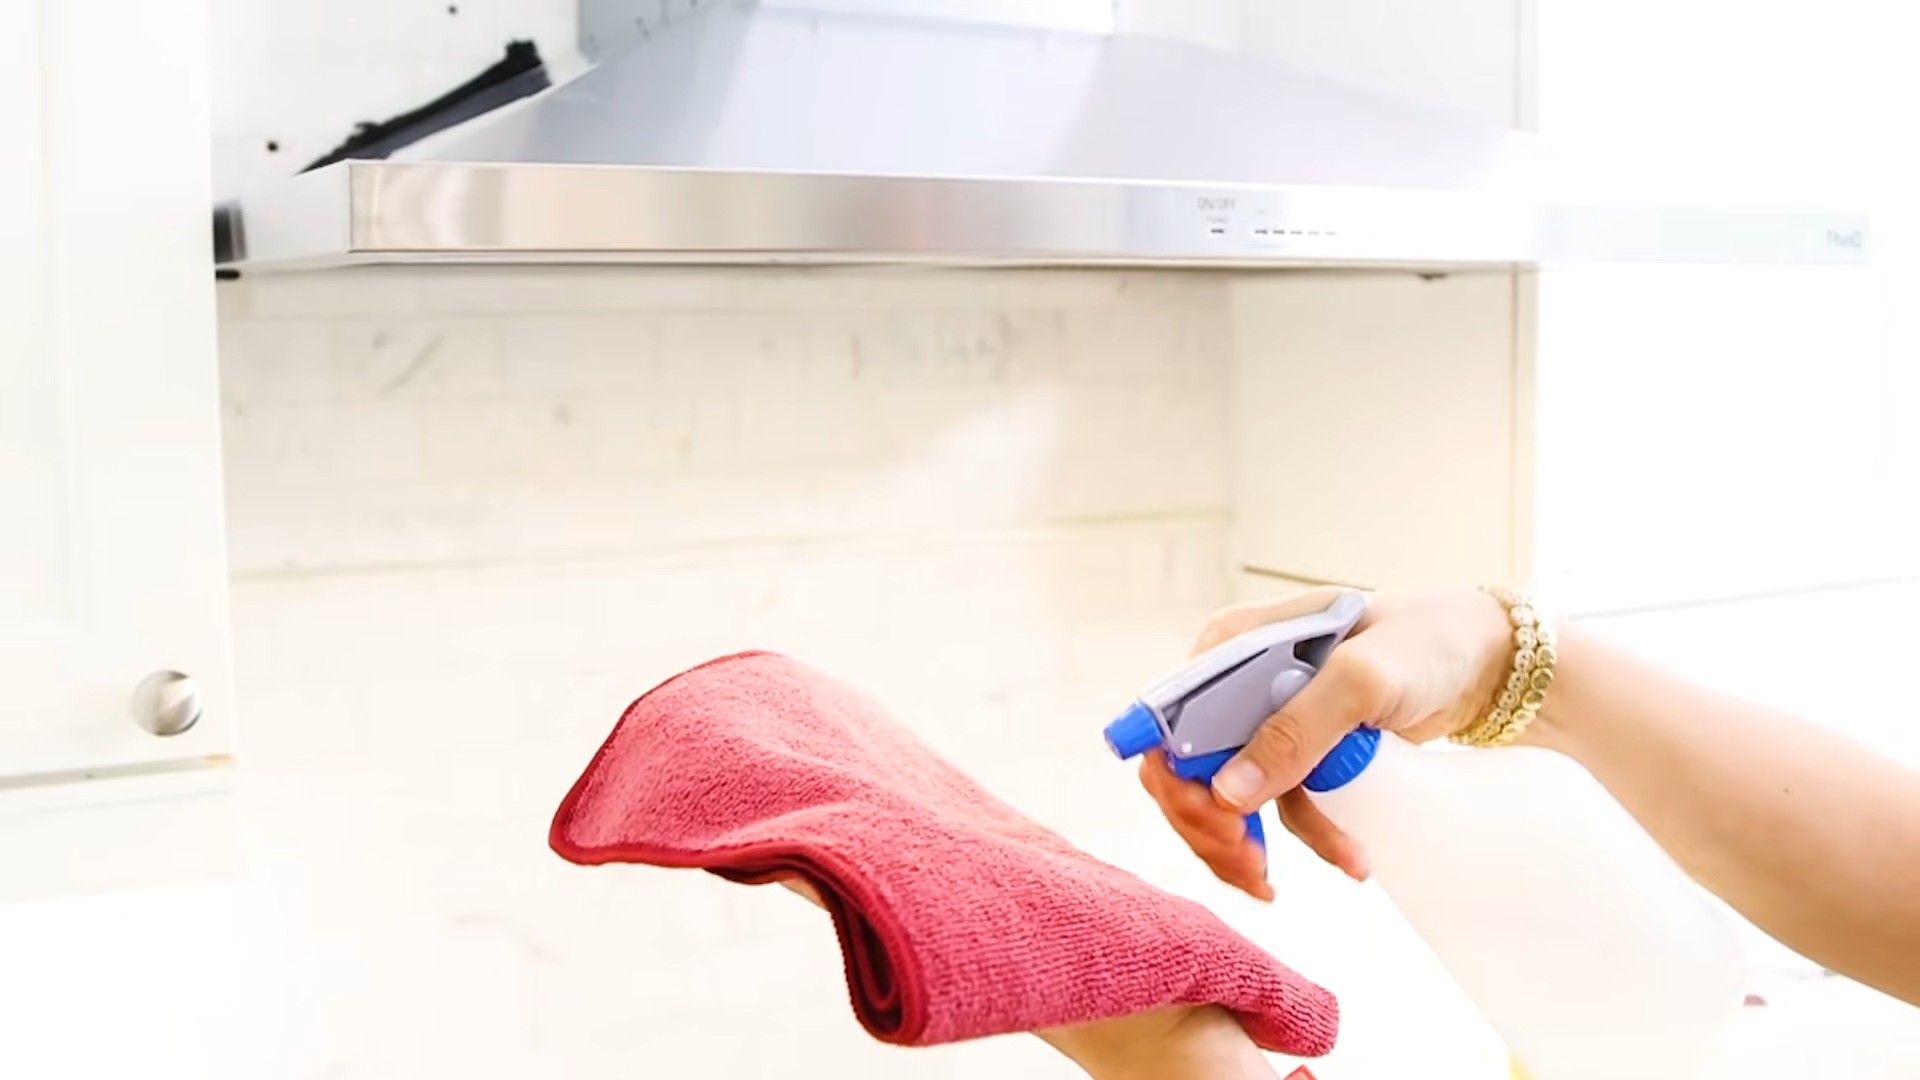
1. Prepare Your Vinegar Solution: Pour white vinegar into your spray bottle. If you’re using lemon essential oil, add 5-10 drops to the vinegar and give it a gentle shake. The lemon oil not only smells great but also helps to further degrease the surface.
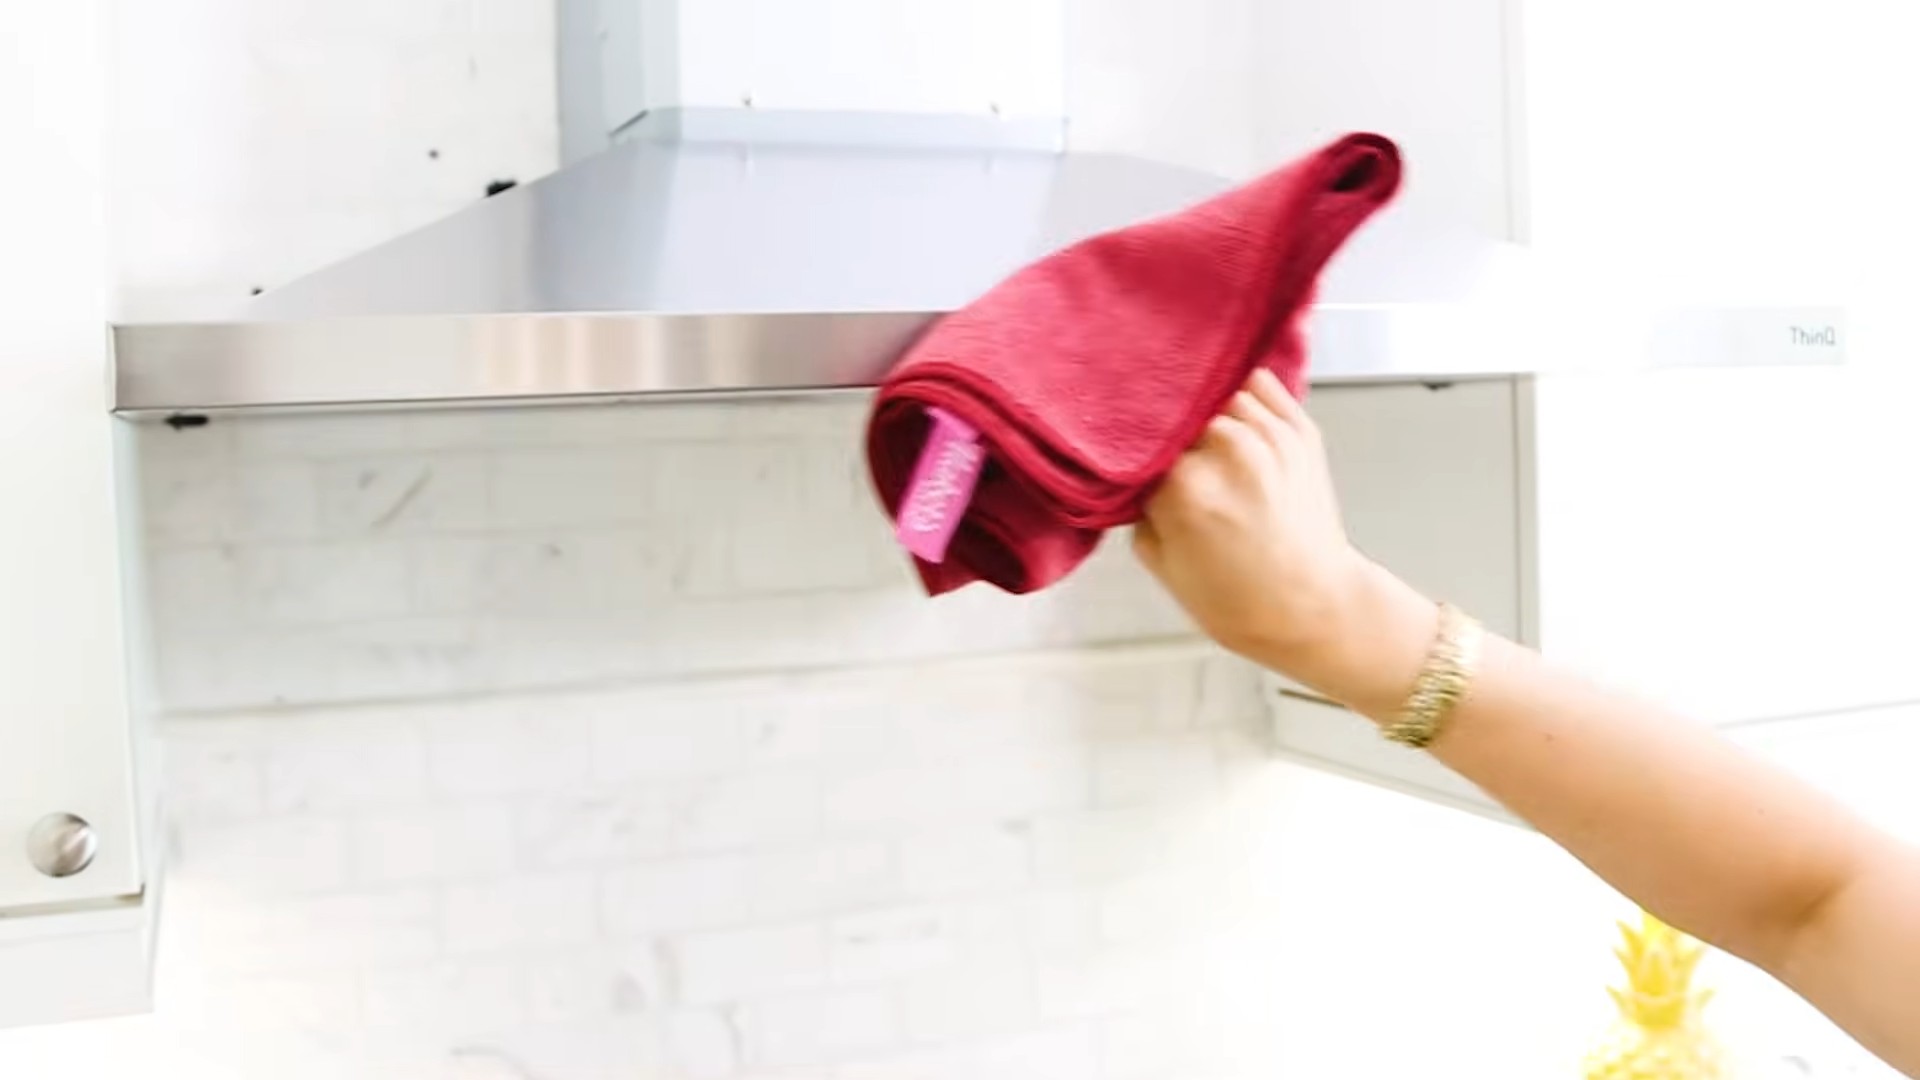
2. Spray and Wipe: Lightly spray the stainless steel surface with the vinegar solution. Don’t overdo it; a light mist is all you need. Then, using one of your microfiber cloths, wipe the surface in the direction of the grain. This is crucial! Stainless steel has a grain, and wiping with it prevents streaks. If you’re unsure which way the grain runs, look closely – it’s usually vertical on appliances like refrigerators and dishwashers.
3. Dry Thoroughly: Before moving on to the next step, make sure the surface is completely dry. You can use the dry side of your cleaning microfiber cloth or grab a fresh one. Any remaining moisture can interfere with the olive oil application.
4. Apply Olive Oil: Now for the magic ingredient! Pour a small amount of olive oil (about a teaspoon) onto your second, clean microfiber cloth. You don’t need a lot; a little goes a long way.
5. Polish with Olive Oil: Gently rub the olive oil onto the stainless steel surface, again following the grain. Use circular motions to ensure even coverage. You’ll notice the stainless steel starting to shine almost immediately.
6. Buff to a Shine: Once you’ve applied the olive oil, use a clean section of your microfiber cloth to buff the surface. Continue buffing until all excess oil is removed and you’re left with a beautiful, streak-free shine. This step is important to prevent the surface from feeling greasy.
7. Admire Your Work! Step back and admire your sparkling stainless steel! You’ll be amazed at the difference.
Dealing with Stubborn Stains and Grime
Sometimes, you might encounter stubborn stains or grime that require a little extra attention. Here’s how to tackle those tricky spots:
1. Baking Soda Paste: For baked-on food or tough stains, create a paste of baking soda and water. The consistency should be similar to toothpaste.
2. Gentle Scrubbing: Apply the baking soda paste to the stain and gently scrub with a soft cloth or sponge. Avoid using abrasive scrubbers, as they can scratch the stainless steel.
3. Rinse Thoroughly: Once you’ve scrubbed the stain, rinse the area thoroughly with water to remove all traces of baking soda.
4. Repeat the Polishing Process: After rinsing, dry the area completely and repeat the vinegar and olive oil polishing steps outlined above.
Maintaining Your Stainless Steel Shine
To keep your stainless steel looking its best, I recommend regular cleaning and polishing. Here are a few tips:
* Wipe Up Spills Immediately: The sooner you wipe up spills, the less likely they are to stain.
* Dust Regularly: Use a microfiber cloth to dust your stainless steel appliances regularly. This will prevent dust and grime from building up.
* Polish Weekly: For high-traffic areas like refrigerator doors, polish weekly to maintain the shine. For less frequently used appliances, you can polish every few weeks.
* Avoid Harsh Chemicals: Never use abrasive cleaners, bleach, or steel wool on stainless steel. These can damage the surface.
Troubleshooting Common Issues
Even with the best intentions, you might encounter a few hiccups along the way. Here are some common issues and how to fix them:
* Streaks: If you’re seeing streaks after polishing, it’s likely due to wiping against the grain or using too much olive oil. Try wiping in the direction of the grain with a clean microfiber cloth and buffing away any excess oil.
* Greasy Residue: If your stainless steel feels greasy after polishing, you’ve probably used too much olive oil. Use a clean microfiber cloth to buff away the excess oil until the surface feels dry and smooth.
* Water Spots: Water spots can be prevented by drying the surface thoroughly after cleaning. If you already have water spots, try using the vinegar solution to remove them before polishing.
* Dull Finish: If your stainless steel still looks dull after polishing, it might be due to a buildup of grime. Try using the baking soda paste to remove any stubborn stains before polishing.
Why This DIY Polish Works So Well
You might be wondering why this simple DIY polish is so effective. Here’s a breakdown of the science behind it:
* Vinegar’s Acidity: White vinegar is a mild acid that helps to dissolve grease, grime, and hard water stains. It’s also a natural disinfectant.
* Olive Oil’s Protective Layer: Olive oil creates a thin, protective layer on the stainless steel surface, which helps to repel water and prevent fingerprints. It also adds a beautiful shine.
* Microfiber Cloths: Microfiber cloths are essential for cleaning and polishing stainless steel because they’re non-abrasive and highly absorbent. They effectively remove dirt and grime without scratching the surface.
Safety Precautions
While this DIY polish is generally safe, it’s always a good idea to take a few precautions:
* Ventilation: When using vinegar, make sure the area is well-ventilated.
* Skin Sensitivity: If you have sensitive skin, wear gloves when handling vinegar and olive oil.
* Eye Contact: Avoid getting vinegar in your eyes. If contact occurs, rinse thoroughly with water.
* Test in an Inconspicuous Area: Before polishing your entire appliance, test the polish in a small, inconspicuous area to ensure it doesn’t damage the surface.
Alternative Ingredients
While I prefer using white vinegar and olive oil, you can experiment with other ingredients. Here are a few alternatives:
* Lemon Juice: Lemon juice can be used in place of vinegar. It has similar cleaning properties and a pleasant scent.
* Mineral Oil: Mineral oil can be used in place of olive oil. It’s a lighter oil that may be less likely to leave a greasy residue.
* Dish Soap: A small amount of mild dish soap can be added to the vinegar solution for extra cleaning power.
Beyond Appliances: Other Uses for This Polish
This DIY stainless steel polish isn’t just for appliances! You can also use it to clean and polish:
* Stainless Steel Sinks: Keep your kitchen sink sparkling clean with this easy polish.
* Stainless Steel Cookware: Remove food stains and restore the shine to your pots and pans.
* Stainless Steel Utensils: Polish your silverware for a beautiful table setting.
* Stainless Steel Railings: Keep your railings looking their best with regular cleaning and polishing.
* Stainless Steel Fixtures: Polish your faucets and showerheads for a sparkling bathroom.
Final Thoughts
I hope you found this DIY stainless steel polish tutorial helpful! It’s a simple, affordable, and effective way to keep your stainless steel appliances and fixtures looking their best. Give it a try, and let me know what you think! Happy polishing!
Conclusion
So, there you have it! Ditching the expensive store-bought cleaners and embracing this simple, effective DIY stainless steel polish is a game-changer for anyone who wants sparkling, streak-free stainless steel without harsh chemicals or a hefty price tag. We’ve walked you through the easy steps, highlighted the benefits, and hopefully, convinced you that this is a must-try for your kitchen and beyond.
Why is this DIY trick a must-try? Because it’s not just about saving money (although that’s a definite perk!). It’s about taking control of the ingredients you’re using in your home, opting for a more natural and sustainable approach to cleaning. Commercial stainless steel cleaners often contain harsh chemicals that can irritate skin, pollute the air, and leave behind a residue. Our DIY version, on the other hand, utilizes common household items that are gentle, effective, and readily available. Plus, the satisfaction of creating your own cleaning solution and seeing the immediate results is incredibly rewarding.
But the best part? This DIY stainless steel polish is incredibly versatile. While we’ve provided a basic recipe, feel free to experiment with variations to suit your specific needs and preferences. For example, if you’re dealing with stubborn water spots, adding a touch more vinegar can help cut through the mineral buildup. If you prefer a more fragrant cleaner, a few drops of your favorite essential oil (lemon, orange, or lavender work particularly well) can be added to the mixture. Just be sure to test the essential oil on an inconspicuous area first to ensure it doesn’t react with the stainless steel.
Another variation involves the application method. While a microfiber cloth is our go-to choice for its gentle yet effective cleaning power, you can also use a soft sponge or even an old t-shirt. The key is to avoid abrasive materials that could scratch the surface. For larger appliances, consider using a spray bottle to apply the polish evenly. Simply pour the mixture into a clean spray bottle, spritz it onto the surface, and then wipe it down with a microfiber cloth.
Don’t be afraid to experiment and find what works best for you and your stainless steel surfaces. The beauty of DIY is that you can customize it to your liking!
We truly believe that this DIY stainless steel polish will become a staple in your cleaning routine. It’s simple, effective, affordable, and environmentally friendly. What’s not to love?
Now, it’s your turn! We encourage you to give this DIY trick a try and see the amazing results for yourself. We’re confident that you’ll be impressed with how easily you can achieve a sparkling, streak-free shine on your stainless steel appliances and fixtures.
But don’t just take our word for it! We want to hear about your experience. Share your before-and-after photos, your favorite variations, and any tips or tricks you discover along the way. Let’s create a community of DIY cleaning enthusiasts who are passionate about keeping their homes clean and healthy without breaking the bank.
So, grab your ingredients, roll up your sleeves, and get ready to transform your stainless steel surfaces. We can’t wait to see your results! Share your experiences in the comments below or tag us on social media using #DIYStainlessSteelPolish. Happy cleaning!
Frequently Asked Questions (FAQ)
What kind of vinegar should I use for this DIY stainless steel polish?
White distilled vinegar is the best option for this DIY stainless steel polish. It’s readily available, inexpensive, and has a high acidity level, making it effective at cutting through grease, grime, and water spots. Avoid using other types of vinegar, such as apple cider vinegar or balsamic vinegar, as they may contain sugars or pigments that could leave a residue on your stainless steel.
Can I use this DIY polish on all types of stainless steel?
Generally, yes, this DIY stainless steel polish is safe to use on most types of stainless steel. However, it’s always a good idea to test it on an inconspicuous area first, especially if you have a brushed or textured finish. This will help ensure that the polish doesn’t damage or discolor the surface. If you’re unsure about the type of stainless steel you have, consult the manufacturer’s instructions or contact a professional cleaner.
How often should I use this DIY stainless steel polish?
The frequency of polishing depends on how often your stainless steel surfaces get dirty. For high-traffic areas like kitchen countertops and appliances, you may want to polish them once or twice a week. For less frequently used items, such as stainless steel sinks in guest bathrooms, you can polish them less often. A good rule of thumb is to polish your stainless steel whenever you notice fingerprints, smudges, or water spots.
Will this DIY polish remove scratches from stainless steel?
Unfortunately, this DIY stainless steel polish is not designed to remove scratches. It’s primarily intended to clean and polish the surface, removing dirt, grime, and water spots. For removing scratches from stainless steel, you’ll need a specialized stainless steel scratch removal kit or professional assistance. These kits typically contain abrasive compounds that can buff out the scratches, but they should be used with caution to avoid further damage.
Can I store the leftover DIY stainless steel polish?
Yes, you can store the leftover DIY stainless steel polish in an airtight container for future use. A glass jar or a plastic spray bottle works well. Be sure to label the container clearly so you don’t accidentally mistake it for something else. The polish should last for several weeks or even months if stored properly. However, if you notice any changes in color, odor, or consistency, it’s best to discard it and make a fresh batch.
Is this DIY polish safe for use around children and pets?
While this DIY stainless steel polish is generally safer than commercial cleaners, it’s still important to exercise caution when using it around children and pets. Keep the ingredients and the finished polish out of their reach. Avoid spraying the polish directly onto surfaces that children or pets may come into contact with, such as food preparation areas or pet bowls. If you’re concerned about potential allergies or sensitivities, you can substitute the vinegar with a milder alternative, such as lemon juice.
What if I don’t have olive oil? Can I use another type of oil?
Yes, you can substitute olive oil with other types of oil, such as mineral oil, coconut oil (melted), or even baby oil. However, keep in mind that different oils may produce slightly different results. Olive oil is generally preferred for its moisturizing and polishing properties, but other oils can still provide a good shine. Experiment with different oils to see which one works best for you and your stainless steel surfaces.
My stainless steel has a lot of stubborn grease and grime. Will this DIY polish be effective?
For stubborn grease and grime, you may need to pre-treat the surface before using the DIY stainless steel polish. You can do this by wiping the surface with a solution of warm water and dish soap. Rinse thoroughly and dry before applying the polish. Alternatively, you can create a stronger cleaning solution by adding a small amount of baking soda to the vinegar and water mixture. The baking soda will act as a mild abrasive, helping to loosen the grease and grime.
How do I prevent streaks when using this DIY stainless steel polish?
Streaks are a common problem when cleaning stainless steel, but they can be easily avoided by following a few simple tips. First, always use a clean, dry microfiber cloth. Second, apply the polish sparingly. A little goes a long way. Third, wipe in the direction of the grain of the stainless steel. This will help to prevent streaks and ensure a more even shine. Finally, buff the surface with a clean, dry microfiber cloth after polishing to remove any remaining residue.
Can I use this DIY polish on other metal surfaces besides stainless steel?
While this DIY polish is primarily designed for stainless steel, it can also be used on other metal surfaces, such as chrome, brass, and copper. However, it’s important to test it on an inconspicuous area first to ensure that it doesn’t damage or discolor the surface. Avoid using it on delicate or antique metal items, as it may be too abrasive. For these items, it’s best to consult a professional cleaner.

Leave a Comment