

DIY Cherry Tomato Growing: Your Guide to a Bountiful Harvest
DIY Cherry Tomato Growing is more than just a hobby; it’s a rewarding journey that connects you with nature and provides delicious, homegrown produce. I’ve always loved the vibrant burst of flavor from a perfectly ripe cherry tomato, and nothing beats the satisfaction of knowing you grew it yourself. This isn’t just about throwing some seeds in the ground; it’s about understanding the nuances of cultivation and employing clever DIY techniques to maximize your yield. From my own experiences, I’ve learned that even small spaces can yield surprisingly large harvests with the right know-how.
The history of cultivating tomatoes is fascinating! Originally from South America, these fruits (yes, botanically they’re fruits!) only gained widespread popularity in Europe centuries later. Today, growing your own tomatoes, especially the delightful cherry variety, has become a popular pastime, reflecting a growing interest in sustainable living and self-sufficiency. But let’s be honest, buying cherry tomatoes from the supermarket can be expensive, and the flavor often pales in comparison to homegrown ones.
Why You Need These DIY Cherry Tomato Growing Tricks
This article is your comprehensive guide to mastering DIY cherry tomato growing. Whether you have a sprawling backyard or a tiny balcony, I’ll share practical tips and tricks to help you achieve a bountiful harvest. We’ll explore everything from seed starting and soil preparation to pest control and harvesting techniques. You’ll learn how to overcome common challenges, optimize your growing space, and ultimately enjoy the freshest, most flavorful cherry tomatoes you’ve ever tasted. So, let’s get started on your DIY cherry tomato growing adventure!
My Super Simple Guide to Growing Cherry Tomatoes at Home
I love cherry tomatoes! Their sweetness and burst of flavor make them perfect for salads, snacks, or even just popping straight into your mouth. And the best part? Growing them yourself is easier than you think! This guide will walk you through everything, from seed to delicious, homegrown tomato.
Phase 1: Getting Started – Seeds and Supplies
- Choose your seeds: Select a variety of cherry tomato that suits your climate and growing space. I like to try a few different kinds each year – some heirloom varieties are amazing!
- Gather your supplies: You’ll need seed starting mix (not regular garden soil!), small pots or seed trays, a watering can with a gentle rose, a sunny location (at least 6 hours of sunlight daily), and small plant markers.
- Optional but helpful: A grow light can be a game-changer, especially if you’re starting seeds indoors during winter or in a low-light area. A humidity dome can also help maintain moisture levels.
- Fill your small pots or seed trays with seed starting mix. Gently moisten the mix – don’t make it soggy.
- Plant your seeds about ¼ inch deep and ½ inch apart. If you’re using a seed tray, follow the spacing recommendations on the packaging.
- Gently cover the seeds with a thin layer of seed starting mix.
- Water the seeds lightly again, using a gentle spray to avoid disturbing them.
- Label your pots or trays with the variety of tomato and the planting date. This helps keep track of everything, especially if you’re growing multiple types.
- Place your pots in a warm, sunny location. If using a grow light, follow the manufacturer’s instructions for distance and duration.
- Keep the soil consistently moist but not waterlogged. Check the moisture level daily, especially during the first few weeks.
Phase 2: Seedling Care – From Sprout to Transplant
- Germination: Cherry tomato seeds usually germinate within 7-14 days. Be patient! Once you see sprouts, you can reduce watering slightly to prevent damping off (a fungal disease that can kill seedlings).
- Thinning: Once your seedlings have a couple of true leaves (the leaves that appear after the first cotyledons), thin them out to give each plant enough space to grow. Carefully remove the weaker seedlings, leaving the strongest ones.
- Hardening off: Before transplanting your seedlings outdoors, you need to harden them off. This gradually acclimates them to the outdoor environment. Start by placing them outside for a short period each day, gradually increasing the time over a week or two.
- Choosing the right location: Select a sunny spot in your garden with well-drained soil. Cherry tomatoes need at least 6-8 hours of direct sunlight per day.
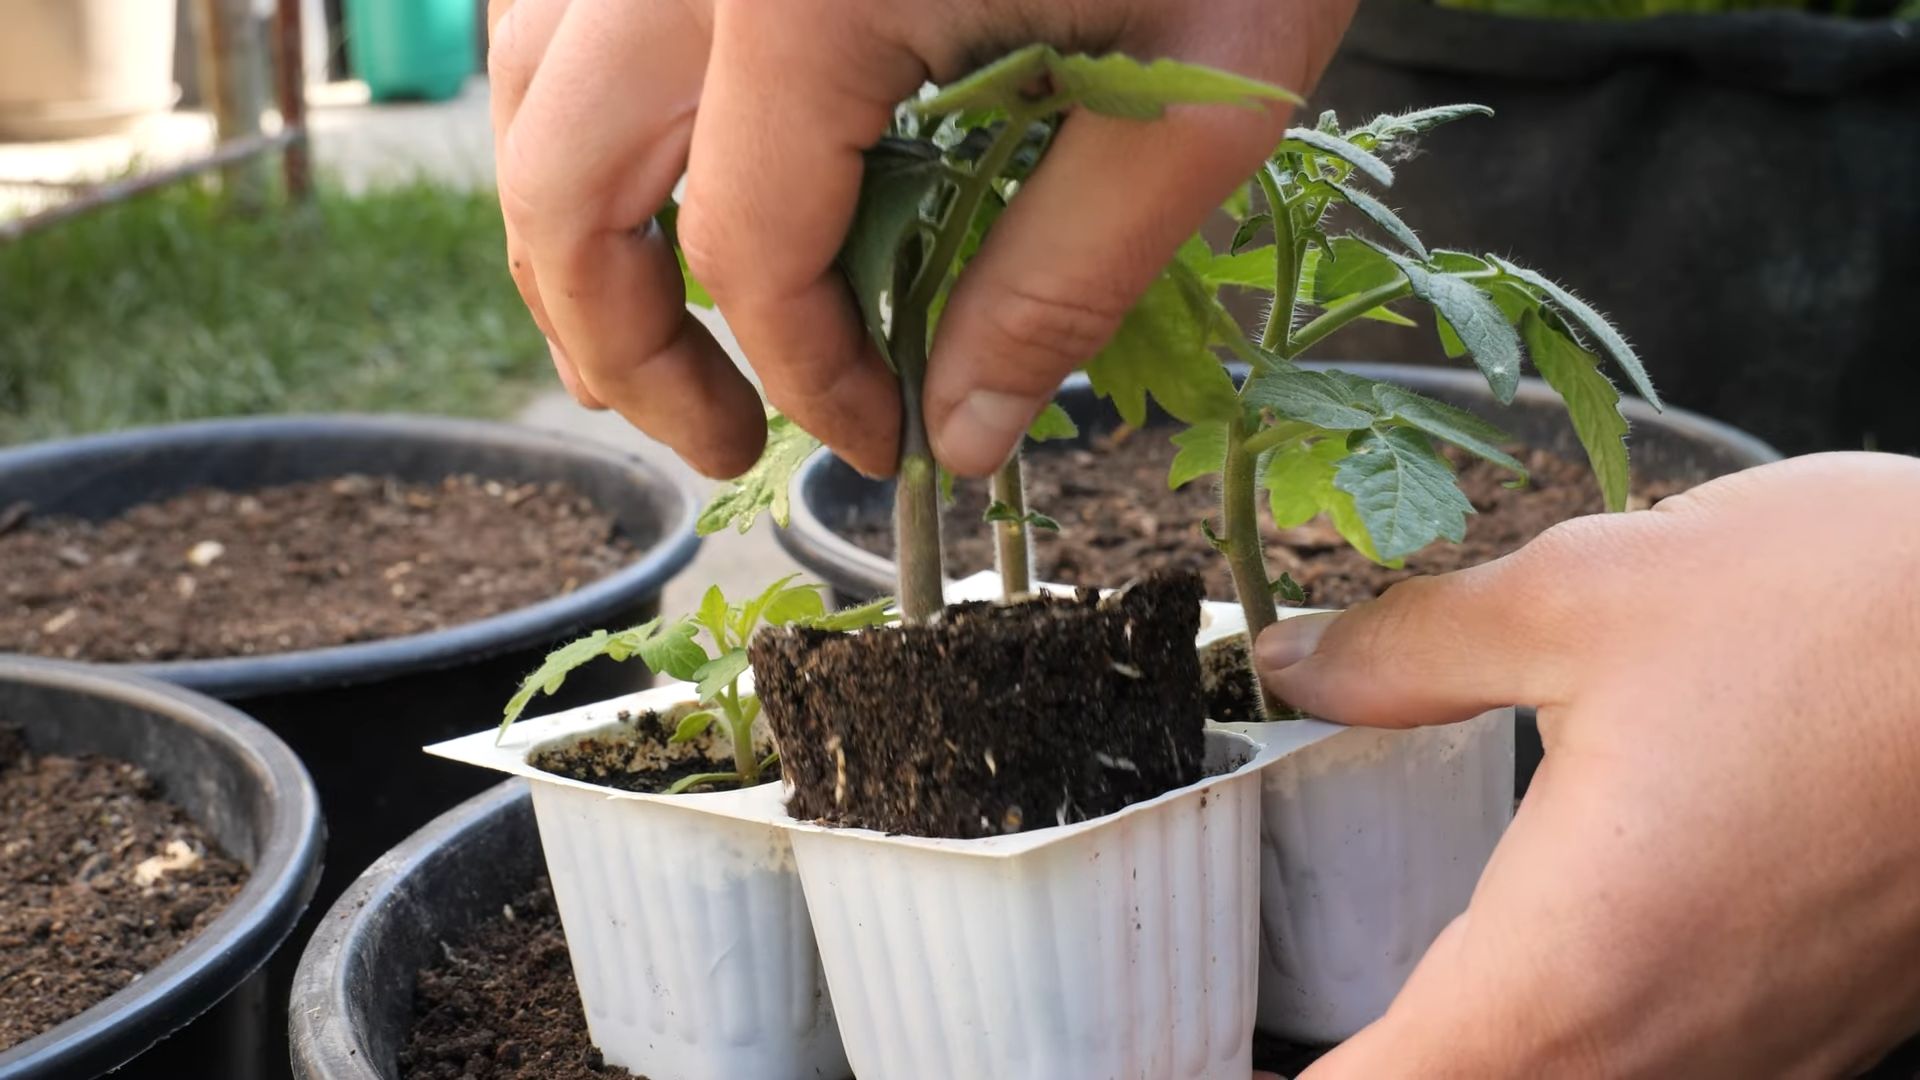
- Once your seedlings are about 6-8 inches tall and have several sets of true leaves, they’re ready for transplanting.
- Prepare your garden bed by loosening the soil and adding compost or other organic matter to improve drainage and fertility. This will give your plants the best start.
- Dig holes slightly larger than the root balls of your seedlings.
- Carefully remove the seedlings from their pots, being careful not to damage the roots.
- Plant the seedlings in the holes, ensuring the root ball is completely covered with soil.
- Water the newly planted seedlings thoroughly.
- Consider using plant supports, such as stakes or cages, to help the plants grow upright and prevent the branches from breaking under the weight of the tomatoes.
Phase 3: Ongoing Care – From Transplant to Harvest
- Watering: Water your tomato plants regularly, especially during dry periods. Aim to keep the soil consistently moist but not waterlogged. Deep watering is better than frequent shallow watering.
- Fertilizing: Feed your plants with a balanced tomato fertilizer every 2-3 weeks. Follow the instructions on the fertilizer packaging.
- Pest and disease control: Regularly inspect your plants for pests and diseases. Take action promptly if you notice any problems. Organic pest control methods are often effective and safer for the environment.
- Pruning: Pruning can improve air circulation and increase fruit production. Remove any suckers (small shoots that grow between the main stem and branches) regularly. This focuses the plant’s energy on fruit production.
- Mulch around your plants to help retain moisture, suppress weeds, and regulate soil temperature.
- Continue to water and fertilize your plants as needed throughout the growing season.
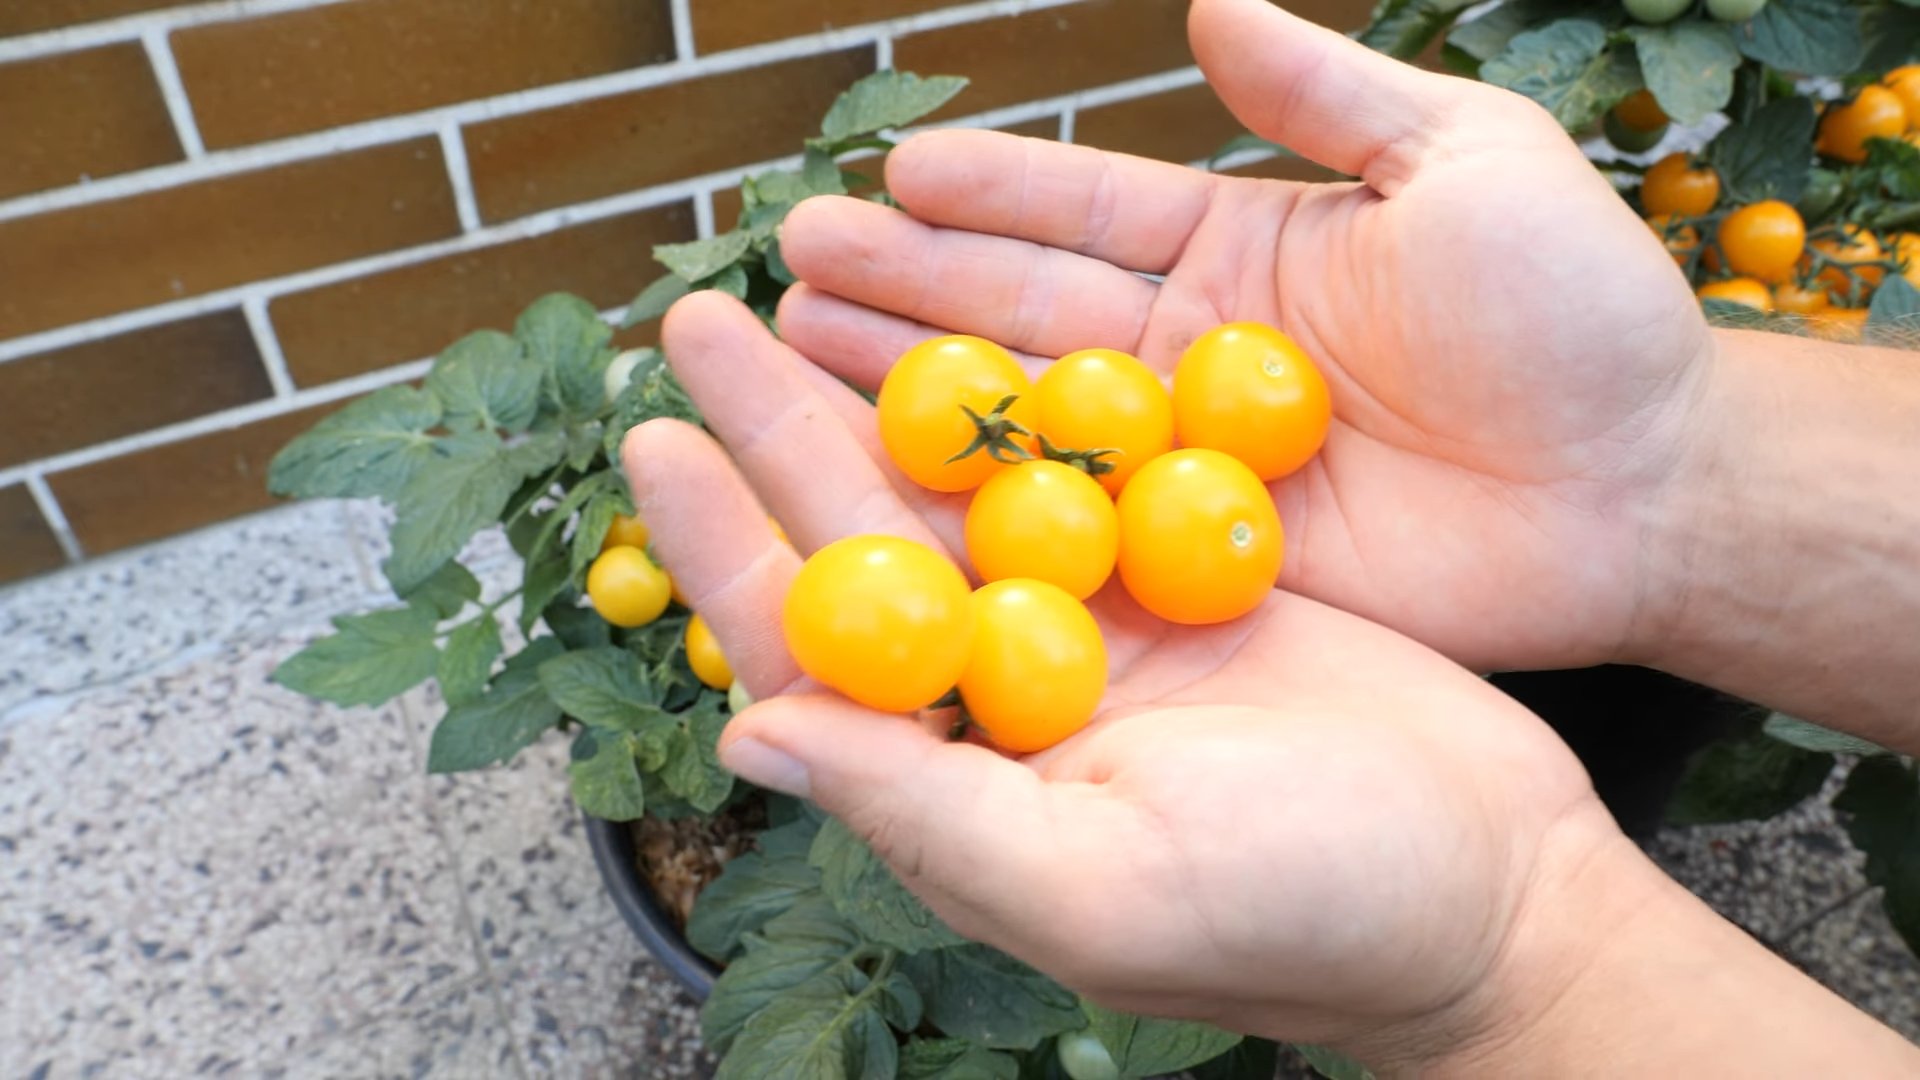
- Harvest your cherry tomatoes when they are fully ripe and have a deep red color. They’ll be sweet and juicy!
- Dealing with Blossom-End Rot: This is a common problem in tomatoes, characterized by a dark, leathery spot at the blossom end of the fruit. It’s usually caused by inconsistent watering. Ensure consistent moisture by watering deeply and regularly.
- Dealing with Early Blight: This fungal disease can cause brown spots on leaves and stems. Remove affected leaves and stems immediately and improve air circulation around the plants. Consider using a fungicide if the problem is severe.
- Dealing with Pests: Common tomato pests include aphids, whiteflies, and tomato hornworms. Monitor your plants regularly and use appropriate pest control methods, such as insecticidal soap or neem oil.
- Protecting from extreme weather: Extreme heat or cold can damage your tomato plants. Provide shade during hot days and protect them from frost during cold snaps.
Phase 4: Enjoying Your Harvest!
Once your cherry tomatoes are ripe, pick them regularly to encourage more fruit production. Enjoy the fruits of your labor – literally! You’ve successfully grown your own delicious cherry tomatoes. Experiment with different varieties and techniques next year to further improve your yield and enjoy the process even more.
Tips for Success:
- Start seeds indoors 6-8 weeks before the last expected frost.
- Choose a sunny location with well-drained soil.
- Water deeply and regularly.
- Fertilize regularly with a balanced tomato fertilizer.
- Protect your plants from pests and diseases.
Conclusion
So there you have it – your comprehensive guide to the surprisingly simple and rewarding world of DIY cherry tomato growing! This method isn’t just about saving money; it’s about experiencing the pure joy of nurturing a plant from seed to succulent, sun-ripened cherry tomato. The satisfaction of harvesting your own homegrown tomatoes, bursting with flavor far superior to anything you’ll find in the supermarket, is unparalleled. This DIY cherry tomato growing technique is a must-try for anyone, regardless of experience level. It’s a fantastic project for beginners, offering a gentle introduction to the world of gardening, and a rewarding challenge for seasoned gardeners looking for a new approach. The control you have over the entire process, from selecting seeds to harvesting your crop, is incredibly empowering. You’ll be amazed at how quickly your little seedlings transform into thriving plants, laden with juicy, sweet cherry tomatoes.
Beyond the immediate gratification of fresh, flavorful tomatoes, this DIY approach offers a deeper connection to your food. You’ll understand the journey your food takes from seed to plate, appreciating the effort and care involved in its cultivation. It’s a truly enriching experience that extends beyond the simple act of growing food. And let’s not forget the versatility! The abundance of cherry tomatoes you’ll harvest can be used in countless ways – from salads and pasta sauces to pizzas and bruschetta. The possibilities are endless!
Consider experimenting with different varieties of cherry tomatoes to discover your favorites. Some varieties are better suited to specific climates, so research your local conditions to maximize your success. You can also explore different growing methods, such as vertical gardening or using hanging baskets, to optimize space and aesthetics. Don’t be afraid to get creative! Perhaps try companion planting, incorporating herbs like basil or oregano near your tomato plants to enhance their growth and flavor. The beauty of this DIY approach is its adaptability; you can tailor it to your specific needs and preferences.
We strongly encourage you to embark on this rewarding journey of DIY cherry tomato growing. Share your experience with us! Post pictures of your thriving plants and delicious harvests on social media using #DIYCherryTomatoes. We’d love to see your success and learn from your experiences. Let’s build a community of home gardeners, sharing tips, tricks, and the joy of growing our own food. Remember, even a small balcony or windowsill can be transformed into a thriving little tomato patch. So, what are you waiting for? Get your seeds, get your soil, and get growing!
Frequently Asked Questions
What type of soil is best for growing cherry tomatoes?
Cherry tomatoes thrive in well-draining soil that’s rich in organic matter. A good quality potting mix specifically designed for vegetables is ideal. Avoid heavy clay soils, which can retain too much water and lead to root rot. You can amend heavy clay soils by adding compost or perlite to improve drainage.
How much sunlight do cherry tomato plants need?
Cherry tomatoes are sun-worshippers! They need at least 6-8 hours of direct sunlight per day to produce a bountiful harvest. Choose a location in your garden or on your balcony that receives ample sunlight. If you’re growing them indoors, consider using grow lights to supplement natural sunlight, especially during the winter months.
How often should I water my cherry tomato plants?
Consistent watering is crucial, but avoid overwatering, which can lead to root rot. Water deeply and thoroughly when the top inch or two of soil feels dry to the touch. The frequency will depend on your climate and the weather conditions. During hot, dry spells, you may need to water more frequently.
When can I expect to harvest my cherry tomatoes?
The time it takes for cherry tomatoes to mature varies depending on the variety and growing conditions. Generally, you can expect to harvest your first tomatoes 60-80 days after planting the seeds. Look for tomatoes that are firm, brightly colored, and slightly soft to the touch. Harvest regularly to encourage continued production.
What are some common problems I might encounter when growing cherry tomatoes?
Common problems include pests like aphids and tomato hornworms, as well as diseases like blight and blossom-end rot. Regularly inspect your plants for signs of pests or diseases and take appropriate action. This might involve using insecticidal soap for pests or ensuring proper watering and fertilization to prevent diseases. Prevention is key! Choose disease-resistant varieties and maintain good growing conditions.
Can I grow cherry tomatoes indoors?
Absolutely! You can successfully grow cherry tomatoes indoors, provided you provide them with sufficient sunlight (either through large south-facing windows or grow lights) and adequate ventilation. Choose compact varieties that are better suited for container growing. Make sure your containers are large enough to accommodate the roots.
What should I do with my excess cherry tomatoes?
The possibilities are endless! You can preserve your bounty by making delicious sauces, salsas, jams, or even drying them for later use. Freezing is another excellent option for preserving the flavor and freshness of your homegrown cherry tomatoes. Share the abundance with friends and family – it’s a wonderful way to share the joy of your harvest.
What if my cherry tomato plants aren’t producing many tomatoes?
Several factors can affect tomato production. Insufficient sunlight, inadequate watering, nutrient deficiencies, or pest infestations can all reduce yields. Review your growing practices, ensure your plants are getting enough sunlight and water, and check for any signs of pests or diseases. Consider using a balanced fertilizer to provide essential nutrients. If you’re still having problems, consult a local gardening expert for personalized advice.

Leave a Comment