

Cucumber Growing Problems? Don’t let them squash your gardening dreams! I know the frustration – you’ve envisioned crisp, refreshing cucumbers straight from your garden, perfect for salads, pickles, and everything in between. But instead, you’re facing yellowing leaves, misshapen fruits, or plants that just don’t seem to thrive.
Growing cucumbers has been a rewarding practice for centuries, dating back to ancient India. These versatile veggies have nourished civilizations and added a delightful crunch to cuisines worldwide. But even with centuries of cultivation under our belts, cucumber growing problems can still pop up and leave us scratching our heads.
That’s why I’ve put together this guide to tackle the most common cucumber conundrums. Whether it’s identifying pests, understanding nutrient deficiencies, or mastering the art of pollination, I’m here to equip you with the knowledge and DIY solutions you need. Because let’s face it, nobody wants to spend time and effort on a garden only to be met with disappointment. With a few simple tricks and hacks, you can overcome these challenges and enjoy a bountiful harvest of delicious, homegrown cucumbers. Let’s get started!
Gurken-SOS: Häufige Probleme und ihre DIY-Lösungen
Hallo liebe Gartenfreunde! Gurken sind eine fantastische Ergänzung für jeden Garten, aber sie können manchmal ganz schön zickig sein. Keine Sorge, ich helfe euch dabei, die häufigsten Gurkenprobleme zu erkennen und mit einfachen DIY-Lösungen in den Griff zu bekommen. Los geht’s!
Gelbe Blätter – Was ist da los?
Gelbe Blätter an euren Gurkenpflanzen können verschiedene Ursachen haben. Hier sind die häufigsten Verdächtigen und wie ihr sie bekämpfen könnt:
* Nährstoffmangel: Gurken sind hungrige Pflanzen!
* Überwässerung oder schlechte Drainage: Staunässe ist Gift für Gurkenwurzeln.
* Krankheiten: Pilzkrankheiten können ebenfalls gelbe Blätter verursachen.
* Schädlinge: Blattläuse und andere Schädlinge saugen den Saft aus den Blättern.
Lösung 1: Nährstoffmangel beheben
1. Boden testen: Bevor ihr blindlings düngt, solltet ihr euren Boden testen, um herauszufinden, welche Nährstoffe fehlen. Ein einfaches Bodentest-Kit aus dem Gartencenter reicht dafür aus.
2. Organischen Dünger verwenden: Ich empfehle einen organischen Dünger, der speziell für Gemüse geeignet ist. Komposttee ist auch eine super Option!
3. Dünger richtig anwenden: Achtet darauf, den Dünger gemäß den Anweisungen auf der Verpackung anzuwenden. Zu viel Dünger kann genauso schädlich sein wie zu wenig.
4. Regelmäßig düngen: Gurken brauchen während der Wachstumsperiode regelmäßige Düngergaben. Alle zwei bis drei Wochen ist ein guter Richtwert.
Lösung 2: Überwässerung vermeiden
1. Boden verbessern: Sorgt für eine gute Drainage, indem ihr Kompost oder andere organische Materialien in den Boden einarbeitet.
2. Richtig gießen: Gießt eure Gurkenpflanzen nur, wenn die oberste Bodenschicht trocken ist. Vermeidet es, die Blätter zu benetzen, um Pilzkrankheiten vorzubeugen.
3. Mulchen: Eine Mulchschicht hilft, die Feuchtigkeit im Boden zu halten und gleichzeitig die Verdunstung zu reduzieren.
Lösung 3: Krankheiten bekämpfen
1. Befallene Blätter entfernen: Entfernt alle gelben oder befallenen Blätter sofort, um die Ausbreitung der Krankheit zu verhindern.
2. Fungizid verwenden: Bei starkem Befall könnt ihr ein biologisches Fungizid verwenden. Achtet darauf, ein Produkt zu wählen, das für den Einsatz im Gemüsegarten zugelassen ist.
3. Gute Belüftung: Sorgt für eine gute Belüftung der Pflanzen, indem ihr sie nicht zu dicht pflanzt.
Lösung 4: Schädlinge loswerden
1. Pflanzen regelmäßig kontrollieren: Untersucht eure Gurkenpflanzen regelmäßig auf Schädlinge. Je früher ihr sie entdeckt, desto einfacher ist es, sie zu bekämpfen.
2. Blattläuse abspritzen: Blattläuse lassen sich oft einfach mit einem kräftigen Wasserstrahl von den Blättern spülen.
3. Nützlinge fördern: Marienkäfer und Florfliegen sind natürliche Feinde von Blattläusen. Fördert ihre Anwesenheit in eurem Garten, indem ihr ihnen Unterschlupf und Nahrung bietet.
4. Neemöl verwenden: Neemöl ist ein natürliches Insektizid, das gegen viele Schädlinge wirksam ist.
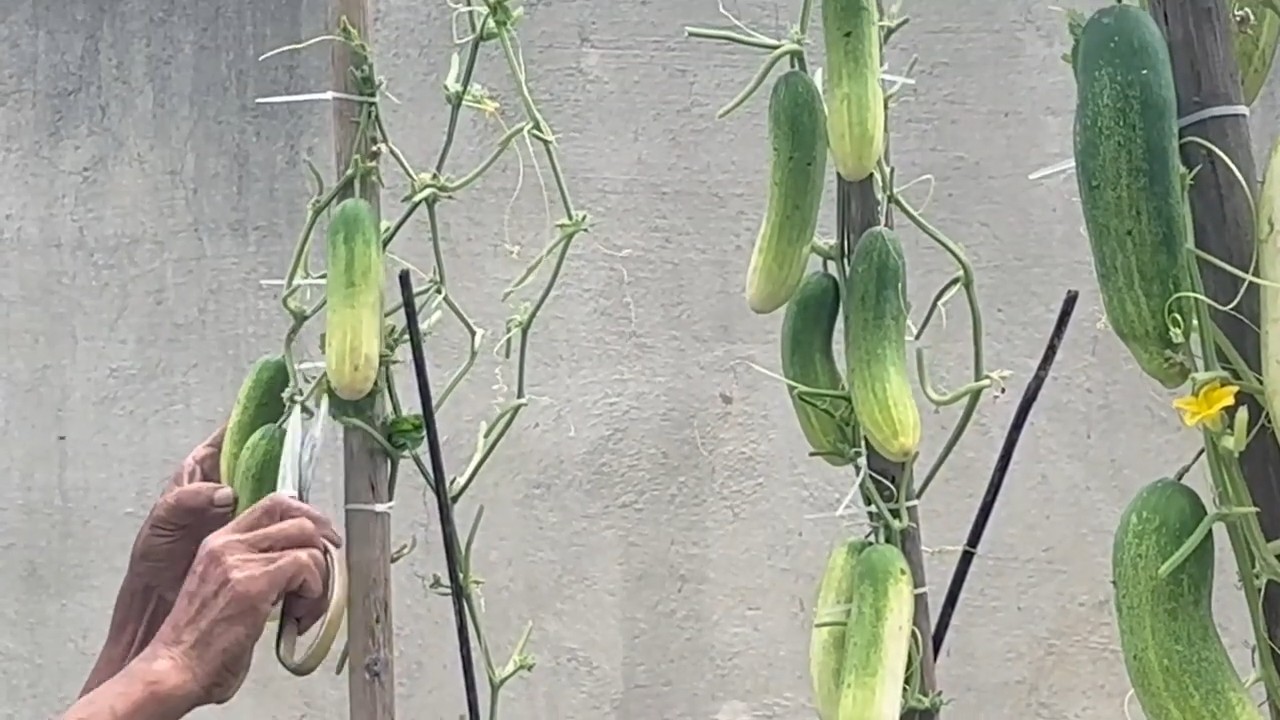
Krumme Gurken – Was läuft schief?
Krumme Gurken sind zwar nicht schön anzusehen, aber meistens kein Grund zur Sorge. Hier sind die häufigsten Ursachen:
* Unzureichende Bestäubung: Gurken brauchen eine gute Bestäubung, um gerade zu wachsen.
* Wassermangel: Wassermangel kann zu unregelmäßigem Wachstum führen.
* Nährstoffmangel: Auch hier kann ein Nährstoffmangel eine Rolle spielen.
* Temperaturschwankungen: Große Temperaturschwankungen können das Wachstum beeinträchtigen.
Lösung 1: Bestäubung verbessern
1. Bienen und andere Bestäuber anlocken: Pflanzt blühende Pflanzen in der Nähe eurer Gurken, um Bienen und andere Bestäuber anzulocken.
2. Handbestäubung: Wenn ihr wenig Bestäuber in eurem Garten habt, könnt ihr die Gurken auch von Hand bestäuben. Nehmt dazu einen kleinen Pinsel und übertragt den Pollen von den männlichen auf die weiblichen Blüten. Die weiblichen Blüten erkennt man an dem kleinen Fruchtansatz direkt hinter der Blüte.
3. Selbstbefruchtende Sorten wählen: Es gibt auch selbstbefruchtende Gurkensorten, die keine Bestäubung benötigen.
Lösung 2: Ausreichend wässern
1. Regelmäßig gießen: Gießt eure Gurkenpflanzen regelmäßig, besonders während trockener Perioden.
2. Tief gießen: Gießt tief, damit das Wasser bis zu den Wurzeln gelangt.
3. Mulchen: Eine Mulchschicht hilft, die Feuchtigkeit im Boden zu halten.
Lösung 3: Nährstoffmangel beheben (siehe oben)
Lösung 4: Temperaturschwankungen minimieren
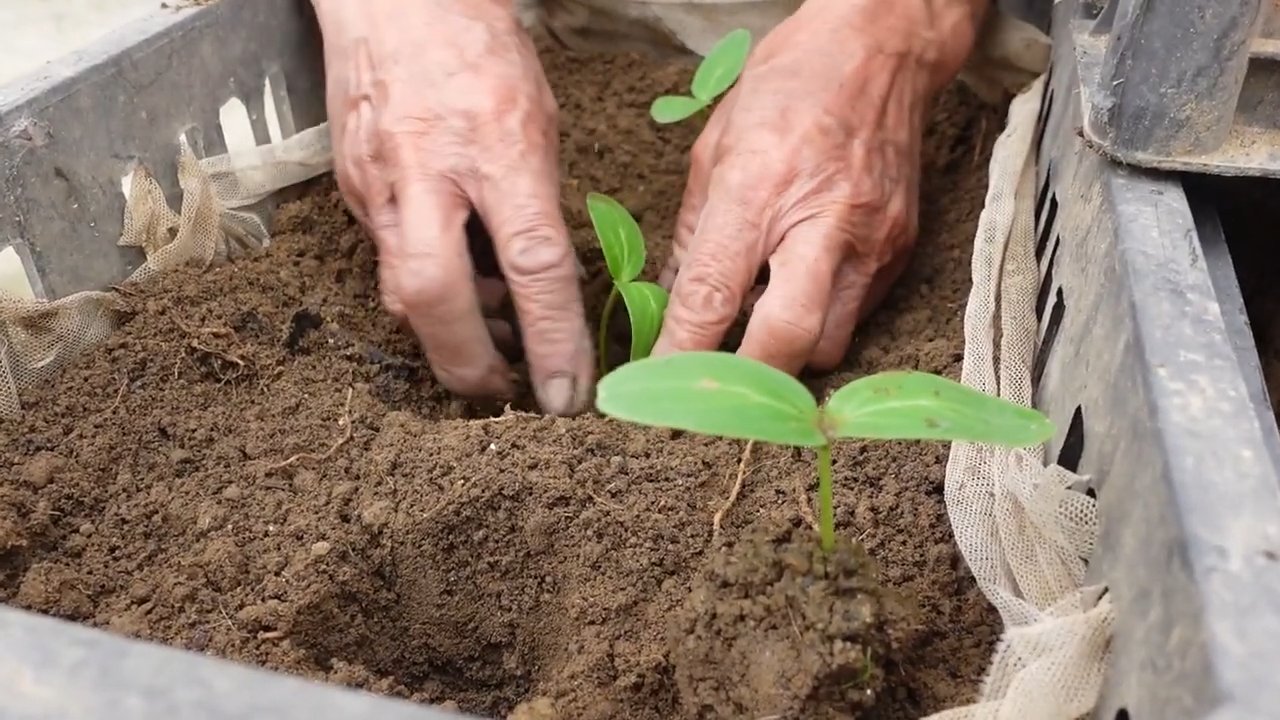
1. Frühzeitig aussäen: Beginnt mit der Aussaat im Haus, um die Pflanzen vor späten Frösten zu schützen.
2. Abdecken: Bei kalten Nächten könnt ihr die Pflanzen mit einem Vlies abdecken.
3. Geschützter Standort: Wählt einen geschützten Standort für eure Gurken, der vor Wind und extremen Temperaturen geschützt ist.
Bittere Gurken – Was ist passiert?
Bittere Gurken sind kein Genuss! Die Bitterkeit wird durch Cucurbitacine verursacht, natürliche Verbindungen, die in Gurken vorkommen. Hier sind die häufigsten Ursachen:
* Stress: Stress durch Wassermangel, Nährstoffmangel oder extreme Temperaturen kann die Cucurbitacin-Produktion erhöhen.
* Sorte: Einige Gurkensorten sind anfälliger für Bitterkeit als andere.
* Falsche Lagerung: Gurken sollten nicht in der Nähe von Äpfeln oder Bananen gelagert werden, da diese Ethylen abgeben, was die Bitterkeit verstärken kann.
Lösung 1: Stress vermeiden
1. Ausreichend wässern: Sorgt für eine gleichmäßige Wasserversorgung.
2. Richtig düngen: Versorgt eure Gurken mit ausreichend Nährstoffen.
3. Temperaturschwankungen minimieren (siehe oben)
Lösung 2: Bitterarme Sorten wählen
1. Recherche: Informiert euch vor dem Kauf über die verschiedenen Gurkensorten und wählt eine bitterarme Sorte.
2. Hybridsorten: Hybridsorten sind oft weniger anfällig für Bitterkeit.
Lösung 3: Richtig lagern
1. Getrennt lagern: Lagert Gurken getrennt von Äpfeln und Bananen.
2. Kühl lagern: Lagert Gurken im Kühlschrank, aber nicht zu kalt.
Gurken faulen am Ende – Blütenendfäule
Die Blütenendfäule ist ein häufiges Problem bei Gurken und anderen Gemüsesorten. Sie äußert sich durch braune, faulige Stellen am Blütenende der Frucht. Die Ursache ist meist ein Calciummangel, der aber nicht unbedingt durch einen Mangel im Boden verursacht wird. Oft ist es ein Problem der Calciumaufnahme.
* Unregelmäßige Bewässerung: Schwankende Bodenfeuchtigkeit beeinträchtigt die Calciumaufnahme.
* Hohe Salzkonzentration im Boden: Zu viel Dünger kann die Calciumaufnahme blockieren.
* Boden-pH-Wert: Ein zu hoher oder zu niedriger pH-Wert kann die Calciumaufnahme behindern.
Lösung 1: Gleichmäßige Bewässerung
1. Regelmäßig gießen: Sorgt für eine gleichmäßige Wasserversorgung.
2. Mulchen: Eine Mulchschicht hilft, die Feuchtigkeit im Boden zu halten.
Lösung 2: Salzkonzentration reduzieren
1. B
Conclusion
So, there you have it! Tackling cucumber growing problems doesn’t have to be a daunting task. By understanding the common issues and implementing these simple yet effective DIY solutions, you can transform your cucumber patch from a source of frustration into a thriving, bountiful garden. Remember, a little proactive care goes a long way in preventing many of these problems from even arising.
The beauty of these DIY tricks lies in their simplicity and accessibility. You likely already have many of the ingredients needed right in your pantry or garden shed. From the baking soda solution combating powdery mildew to the beer traps luring away slugs and snails, these methods are not only cost-effective but also environmentally friendly alternatives to harsh chemical treatments.
Why is this DIY approach a must-try? Because it empowers you to take control of your garden’s health without relying on expensive or potentially harmful products. It’s about understanding the needs of your cucumber plants and providing them with the right support to flourish. Plus, there’s a certain satisfaction that comes from solving a problem with your own ingenuity and resourcefulness.
Don’t be afraid to experiment and adapt these solutions to your specific needs and environment. For instance, if you’re dealing with particularly stubborn aphids, you might consider adding a few drops of dish soap to your neem oil spray for extra potency. Or, if you’re struggling with blossom end rot, ensure consistent watering and consider adding calcium to the soil.
Variations and Suggestions:
* Companion Planting: Enhance your cucumber’s environment by planting beneficial companions like marigolds (to deter nematodes) or dill (to attract beneficial insects).
* Vertical Growing: If space is limited, consider growing your cucumbers vertically on a trellis or fence. This improves air circulation and reduces the risk of fungal diseases.
* Soil Testing: Regularly test your soil to ensure it has the proper pH and nutrient levels for optimal cucumber growth.
* Watering Techniques: Water deeply and infrequently, focusing on the base of the plant to avoid wetting the foliage and encouraging fungal growth. Drip irrigation is an excellent option.
* Mulching: Apply a layer of organic mulch around your cucumber plants to retain moisture, suppress weeds, and regulate soil temperature.
We strongly encourage you to try these DIY tricks and witness the positive impact they can have on your cucumber crop. Gardening is a journey of learning and experimentation, and we believe these solutions will equip you with the knowledge and tools to overcome common cucumber growing challenges.
Most importantly, we want to hear about your experiences! Did these DIY tricks work for you? Did you discover any variations or modifications that were particularly effective? Share your stories, tips, and photos in the comments below. Let’s create a community of cucumber growers who are passionate about finding natural and sustainable solutions to common gardening problems. Your insights could be invaluable to other gardeners facing similar challenges. Together, we can cultivate healthier, more productive cucumber gardens and enjoy the delicious rewards of our labor. So, get out there, get your hands dirty, and let’s grow some amazing cucumbers! Remember, the key to success lies in observation, adaptation, and a willingness to learn. Happy gardening!
Frequently Asked Questions (FAQ)
Q: My cucumber leaves are turning yellow. What could be the problem?
A: Yellowing cucumber leaves can indicate several issues. Overwatering or underwatering are common culprits. Check the soil moisture – it should be consistently moist but not waterlogged. Nutrient deficiencies, particularly nitrogen or magnesium, can also cause yellowing. Consider a soil test to determine if your soil is lacking essential nutrients. Finally, pests like spider mites or aphids can suck the sap from leaves, leading to yellowing. Inspect the undersides of the leaves for signs of infestation.
Q: What is blossom end rot, and how can I prevent it?
A: Blossom end rot is a condition where the blossom end of the cucumber fruit develops a dark, sunken, and leathery spot. It’s primarily caused by a calcium deficiency, often due to inconsistent watering. While the soil might contain enough calcium, the plant may not be able to absorb it properly if the soil is too dry or too wet. To prevent blossom end rot, ensure consistent and even watering, especially during fruit development. Consider adding calcium to the soil by incorporating bone meal or crushed eggshells. Also, avoid over-fertilizing with nitrogen, as this can interfere with calcium uptake.
Q: How do I get rid of powdery mildew on my cucumber plants?
A: Powdery mildew is a fungal disease that appears as a white, powdery coating on the leaves and stems of cucumber plants. The baking soda solution mentioned earlier is an effective treatment. Mix 1 tablespoon of baking soda with 1 gallon of water and a few drops of dish soap (as a surfactant). Spray the affected areas thoroughly, making sure to cover both the tops and undersides of the leaves. Repeat every 7-10 days, or as needed. Improve air circulation around your plants by spacing them properly and pruning away any overcrowded foliage. You can also try milk spray (diluted milk in water) as an alternative organic treatment.
Q: My cucumbers are bitter. Why is this happening?
A: Cucumber bitterness is often caused by stress, such as inconsistent watering, high temperatures, or poor soil conditions. These stressors can trigger the production of cucurbitacins, compounds that give cucumbers their bitter taste. To prevent bitterness, ensure consistent watering, especially during hot weather. Provide shade during the hottest part of the day. Choose cucumber varieties that are less prone to bitterness. Also, harvest cucumbers when they are young and tender, as bitterness tends to increase as they mature.
Q: How can I attract pollinators to my cucumber plants?
A: Cucumbers require pollination to produce fruit. To attract pollinators like bees and butterflies, plant flowering herbs and vegetables nearby, such as lavender, borage, sunflowers, and zinnias. Avoid using pesticides that can harm pollinators. Provide a source of water for pollinators, such as a shallow dish filled with pebbles and water. You can also try hand-pollinating your cucumber flowers by transferring pollen from the male flowers to the female flowers using a small brush.
Q: What are some common pests that attack cucumber plants, and how can I control them?
A: Common cucumber pests include aphids, spider mites, cucumber beetles, and squash bugs. Aphids and spider mites can be controlled with neem oil or insecticidal soap. Cucumber beetles can be hand-picked or controlled with row covers. Squash bugs can be difficult to manage, but hand-picking, trapping, and using insecticidal soap can help. Encourage beneficial insects like ladybugs and lacewings, which prey on these pests.
Q: How often should I fertilize my cucumber plants?
A: Fertilize your cucumber plants every 2-3 weeks with a balanced fertilizer or a fertilizer specifically formulated for vegetables. Avoid over-fertilizing, as this can lead to excessive foliage growth at the expense of fruit production. Side-dress your plants with compost or aged manure to provide a slow-release source of nutrients.
Q: Can I grow cucumbers in containers?
A: Yes, you can successfully grow cucumbers in containers. Choose a large container (at least 5 gallons) with good drainage. Use a high-quality potting mix and provide a trellis or support for the vines to climb. Water regularly and fertilize every 2-3 weeks. Select bush or compact cucumber varieties that are well-suited for container gardening.
Q: How do I know when my cucumbers are ready to harvest?
A: Cucumbers are typically ready to harvest when they are firm, green, and have reached the desired size for the variety. Check the seed packet or plant tag for specific harvesting guidelines. Avoid letting cucumbers become overripe, as they can become bitter and seedy. Harvest regularly to encourage continued fruit production.


Leave a Comment