

Container chili pepper growing is more than just a trend; it’s a vibrant, accessible way to bring the heat and flavor of fresh chilies right to your doorstep! Imagine plucking fiery peppers straight from your patio to spice up your next meal – that’s the magic we’re unlocking today. For centuries, chili peppers have been cultivated and cherished across cultures, from their origins in South America, where they were used in ancient rituals and cuisine, to their global spread, adding zest to dishes worldwide.
But let’s face it, not everyone has acres of land for a sprawling garden. That’s where container gardening comes in! I’ve found that growing chili peppers in containers is the perfect solution for apartment dwellers, balcony enthusiasts, or anyone with limited space. This DIY guide is packed with simple, effective tricks and hacks to help you cultivate a thriving chili pepper garden, no matter your experience level.
Why do you need these tricks? Because while growing chili peppers can be rewarding, it also comes with its own set of challenges. From choosing the right container size to understanding watering needs and pest control, I’ll guide you through every step of the process. With these tips, you’ll be harvesting a bountiful crop of delicious chili peppers in no time, adding a touch of homegrown goodness to your life. So, let’s dive into the world of container chili pepper growing and transform your space into a spicy paradise!

Growing Chili Peppers in Containers: A Spicy DIY Guide
Hey there, fellow chili enthusiasts! Ever dreamt of having a fiery little garden right on your balcony or patio? Well, you’ve come to the right place! Growing chili peppers in containers is surprisingly easy and rewarding. I’m going to walk you through everything you need to know, from choosing the right pepper to harvesting your spicy bounty. Let’s get started!
Choosing Your Chili Pepper Variety
First things first, let’s talk peppers! The world of chili peppers is vast and exciting, ranging from mild and sweet to face-meltingly hot. Here’s a quick guide to help you pick the perfect pepper for your container garden:
* Beginner-Friendly: If you’re new to chili growing, I recommend starting with milder varieties like Jalapeños, Poblano, or Anaheim. These are relatively easy to grow and offer a good balance of flavor and heat.
* Medium Heat: Ready for a bit more kick? Try Serrano, Cayenne, or Thai peppers. These are great for adding a noticeable zing to your dishes.
* Hot Stuff: For the seasoned chili lover, consider Habaneros, Scotch Bonnets, or even Ghost Peppers (if you dare!). Be warned, these require a bit more experience and careful handling.
* Consider Size: Think about the size of your container. Smaller pepper varieties like Thai peppers or ornamental peppers are well-suited for smaller pots, while larger varieties like Bell Peppers or Poblano peppers will need larger containers.
Gathering Your Supplies
Okay, now that you’ve chosen your pepper, let’s gather the necessary supplies. Here’s what you’ll need:
* Containers: Choose containers that are at least 12 inches in diameter and depth. Larger containers are always better, as they provide more room for the roots to grow. Make sure your containers have drainage holes!
* Potting Mix: Use a high-quality potting mix specifically formulated for containers. Avoid using garden soil, as it can become compacted and doesn’t drain well.
* Chili Pepper Seeds or Seedlings: You can start your peppers from seed or purchase seedlings from a local nursery.
* Fertilizer: A balanced fertilizer (e.g., 10-10-10) or a fertilizer specifically formulated for tomatoes and peppers will work great.
* Watering Can or Hose: For regular watering.
* Gloves: Especially if you’re handling hot peppers! The oils can irritate your skin.
* Optional: Plant labels, stakes or cages for support (especially for taller varieties).
Planting Your Chili Peppers
Now for the fun part – planting! Whether you’re starting from seed or using seedlings, the process is pretty straightforward.
Starting from Seed (Optional)
If you’re starting from seed, you’ll need to start them indoors about 6-8 weeks before the last expected frost.
1. Prepare Seed Trays: Fill seed trays or small pots with seed-starting mix.
2. Sow Seeds: Sow the seeds about ¼ inch deep and gently water them.
3. Provide Warmth: Keep the soil consistently moist and provide warmth (around 70-80°F) using a heat mat or by placing them in a warm location.
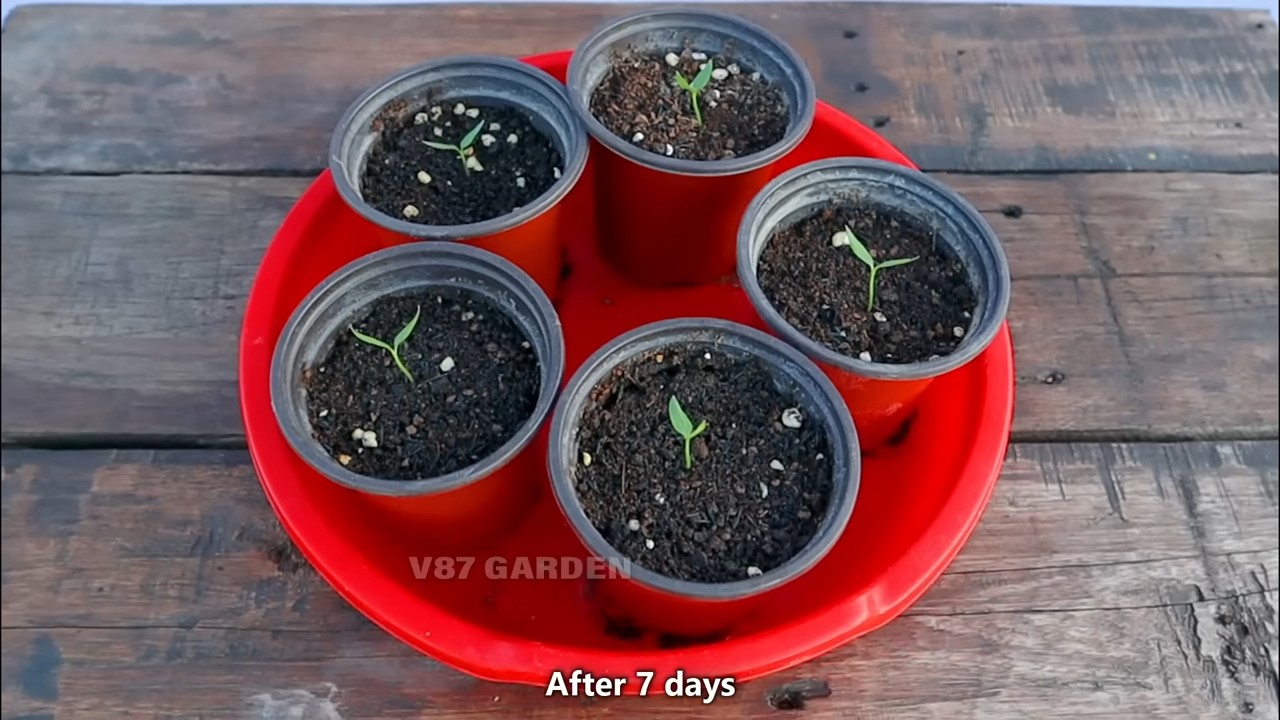
4. Provide Light: Once the seedlings emerge, provide them with plenty of light. A grow light is ideal, but a sunny windowsill can also work.
5. Harden Off: Before transplanting the seedlings outdoors, you’ll need to “harden them off.” This means gradually exposing them to outdoor conditions over a period of 1-2 weeks. Start by placing them outside for a few hours each day, gradually increasing the amount of time they spend outdoors.
Transplanting Seedlings or Planting Purchased Seedlings
1. Prepare the Container: Fill your container with potting mix, leaving a few inches of space at the top.
2. Dig a Hole: Dig a hole in the center of the container that is large enough to accommodate the root ball of your seedling.
3. Remove the Seedling: Gently remove the seedling from its container, being careful not to damage the roots. If the roots are tightly bound, gently loosen them with your fingers.
4. Plant the Seedling: Place the seedling in the hole and backfill with potting mix. Gently firm the soil around the base of the plant.
5. Water Thoroughly: Water the seedling thoroughly after planting.
Caring for Your Chili Peppers
Once your chili peppers are planted, it’s time to provide them with the care they need to thrive.
* Sunlight: Chili peppers need at least 6-8 hours of sunlight per day. Place your containers in a sunny location.
* Watering: Water your chili peppers regularly, especially during hot weather. The soil should be consistently moist, but not soggy. Check the soil moisture by sticking your finger into the soil. If the top inch of soil is dry, it’s time to water.
* Fertilizing: Fertilize your chili peppers every 2-3 weeks with a balanced fertilizer or a fertilizer specifically formulated for tomatoes and peppers. Follow the instructions on the fertilizer label.
* Pruning: Pruning isn’t strictly necessary, but it can help to improve air circulation and encourage bushier growth. You can prune away any dead or yellowing leaves.
* Support: Taller chili pepper varieties may need support to prevent them from falling over. Use stakes or cages to provide support.
* Pest Control: Keep an eye out for pests such as aphids, spider mites, and whiteflies. If you notice any pests, you can treat them with insecticidal soap or neem oil.
* Pollination: Chili peppers are self-pollinating, but you can help them along by gently shaking the plants or using a small brush to transfer pollen from one flower to another. This is especially helpful if you’re growing your peppers indoors.
Harvesting Your Chili Peppers
The moment you’ve been waiting for – harvesting your spicy peppers!
* When to Harvest: The timing of the harvest depends on the variety of chili pepper you’re growing. Generally, chili peppers are ready to harvest when they have reached their mature color and size. For example, Jalapeños are typically harvested when they are dark green and about 2-3 inches long. Habaneros are harvested when they are bright orange or red.
* How to Harvest: Use scissors or pruning shears to cut the peppers from the plant. Be careful not to damage the plant.
* Handling Hot Peppers: When handling hot peppers, wear gloves to protect your skin from the oils. Avoid touching your eyes or face after handling hot peppers.
* Storage: Fresh chili peppers can be stored in the refrigerator for up to a week. You can also dry them, freeze them, or pickle them for longer storage.
Troubleshooting
Even with the best care, you might encounter a few challenges along the way. Here are some common problems and how to address them:
* Yellowing Leaves: This could be a sign of overwatering, underwatering, or nutrient deficiency. Adjust your watering schedule and fertilize your plants.
* Blossom End Rot: This is a condition where the bottom of the pepper turns black and rotten. It’s usually caused by calcium deficiency. Add calcium to the soil or use a fertilizer that contains calcium.
* Pests: As mentioned earlier, keep an eye out for pests and treat them accordingly.
* Lack of Fruit: This could be due to a lack of sunlight, poor pollination, or nutrient deficiency. Make sure your plants are getting enough sunlight, hand-pollinate the flowers, and fertilize your plants.
Extra Tips for Success
Here are a few extra tips to help you grow the best chili peppers possible:
* Choose the Right Container: As I mentioned earlier, choose containers that are at least 12 inches in diameter and depth. Larger containers are always better.
* Use High-Quality Potting Mix: Don’t skimp on the potting mix! Use a high-quality potting mix specifically formulated for containers.
* Water Regularly: Chili peppers need consistent moisture, but don’t overwater them.
* Fertilize Regularly: Fertilize your chili peppers every 2-3 weeks.
* Provide Support: Taller varieties may need support.
* Protect from Frost: Chili peppers are sensitive to frost. If frost is predicted, bring your containers indoors or cover them with a blanket.
* Experiment: Don’t be afraid to experiment with different varieties of chili peppers and different growing techniques. The more you experiment, the more you’ll learn.
Growing chili peppers in containers is a fun and rewarding experience. With a little bit of care and attention, you can enjoy a bountiful harvest of spicy peppers right in your own backyard. So, get out there and start growing! Happy gardening!
Conclusion
So, there you have it! Mastering the art of container chili pepper growing is not only achievable but also incredibly rewarding. We’ve walked through the essential steps, from selecting the right container and soil to providing optimal sunlight and water. But the real magic lies in the DIY tricks we’ve uncovered. These aren’t just shortcuts; they’re game-changers that can significantly boost your chili pepper yield and overall plant health.
Why is this DIY approach a must-try? Because it empowers you to take control of your growing environment. You’re no longer solely reliant on commercially available solutions. You’re actively participating in the process, tailoring your methods to the specific needs of your chili peppers. This hands-on approach fosters a deeper connection with your plants and a greater understanding of their growth cycle.
Think about it: crafting your own nutrient-rich soil amendments using compost from your kitchen scraps, or building a simple trellis system from repurposed materials. These small acts not only save you money but also contribute to a more sustainable gardening practice. Plus, there’s an undeniable satisfaction in knowing that you’ve nurtured your chili peppers from seed to harvest using your own ingenuity.
But the benefits extend beyond cost savings and sustainability. The DIY tricks we’ve discussed can also lead to healthier, more productive plants. By creating a well-draining soil mix, you’re preventing root rot and ensuring that your chili peppers receive the oxygen they need. By providing adequate support with a DIY trellis, you’re maximizing sunlight exposure and preventing the fruits from touching the ground, reducing the risk of disease.
Variations and Suggestions:
Don’t be afraid to experiment! The beauty of DIY is that it allows for endless customization.
* Spice it up with different chili varieties: Try growing a mix of mild and hot peppers in separate containers to cater to different taste preferences.
* Companion planting: Consider planting basil or marigolds alongside your chili peppers to deter pests and attract beneficial insects.
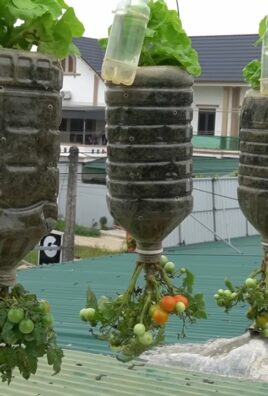
* DIY watering system: Explore creating a self-watering system using recycled plastic bottles to ensure consistent moisture levels, especially during hot weather.
* Vertical gardening: If you’re short on space, consider building a vertical garden using pallets or repurposed materials to maximize your growing area.
* Experiment with different soil amendments: Try adding coffee grounds or eggshells to your soil to provide extra nutrients.
We believe that anyone can successfully grow chili peppers in containers, regardless of their experience level. With a little bit of knowledge, some creativity, and a willingness to experiment, you can transform your balcony, patio, or even a sunny windowsill into a thriving chili pepper garden.
So, what are you waiting for? Grab your containers, gather your supplies, and get ready to embark on a chili pepper growing adventure! We’re confident that you’ll be amazed by the results.
We encourage you to try these DIY tricks and share your experiences with us. Let us know what worked for you, what challenges you faced, and any other tips or tricks you’ve discovered along the way. Together, we can create a community of passionate chili pepper growers who are dedicated to sharing their knowledge and helping each other succeed. Share your photos and stories on social media using #ContainerChiliPeppersDIY. We can’t wait to see what you grow!
Frequently Asked Questions (FAQ)
What is the best size container for growing chili peppers?
The ideal container size for growing chili peppers depends on the variety you choose. Generally, a container that is at least 5 gallons in size is recommended. Larger varieties, such as bell peppers or jalapeños, may benefit from even larger containers, such as 10-gallon pots. The larger the container, the more room the roots have to grow, which can lead to a healthier and more productive plant. Make sure the container has adequate drainage holes to prevent waterlogging.
What type of soil is best for container chili pepper growing?
Chili peppers thrive in well-draining, nutrient-rich soil. A good potting mix should consist of a combination of peat moss, perlite, and vermiculite. You can also amend your potting mix with compost or other organic matter to provide additional nutrients. Avoid using garden soil in containers, as it can become compacted and prevent proper drainage. A slightly acidic to neutral pH (around 6.0 to 7.0) is ideal for chili peppers.
How often should I water my container chili peppers?
The frequency of watering depends on several factors, including the size of the container, the weather conditions, and the type of soil you’re using. As a general rule, water your chili peppers when the top inch of soil feels dry to the touch. Avoid overwatering, as this can lead to root rot. During hot weather, you may need to water your plants more frequently. Check the soil moisture regularly and adjust your watering schedule accordingly.
How much sunlight do chili peppers need?
Chili peppers need at least 6-8 hours of direct sunlight per day to thrive. Choose a location that receives plenty of sunlight throughout the day. If you’re growing your chili peppers indoors, you may need to supplement with artificial lighting, such as grow lights. Insufficient sunlight can lead to leggy growth and reduced fruit production.
What are some common pests and diseases that affect chili peppers?
Common pests that affect chili peppers include aphids, spider mites, whiteflies, and thrips. These pests can suck the sap from the leaves, causing them to become yellow and distorted. Diseases that can affect chili peppers include fungal diseases such as powdery mildew, blossom end rot, and verticillium wilt. To prevent pests and diseases, keep your plants healthy by providing them with adequate sunlight, water, and nutrients. You can also use organic pest control methods, such as insecticidal soap or neem oil, to control pests. Ensure good air circulation around the plants to minimize fungal diseases.
How do I fertilize my container chili peppers?
Chili peppers are heavy feeders and require regular fertilization to produce a bountiful harvest. Use a balanced fertilizer with an NPK ratio of 10-10-10 or 14-14-14. You can also use a fertilizer specifically formulated for tomatoes or peppers. Fertilize your chili peppers every 2-3 weeks during the growing season. Avoid over-fertilizing, as this can lead to excessive foliage growth and reduced fruit production.
When should I harvest my chili peppers?
The timing of harvest depends on the variety of chili pepper you’re growing and your personal preference. Generally, chili peppers are ready to harvest when they have reached their mature size and color. Some varieties will turn from green to red, while others may turn yellow, orange, or even purple. You can harvest your chili peppers at any stage of ripeness, but they will be hotter and more flavorful when they are fully ripe. Use a sharp knife or scissors to cut the peppers from the plant, leaving a small stem attached.
Can I overwinter my container chili peppers?
Yes, you can overwinter your container chili peppers to keep them alive through the winter and get a head start on the next growing season. Before the first frost, prune your plants back to about 6-8 inches tall. Move your plants indoors to a cool, bright location. Water sparingly during the winter months, allowing the soil to dry out slightly between waterings. In the spring, gradually acclimate your plants to outdoor conditions before transplanting them back into their containers.
How do I deal with blossom end rot on my chili peppers?
Blossom end rot is a common problem that affects chili peppers, causing the bottom of the fruit to become dark and leathery. It is caused by a calcium deficiency in the plant. To prevent blossom end rot, ensure that your soil is well-draining and that your plants are receiving adequate calcium. You can add calcium to the soil by amending it with bone meal or crushed eggshells. Also, avoid overwatering or underwatering your plants, as this can also contribute to blossom end rot.
What are some good companion plants for chili peppers?
Companion planting can help to deter pests, attract beneficial insects, and improve the overall health of your chili peppers. Some good companion plants for chili peppers include basil, marigolds, onions, garlic, and carrots. Basil helps to repel aphids and whiteflies, while marigolds attract beneficial insects such as ladybugs and hoverflies. Onions and garlic can help to deter pests such as spider mites and thrips. Carrots can help to improve soil drainage and aeration.
Leave a Comment