

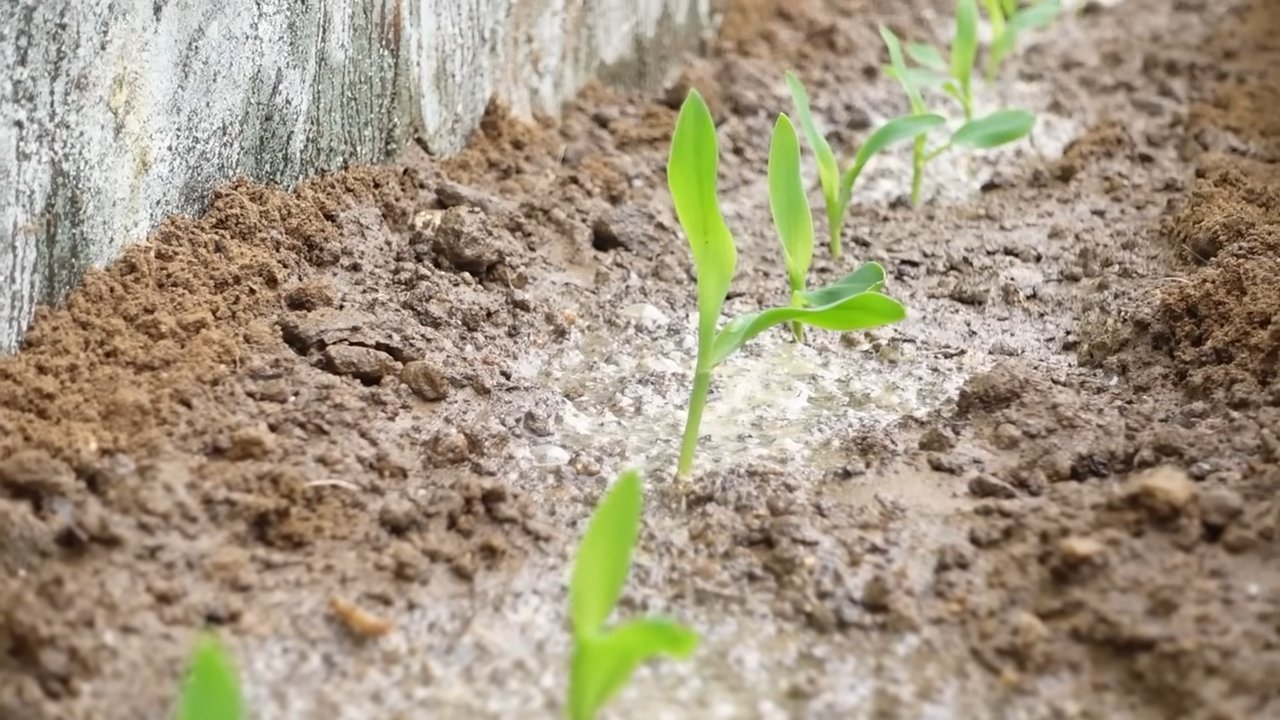
Concrete corn growing might sound like an oxymoron, a gardening impossibility! But what if I told you that you could actually cultivate delicious, homegrown corn even without acres of sprawling farmland? Forget the traditional image of endless rows of cornstalks swaying in the breeze; we’re about to unlock a revolutionary approach to urban gardening.
For centuries, corn has been a staple crop, deeply woven into the fabric of countless cultures. From the ancient civilizations of Mesoamerica, where corn was revered as a sacred gift, to its modern-day prominence as a global food source, its importance is undeniable. But access to fresh, homegrown corn has often been limited to those with ample space.
That’s where our DIY magic comes in! This article is your ultimate guide to mastering the art of concrete corn growing. We’ll explore innovative techniques and clever hacks that allow you to bypass the limitations of traditional gardening. Imagine the satisfaction of harvesting your own sweet corn, grown right on your patio, balcony, or even a small urban plot. No more relying solely on grocery store produce – you’ll have fresh, flavorful corn at your fingertips.
Whether you’re a seasoned gardener looking for a new challenge or a complete beginner eager to try something unique, this guide will equip you with the knowledge and confidence to succeed. Let’s ditch the dirt (well, some of it!) and embark on this exciting journey of concrete corn cultivation together!

Betonmais: Eine ungewöhnliche DIY-Gartenidee
Ich liebe es, meinen Garten mit ungewöhnlichen und kreativen Elementen zu gestalten. Und was könnte ungewöhnlicher sein als Maiskolben aus Beton? Dieses DIY-Projekt ist nicht nur ein echter Hingucker, sondern auch überraschend einfach umzusetzen. Hier zeige ich dir, wie du deine eigenen Betonmaiskolben herstellen kannst!
Benötigte Materialien und Werkzeuge
Bevor wir loslegen, stelle sicher, dass du alle notwendigen Materialien und Werkzeuge zur Hand hast. Das spart Zeit und Nerven!
* Zementmörtel: Ich empfehle einen schnelltrocknenden Zementmörtel, um die Wartezeit zu verkürzen.
* Feiner Sand: Für eine glattere Oberfläche und bessere Verarbeitung.
* Wasser: Zum Anmischen des Betons.
* Maiskolben: Frische oder getrocknete Maiskolben als Formvorlage. Je nach gewünschter Größe.
* Speiseöl oder Trennmittel: Damit sich der Beton später leichter von den Maiskolben löst.
* Eimer oder Mörtelkübel: Zum Anmischen des Betons.
* Spachtel oder Kelle: Zum Auftragen und Glätten des Betons.
* Drahtbürste: Zum Aufrauen der Oberfläche (optional).
* Schleifpapier (verschiedene Körnungen): Zum Glätten der Oberfläche (optional).
* Farbe (Acrylfarben oder Betonfarbe): Zum Bemalen der Maiskolben.
* Pinsel: Zum Auftragen der Farbe.
* Handschuhe: Zum Schutz deiner Hände.
* Atemschutzmaske: Beim Arbeiten mit Zementstaub.
* Schutzbrille: Zum Schutz deiner Augen.
* Alte Zeitungen oder Folie: Zum Abdecken der Arbeitsfläche.
* Gefäße zum Fixieren der Maiskolben: Zum Beispiel Eimer mit Sand oder Styroporblöcke.
* Cuttermesser oder scharfes Messer: Zum Entfernen der Maiskörner (optional).
Vorbereitung der Maiskolben
Dieser Schritt ist entscheidend für das Endergebnis. Eine gute Vorbereitung sorgt für eine saubere und detaillierte Betonform.
1. Reinigung der Maiskolben: Entferne zunächst alle losen Blätter und Fasern von den Maiskolben. Ich wasche sie dann gründlich mit Wasser und lasse sie vollständig trocknen.
2. Entfernen der Maiskörner (optional): Wenn du eine sehr detaillierte Oberfläche möchtest, kannst du die Maiskörner entfernen. Das ist zwar etwas mühsam, aber es lohnt sich! Verwende dazu ein Cuttermesser oder ein scharfes Messer und heble die Körner vorsichtig heraus. Achte darauf, die Kolben nicht zu beschädigen.
3. Auftragen des Trennmittels: Bestreiche die Maiskolben großzügig mit Speiseöl oder einem speziellen Trennmittel. Das verhindert, dass der Beton an den Kolben kleben bleibt und erleichtert das spätere Entfernen. Ich verwende dazu einen Pinsel, um das Öl gleichmäßig zu verteilen.
Anmischen des Betons
Das richtige Mischungsverhältnis ist wichtig für die Stabilität und Haltbarkeit deiner Betonmaiskolben.
1. Schutzmaßnahmen: Ziehe deine Handschuhe, Atemschutzmaske und Schutzbrille an. Zementstaub kann reizend sein.
2. Mischen der trockenen Zutaten: Gib den Zementmörtel und den feinen Sand in den Eimer oder Mörtelkübel. Ich verwende ein Verhältnis von etwa 3 Teilen Zementmörtel zu 1 Teil Sand. Mische die trockenen Zutaten gründlich mit einer Spachtel oder Kelle.
3. Hinzufügen von Wasser: Gib nach und nach Wasser hinzu und verrühre die Mischung, bis eine zähflüssige, aber noch formbare Konsistenz entsteht. Der Beton sollte nicht zu flüssig sein, da er sonst nicht gut an den Maiskolben haftet. Ich achte darauf, dass keine Klumpen entstehen.
4. Test der Konsistenz: Nimm eine kleine Menge Beton in die Hand und forme eine Kugel. Wenn die Kugel ihre Form behält und nicht zerläuft, hat der Beton die richtige Konsistenz.
Auftragen des Betons auf die Maiskolben
Jetzt kommt der spannende Teil: das Formen der Betonmaiskolben!
1. Fixieren der Maiskolben: Stelle die Maiskolben in Eimer mit Sand oder Styroporblöcke, um sie zu stabilisieren. So kannst du sie leichter bearbeiten.
2. Erste Schicht Beton auftragen: Trage mit der Spachtel oder Kelle eine dünne Schicht Beton auf die Maiskolben auf. Achte darauf, alle Ritzen und Vertiefungen gut auszufüllen. Ich beginne meistens an der Spitze und arbeite mich dann nach unten vor.
3. Zweite Schicht Beton auftragen: Nachdem die erste Schicht etwas angetrocknet ist (ca. 30-60 Minuten), trage eine zweite, dickere Schicht Beton auf. Forme den Beton so, dass er die Form eines Maiskolbens annimmt. Ich versuche, die natürliche Form des Kolbens so gut wie möglich nachzubilden.
4. Glätten der Oberfläche: Glätte die Oberfläche des Betons mit der Spachtel oder Kelle. Du kannst auch deine Finger verwenden, um Unebenheiten auszugleichen. Ich achte darauf, dass die Oberfläche möglichst glatt und eben ist.
5. Trocknungszeit: Lasse die Betonmaiskolben mindestens 24 Stunden trocknen. Ich stelle sie an einen schattigen und trockenen Ort, um ein zu schnelles Austrocknen zu verhindern.
Entfernen der Maiskolben aus dem Beton
Dieser Schritt erfordert etwas Geduld und Fingerspitzengefühl.
1. Vorsichtiges Lösen: Versuche, die Maiskolben vorsichtig aus dem Beton zu lösen. Wenn sie festkleben, kannst du sie leicht drehen oder mit einem Messer vorsichtig lösen. Ich arbeite mich langsam vor, um den Beton nicht zu beschädigen.
2. Entfernen von Maisresten: Entferne alle Maisreste, die im Beton verblieben sind. Du kannst dazu ein Messer, eine Drahtbürste oder Schleifpapier verwenden. Ich achte darauf, alle kleinen Ritzen und Vertiefungen gründlich zu reinigen.
Nachbearbeitung und Gestaltung
Jetzt kannst du deinen Betonmaiskolben den letzten Schliff verleihen!
1. Aufrauen der Oberfläche (optional): Wenn du eine rustikalere Optik möchtest, kannst du die Oberfläche mit einer Drahtbürste aufrauen. Ich finde, das verleiht den Maiskolben einen besonderen Charme.
2. Schleifen der Oberfläche (optional): Wenn du eine glattere Oberfläche bevorzugst, kannst du die Betonmaiskolben mit Schleifpapier (verschiedene Körnungen) abschleifen. Ich beginne mit einer groben Körnung und wechsle dann zu einer feineren Körnung.
3. Bemalen der Maiskolben: Bemale die Betonmaiskolben mit Acrylfarben oder Betonfarbe. Ich verwende meistens Gelb- und Grüntöne, um das Aussehen von echten Maiskolben nachzubilden. Du kannst aber auch deiner Kreativität freien Lauf lassen und andere Farben verwenden.
4. Versiegelung (optional): Um die Farbe zu schützen und die Haltbarkeit der Betonmaiskolben zu erhöhen, kannst du sie mit einem Klarlack oder einer speziellen Betonversiegelung versiegeln. Ich trage den Lack mit einem Pinsel auf und lasse ihn gut trocknen.
Dekoration und Präsentation
Jetzt sind deine Betonmaiskolben fertig und bereit, deinen Garten zu verschönern!
* Platzierung im Garten: Platziere die Betonmaiskolben in deinem Garten, auf deiner Terrasse oder deinem Balkon. Ich finde, sie sehen besonders gut in Blumenbeeten, zwischen anderen Pflanzen oder als Dekoration auf einem Gartentisch aus.
* Kombination mit anderen Dekoelementen: Kombiniere die Betonmaiskolben mit anderen Dekoelementen wie Steinen, Holz oder Pflanzen. So schaffst du eine harmonische und individuelle Gartengestaltung.
* Geschenkidee: Die Betonmaiskolben sind auch eine tolle Geschenkidee für Gartenliebhaber. Ich habe schon einige verschenkt und sie sind immer gut angekommen!
Ich hoffe, diese Anleitung hat dir gefallen und inspiriert, deine eigenen Betonmaiskolben herzustellen. Viel Spaß beim Basteln und Dekorieren!
Conclusion
So, there you have it! Transforming your concrete landscape into a surprisingly fertile ground for corn might seem unconventional, but the results speak for themselves. This DIY concrete corn growing method isn’t just about defying expectations; it’s about resourcefulness, sustainability, and proving that with a little ingenuity, you can cultivate life in the most unexpected places.
Why is this a must-try? Because it addresses several key issues simultaneously. Firstly, it offers a solution for those unsightly, unused concrete areas that often dominate urban and suburban landscapes. Instead of letting them sit barren, you’re repurposing them into productive spaces. Secondly, it provides a unique opportunity to grow your own food, reducing your reliance on commercially produced corn and minimizing your carbon footprint. And thirdly, it’s a fantastic conversation starter! Imagine the looks of amazement and curiosity when your neighbors see thriving corn stalks emerging from what was once a lifeless slab of concrete.
But the beauty of this method lies in its adaptability. Feel free to experiment with different corn varieties. Perhaps you’d like to try growing sweet corn for grilling, or maybe some colorful Indian corn for decorative purposes. You can also adjust the size and number of growing containers to suit your available space and desired yield. Consider adding companion plants like beans or squash to create a miniature “three sisters” garden within your concrete corn patch.
Don’t be afraid to get creative with your container design. While the instructions outline a simple and effective method, you can personalize your growing containers to match your aesthetic preferences. Use recycled materials, paint them in vibrant colors, or even incorporate them into a larger landscaping design.
Most importantly, we encourage you to embrace the learning process. Growing corn in concrete is an adventure, and there will undoubtedly be challenges along the way. But with patience, observation, and a willingness to adapt, you’ll be rewarded with a bountiful harvest and the satisfaction of knowing you’ve accomplished something truly remarkable.
We are confident that this **concrete corn growing** technique will not only provide you with fresh, homegrown corn but also inspire you to think differently about the potential of your surroundings. So, gather your materials, prepare your containers, and get ready to witness the magic of life sprouting from the most unlikely of surfaces.
We can’t wait to hear about your experiences! Share your photos, tips, and challenges in the comments below. Let’s create a community of concrete corn growers and inspire others to transform their landscapes into thriving food gardens. Happy growing!
Frequently Asked Questions (FAQ)
1. What type of concrete is best for this method?
Any type of concrete surface can be used for this method, as the corn isn’t directly planted into the concrete itself. The key is the container system you create on top of the concrete. However, ensure the concrete is relatively stable and doesn’t have large cracks or crumbling areas that could compromise the stability of your containers. If the concrete is painted, make sure the paint is lead-free and non-toxic, especially if you plan to use the corn for consumption.
2. How do I ensure proper drainage in the containers?
Proper drainage is crucial to prevent root rot and ensure healthy corn growth. When constructing your containers, make sure to include drainage holes at the bottom. You can also add a layer of gravel or pebbles at the base of the container to improve drainage. Monitor the soil moisture regularly and adjust your watering schedule accordingly. If you notice water pooling in the containers, you may need to enlarge the drainage holes or add more drainage material.
3. What type of soil should I use for growing corn in containers?
Corn requires nutrient-rich, well-draining soil. A good potting mix specifically designed for vegetables is ideal. You can also create your own soil mix by combining equal parts of compost, peat moss (or coconut coir), and perlite or vermiculite. Avoid using garden soil, as it can be too heavy and compact for container gardening. Amend the soil with slow-release fertilizer to provide a steady supply of nutrients throughout the growing season.
4. How much sunlight does corn need when grown on concrete?
Corn requires at least 6-8 hours of direct sunlight per day to thrive. Choose a location on your concrete surface that receives ample sunlight. If you live in a particularly hot climate, you may need to provide some afternoon shade to prevent the plants from overheating. Monitor the plants closely and adjust their position as needed to ensure they receive adequate sunlight.
5. How often should I water corn grown in containers on concrete?
Watering frequency will depend on several factors, including the weather, the size of the containers, and the type of soil you’re using. Generally, you should water the corn when the top inch of soil feels dry to the touch. Water deeply, ensuring that the water drains out of the drainage holes. Avoid overwatering, as this can lead to root rot. During hot, dry weather, you may need to water more frequently.
6. What kind of fertilizer should I use for concrete corn growing?
Corn is a heavy feeder, so regular fertilization is essential. Use a balanced fertilizer with an NPK ratio (nitrogen, phosphorus, potassium) of around 10-10-10 or 14-14-14. Apply the fertilizer according to the package instructions. You can also supplement with organic fertilizers such as compost tea or fish emulsion. Avoid over-fertilizing, as this can burn the roots.
7. How do I protect my corn plants from pests and diseases?
Monitor your plants regularly for signs of pests or diseases. Common corn pests include corn earworms, aphids, and spider mites. You can control these pests with insecticidal soap, neem oil, or by handpicking them off the plants. Common corn diseases include rust and leaf blight. Prevent these diseases by ensuring good air circulation, avoiding overhead watering, and using disease-resistant corn varieties.
8. Can I grow other vegetables alongside corn in the same container?
Yes, you can practice companion planting by growing other vegetables alongside corn. Good companion plants for corn include beans, squash, and cucumbers. These plants can help to improve soil fertility, deter pests, and provide shade for the corn roots. Avoid planting vegetables that compete with corn for nutrients or sunlight, such as tomatoes or peppers.
9. How do I know when the corn is ready to harvest?
Corn is typically ready to harvest when the silks turn brown and dry, and the kernels are plump and milky. You can test the ripeness by peeling back the husk and piercing a kernel with your fingernail. If the liquid is milky, the corn is ready to harvest. If the liquid is clear, the corn needs more time to ripen.
10. What are some variations I can try with this concrete corn growing method?
There are many variations you can try to customize this method to your specific needs and preferences. You can experiment with different container sizes and shapes, use recycled materials to build your containers, or incorporate a self-watering system. You can also try growing different varieties of corn, such as sweet corn, popcorn, or ornamental corn. Consider adding a trellis or support system to help the corn stalks stay upright, especially in windy conditions. Finally, you can integrate this method into a larger landscaping design, creating a beautiful and productive concrete garden.

Leave a Comment