

Clean Moldy Shower – just the thought sends shivers down your spine, right? I get it! That icky black and green stuff lurking in the corners of your shower can feel like an insurmountable foe. But fear not, my friend! This isn’t just another article promising a quick fix; I’m going to share some seriously effective DIY tricks that will banish that mold and mildew for good, without harsh chemicals or back-breaking scrubbing.
For centuries, humans have battled mold in their homes. From ancient Roman bathhouses to modern apartments, damp environments have always been a breeding ground for these unwelcome guests. While we might not be building elaborate aqueducts anymore, the struggle to maintain a clean and healthy bathroom remains. And let’s be honest, nobody wants to start their day with a moldy shower staring back at them!
Why is it so important to clean moldy shower spaces effectively? Well, beyond the obvious aesthetic reasons, mold can trigger allergies, asthma, and other respiratory issues. Plus, it can damage your shower surfaces over time, leading to costly repairs. I’m here to empower you with simple, affordable, and effective DIY solutions that will not only eliminate the mold but also prevent it from returning. Get ready to transform your shower into a sparkling, healthy oasis!
DIY Mold Removal: Revive Your Shower Like a Pro!
Okay, let’s face it, nobody likes a moldy shower. It’s gross, it’s unsightly, and frankly, it can be a bit worrying. But don’t despair! You don’t need to call in a professional (unless the mold is REALLY extensive, then definitely call a pro!). I’m going to walk you through a DIY method that’s effective, relatively inexpensive, and will leave your shower sparkling clean.
What You’ll Need: The Mold-Busting Arsenal
Before we dive in, let’s gather our supplies. Having everything ready will make the process much smoother.
* Spray Bottle(s): You’ll need at least one, maybe two, depending on how many solutions you want to prep at once.
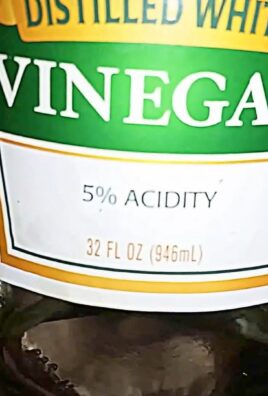
* White Vinegar: This is our main weapon against mold. It’s a natural disinfectant and deodorizer.
* Baking Soda: A mild abrasive that helps scrub away stubborn mold and grime.
* Hydrogen Peroxide (3%): Another great disinfectant and bleaching agent. Use with caution on colored grout.
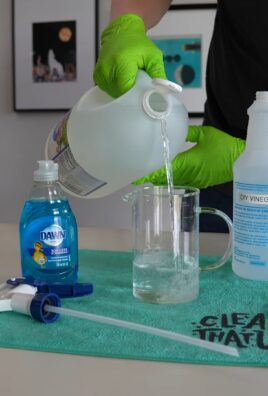
* Dish Soap: Helps to break down surface tension and lift dirt.
* Old Toothbrush or Scrub Brush: For getting into those tight corners and grout lines.
* Microfiber Cloths or Sponges: For wiping and cleaning surfaces.
* Rubber Gloves: Protect your hands from the cleaning solutions and mold.
* Eye Protection (Goggles): Safety first! Protect your eyes from splashes.
* Face Mask: Especially important if you’re sensitive to mold or cleaning solutions.
* Spray Sealant (Optional): To help prevent future mold growth.
* Putty Knife or Scraper (Optional): For removing stubborn caulk.
* Caulk Gun and New Caulk (Optional): For replacing old, moldy caulk.
* Ventilation: Open a window or turn on the exhaust fan.
Phase 1: Prepping the Battlefield
Before we start spraying and scrubbing, let’s get the shower ready for action.
1. Clear the Area: Remove all shampoo bottles, soap bars, loofahs, and anything else that might be in the way. This will give you a clear shot at the mold.
2. Ventilate, Ventilate, Ventilate!: Open a window or turn on the exhaust fan. Good ventilation is crucial for preventing the spread of mold spores and for your own health.
3. Gear Up: Put on your rubber gloves, eye protection, and face mask. Trust me, you’ll thank me later.
Phase 2: The Vinegar Assault
Vinegar is our first line of defense. It’s a natural, effective mold killer.
1. Fill a Spray Bottle with White Vinegar: Use undiluted white vinegar for maximum effectiveness.
2. Saturate the Moldy Areas: Generously spray all areas affected by mold, including grout lines, caulk, shower walls, and even the shower curtain or door.
3. Let it Sit: Allow the vinegar to sit for at least one hour. This gives it time to penetrate and kill the mold. For heavy mold growth, you can let it sit overnight. The longer, the better!
4. Scrub-a-dub-dub: After the vinegar has had its time to work, use your old toothbrush or scrub brush to scrub the moldy areas. You should see the mold starting to loosen and lift.
5. Rinse Thoroughly: Rinse the shower with warm water to remove the vinegar and loosened mold.
Phase 3: Baking Soda Power
If the vinegar didn’t quite get everything, baking soda is our next weapon of choice. It’s a gentle abrasive that can help scrub away stubborn mold and grime.
1. Make a Baking Soda Paste: Mix baking soda with a little water to form a thick paste.
2. Apply the Paste: Apply the baking soda paste to the remaining moldy areas.
3. Scrub Again: Use your toothbrush or scrub brush to scrub the paste into the grout lines and other affected areas.
4. Let it Sit (Optional): For extra stubborn mold, let the baking soda paste sit for 15-20 minutes before scrubbing.
5. Rinse Thoroughly: Rinse the shower with warm water to remove the baking soda and loosened mold.
Phase 4: Hydrogen Peroxide Boost (Use with Caution!)
Hydrogen peroxide is a bleaching agent, so use it with caution, especially on colored grout or surfaces. Test it in an inconspicuous area first to make sure it doesn’t discolor anything.
1. Fill a Spray Bottle with Hydrogen Peroxide (3%): Use the standard 3% solution you can find at most drugstores.
2. Spray the Affected Areas: Spray the hydrogen peroxide onto any remaining moldy areas.
3. Let it Sit: Allow the hydrogen peroxide to sit for 10-15 minutes.
4. Scrub (If Necessary): If needed, scrub the areas with your toothbrush or scrub brush.
5. Rinse Thoroughly: Rinse the shower with warm water to remove the hydrogen peroxide.
Phase 5: Dish Soap Cleanse
Now that we’ve tackled the mold, let’s give the shower a good general cleaning.
1. Apply Dish Soap: Apply a small amount of dish soap to a sponge or microfiber cloth.
2. Wash All Surfaces: Wash all surfaces of the shower, including the walls, floor, shower door, and fixtures.
3. Rinse Thoroughly: Rinse the shower with warm water to remove all traces of soap.
Phase 6: Drying and Inspection
Drying the shower thoroughly is crucial for preventing future mold growth.
1. Dry All Surfaces: Use a clean microfiber cloth to dry all surfaces of the shower. Pay special attention to grout lines and corners.
2. Inspect for Remaining Mold: Carefully inspect the shower for any remaining mold. If you find any, repeat the appropriate cleaning steps.
3. Address Stubborn Caulk: If the caulk is heavily moldy and can’t be cleaned effectively, it’s best to remove and replace it.
Phase 7: Replacing Moldy Caulk (Optional but Recommended)
Replacing moldy caulk can make a huge difference in the appearance and cleanliness of your shower.
1. Remove the Old Caulk: Use a putty knife or scraper to carefully remove the old caulk. Be sure to remove all traces of the old caulk.
2. Clean the Area: Clean the area where the caulk was removed with a damp cloth and a mild cleaner.
3. Dry the Area Thoroughly: Make sure the area is completely dry before applying new caulk.
4. Apply New Caulk: Load a caulk gun with a tube of mildew-resistant caulk. Apply a smooth, even bead of caulk along the seams.
5. Smooth the Caulk: Use a wet finger or a caulk smoothing tool to smooth the caulk and remove any excess.
6. Allow to Dry: Allow the caulk to dry completely according to the manufacturer’s instructions.
Phase 8: Prevention is Key!
Now that your shower is sparkling clean, let’s talk about preventing mold from coming back.
1. Ventilate After Each Shower: Always open a window or turn on the exhaust fan after each shower to help dry the shower.
2. Squeegee the Walls and Door: Use a squeegee to remove excess water from the walls and door after each shower. This will help prevent water from sitting on the surfaces and promoting mold growth.
3. Clean Regularly: Clean your shower regularly, at least once a week, with a mild cleaner.
4. Use a Mold-Resistant Shower Cleaner: Consider using a shower cleaner specifically designed to prevent mold growth.
5. Spray Sealant (Optional): Apply a spray sealant to the grout lines to help prevent water from penetrating and promoting mold growth.
6. Fix Leaks Promptly: Address any leaks in your shower promptly to prevent water damage and mold growth.
7. Consider a Dehumidifier: If you live in a humid climate, consider using a dehumidifier in your bathroom to help reduce moisture levels.
And there you have it! A sparkling clean, mold-free shower. It might seem like a lot of work, but trust me, it’s worth it. Not only will your shower look better, but you’ll also be improving the air quality in your bathroom and protecting your health. Happy cleaning!
Conclusion
So, there you have it! A simple, effective, and surprisingly satisfying way to tackle that unsightly mold in your shower. We’ve walked you through the steps, highlighting the ease and affordability of this DIY mold removal method. But why is this a must-try? Because it works! It’s a powerful alternative to harsh chemicals, often relying on ingredients you already have in your pantry. Think about it: no more holding your breath while spraying toxic fumes, no more expensive specialty cleaners that promise the world but deliver little. This method is gentle on your lungs, your wallet, and often, even more effective on stubborn mold stains.
Beyond the basic recipe, feel free to experiment! For a more potent solution, consider adding a few drops of tea tree oil, known for its antifungal properties. If you’re dealing with particularly stubborn mold in grout lines, a toothbrush or grout brush will be your best friend. And for those who prefer a thicker consistency, a little cornstarch can turn your spray into a paste, allowing it to cling to vertical surfaces for longer. Remember to always test any new solution in an inconspicuous area first to ensure it doesn’t discolor your shower surfaces.
The beauty of this DIY approach is its adaptability. You can tailor the ingredients and application to suit your specific needs and preferences. Whether you’re a seasoned DIY enthusiast or a complete beginner, this is a project you can confidently tackle.
But the real test is in the doing. We wholeheartedly encourage you to give this DIY mold removal trick a try. Reclaim your shower from the clutches of mold and mildew, and enjoy a cleaner, healthier bathroom. The satisfaction of seeing those stubborn stains disappear before your eyes is truly rewarding.
Don’t just take our word for it, though. We want to hear about your experiences! Did you find this method effective? Did you try any variations? What tips and tricks did you discover along the way? Share your stories, photos, and feedback in the comments below. Let’s build a community of DIY mold-busting experts and help each other create sparkling clean showers! Your insights could be invaluable to someone else struggling with the same problem. Together, we can conquer mold and enjoy the simple pleasure of a fresh, clean shower. So, grab your supplies, roll up your sleeves, and get ready to say goodbye to mold and hello to a brighter, cleaner bathroom! This **DIY mold removal** method is a game-changer, and we can’t wait to hear about your success.
Frequently Asked Questions (FAQ)
1. What kind of mold is this DIY solution effective against?
This DIY solution is generally effective against common household mold and mildew found in showers, such as black mold (Aspergillus niger) and mildew. However, it’s important to note that severe mold infestations, especially those covering large areas or penetrating deep into building materials, may require professional remediation. If you suspect a serious mold problem, consult a qualified mold removal specialist. This DIY method is best suited for surface mold and preventative maintenance.
2. Is this DIY mold removal solution safe for all shower surfaces?
While generally safe, it’s always best to test the solution in an inconspicuous area first, especially on delicate surfaces like natural stone or certain types of acrylic. Some acidic ingredients, like vinegar, can potentially etch or discolor certain materials if left on for too long. Observe the test area for any adverse reactions before applying the solution to the entire shower. If you’re unsure about the compatibility of the solution with your shower surfaces, consult the manufacturer’s recommendations or a professional cleaner.
3. How often should I use this DIY mold removal solution?
The frequency of application depends on the severity of the mold problem and the humidity levels in your bathroom. For preventative maintenance, cleaning your shower with this solution once a week can help prevent mold from returning. If you’re dealing with an existing mold problem, you may need to apply the solution more frequently, perhaps every few days, until the mold is under control. After that, you can reduce the frequency to once a week or as needed. Proper ventilation is also crucial in preventing mold growth, so be sure to run the exhaust fan during and after showers.
4. What are the best ingredients to use for this DIY mold removal solution?
The best ingredients depend on your preferences and the severity of the mold. White vinegar is a popular and effective option due to its acidity, which inhibits mold growth. Baking soda is a gentle abrasive that can help scrub away mold stains. Hydrogen peroxide is another effective disinfectant and bleaching agent. Tea tree oil is a natural antifungal that can be added for extra potency. Experiment with different combinations and concentrations to find what works best for your shower. Remember to always dilute concentrated solutions to avoid damaging surfaces.
5. How long should I leave the DIY mold removal solution on the affected area?
The optimal dwell time depends on the severity of the mold and the type of solution you’re using. Generally, allowing the solution to sit on the affected area for 10-15 minutes is sufficient. For stubborn mold stains, you can leave it on for longer, up to 30 minutes, but be sure to monitor the area for any adverse reactions. After the dwell time, scrub the area thoroughly with a brush or sponge and rinse with clean water.
6. What safety precautions should I take when using this DIY mold removal solution?
While this DIY solution is generally safer than harsh chemicals, it’s still important to take precautions. Wear gloves to protect your hands from irritation. Avoid getting the solution in your eyes, and if you do, rinse immediately with plenty of water. Ensure proper ventilation in the bathroom by opening windows or running the exhaust fan. If you have sensitive skin or allergies, consider wearing a mask to avoid inhaling any fumes. Keep the solution out of reach of children and pets.
7. Can I use this DIY mold removal solution on other surfaces besides the shower?
Yes, this DIY solution can be used on other surfaces prone to mold growth, such as bathroom tiles, grout, sinks, and even some fabrics. However, always test the solution in an inconspicuous area first to ensure it doesn’t damage the surface. Avoid using acidic solutions on delicate materials like marble or natural stone. For fabrics, test the solution on a small, hidden area before applying it to the entire garment.
8. What if the mold keeps coming back after using this DIY solution?
If mold keeps returning, it indicates an underlying moisture problem that needs to be addressed. Check for leaky pipes, dripping faucets, or inadequate ventilation. Repair any leaks and ensure proper ventilation in the bathroom. Consider using a dehumidifier to reduce humidity levels. You may also need to reapply the DIY solution more frequently or try a stronger concentration. If the mold problem persists despite your efforts, consult a professional mold remediation specialist.
9. Can I mix different cleaning agents together to make a more powerful mold removal solution?
It’s generally not recommended to mix different cleaning agents together, as this can create dangerous fumes or chemical reactions. For example, never mix bleach with ammonia or vinegar, as this can produce toxic gases. Stick to using individual cleaning agents or pre-mixed solutions according to the manufacturer’s instructions. If you’re unsure about the compatibility of different cleaning agents, err on the side of caution and avoid mixing them.
10. Is this DIY mold removal solution environmentally friendly?
Compared to harsh chemical cleaners, this DIY solution is generally more environmentally friendly, as it relies on natural ingredients like vinegar, baking soda, and hydrogen peroxide. However, it’s still important to use these ingredients responsibly and avoid excessive use. Dispose of any leftover solution properly according to local regulations. Consider using reusable spray bottles and cleaning cloths to further reduce your environmental impact.

Leave a Comment