

Bell Peppers in Plastic Bottles: Sounds a little crazy, right? But trust me, this ingenious DIY trick is about to revolutionize your home gardening game! Imagine harvesting a vibrant bounty of bell peppers, all thanks to repurposed plastic bottles. It’s not just about saving money; it’s about embracing a sustainable and space-saving approach to growing your own food.
For centuries, humans have cultivated gardens, nurturing life from the earth. While the methods have evolved, the core desire to connect with nature and provide for ourselves remains. This innovative technique of growing bell peppers in plastic bottles taps into that ancient tradition while addressing modern challenges like limited space and environmental concerns. Think of it as a modern twist on the hanging gardens of Babylon, but with a focus on recycling and fresh produce!
Let’s face it, not everyone has a sprawling backyard perfect for a traditional garden. Apartment dwellers, balcony gardeners, and even those with limited mobility can struggle to enjoy the joys of growing their own vegetables. That’s where this DIY hack comes in. By utilizing readily available plastic bottles, you can create a vertical garden that maximizes space and minimizes waste. Plus, it’s a fantastic way to teach kids about sustainability and the life cycle of plants. I’m excited to show you how to transform those discarded bottles into thriving homes for your bell pepper plants. Get ready to unleash your inner gardener and enjoy the sweet taste of success!

Paprika-Paradies: So ziehst du deine eigenen Paprika in Plastikflaschen!
Hey Gärtner-Freunde! Habt ihr auch genug von teuren Paprika aus dem Supermarkt? Oder wollt ihr einfach nur einen grünen Daumen beweisen? Dann habe ich genau das Richtige für euch: Wir ziehen unsere eigenen Paprika in Plastikflaschen! Klingt verrückt? Ist es vielleicht ein bisschen, aber es funktioniert super und ist eine tolle Möglichkeit, Plastikmüll zu recyceln. Los geht’s!
Was du brauchst:
* Plastikflaschen: Am besten 1,5-Liter-Flaschen oder größer. Je größer die Flasche, desto mehr Platz haben die Wurzeln.
* Paprikasamen: Entweder aus gekauften Paprika (Achtung: Hybridsorten können abweichen!) oder aus dem Gartenfachhandel.
* Anzuchterde: Spezielle Erde für die Anzucht von Sämlingen.
* Blumenerde: Normale Blumenerde für das spätere Umpflanzen.
* Sand oder Kies: Für die Drainage am Boden der Flasche.
* Messer oder Schere: Zum Zuschneiden der Flaschen.
* Sprühflasche: Für die Bewässerung der Sämlinge.
* Gießkanne: Für die spätere Bewässerung.
* Dünge: Flüssigdünger für Gemüse.
* Optional: Kleine Holzstäbe oder Schaschlikspieße zur Stabilisierung der Pflanzen.
* Optional: Etiketten und wasserfester Stift zum Beschriften der Flaschen.
Phase 1: Die Anzucht der Paprikasamen
Paprika brauchen etwas länger, um zu keimen, also starten wir am besten frühzeitig, idealerweise im Februar oder März.
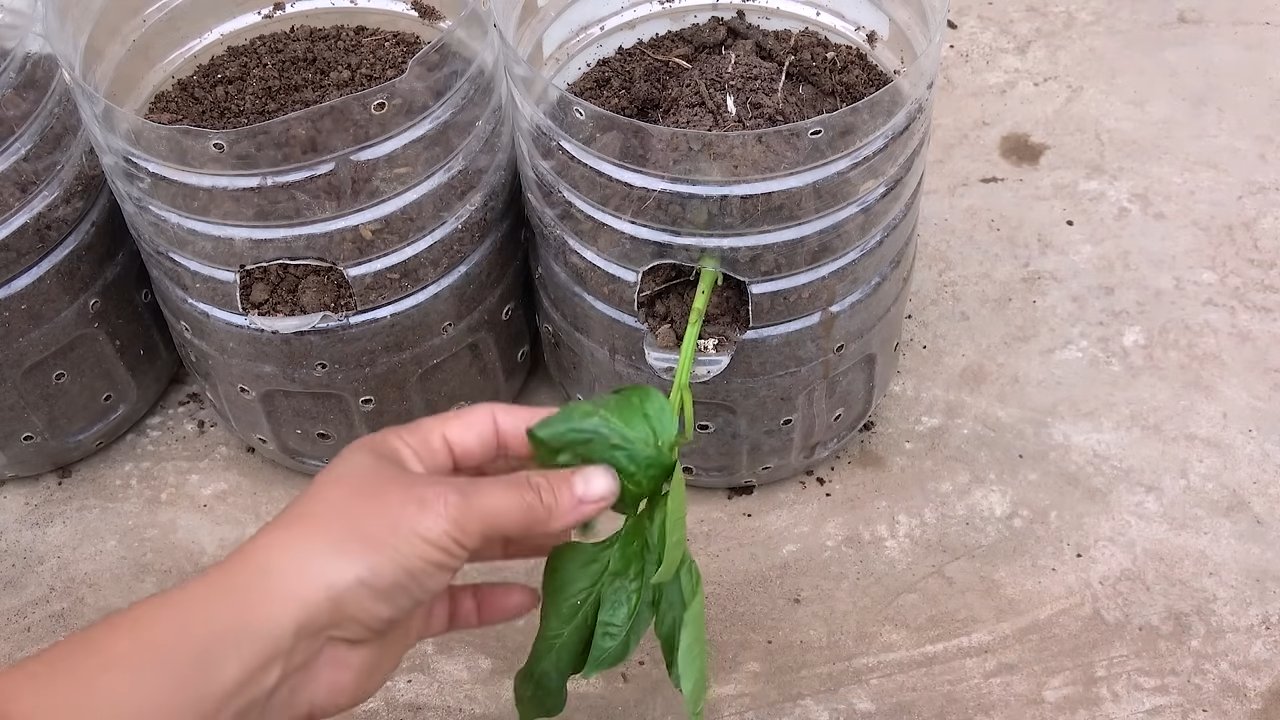
1. Flaschen vorbereiten: Zuerst schneiden wir die Plastikflaschen zurecht. Ich mache das meistens so:
* Schneide die Flasche etwa 10-15 cm vom Boden ab. Der untere Teil wird unser Pflanzgefäß.
* Den oberen Teil (mit dem Flaschenhals) heben wir auf. Den brauchen wir später als eine Art Mini-Gewächshaus.
* Reinige die Flaschen gründlich mit Wasser und Spülmittel, um eventuelle Rückstände zu entfernen.
2. Drainage schaffen: Auf den Boden des unteren Flaschenteils geben wir eine Schicht Sand oder Kies. Das sorgt für eine gute Drainage und verhindert Staunässe, die Paprika gar nicht mögen.
3. Anzuchterde einfüllen: Fülle die Flasche mit Anzuchterde bis etwa 2 cm unter den Rand. Drücke die Erde leicht an.
4. Samen säen: Verteile die Paprikasamen gleichmäßig auf der Erde. Ich nehme meistens 2-3 Samen pro Flasche, um sicherzugehen, dass mindestens einer keimt. Bedecke die Samen dann mit einer dünnen Schicht Anzuchterde (ca. 0,5 cm).
5. Bewässern: Befeuchte die Erde vorsichtig mit einer Sprühflasche. Die Erde sollte feucht, aber nicht nass sein.
6. Mini-Gewächshaus bauen: Setze den oberen Teil der Flasche (mit dem Flaschenhals nach oben) wie einen Deckel auf den unteren Teil. Das erzeugt ein feuchtwarmes Klima, das die Keimung fördert.
7. Warm und hell stellen: Stelle die Flaschen an einen warmen und hellen Ort. Ideal sind Temperaturen zwischen 22 und 25 Grad Celsius. Ein Fensterbrett über der Heizung ist perfekt.
8. Geduld haben: Jetzt heißt es warten! Paprika brauchen in der Regel 1-3 Wochen, um zu keimen. Achte darauf, dass die Erde immer leicht feucht bleibt. Lüfte das Mini-Gewächshaus regelmäßig, indem du den Deckel kurz abnimmst, um Schimmelbildung zu vermeiden.
Phase 2: Die Pflege der Sämlinge
Sobald die ersten kleinen Pflänzchen aus der Erde sprießen, beginnt die nächste Phase.
1. Mini-Gewächshaus entfernen: Wenn die Sämlinge groß genug sind (ca. 5 cm hoch), kannst du den oberen Teil der Flasche entfernen.
2. Weiter gießen: Gieße die Sämlinge weiterhin regelmäßig, aber vermeide Staunässe. Die Erde sollte immer leicht feucht sein.
3. Heller Standort: Sorge für ausreichend Licht. Wenn die Sämlinge zu wenig Licht bekommen, werden sie lang und dünn. Ein Südfenster ist ideal.
4. Vereinzeln (pikieren): Wenn mehrere Sämlinge in einer Flasche gewachsen sind, musst du sie vereinzeln. Das bedeutet, dass du die kräftigsten Pflänzchen in separate Töpfe umpflanzt.
* Fülle kleine Töpfe mit Anzuchterde.
* Lockere die Erde um die Sämlinge vorsichtig auf.
* Hebe die Sämlinge vorsichtig aus der Erde und achte darauf, die Wurzeln nicht zu beschädigen.
* Setze jeden Sämling in einen separaten Topf und fülle die Töpfe mit Erde auf.
* Gieße die Sämlinge an.
Phase 3: Das Umpflanzen in größere Flaschen und die weitere Pflege
Wenn die Sämlinge groß genug sind (ca. 10-15 cm hoch) und kräftige Wurzeln haben, ist es Zeit, sie in größere Flaschen umzupflanzen.
1. Größere Flaschen vorbereiten: Wiederhole den Vorgang vom Anfang: Schneide größere Plastikflaschen (mindestens 1,5 Liter) zurecht und sorge für eine Drainage am Boden.
2. Blumenerde einfüllen: Fülle die Flaschen mit Blumenerde bis etwa 2 cm unter den Rand.
3. Umpflanzen: Hebe die Sämlinge vorsichtig aus den kleinen Töpfen und setze sie in die größeren Flaschen. Fülle die Flaschen mit Erde auf und drücke die Erde leicht an.
4. Angießen: Gieße die Pflanzen gründlich an.
5. Düngen: Beginne etwa 2 Wochen nach dem Umpflanzen mit dem Düngen. Verwende einen Flüssigdünger für Gemüse und befolge die Anweisungen auf der Packung.
6. Standort: Stelle die Flaschen an einen sonnigen und warmen Ort. Paprika lieben die Sonne!
7. Gießen: Gieße die Pflanzen regelmäßig, aber vermeide Staunässe. Die Erde sollte immer leicht feucht sein.
8. Stützen: Wenn die Pflanzen größer werden und Früchte tragen, kann es sein, dass sie Unterstützung brauchen. Stecke kleine Holzstäbe oder Schaschlikspieße in die Erde und binde die Pflanzen daran fest.
9. Ausgeizen: Entferne regelmäßig die Seitentriebe (Geiztriebe), die in den Blattachseln wachsen. Das fördert das Wachstum der Haupttriebe und die Fruchtbildung.
Phase 4: Die Ernte
Nach einigen Wochen (je nach Sorte) kannst du deine eigenen Paprika ernten!
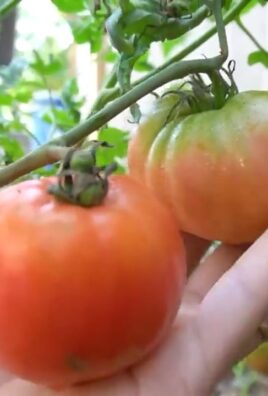
1. Reife erkennen: Paprika sind reif, wenn sie ihre endgültige Farbe erreicht haben (rot, gelb, orange, grün) und sich fest anfühlen.
2. Ernten: Schneide die Paprika mit einem scharfen Messer oder einer Schere ab.
3. Genießen: Verwende deine selbstgezogenen Paprika in deinen Lieblingsgerichten!
Zusätzliche Tipps und Tricks:
* Sortenwahl: Wähle Paprikasorten, die für den Anbau im Topf geeignet sind. Kleine, kompakte Sorten sind ideal.
* Bestäubung: Paprika sind Selbstbestäuber, aber du kannst die Bestäubung unterstützen, indem du die Pflanzen leicht schüttelst oder mit einem Pinsel über die Blüten streichst.
* Schädlinge: Achte auf Schädlinge wie Blattläuse oder Spinnmilben. Bei Befall kannst du die Pflanzen mit einem natürlichen Insektizid behandeln.
* Überwinterung: Paprika sind mehrjährig, aber nicht winterhart. Du kannst versuchen, die Pflanzen im Haus zu überwintern. Schneide sie dafür im Herbst zurück und stelle sie an einen hellen und kühlen Ort. Gieße sie nur wenig. Im Frühjahr kannst du sie dann
Conclusion
So, there you have it! Transforming humble plastic bottles into miniature greenhouses for your bell peppers is not just a clever upcycling project; it’s a game-changer for your gardening success. This simple DIY trick offers a multitude of benefits, from protecting your delicate seedlings from harsh weather and pests to creating a warmer, more humid microclimate that encourages faster growth and earlier harvests.
Why is this a must-try? Because it’s accessible, affordable, and incredibly effective. You’re likely already generating the “raw materials” – those empty plastic bottles – in your household, turning what would otherwise be waste into a valuable resource. The setup is quick and easy, requiring minimal tools and effort. And the results? Stronger, healthier bell pepper plants that are better equipped to thrive and produce a bountiful crop.
But the beauty of this DIY bell pepper bottle method lies in its adaptability. Feel free to experiment with different types of plastic bottles. Larger bottles can accommodate larger plants for a longer period, while smaller bottles are perfect for starting seeds indoors before transplanting. You can also adjust the ventilation by creating more or fewer holes in the bottle, depending on your local climate and the specific needs of your bell pepper variety.
Consider adding a layer of mulch around the base of the bottle to further insulate the soil and retain moisture. For added protection against strong winds, you can secure the bottles to the ground with stakes or by burying them slightly deeper. If you’re growing your bell peppers in containers, you can even use cut-off plastic bottles as mini-cloches to provide extra warmth and protection during cooler evenings.
Don’t be afraid to get creative and personalize this method to suit your own gardening style and environment. The key is to provide your bell pepper plants with a sheltered, nurturing environment that promotes healthy growth and abundant fruit production.
We wholeheartedly encourage you to give this DIY bell pepper bottle trick a try. It’s a rewarding and sustainable way to enhance your gardening experience and enjoy the delicious taste of homegrown bell peppers. Once you’ve tried it, we’d love to hear about your experience! Share your photos, tips, and variations in the comments below. Let’s build a community of resourceful gardeners who are passionate about growing their own food in a sustainable and innovative way. Let us know what worked for you, what challenges you faced, and any creative solutions you came up with. Together, we can learn and grow even more! Happy gardening!
Frequently Asked Questions (FAQ)
1. What type of plastic bottles are best for this DIY trick?
The ideal plastic bottles are clear, clean, and free of any harmful chemicals. Look for bottles that have previously contained water, juice, or soda. Avoid using bottles that have contained harsh chemicals or cleaning products, as these may contaminate the soil and harm your plants. The size of the bottle will depend on the size of your bell pepper plants. Smaller bottles are suitable for seedlings, while larger bottles are better for more mature plants. Two-liter soda bottles are a popular and readily available option.
2. How do I prepare the plastic bottles before using them?
First, thoroughly wash the bottles with soap and water to remove any residue. Rinse them well and allow them to dry completely. Next, cut off the bottom of the bottle using a sharp knife or scissors. Be careful not to cut yourself. You can also remove the bottle cap or drill a few small holes in the cap to provide ventilation. If you live in a particularly hot climate, you may want to create additional ventilation holes in the sides of the bottle to prevent overheating.
3. When is the best time to use this DIY trick for bell peppers?
This method is particularly useful during the early stages of growth, when bell pepper plants are most vulnerable to cold weather, pests, and diseases. You can use it to start seeds indoors and then transplant the seedlings into the garden under the protection of the plastic bottles. It’s also beneficial during periods of unpredictable weather, such as late spring frosts or early autumn chills. Once the plants have grown larger and the weather has stabilized, you can remove the bottles.
4. How do I water my bell pepper plants when they are covered with plastic bottles?
There are several ways to water your bell pepper plants when they are protected by plastic bottles. You can remove the bottle and water the soil directly, or you can pour water into the bottle cap (if you have removed the cap, you can simply pour water into the opening). Another option is to create small holes in the sides of the bottle near the bottom and water through these holes. Be sure to water thoroughly, allowing the water to soak into the soil and reach the roots of the plants. Avoid overwatering, as this can lead to root rot.
5. How do I prevent overheating inside the plastic bottles?
Overheating can be a concern, especially in hot climates. To prevent this, make sure to provide adequate ventilation by removing the bottle cap or creating additional holes in the sides of the bottle. You can also shade the bottles during the hottest part of the day by covering them with a light-colored cloth or moving them to a partially shaded location. Monitor the temperature inside the bottles regularly and adjust the ventilation as needed.
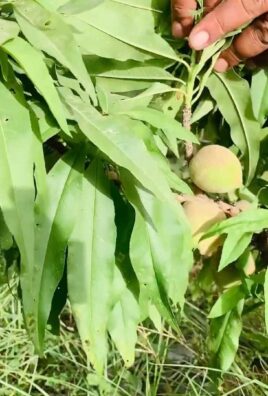
6. Can I use this method for other types of plants besides bell peppers?
Yes, this DIY trick can be used for a variety of other plants, including tomatoes, cucumbers, eggplants, and herbs. The principles are the same: the plastic bottles provide a protective microclimate that promotes faster growth and earlier harvests. Just be sure to choose bottles that are appropriately sized for the plants you are growing.
7. How long should I leave the plastic bottles on my bell pepper plants?
The length of time you leave the plastic bottles on your bell pepper plants will depend on the weather conditions and the size of the plants. Generally, you can remove the bottles once the plants have grown larger and the weather has stabilized. This is typically around 4-6 weeks after transplanting. However, if you experience a sudden cold snap or a period of heavy rain, you may want to put the bottles back on to provide extra protection.
8. What are the benefits of using this DIY trick compared to other methods of protecting bell pepper plants?
This DIY trick offers several advantages over other methods of protecting bell pepper plants. It’s a cost-effective and sustainable way to upcycle plastic bottles. It provides a warmer, more humid microclimate that encourages faster growth. It protects plants from harsh weather, pests, and diseases. And it’s easy to set up and maintain. Compared to more expensive options like greenhouses or row covers, this DIY method is a simple and accessible solution for gardeners of all levels.
9. How does this DIY bell pepper bottle method help with pest control?
The plastic bottle acts as a physical barrier, preventing many common garden pests from reaching your bell pepper plants. This is especially helpful in protecting young, vulnerable seedlings from slugs, snails, cutworms, and other insects that can quickly decimate a garden. While the bottle won’t completely eliminate all pests, it significantly reduces the risk of infestation and allows your plants to establish themselves before becoming more susceptible to pest damage.
10. Is this method environmentally friendly?
Yes, this method is considered environmentally friendly because it promotes upcycling and reduces waste. Instead of throwing away plastic bottles, you are repurposing them into a valuable resource for your garden. This helps to conserve resources and reduce the amount of plastic that ends up in landfills. Furthermore, by protecting your plants from pests and diseases, you may be able to reduce your reliance on chemical pesticides and herbicides, which can have harmful effects on the environment.

Leave a Comment