

Baking Soda Oven Cleaning: Is your oven looking less like a culinary haven and more like a burnt offering? Don’t despair! I know the dread of facing a grimy oven – it’s a chore we all put off. But what if I told you there’s a simple, effective, and surprisingly satisfying way to tackle that mess using something you probably already have in your pantry?
For generations, baking soda has been a household staple, not just for baking, but for cleaning too! Its gentle abrasive properties and ability to neutralize odors make it a fantastic, eco-friendly alternative to harsh chemical cleaners. Think of your grandmother’s cleaning secrets – baking soda was likely a star player! This isn’t just some newfangled trend; it’s a time-tested method that works.
Why do you need this DIY trick? Because nobody wants to spend hours scrubbing away at baked-on grease and grime! Harsh chemical oven cleaners can be expensive, smelly, and even harmful. This baking soda oven cleaning method is not only safer and cheaper, but it’s also incredibly effective. I’m going to show you how to transform your oven from a sticky, smoky mess into a sparkling clean space, ready for your next culinary adventure. Get ready to say goodbye to oven cleaning dread and hello to a sparkling clean oven, the natural way!
DIY Oven Cleaning with Baking Soda: A Sparkling Clean Oven, Naturally!
Hey there, fellow DIY enthusiasts! I’m so excited to share my go-to method for cleaning a grimy oven using the power of baking soda. Forget harsh chemicals and overpowering fumes – this method is natural, effective, and surprisingly easy. I promise, you’ll be amazed at the results!
What You’ll Need: The Baking Soda Arsenal
Before we dive in, let’s gather our supplies. This is a pretty simple list, which is one of the things I love about this method!
* Baking Soda: The star of the show! You’ll need about ½ to ¾ of a cup, depending on how dirty your oven is.
* Water: Just plain old tap water will do.
* Spray Bottle: For spritzing water onto the baking soda paste.
* Spatula or Scraper: A plastic or silicone spatula is perfect for applying and removing the baking soda paste. Avoid metal, as it can scratch your oven.
* Rubber Gloves: Protect your hands from the baking soda paste, especially if you have sensitive skin.
* Sponge or Cloth: For wiping down the oven after the baking soda has done its magic.
* Old Towels or Rags: For soaking up any spills and general cleanup.
* Small Bowl: For mixing the baking soda paste.
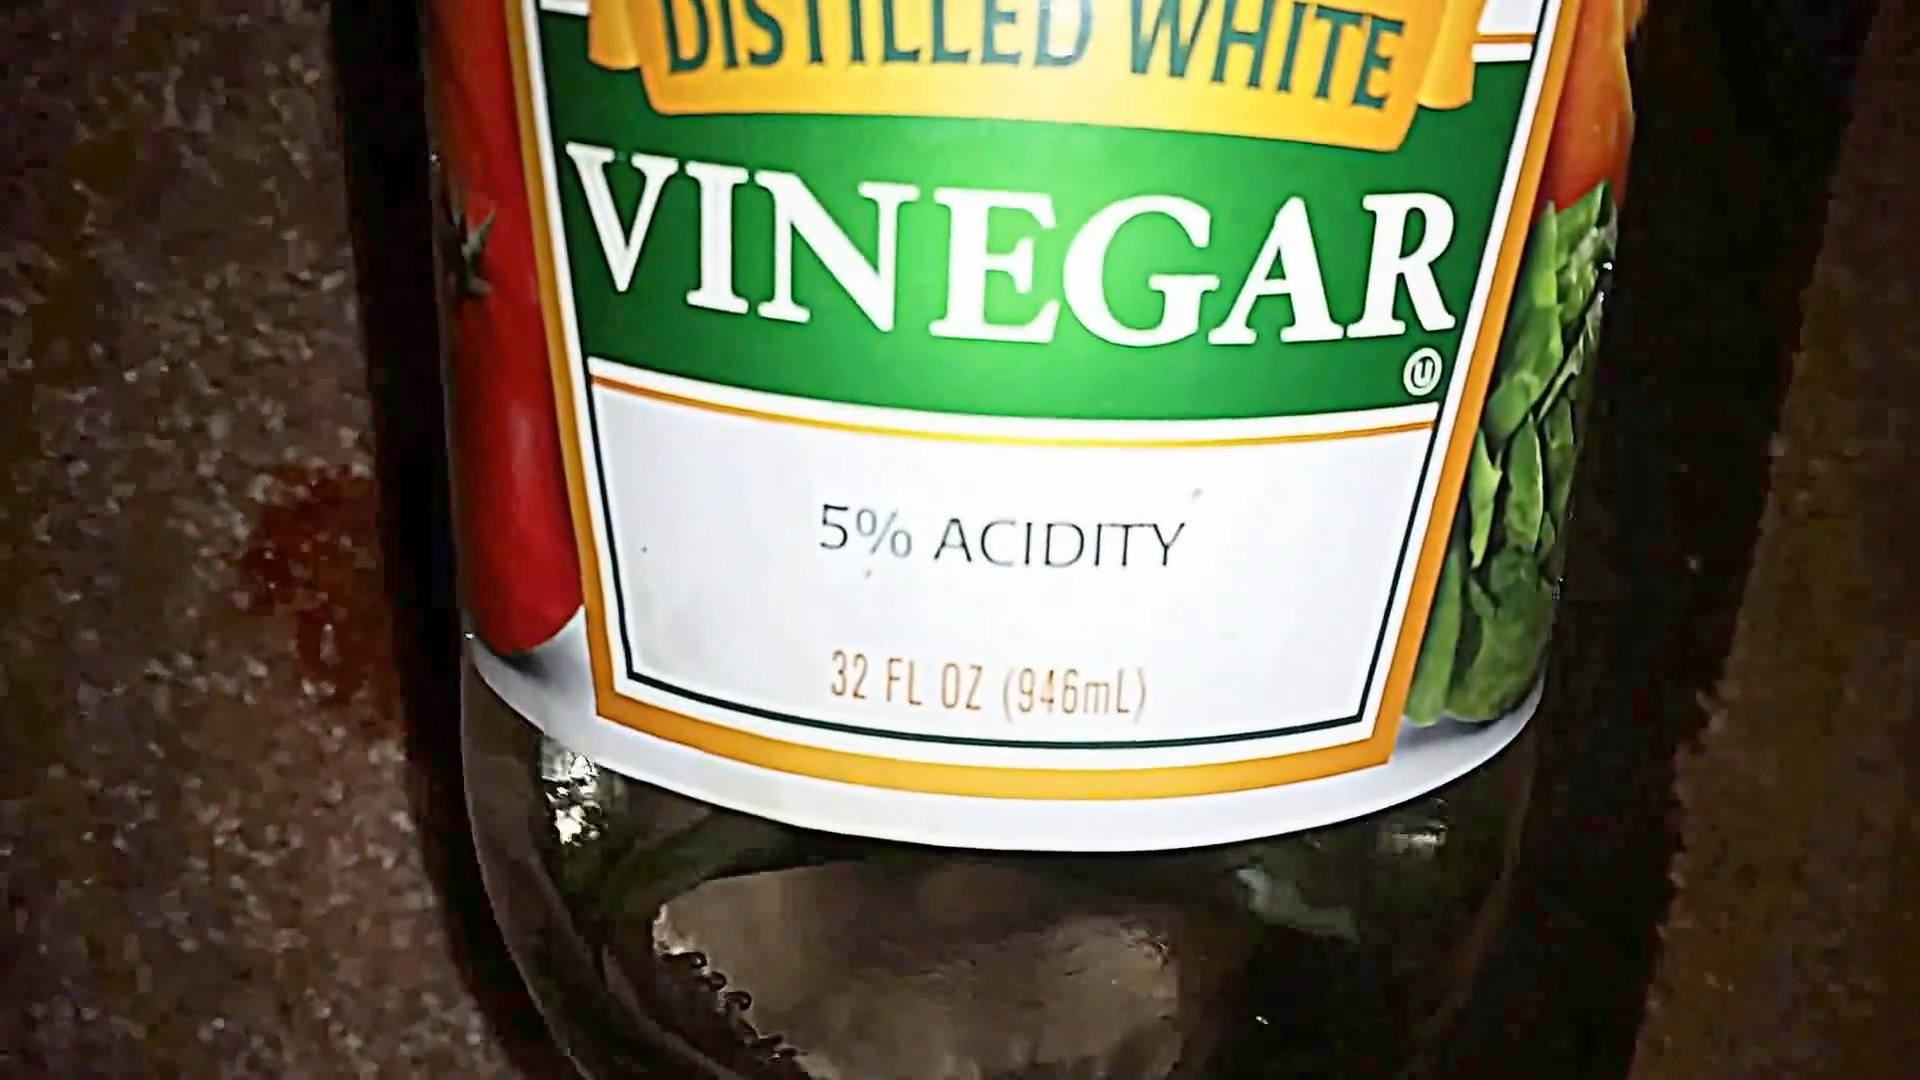
* Vinegar (Optional): We’ll use this for a final spritz to boost the cleaning power.
Step-by-Step Guide: From Grimy to Gleaming
Okay, let’s get started! Here’s the breakdown of how I tackle this oven-cleaning project:
1. Prep Your Oven: Safety First!
* Unplug the Oven: This is crucial for safety! Make sure the oven is completely disconnected from the power source.
* Remove Oven Racks and Accessories: Take out the oven racks, baking stones, thermometers, or anything else that’s inside. We’ll clean the racks separately later.
* Clear the Area: Protect your floor by laying down old towels or newspapers around the oven.
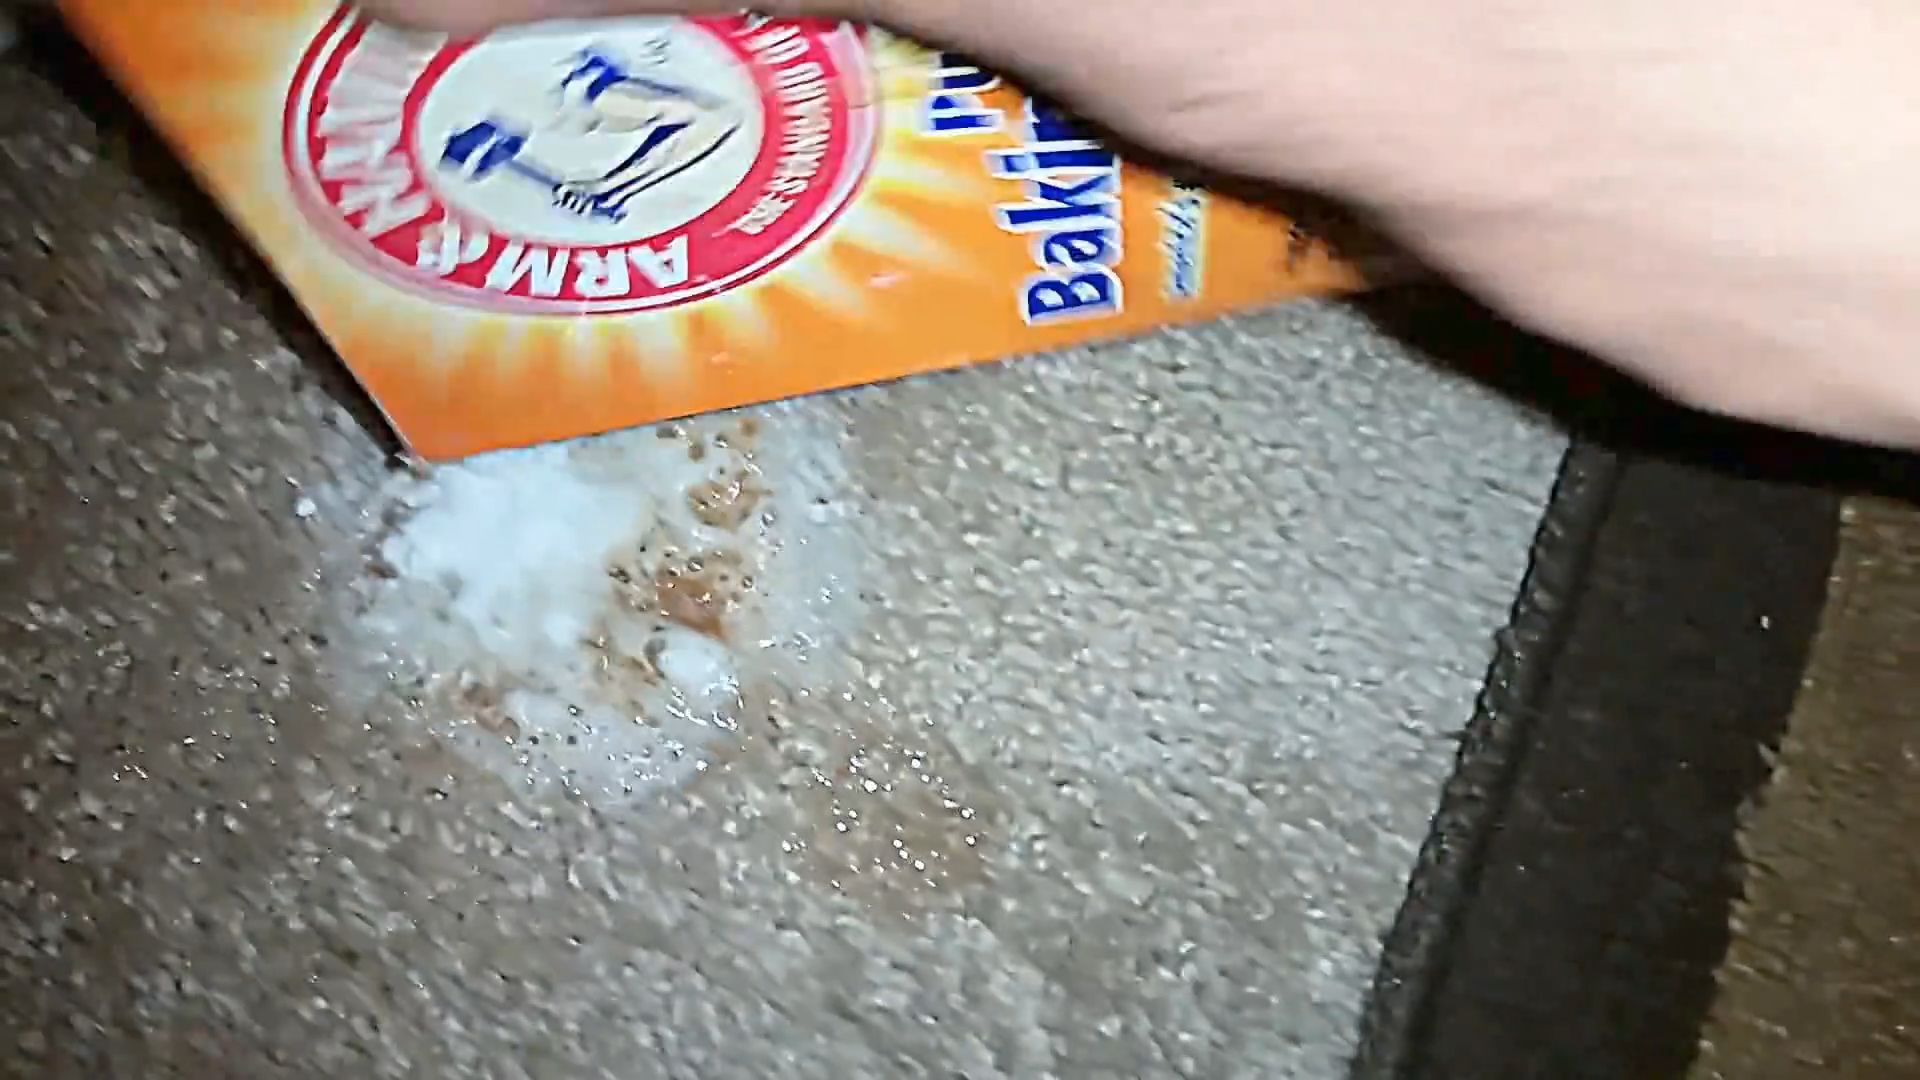
2. Mixing the Baking Soda Paste: The Magic Potion
* Combine Baking Soda and Water: In your small bowl, mix ½ cup of baking soda with a few tablespoons of water. Add water gradually until you form a thick, spreadable paste. It should be similar in consistency to frosting.
* Adjust Consistency: If the paste is too thick, add a little more water. If it’s too runny, add a bit more baking soda.
3. Applying the Baking Soda Paste: The Coating Process
* Coat the Oven Interior: Using your spatula or scraper, generously apply the baking soda paste to all interior surfaces of the oven. This includes the walls, floor, door (inside), and ceiling.
* Avoid Heating Elements: Be careful not to get the paste on the heating elements. If you do, just wipe it off with a damp cloth.
* Tackle Stubborn Spots: For particularly greasy or burnt-on areas, apply a thicker layer of paste.
* Don’t Forget the Door: Make sure to coat the inside of the oven door thoroughly.
* Be Patient: This might take a little time, but it’s worth it! Ensure every surface is covered.
4. Let it Sit: The Waiting Game
* The 12-Hour Rule: This is where the patience comes in. I recommend letting the baking soda paste sit for at least 12 hours, or even overnight. The longer it sits, the more effectively it will loosen the grime.
* Why So Long?: The baking soda needs time to react with the grease and baked-on food. This slow reaction is what makes it so effective.
5. Cleaning the Oven Racks: A Separate Operation
While the baking soda is working its magic inside the oven, let’s tackle those grimy racks. I have two methods I like to use:
* Method 1: The Bathtub Soak
* Line Your Tub: Protect your bathtub by lining it with old towels or a plastic sheet.
* Hot Water and Dish Soap: Fill the tub with hot water and add a generous amount of dish soap.
* Submerge the Racks: Place the oven racks in the tub, making sure they are completely submerged.
* Let Them Soak: Let the racks soak for several hours, or even overnight.
* Scrub and Rinse: After soaking, scrub the racks with a scrub brush or sponge to remove any remaining grime. Rinse thoroughly with clean water.
* Dry Completely: Before putting the racks back in the oven, make sure they are completely dry to prevent rust.
* Method 2: Baking Soda Paste for Racks
* Apply Baking Soda Paste: Similar to the oven interior, create a baking soda paste and apply it generously to the oven racks.
* Let it Sit: Let the paste sit for several hours or overnight.
* Scrub and Rinse: Scrub the racks with a scrub brush or sponge and rinse thoroughly with clean water.
* Dry Completely: Ensure the racks are completely dry before placing them back in the oven.
6. Wiping Away the Grime: The Big Reveal
* Damp Sponge or Cloth: After the baking soda has sat for the recommended time, use a damp sponge or cloth to start wiping away the paste.
* It Might Take Some Elbow Grease: Depending on how dirty your oven was, you might need to put in a little elbow grease. Don’t be afraid to scrub!
* Rinse Frequently: Rinse your sponge or cloth frequently with clean water to avoid spreading the grime around.
* Persistence is Key: Keep wiping until you’ve removed all the baking soda paste and grime.
7. The Vinegar Spritz (Optional): The Extra Boost
* Fill Your Spray Bottle: Fill your spray bottle with white vinegar.
* Spritz the Interior: Lightly spritz the interior of the oven with vinegar. The vinegar will react with any remaining baking soda, creating a foamy action that helps to lift any stubborn residue.
* Wipe Clean: Wipe down the oven again with a clean, damp sponge or cloth.
8. Final Touches: The Polishing Stage
* Dry the Oven: Use a clean, dry towel to dry the interior of the oven.
* Reassemble: Place the clean oven racks and any other accessories back into the oven.
* Admire Your Work!: Step back and admire your sparkling clean oven!
9. First Use After Cleaning: Burn-Off
* Run the Oven Empty: After cleaning, I recommend running the oven at a low temperature (around 300°F or 150°C) for about 15-20 minutes. This will burn off any remaining residue and eliminate any lingering odors.
* Ventilate: Open a window or turn on the kitchen fan to ventilate the area during the burn-off process.
Tips and Tricks: Making the Process Even Easier
* For Extremely Dirty Ovens: If your oven is exceptionally dirty, you might need to repeat the baking soda paste application process.
* Preventative Measures: To keep your oven cleaner for longer, try wiping up spills as soon as they happen.
* Regular Cleaning: I try to do a deep clean like this every few months to prevent buildup. A quick wipe-down after cooking can also make a big difference.
* Lemon Power: For a fresh scent, you can add a few drops of lemon essential oil to the baking soda paste.
* Don’t Forget the Glass Door: For the glass door, you can use the same baking soda paste method or a glass cleaner.
Troubleshooting: Common Issues and Solutions
* Baking Soda Paste is Hard to Remove: If the baking soda paste is difficult to remove, try spritzing it with vinegar and letting it sit for a few minutes before wiping.
* Stubborn Stains Remain: For stubborn stains, you can try using a paste of baking soda and hydrogen peroxide. Apply the paste to the stain, let it sit for a few minutes, and then scrub.
* Oven Still Smells: If your oven still smells after cleaning, try placing a bowl of vinegar or baking soda inside the oven overnight to absorb any lingering odors.
I hope you found this guide helpful! Cleaning your oven with baking soda is a simple, effective, and eco-friendly way to keep your kitchen sparkling. Happy cleaning!
Conclusion
So, there you have it! Growing strawberries at home, especially with this simple DIY trick, is more than just a gardening project; it’s an investment in fresh, flavorful, and healthy eating. Forget those bland, store-bought berries that lack the vibrant sweetness of homegrown fruit. With minimal effort and a touch of creativity, you can transform your balcony, patio, or garden into a thriving strawberry patch.
This method, focusing on efficient space utilization and optimal growing conditions, is a game-changer for both seasoned gardeners and beginners alike. The satisfaction of harvesting your own juicy, red strawberries is unparalleled. Imagine the delightful desserts, refreshing smoothies, and healthy snacks you can create with your own homegrown bounty.
But the benefits extend beyond just the taste. Growing your own strawberries allows you to control the entire process, ensuring that your berries are free from harmful pesticides and chemicals. You’ll know exactly what goes into your food, giving you peace of mind and a healthier option for you and your family. Plus, gardening is a fantastic stress reliever and a great way to connect with nature.
Don’t be afraid to experiment with different varieties of strawberries to find your favorites. Everbearing varieties will provide you with a continuous harvest throughout the growing season, while June-bearing varieties offer a larger crop all at once. Consider adding companion plants like basil or marigolds to deter pests and attract beneficial insects. You can also try different container types, from hanging baskets to repurposed pallets, to create a unique and visually appealing strawberry garden.
This DIY trick for growing strawberries at home is a must-try because it’s:
* Cost-effective: Save money on store-bought strawberries.
* Space-saving: Perfect for small gardens, balconies, and patios.
* Easy to implement: Suitable for gardeners of all skill levels.
* Environmentally friendly: Reduce your carbon footprint by growing your own food.
* Delicious: Enjoy the unparalleled taste of fresh, homegrown strawberries.
We encourage you to give this DIY strawberry growing method a try. It’s a rewarding experience that will bring joy and deliciousness to your life. Don’t forget to share your experiences with us! We’d love to see your strawberry gardens and hear about your successes (and any challenges you encounter along the way). Post pictures and tips on our social media pages using #HomegrownStrawberries and let’s build a community of strawberry enthusiasts! Happy gardening!
Frequently Asked Questions (FAQ)
Q: What is the best time of year to start growing strawberries?
A: The best time to plant strawberries depends on your climate and the type of strawberry you’re growing. Generally, early spring (after the last frost) or early fall are ideal times. Planting in the spring allows the plants to establish themselves before the heat of summer, while fall planting gives them a head start for the following spring. For everbearing varieties, you can often plant them throughout the growing season, as long as you provide adequate water and protection from extreme temperatures. Check your local climate zone for specific recommendations.
Q: What kind of soil is best for growing strawberries?
A: Strawberries thrive in well-draining, slightly acidic soil with a pH between 5.5 and 6.5. Amend your soil with compost or other organic matter to improve drainage and fertility. If your soil is heavy clay, consider growing strawberries in raised beds or containers to ensure proper drainage. A soil test can help you determine the pH and nutrient levels of your soil and guide you on any necessary amendments.
Q: How much sunlight do strawberries need?
A: Strawberries need at least 6-8 hours of direct sunlight per day to produce a good crop of fruit. Choose a location that receives plenty of sunlight throughout the day. If you live in a hot climate, some afternoon shade can be beneficial to prevent the plants from overheating. Insufficient sunlight can result in smaller berries and reduced yields.
Q: How often should I water my strawberry plants?
A: Water your strawberry plants regularly, especially during dry periods. Aim to keep the soil consistently moist but not waterlogged. Water deeply and less frequently, rather than shallowly and more often, to encourage deep root growth. The frequency of watering will depend on the weather, soil type, and the size of your plants. Check the soil moisture regularly by sticking your finger into the soil. If the top inch feels dry, it’s time to water.
Q: What kind of fertilizer should I use for strawberries?
A: Strawberries benefit from regular fertilization. Use a balanced fertilizer with equal amounts of nitrogen, phosphorus, and potassium (e.g., 10-10-10) in the spring before the plants start to bloom. Avoid over-fertilizing with nitrogen, as this can promote leafy growth at the expense of fruit production. You can also use a fertilizer specifically formulated for berries. Organic options like compost tea or fish emulsion are also excellent choices.
Q: How do I protect my strawberries from pests and diseases?
A: Strawberries are susceptible to various pests and diseases, including slugs, snails, aphids, spider mites, and fungal diseases like gray mold. To prevent problems, practice good garden hygiene by removing dead leaves and debris from around the plants. Use organic pest control methods like diatomaceous earth or insecticidal soap to control pests. Ensure good air circulation to prevent fungal diseases. Consider using row covers to protect your plants from birds and other animals.
Q: How do I propagate strawberry plants?
A: Strawberries can be easily propagated from runners, which are horizontal stems that grow from the mother plant. These runners will develop roots and form new plantlets. Once the plantlets have developed a good root system, you can cut them from the mother plant and transplant them to a new location. This is a simple and effective way to expand your strawberry patch.
Q: How long does it take for strawberry plants to produce fruit?
A: The time it takes for strawberry plants to produce fruit depends on the type of strawberry and the planting time. June-bearing varieties typically produce fruit the following spring after planting, while everbearing varieties may produce a small crop the first year and a larger crop in subsequent years. Day-neutral varieties will produce fruit throughout the growing season. Be patient and provide your plants with proper care, and you’ll be rewarded with delicious strawberries.
Q: Can I grow strawberries in containers?
A: Yes, strawberries are well-suited for container gardening. Choose a container that is at least 12 inches deep and wide to provide adequate space for the roots. Use a well-draining potting mix and ensure that the container has drainage holes. Container-grown strawberries may require more frequent watering and fertilization than those grown in the ground.
Q: How do I overwinter my strawberry plants?
A: In colder climates, strawberry plants need protection during the winter. After the first frost, mulch the plants with straw or pine needles to insulate the roots. In very cold areas, you may need to cover the plants with a heavier layer of mulch or move them to a sheltered location, such as a garage or shed. Remove the mulch in the spring after the last frost.
Leave a Comment