

Grow Sweet Peppers Home and unlock a world of vibrant flavors and colors right in your backyard! Imagine biting into a juicy, sun-ripened sweet pepper you nurtured from a tiny seed. Sounds amazing, right? For centuries, peppers have been cherished across cultures, from their origins in South America where they were used for both culinary and medicinal purposes, to their global spread thanks to explorers and traders. Now, you can easily bring this rich history and deliciousness to your own home.
But let’s be honest, sometimes gardening feels more like a chore than a joy. That’s where our DIY tricks and hacks come in! Maybe you’ve struggled with getting your pepper plants to thrive, or perhaps you’re short on space and think growing your own is impossible. Fear not! This article is packed with simple, effective, and budget-friendly solutions to help you grow sweet peppers home successfully, no matter your experience level or garden size. We’ll cover everything from choosing the right varieties and preparing your soil to warding off pests and maximizing your harvest. Get ready to transform your garden (or even your balcony!) into a sweet pepper paradise. I’m excited to share these tips with you!
Growing Sweet Peppers at Home: A DIY Guide for a Bountiful Harvest
Hey there, fellow gardening enthusiasts! I’m so excited to share my tried-and-true method for growing sweet peppers right in your own backyard (or even on your balcony!). There’s nothing quite like the taste of a freshly picked, sun-ripened pepper, and trust me, it’s easier than you think to achieve a fantastic harvest. Let’s dive in!
Choosing the Right Sweet Pepper Variety
Before we get our hands dirty, it’s important to pick the perfect pepper variety for your needs and climate. Here are a few of my favorites:
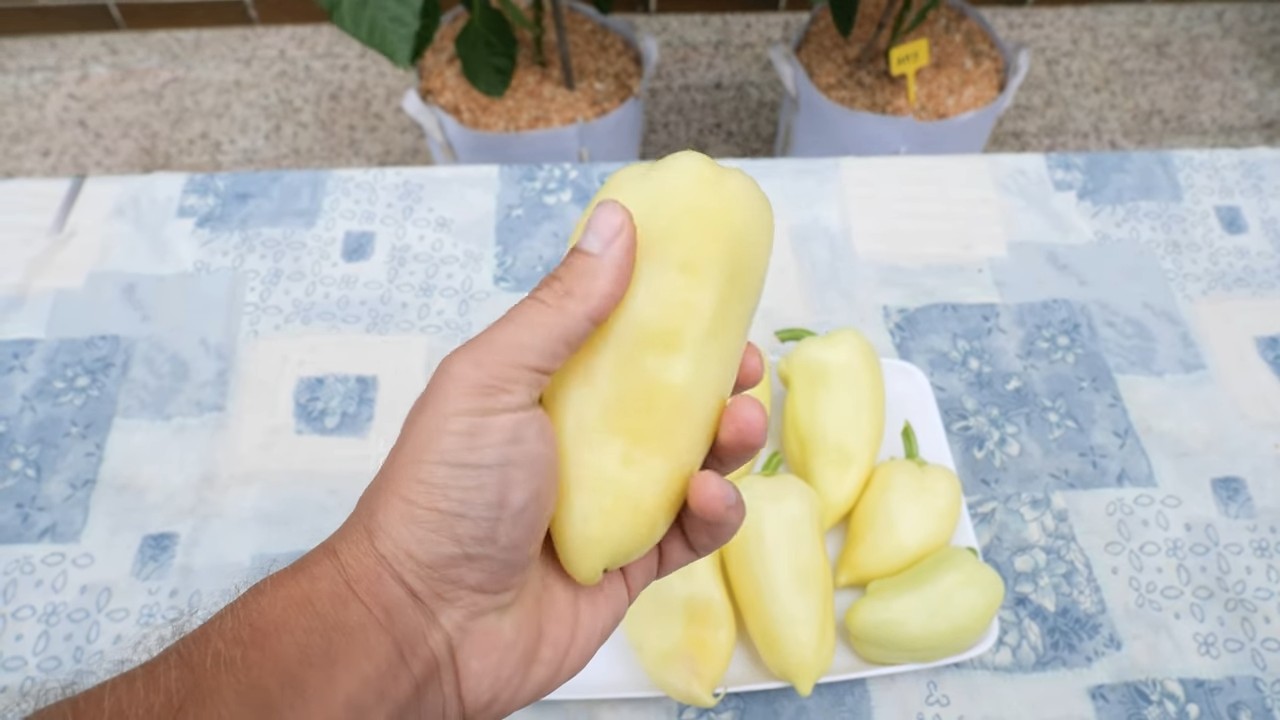
* Bell Peppers: These are the classic choice, available in a rainbow of colors – green, red, yellow, orange, and even purple! They’re versatile and great for stuffing, salads, and roasting.
* Banana Peppers: Mild and slightly sweet, banana peppers are delicious pickled, grilled, or added to sandwiches.
* Pimiento Peppers: These heart-shaped peppers are sweet and mild, perfect for making pimento cheese or adding a touch of sweetness to sauces.
* Mini Sweet Peppers: These bite-sized peppers are incredibly sweet and flavorful, making them ideal for snacking or adding to lunchboxes.
Consider your local climate and growing season when making your choice. Some varieties are better suited to warmer climates, while others can tolerate cooler temperatures. Check the seed packet or plant label for specific recommendations.
Starting Your Pepper Plants: Seeds vs. Seedlings
You have two main options for starting your pepper plants: from seeds or from seedlings (also known as transplants).
* Starting from Seeds: This is the more economical option, but it requires a bit more patience and effort. You’ll need to start your seeds indoors about 6-8 weeks before the last expected frost in your area.
* Buying Seedlings: This is the easier and faster option, especially for beginners. You can find healthy pepper seedlings at your local garden center or nursery.
I personally prefer starting from seeds because I love the satisfaction of watching them sprout and grow into mature plants. Plus, it gives me more control over the varieties I grow.
Starting Peppers from Seeds: A Step-by-Step Guide
If you’re like me and want to start your peppers from seeds, here’s how to do it:
1. Gather Your Supplies: You’ll need:
* Pepper seeds
* Seed starting trays or small pots
* Seed starting mix (a lightweight, sterile potting mix)
* A spray bottle filled with water
* A heat mat (optional, but recommended)
* A grow light (optional, but recommended)
* A clear plastic dome or plastic wrap
2. Sow the Seeds: Fill your seed starting trays or pots with seed starting mix. Moisten the mix with the spray bottle until it’s evenly damp but not soggy. Sow 2-3 pepper seeds per cell or pot, about ¼ inch deep. Gently cover the seeds with more seed starting mix.
3. Provide Warmth and Moisture: Cover the trays or pots with a clear plastic dome or plastic wrap to create a humid environment. Place them on a heat mat to maintain a soil temperature of around 75-85°F (24-29°C). This will help the seeds germinate faster. Mist the soil regularly to keep it moist.
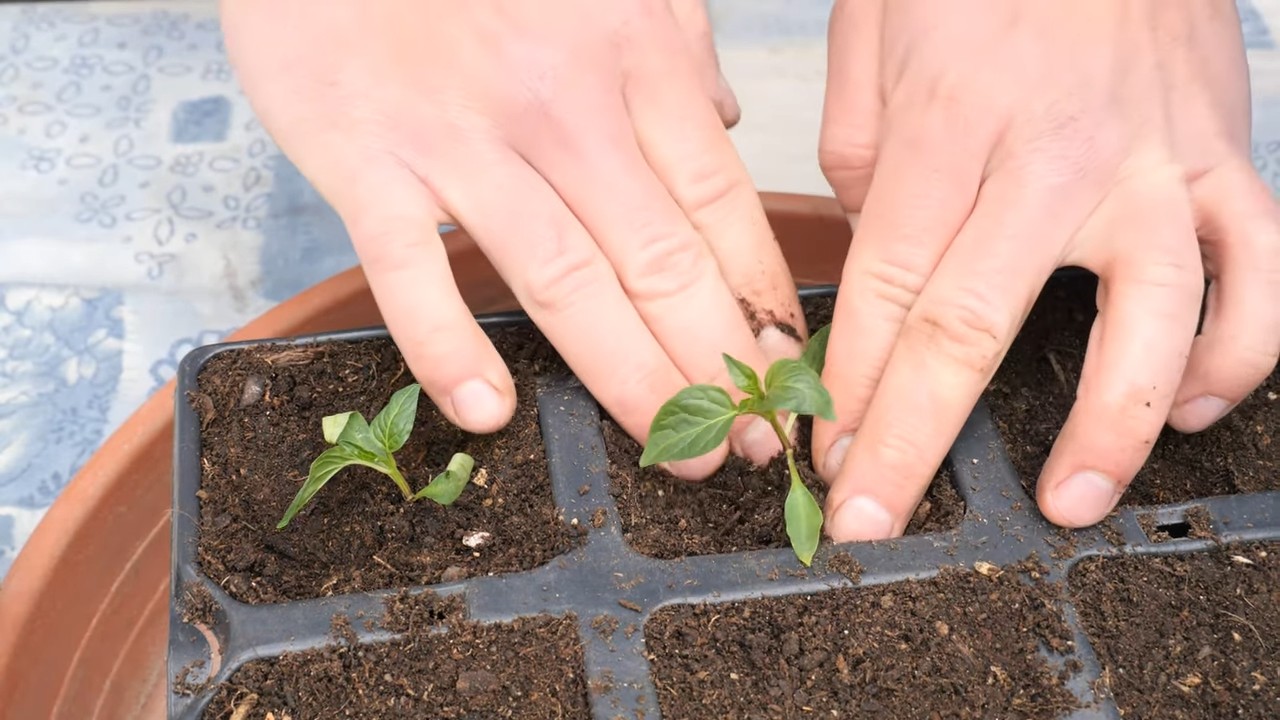
4. Provide Light: Once the seeds germinate (usually within 7-14 days), remove the plastic dome or plastic wrap and place the seedlings under a grow light. If you don’t have a grow light, you can place them in a sunny window, but be sure to rotate them regularly to prevent them from becoming leggy.
5. Thin the Seedlings: Once the seedlings have their first set of true leaves (the leaves that look like miniature pepper leaves), thin them to one seedling per cell or pot. Choose the strongest and healthiest seedling and snip off the others at the soil line.
6. Harden Off the Seedlings: About a week before you plan to transplant the seedlings outdoors, you’ll need to harden them off. This means gradually exposing them to outdoor conditions to help them acclimate. Start by placing them outdoors in a sheltered location for an hour or two each day, gradually increasing the amount of time they spend outdoors.
Transplanting Your Pepper Plants Outdoors
Once the danger of frost has passed and the soil has warmed up, it’s time to transplant your pepper plants outdoors.
1. Choose a Sunny Location: Peppers need at least 6-8 hours of sunlight per day to thrive. Choose a location in your garden that receives plenty of sunlight.
2. Prepare the Soil: Peppers prefer well-drained soil that is rich in organic matter. Amend the soil with compost or well-rotted manure before planting.
3. Space the Plants Properly: Space your pepper plants about 18-24 inches apart. This will give them enough room to grow and prevent overcrowding.
4. Dig the Holes: Dig holes that are slightly larger than the root balls of your pepper plants.
5. Transplant the Seedlings: Gently remove the seedlings from their pots or trays and place them in the holes. Make sure the top of the root ball is level with the surrounding soil.
6. Fill the Holes: Fill the holes with soil and gently firm it around the base of the plants.
7. Water Thoroughly: Water the plants thoroughly after transplanting.
Caring for Your Pepper Plants
Once your pepper plants are in the ground, it’s important to provide them with proper care to ensure a bountiful harvest.
* Watering: Water your pepper plants regularly, especially during hot, dry weather. Aim to keep the soil consistently moist but not soggy. I usually water deeply once or twice a week, depending on the weather.
* Fertilizing: Peppers are heavy feeders, so they need regular fertilization. Use a balanced fertilizer (such as 10-10-10) every 2-3 weeks. You can also use a liquid fertilizer, such as fish emulsion or seaweed extract.
* Mulching: Mulch around your pepper plants with straw, wood chips, or other organic material. This will help to retain moisture, suppress weeds, and regulate soil temperature.
* Pruning: Pruning is not essential for pepper plants, but it can help to improve air circulation and promote bushier growth. You can prune off any suckers (small shoots that grow from the base of the plant) or any yellowing or diseased leaves.
* Staking or Caging: Some pepper varieties, especially bell peppers, can become quite heavy with fruit. Staking or caging your plants will help to prevent them from falling over. I use tomato cages for my bell peppers, and they work great.
Dealing with Pests and Diseases
Peppers are generally relatively pest-resistant, but they can be susceptible to certain pests and diseases.
* Aphids: These tiny insects can suck the sap from pepper plants, causing them to become weak and stunted. You can control aphids by spraying them with a strong stream of water or by using insecticidal soap.
* Flea Beetles: These small, jumping beetles can chew holes in the leaves of pepper plants. You can control flea beetles by using row covers or by spraying them with neem oil.
* Blossom End Rot: This is a common problem that affects peppers, especially bell peppers. It’s caused by a calcium deficiency in the soil. You can prevent blossom end rot by adding calcium to the soil before planting and by watering your plants regularly.
* Fungal Diseases: Peppers can be susceptible to various fungal diseases, such as powdery mildew and leaf spot. You can prevent fungal diseases by providing good air circulation and by avoiding overhead watering. If you notice signs of fungal disease, you can treat your plants with a fungicide.
Harvesting Your Sweet Peppers
The moment you’ve been waiting for! Harvesting your sweet peppers is the most rewarding part of the process.
* When to Harvest: Peppers are typically ready to harvest when they reach their mature size and color. Green bell peppers can be harvested when they are firm and green, while colored bell peppers should be allowed to ripen to their full color. Banana peppers are usually harvested when they are yellow, and pimiento peppers are harvested when they are red.
* How to Harvest: Use a sharp knife or pruning shears to cut the peppers from the plant. Be careful not to damage the plant.
* Storing Your Peppers: Freshly harvested peppers can be stored in the refrigerator for up to a week. You can also freeze peppers for longer storage. To freeze peppers, wash them, remove the seeds and membranes, and chop them into pieces. Then, blanch them in boiling water for 2-3 minutes and transfer them to an ice bath. Drain the peppers and freeze them in freezer bags or containers.
Enjoying Your Homegrown Sweet Peppers
Now that you’ve harvested your sweet peppers, it’s time to enjoy them!
Conclusion
So, there you have it! Growing sweet peppers at home, from seed to vibrant, delicious fruit, is not only achievable but incredibly rewarding. We’ve explored the ins and outs of this process, highlighting the key steps and offering practical tips to ensure your success. But why is this DIY approach a must-try?
Firstly, consider the unparalleled freshness. Store-bought peppers, while convenient, simply cannot compare to the flavor explosion of a pepper ripened on the vine in your own garden. The difference is palpable, a testament to the power of homegrown produce. Secondly, you have complete control over the growing process. No need to worry about harmful pesticides or questionable farming practices. You know exactly what goes into nurturing your sweet peppers, ensuring a healthy and safe harvest for you and your family.
Furthermore, growing your own sweet peppers is a fantastic way to connect with nature and learn about the life cycle of plants. It’s a therapeutic activity that can reduce stress and provide a sense of accomplishment as you watch your tiny seedlings transform into thriving plants laden with colorful peppers. And let’s not forget the cost savings! While there’s an initial investment in seeds, soil, and perhaps a few supplies, you’ll quickly recoup your expenses as you harvest a bountiful crop of sweet peppers throughout the growing season.
But the benefits don’t stop there. This DIY project offers endless opportunities for customization and experimentation. Want to try a different variety of sweet pepper? Go for it! From the classic bell pepper to the sweeter banana pepper or the slightly spicy poblano, the possibilities are endless. You can also experiment with different growing methods, such as container gardening, raised beds, or even hydroponics.
Consider these variations to elevate your sweet pepper growing experience:
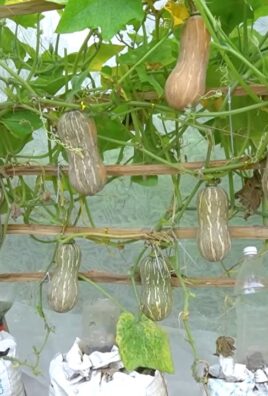
* Vertical Gardening: If you’re short on space, try growing your sweet peppers in vertical planters or hanging baskets. This is a great way to maximize your yield in a small area.
* Companion Planting: Plant basil, marigolds, or carrots near your sweet peppers to deter pests and attract beneficial insects.
* Succession Planting: Stagger your planting dates to ensure a continuous harvest of sweet peppers throughout the growing season.
* Fermenting: Once you have a good harvest, consider fermenting some of your peppers to make hot sauce or other delicious condiments.
Ultimately, growing sweet peppers at home is an enriching experience that offers a multitude of benefits. It’s a chance to connect with nature, enjoy fresh, healthy produce, and save money in the process. So, what are you waiting for? Grab some seeds, get your hands dirty, and embark on this rewarding journey.
We encourage you to try this DIY trick and share your experiences with us. Let us know what varieties you’re growing, what challenges you’ve faced, and what successes you’ve achieved. Your insights can help other aspiring gardeners and inspire them to embark on their own sweet pepper growing adventures. Share your photos, tips, and stories in the comments below. We can’t wait to hear from you!
Frequently Asked Questions (FAQ)
What are the best varieties of sweet peppers to grow at home?
The best varieties of sweet peppers to grow at home depend on your personal preferences and growing conditions. However, some popular and reliable choices include:
* Bell Peppers: These are the classic sweet peppers, available in a variety of colors, including green, red, yellow, and orange. They are versatile and easy to grow.
* Banana Peppers: These long, slender peppers have a mild, sweet flavor and are great for pickling or adding to salads.
* Poblano Peppers: While technically considered mild chili peppers, poblanos have a rich, slightly sweet flavor and are perfect for stuffing or roasting.
* Sweet Italian Peppers: These long, thin peppers have a sweet, slightly tangy flavor and are delicious grilled or sautéed.
* Mini Sweet Peppers: These small, colorful peppers are perfect for snacking or adding to lunchboxes.
Consider your local climate and growing season when choosing your varieties. Some peppers may require a longer growing season than others.
How much sunlight do sweet peppers need?
Sweet peppers need at least 6-8 hours of direct sunlight per day to thrive. Choose a sunny location in your garden or on your patio where your plants will receive ample sunlight. If you’re growing your peppers indoors, you may need to supplement with grow lights.
What type of soil is best for growing sweet peppers?
Sweet peppers prefer well-drained, fertile soil with a pH of 6.0 to 6.8. Amend your soil with compost or other organic matter to improve drainage and fertility. Avoid heavy clay soils, as they can become waterlogged and inhibit root growth.
How often should I water my sweet pepper plants?
Water your sweet pepper plants regularly, especially during hot, dry weather. Aim to keep the soil consistently moist but not waterlogged. Water deeply at the base of the plant, avoiding wetting the foliage, which can increase the risk of disease. A good rule of thumb is to water when the top inch of soil feels dry to the touch.
When should I fertilize my sweet pepper plants?
Fertilize your sweet pepper plants every 2-3 weeks with a balanced fertilizer. Look for a fertilizer that is specifically formulated for vegetables or tomatoes. Avoid over-fertilizing, as this can lead to excessive foliage growth and reduced fruit production.
How do I prevent pests and diseases from affecting my sweet pepper plants?
To prevent pests and diseases from affecting your sweet pepper plants, follow these tips:
* Choose disease-resistant varieties: Select varieties that are known to be resistant to common pepper diseases.
* Practice crop rotation: Avoid planting peppers in the same location year after year.
* Provide good air circulation: Space your plants adequately to allow for good air circulation.
* Water at the base of the plant: Avoid wetting the foliage, which can promote fungal diseases.
* Inspect your plants regularly: Check your plants regularly for signs of pests or diseases.
* Use organic pest control methods: If you find pests on your plants, try using organic pest control methods, such as insecticidal soap or neem oil.
When are sweet peppers ready to harvest?
Sweet peppers are typically ready to harvest when they have reached their mature size and color. The exact timing will depend on the variety of pepper you are growing. Gently twist or cut the pepper from the plant, leaving a small stem attached.
Can I grow sweet peppers in containers?
Yes, sweet peppers can be successfully grown in containers. Choose a container that is at least 12 inches in diameter and has drainage holes. Use a high-quality potting mix and follow the same watering and fertilizing guidelines as you would for peppers grown in the ground.
My sweet pepper plants are producing flowers but no fruit. What could be the problem?
There are several reasons why your sweet pepper plants may be producing flowers but no fruit:
* Lack of pollination: Peppers are self-pollinating, but they may need help from wind or insects to transfer pollen. You can try gently shaking the plants or using a small brush to transfer pollen from one flower to another.
* High temperatures: High temperatures can interfere with pollination. If temperatures are consistently above 90 degrees Fahrenheit, your plants may not set fruit.
* Nutrient deficiencies: A lack of certain nutrients, such as phosphorus or potassium, can also prevent fruit set.
* Over-fertilizing with nitrogen: Too much nitrogen can promote foliage growth at the expense of fruit production.
How do I store sweet peppers after harvesting?
Store sweet peppers in the refrigerator for up to a week. To prolong their shelf life, wrap them in a paper towel and place them in a plastic bag. You can also freeze sweet peppers for longer storage. To freeze them, wash, core, and slice the peppers, then blanch them in boiling water for 2-3 minutes. Cool them in ice water, drain, and freeze in a single layer on a baking sheet. Once frozen, transfer them to a freezer bag or container.
Leave a Comment