

Potato harvest no soil? Sounds like magic, right? Well, it’s not quite magic, but it’s definitely a clever trick that will revolutionize your gardening game! Forget back-breaking digging and accidentally slicing into your precious potatoes. I’m going to show you a super easy DIY method to harvest a bountiful potato crop without ever touching the soil.
Potatoes have been a staple food for centuries, originating in the Andes Mountains of South America. They’ve nourished civilizations and fueled culinary traditions worldwide. But the traditional method of harvesting them? Let’s just say it’s always been a bit of a workout. That’s where this no-soil method comes in – it’s a modern twist on an age-old favorite.
Why do you need this DIY trick? Because let’s face it, gardening should be enjoyable, not a chore! This potato harvest no soil technique is perfect for small spaces, beginners, or anyone who wants to avoid the mess and hassle of traditional potato farming. Imagine harvesting fresh, clean potatoes with minimal effort. Plus, it’s a fantastic way to get the kids involved in gardening. So, ditch the shovel and get ready to discover the easiest way to grow and harvest potatoes you’ve ever seen!
Harvesting Potatoes Without Digging: The Ultimate No-Dig Method
Hey there, fellow gardeners! Tired of back-breaking potato harvests that leave you covered in dirt and potentially damaging your precious spuds? I’ve got the perfect solution for you: the no-dig potato harvesting method! This technique is a game-changer, making harvesting a breeze and minimizing the risk of bruising or cutting your potatoes. Let’s dive in!
What You’ll Need
Before we get started, gather these essential items:
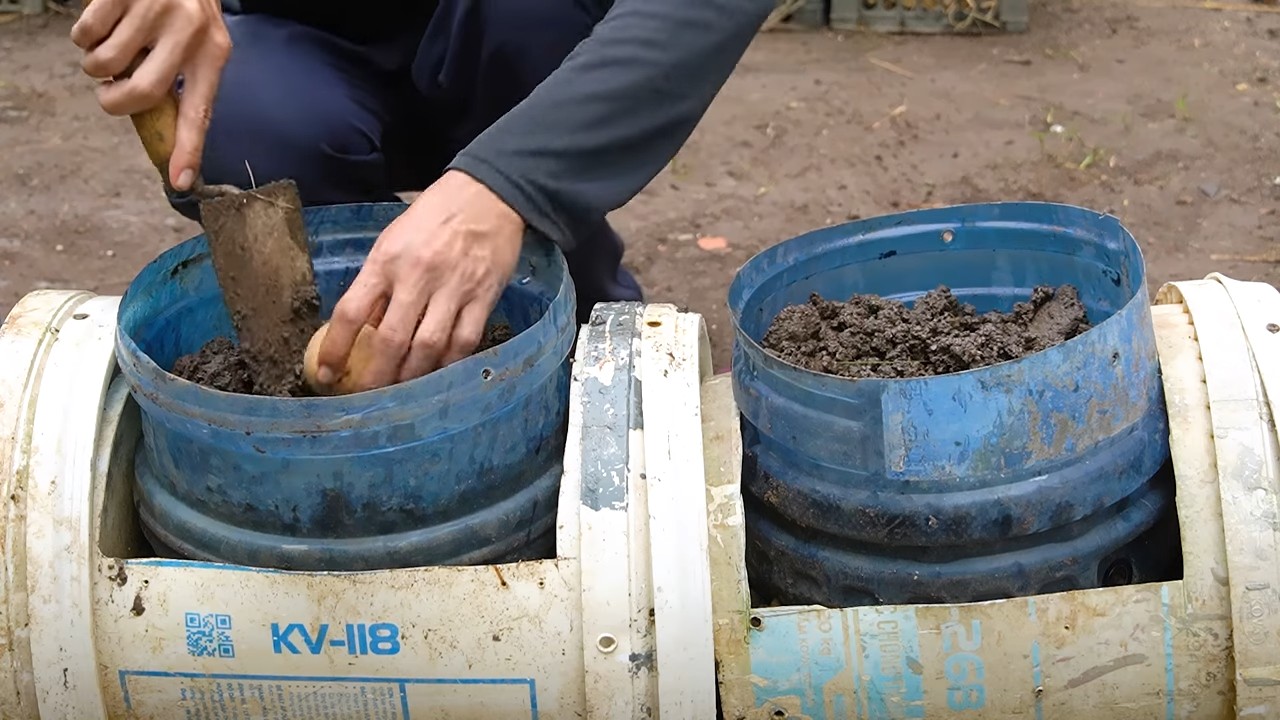
* Potato Plants Grown in Containers or Raised Beds: This method works best when your potatoes are grown above ground, either in large containers, grow bags, or raised beds.
* Sharp Knife or Pruning Shears: For cutting the potato plant stems.
* Gloves: To protect your hands from dirt and potential irritants.
* Tarp or Old Sheet: To lay out your harvested potatoes.
* Storage Containers: Baskets, crates, or burlap sacks for storing your harvested potatoes.
* Well-Ventilated, Dark, and Cool Storage Area: Crucial for long-term potato storage.
* Optional: Garden Fork: For loosening the soil *slightly* if needed, but we’re aiming for minimal digging!
Understanding the No-Dig Method
The beauty of this method lies in its simplicity. Instead of digging around in the soil, risking damage to the potatoes, we’re essentially “unveiling” them. Because the potatoes are grown in a contained environment, the soil is looser and easier to work with. We’ll be gently removing the soil around the potatoes to expose them, making harvesting a clean and efficient process.
Step-by-Step Guide to No-Dig Potato Harvesting
Here’s the breakdown of how to harvest your potatoes without all the digging:
1. Prepare Your Harvesting Area: Lay down your tarp or old sheet near your potato plants. This will give you a clean surface to place your harvested potatoes and prevent them from getting dirty.
2. Assess Your Potato Plants: Look for signs that your potatoes are ready for harvest. Generally, this is when the foliage starts to yellow and die back. This indicates that the plant has matured and the potatoes have reached their full size. However, you can harvest “new potatoes” earlier, when the plants are still green, if you prefer smaller, more tender potatoes.
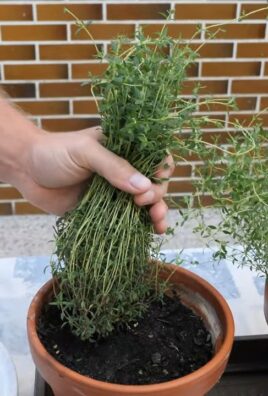
3. Cut Back the Foliage: Using your sharp knife or pruning shears, cut the potato plant stems down to just a few inches above the soil line. This will stop the plant from putting energy into growing new foliage and allow the potatoes to mature further. I usually leave about 4-6 inches of stem.
4. Wait a Week (Optional, but Recommended): After cutting back the foliage, it’s beneficial to wait about a week before harvesting. This allows the potato skins to thicken, which will improve their storage life. This step is especially important if you plan to store your potatoes for an extended period.
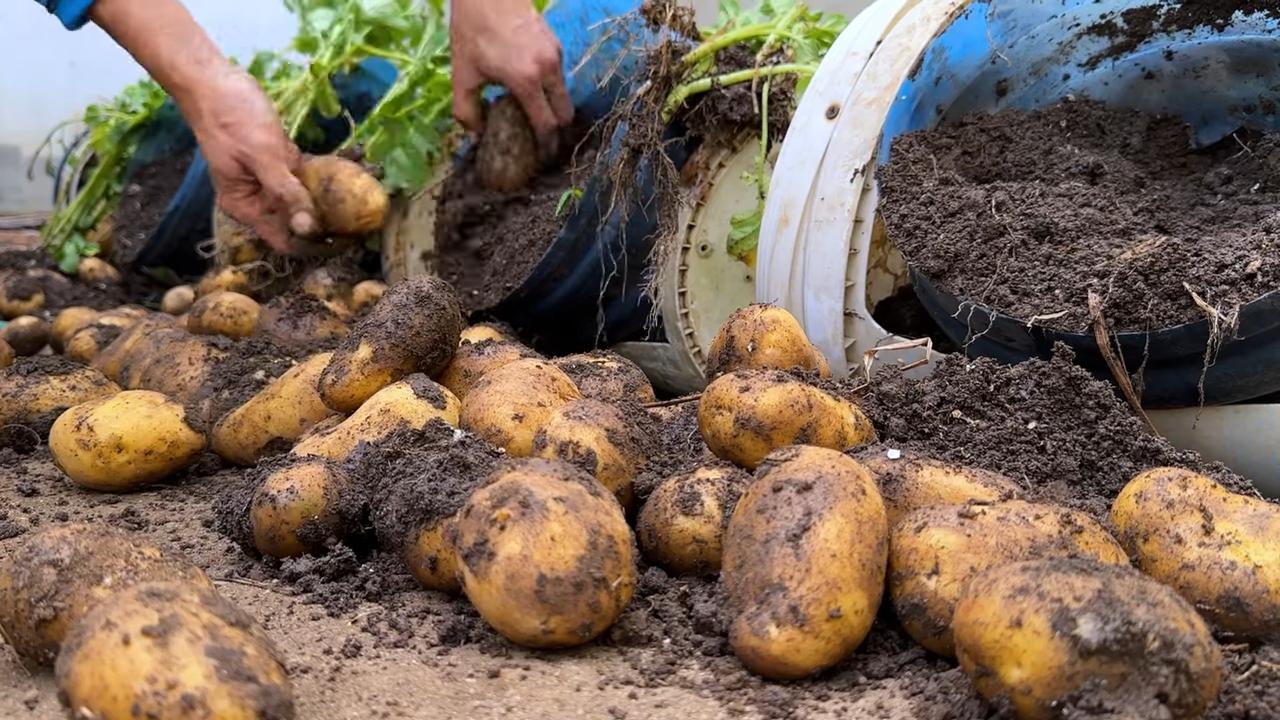
5. Gently Remove the Top Layer of Soil: Now comes the fun part! Using your hands (with gloves on, of course!), gently remove the top layer of soil from around the base of the potato plants. Be careful not to damage the potatoes as you’re doing this. You should start to see the potatoes emerging from the soil.
6. Continue Unearthing the Potatoes: Continue carefully removing the soil around the potatoes, working your way down and around the plant. You can use your fingers to gently loosen the soil and expose the potatoes. If the soil is compacted, you can use a garden fork to *very gently* loosen it, but be extremely careful not to puncture the potatoes. The goal is to expose the potatoes without having to dig deep or use excessive force.
7. Harvest the Potatoes: Once the potatoes are exposed, gently lift them out of the soil. Brush off any excess dirt and place them on your tarp or old sheet. Inspect each potato for any signs of damage or disease. Discard any potatoes that are rotten or severely damaged.
8. Sort and Cure Your Potatoes: After harvesting all of your potatoes, sort them by size and condition. Set aside any potatoes with cuts, bruises, or blemishes to use first, as they won’t store as well. The remaining potatoes should be cured before storing.
Curing Your Potatoes for Long-Term Storage
Curing is an essential step for extending the shelf life of your potatoes. It allows the skins to harden and any minor wounds to heal, preventing rot and spoilage.
1. Spread Out Your Potatoes: Spread your healthy, undamaged potatoes out in a single layer on a tarp or old sheet in a dark, well-ventilated area. A garage, shed, or basement works well.
2. Maintain Proper Conditions: The ideal curing conditions are a temperature of around 60-65°F (15-18°C) and a humidity level of 85-95%. You can increase humidity by misting the potatoes lightly with water.
3. Cure for 1-2 Weeks: Allow the potatoes to cure for 1-2 weeks, or until the skins have hardened and any minor wounds have healed. Check the potatoes regularly for any signs of rot or spoilage. Remove any affected potatoes immediately to prevent the spread of disease.
Storing Your Cured Potatoes
Once your potatoes are cured, it’s time to store them for long-term use.
1. Choose the Right Storage Container: Store your cured potatoes in a well-ventilated container, such as a basket, crate, or burlap sack. Avoid using plastic bags, as they can trap moisture and promote rot.
2. Maintain Proper Storage Conditions: The ideal storage conditions for potatoes are a temperature of around 40-45°F (4-7°C) and a dark, dry environment. A root cellar, unheated garage, or basement works well. Avoid storing potatoes near apples or onions, as they release gases that can cause potatoes to sprout.
3. Check Regularly: Check your stored potatoes regularly for any signs of rot or spoilage. Remove any affected potatoes immediately to prevent the spread of disease.
Troubleshooting Tips
* Soil Too Compacted?: If the soil in your containers or raised beds is too compacted, it can be difficult to remove it gently. Try watering the soil a day or two before harvesting to soften it up. You can also use a garden fork to *very gently* loosen the soil around the potatoes, but be extremely careful not to puncture them.
* Potatoes Growing Too Close Together?: If your potatoes are growing too close together, it can be difficult to harvest them without damaging them. Try thinning out the plants earlier in the season to give the potatoes more room to grow.
* Pest Problems?: If you’ve had problems with pests, such as potato beetles or wireworms, inspect your harvested potatoes carefully for any signs of damage. Discard any potatoes that are heavily infested.
* Green Potatoes?: Sometimes potatoes exposed to sunlight will turn green. This is due to the production of solanine, a toxic alkaloid. Green potatoes should not be eaten. Make sure to hill your potatoes properly during the growing season to prevent them from being exposed to sunlight.
Benefits of the No-Dig Method
* Reduced Back Strain: Say goodbye to back-breaking digging! This method is much easier on your body.
* Minimized Potato Damage: Less digging means less chance of accidentally cutting or bruising your potatoes.
* Cleaner Harvest: You’ll end up with cleaner potatoes, as you’re not digging through layers of soil.
* Improved Storage Life: By minimizing damage, you’ll improve the storage life of your potatoes.
* Fun and Easy: Harvesting potatoes this way is actually quite enjoyable!
Conclusion
So there you have it! The no-dig potato harvesting method is a simple, efficient, and enjoyable way to harvest your potatoes without all the back-breaking work. Give it a try this season, and I’m confident you’ll be amazed at how easy it is! Happy harvesting!
Conclusion
So, there you have it! Harvesting potatoes without digging, directly from the surface, is not just a clever gardening hack; it’s a game-changer. It’s a must-try for anyone looking to simplify their potato-growing experience, reduce back strain, and enjoy a cleaner, more accessible harvest. This method, focusing on building up rather than digging down, offers a multitude of benefits that traditional potato farming simply can’t match.
Think about it: no more wrestling with heavy shovels, no more accidentally slicing into your precious potatoes, and no more back-breaking labor trying to unearth every last spud hidden deep within the soil. Instead, you get a clean, easy harvest right at your fingertips. This technique is particularly beneficial for gardeners with limited mobility or those who simply prefer a more relaxed approach to gardening.
But the beauty of this method doesn’t stop there. It’s incredibly adaptable. You can experiment with different containers, from simple grow bags to repurposed tires or even large plastic bins. You can also tailor the soil mix to your specific climate and potato variety. Consider adding extra compost for richer soil or incorporating perlite for better drainage.
For those looking to take their potato harvest to the next level, consider these variations:
* Vertical Potato Towers: Construct a tall, tiered structure using chicken wire or wooden pallets. This maximizes space and allows for an even larger potato yield in a small area.
* Straw Bale Gardening: Plant your seed potatoes directly into straw bales. As the straw decomposes, it provides nutrients and excellent drainage.
* Container Gardening with Companion Plants: Plant herbs like basil or marigolds alongside your potatoes to deter pests and attract beneficial insects.
The possibilities are truly endless! The key is to experiment and find what works best for you and your garden.
We wholeheartedly encourage you to give this no-dig potato harvesting method a try. It’s a rewarding and efficient way to grow your own delicious potatoes. And once you’ve experienced the ease and convenience of this technique, we’re confident you’ll never go back to traditional digging.
Don’t just take our word for it. Try it out for yourself and see the difference it makes. We’re eager to hear about your experiences! Share your photos, tips, and stories in the comments below. Let’s build a community of gardeners who are revolutionizing the way we grow potatoes, one surface harvest at a time. Let us know what potato varieties you tried, what kind of container you used, and any unique modifications you made to the process. Your insights could help other gardeners discover the joy of hassle-free potato harvesting. This method of **potato harvest no soil** is truly a game changer.
Frequently Asked Questions (FAQ)
What type of potatoes work best with this no-dig method?
While most potato varieties can be grown using this method, determinate varieties tend to be more suitable. Determinate potatoes produce one layer of tubers above the seed potato, making them easier to harvest from the surface. Examples include Yukon Gold, Red Norland, and Irish Cobbler. Indeterminate varieties, which produce tubers along the stem, can also be grown, but you may need to add more soil or compost as the plants grow to encourage tuber development along the buried stem. Experiment with different varieties to see what thrives best in your specific climate and growing conditions.
What kind of soil mix should I use?
A well-draining, nutrient-rich soil mix is crucial for successful potato growth. A good starting point is a mix of equal parts compost, potting soil, and perlite or vermiculite. The compost provides essential nutrients, the potting soil provides structure, and the perlite or vermiculite improves drainage and aeration. You can also add slow-release fertilizer to the mix to provide a steady supply of nutrients throughout the growing season. Avoid using heavy clay soil, as it can become waterlogged and hinder tuber development.
How often should I water my potatoes grown in containers?
Potatoes grown in containers tend to dry out more quickly than those grown in the ground, so regular watering is essential. Check the soil moisture level daily, and water when the top inch of soil feels dry to the touch. Water deeply, ensuring that the entire soil mass is thoroughly moistened. Avoid overwatering, as this can lead to root rot. The frequency of watering will depend on factors such as the weather, the size of the container, and the type of soil mix used.
How much sunlight do potatoes need?
Potatoes need at least six to eight hours of direct sunlight per day to thrive. Choose a location that receives plenty of sunlight throughout the growing season. If you live in a particularly hot climate, you may need to provide some afternoon shade to prevent the plants from overheating. Insufficient sunlight can result in stunted growth and reduced tuber production.
How do I know when my potatoes are ready to harvest?
The timing of the harvest will depend on the potato variety and the desired size of the tubers. Generally, potatoes are ready to harvest when the foliage begins to yellow and die back. For “new potatoes,” which are smaller and have thinner skins, you can start harvesting a few weeks after the plants flower. For larger, more mature potatoes, wait until the foliage has completely died back before harvesting. With this no-dig method, you can simply reach into the container and harvest the potatoes as needed.
What if I don’t have a garden? Can I still grow potatoes this way?
Absolutely! One of the great advantages of this method is that it’s perfect for small spaces and urban environments. You can grow potatoes in containers on balconies, patios, or even indoors with sufficient sunlight or grow lights. This makes it accessible to anyone, regardless of their living situation.
Can I reuse the soil mix from year to year?
While you can technically reuse the soil mix, it’s generally recommended to refresh it each year. Potatoes are heavy feeders and deplete the soil of nutrients. Adding fresh compost and fertilizer will ensure that your potatoes have the nutrients they need to thrive. You can also amend the soil with organic matter to improve its structure and drainage.
What are some common pests and diseases that affect potatoes, and how can I prevent them?
Common pests include potato beetles, aphids, and flea beetles. Diseases include early blight, late blight, and potato scab. To prevent these problems, choose disease-resistant potato varieties, practice crop rotation, and keep the foliage dry. You can also use organic pest control methods, such as insecticidal soap or neem oil, to control pests. Ensure good air circulation around the plants to minimize the risk of fungal diseases.
How do I store my harvested potatoes?
Store your harvested potatoes in a cool, dark, and dry place. A root cellar is ideal, but a basement or garage can also work. Avoid storing potatoes in the refrigerator, as this can cause them to convert starch to sugar, resulting in a sweet taste. Properly stored potatoes can last for several months.
Is this method really easier than traditional digging?
Yes, absolutely! The primary advantage of this method is the ease of harvest. No more digging, no more back strain, and no more accidentally damaging the potatoes. It’s a much more gentle and efficient way to harvest your potato crop. The **potato harvest no soil** method is a true time and energy saver.
Leave a Comment