

Chili plant propagation might sound intimidating, but trust me, it’s easier than you think! Have you ever admired a friend’s thriving chili plant, overflowing with fiery peppers, and wished you could have the same bounty? Well, you absolutely can! This isn’t just about growing plants; it’s about connecting with a tradition that stretches back centuries. Chili peppers, originating in South America, have been cultivated for over 6,000 years, adding spice and flavor to cuisines worldwide. Imagine being a part of that long and vibrant history, right in your own backyard!
But beyond the historical connection, chili plant propagation offers practical benefits. Let’s face it, buying new chili plants every year can get expensive. Plus, you might be limited to the varieties available at your local nursery. By learning to propagate your own plants, you can save money, preserve your favorite chili varieties, and even experiment with creating your own unique hybrids. In this article, I’ll share some simple, DIY tricks and hacks that will empower you to become a chili-growing pro. Get ready to multiply your chili harvest and impress your friends with your green thumb!
Propagating Chili Plants: A Beginner’s Guide to Cloning Your Peppers!
Hey fellow chiliheads! Ever wished you could magically duplicate your favorite chili plant, the one that produces those perfectly fiery peppers? Well, you practically can! Propagating chili plants is a rewarding DIY project that lets you create clones of your best producers. It’s easier than you might think, and I’m here to guide you through the whole process. We’ll cover everything from choosing the right cutting to nurturing your new plantlets. Let’s get started!
Choosing the Right Cutting: The Key to Success
Before we dive into the steps, let’s talk about selecting the perfect cutting. This is crucial for successful propagation. Think of it like choosing the best seed – a healthy start makes all the difference!
* Look for healthy stems: Choose stems that are vibrant green, sturdy, and free from any signs of disease or pests. Avoid stems that are yellowing, wilting, or have spots.
* Select non-flowering stems: Stems that are actively producing flowers or buds will put their energy into flowering rather than rooting. Opt for stems that are focused on vegetative growth.
* Choose stems with multiple nodes: Nodes are the points on the stem where leaves emerge. These are where roots will develop, so the more nodes, the better your chances of success.
* Consider the size: Aim for cuttings that are about 4-6 inches long. This size is manageable and provides enough stem for root development.
* Take cuttings from the current season’s growth: New growth tends to root more easily than older, woody stems.
Materials You’ll Need: Gathering Your Supplies
Okay, now that we know what kind of cutting to look for, let’s gather our supplies. You probably have most of these items already!
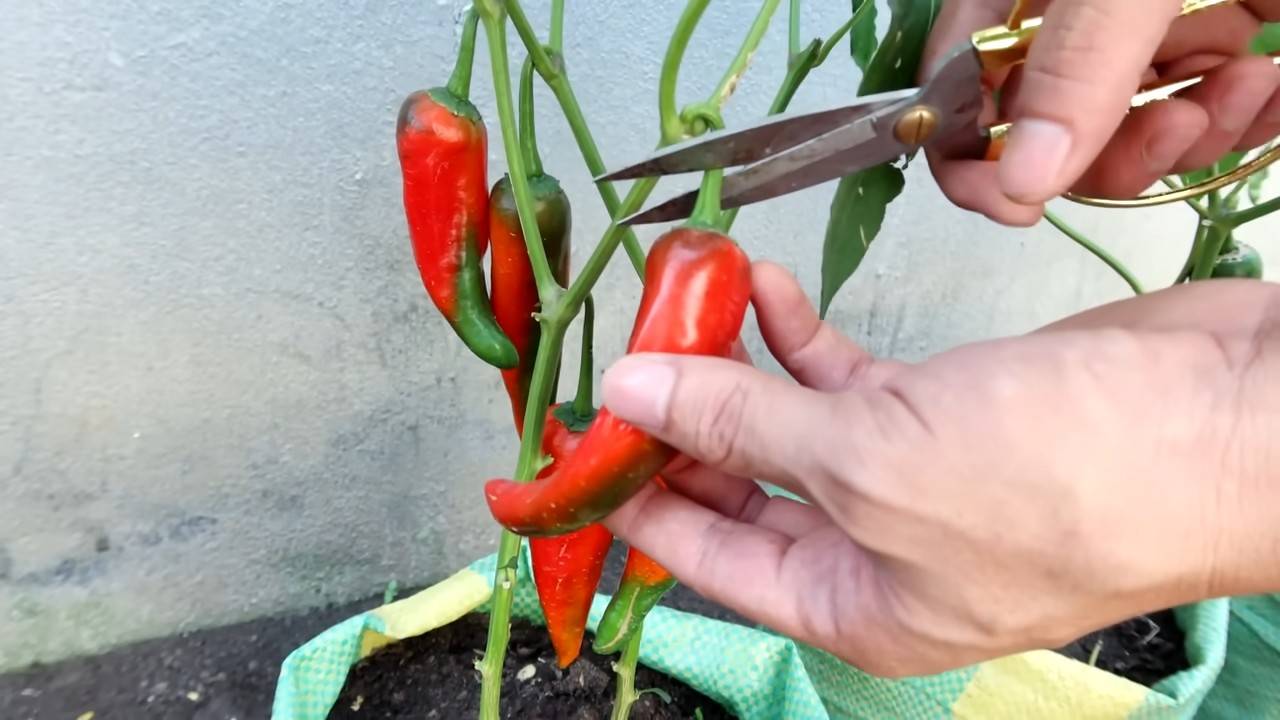
* Sharp, clean knife or pruning shears: A sharp blade is essential for making clean cuts that heal quickly. Make sure it’s sterilized with rubbing alcohol to prevent the spread of disease.
* Rooting hormone (optional but recommended): Rooting hormone encourages root development and increases your chances of success. You can find it at most garden centers.
* Small pots or containers: Choose pots that are about 3-4 inches in diameter. They should have drainage holes to prevent waterlogging.
* Seed starting mix or well-draining potting mix: Avoid using garden soil, as it can be too heavy and may contain pathogens.
* Clear plastic bag or humidity dome: This will help create a humid environment that promotes root growth.
* Spray bottle with water: For misting the cuttings.
* Water: For soaking the cuttings and watering the newly potted plants.
* Labels: To keep track of which cutting is which, especially if you’re propagating multiple varieties.
Step-by-Step Guide: Propagating Your Chili Plants
Alright, let’s get our hands dirty! Here’s a detailed guide to propagating your chili plants from cuttings:
1. Prepare Your Cutting:
* Using your sterilized knife or pruning shears, take a cutting from your chosen chili plant stem. Make the cut at a 45-degree angle just below a node. This increases the surface area for root development.
* Remove the leaves from the bottom 1-2 inches of the cutting. This prevents the leaves from rotting and encourages the plant to focus its energy on root growth.
* If the remaining leaves are very large, you can cut them in half horizontally to reduce water loss.
2. Apply Rooting Hormone (Optional):
* If you’re using rooting hormone, moisten the bottom inch of the cutting with water.
* Dip the moistened end into the rooting hormone powder or gel, coating it evenly.
* Tap off any excess hormone. Too much can actually inhibit root growth.
3. Prepare Your Potting Mix:
* Moisten your seed starting mix or potting mix with water until it’s damp but not soggy.
* Fill your small pots or containers with the moistened mix, leaving about an inch of space at the top.
4. Plant Your Cutting:
* Use a pencil or your finger to create a hole in the center of the potting mix.
* Gently insert the cutting into the hole, making sure that the bottom 1-2 inches of the stem are buried.
* Firm the soil around the cutting to provide support.
5. Create a Humid Environment:
* Mist the cutting with water to increase humidity.
* Place the pot inside a clear plastic bag or under a humidity dome. This will help keep the air around the cutting moist, which is essential for root development.
* If using a plastic bag, make sure it doesn’t touch the leaves of the cutting. You can use skewers or chopsticks to prop it up.
6. Provide Light and Warmth:
* Place the cutting in a warm location with bright, indirect light. Avoid direct sunlight, which can scorch the leaves.
* A temperature of around 70-75°F (21-24°C) is ideal for root development.
7. Maintain Moisture:
* Check the potting mix regularly and mist the cutting with water whenever the soil feels dry to the touch.
* Avoid overwatering, as this can lead to root rot. The soil should be damp, not soggy.
* If you’re using a plastic bag or humidity dome, open it up for a few minutes each day to allow for air circulation and prevent the buildup of mold.
8. Be Patient:
* Root development can take several weeks, so be patient!
* After about 2-3 weeks, gently tug on the cutting to see if it has rooted. If you feel resistance, it means roots have formed.
* You can also look for new growth on the cutting, which is another sign that it has rooted.
9. Acclimatize Your New Plant:
* Once your cutting has rooted, gradually acclimatize it to lower humidity levels.
* Start by opening the plastic bag or humidity dome for longer periods each day.
* Over the course of a week or two, gradually reduce the humidity until the plant is fully exposed to the ambient air.
10. Transplant Your New Plant:
* Once your new chili plant has acclimatized, you can transplant it into a larger pot or directly into your garden.
* Choose a pot that is at least 6 inches in diameter and fill it with well-draining potting mix.
* Gently remove the plant from its original pot and plant it in the new pot, making sure that the top of the root ball is level with the soil surface.
* Water the plant thoroughly and place it in a sunny location.
Troubleshooting: Common Issues and Solutions
Even with the best intentions, sometimes things don’t go as planned. Here are some common issues you might encounter and how to address them:
* Cuttings rotting: This is usually caused by overwatering or poor air circulation. Make sure the potting mix is well-draining and avoid overwatering. Increase air circulation by opening the plastic bag or humidity dome more frequently.
* Cuttings wilting: This is usually caused by low humidity or insufficient watering. Mist the cuttings regularly and make sure the potting mix is consistently damp.
* No root development: This could be due to a number of factors, including poor cutting selection, lack of rooting hormone, or improper environmental conditions. Try taking cuttings from different parts of the plant, using rooting hormone, and ensuring that the cuttings are kept warm and humid.
* Pest infestations: Keep an eye out for pests like aphids or spider mites. Treat infestations with insecticidal soap or neem oil.
Extra Tips for Success: Going the Extra Mile
Want to give your chili plant propagation an extra boost? Here are a few more tips:
* Use a heat mat: A heat mat can help speed up root development by providing consistent warmth to the soil.
* Provide bottom watering: Instead of watering from the top, place the pot in a tray of water and allow the soil to absorb the water from the bottom. This can help prevent overwatering and root rot.
* Experiment with different rooting mediums: While seed starting mix and potting mix are good options, you can also try using perlite, vermiculite, or coco coir.
* Take multiple cuttings: Not all cuttings will root successfully, so it’s always a good idea to take multiple cuttings to increase your chances of success.
* Keep detailed records: Keep track of which cuttings you took from which plants, when you took them, and what rooting medium you used. This will help you learn from your mistakes and improve your propagation techniques over time.
Enjoy Your New Chili Plants!
That’s it! You’ve successfully propagated

Conclusion
So, there you have it! Mastering chili plant propagation from cuttings is not just a cost-effective way to expand your garden; it’s a deeply rewarding experience that connects you more intimately with the life cycle of your favorite spicy peppers. Forget endlessly buying seedlings from the nursery. With a little patience and these simple steps, you can create a thriving chili pepper patch from a single, healthy plant.
This DIY trick is a must-try for several compelling reasons. First, it allows you to clone your best-performing chili plants, ensuring you consistently harvest peppers with the desired heat level, flavor profile, and growth habits. Imagine always having a reliable source of those fiery habaneros or sweet bell peppers that you love! Second, propagating from cuttings is significantly faster than starting from seeds. You’ll be enjoying homegrown chilies weeks, if not months, earlier than if you waited for seeds to germinate and mature. Third, it’s an incredibly sustainable practice. You’re essentially recycling plant material that would otherwise be discarded, reducing waste and minimizing your environmental impact.
But the benefits don’t stop there. This method offers a unique opportunity to experiment and customize your chili garden. Consider these variations:
* Rooting Hormone Alternatives: While rooting hormone is highly recommended, you can explore natural alternatives like willow water or honey. These options contain natural growth stimulants that can aid in root development.
* Different Growing Mediums: Experiment with different rooting mediums beyond the standard potting mix. Perlite, vermiculite, or even a combination of coco coir and perlite can provide excellent drainage and aeration for your cuttings.
* Hydroponic Propagation: For a more advanced approach, try propagating your chili cuttings hydroponically. This involves suspending the cuttings in nutrient-rich water, providing them with a constant supply of moisture and nutrients.
Don’t be afraid to get creative and adapt the process to suit your specific needs and preferences. The key is to provide your cuttings with a warm, humid environment and consistent moisture.
We wholeheartedly encourage you to give this chili plant propagation method a try. It’s a fantastic way to expand your garden, save money, and deepen your connection with the natural world. And most importantly, don’t keep your success (or even your challenges!) to yourself. Share your experiences, tips, and photos with us in the comments below. We’re eager to hear about your chili-growing adventures and learn from your unique perspectives. Let’s build a community of passionate chili growers who are dedicated to sharing knowledge and supporting each other’s success. Happy growing!
Frequently Asked Questions (FAQ)
What is the best time of year to propagate chili plants from cuttings?
The ideal time to propagate chili plants from cuttings is during the active growing season, typically in spring or early summer. This is when the plants are actively producing new growth, and the cuttings are more likely to root successfully. However, with proper care and environmental control (such as using grow lights and a humidity dome), you can propagate chili plants from cuttings at any time of year.
How long does it take for chili plant cuttings to root?
The time it takes for chili plant cuttings to root can vary depending on several factors, including the variety of chili, the environmental conditions, and the use of rooting hormone. Generally, you can expect to see roots developing within 2-4 weeks. It’s important to be patient and avoid disturbing the cuttings during this time. Look for signs of new growth, such as small leaves emerging from the nodes, as an indication that the cuttings have successfully rooted.
What are the signs that my chili plant cuttings have successfully rooted?
The most obvious sign that your chili plant cuttings have successfully rooted is the appearance of new growth. This may include small leaves emerging from the nodes or the elongation of existing leaves. You can also gently tug on the cuttings to feel for resistance, which indicates that roots have anchored the cutting in the growing medium. Avoid pulling too hard, as this could damage the delicate roots. If you’re unsure, you can carefully remove a cutting from the growing medium to inspect the roots directly.
Can I propagate chili plants from cuttings without using rooting hormone?
Yes, it is possible to propagate chili plants from cuttings without using rooting hormone, although the success rate may be lower. Rooting hormone contains auxins, which are plant hormones that stimulate root development. Without rooting hormone, the cuttings may take longer to root, and some may fail to root altogether. However, you can improve your chances of success by providing the cuttings with optimal environmental conditions, such as high humidity and warm temperatures. You can also try using natural rooting hormone alternatives, such as willow water or honey.
What type of growing medium is best for rooting chili plant cuttings?
A well-draining growing medium is essential for rooting chili plant cuttings. A common choice is a mixture of equal parts perlite and vermiculite, which provides excellent aeration and drainage. You can also use a commercial seed-starting mix or a mixture of coco coir and perlite. Avoid using garden soil, as it can be too heavy and may contain pathogens that can harm the cuttings.
How often should I water my chili plant cuttings?
It’s important to keep the growing medium consistently moist, but not waterlogged. Water the cuttings whenever the top inch of the growing medium feels dry to the touch. Avoid overwatering, as this can lead to root rot. You can also increase humidity by misting the cuttings regularly or placing them in a humidity dome.
What kind of light do chili plant cuttings need?
Chili plant cuttings need bright, indirect light to root successfully. Avoid placing them in direct sunlight, as this can scorch the leaves. A north-facing window or a shaded area outdoors is ideal. You can also use grow lights to provide supplemental lighting, especially during the winter months.
When can I transplant my rooted chili plant cuttings into larger pots?
Once the chili plant cuttings have developed a strong root system, typically after 4-6 weeks, you can transplant them into larger pots. Choose pots that are at least 4 inches in diameter and fill them with a well-draining potting mix. Water the plants thoroughly after transplanting and provide them with bright, indirect light.
Can I propagate any type of chili plant from cuttings?
Yes, you can propagate most types of chili plants from cuttings, including bell peppers, jalapenos, habaneros, and scotch bonnets. However, some varieties may be easier to propagate than others. Experiment with different varieties to see which ones work best for you.
What are some common problems I might encounter when propagating chili plants from cuttings?
Some common problems you might encounter when propagating chili plants from cuttings include:
* Root rot: This is caused by overwatering or poor drainage. To prevent root rot, use a well-draining growing medium and avoid overwatering.
* Damping off: This is a fungal disease that can kill young seedlings and cuttings. To prevent damping off, use sterile growing medium and provide good ventilation.
* Leaf drop: This can be caused by low humidity, insufficient light, or stress. To prevent leaf drop, provide the cuttings with optimal environmental conditions and avoid disturbing them unnecessarily.
* Lack of rooting: This can be caused by a variety of factors, including poor environmental conditions, lack of rooting hormone, or unhealthy cuttings. To improve your chances of success, use healthy cuttings, provide optimal environmental conditions, and consider using rooting hormone.

Leave a Comment