

Collard Greens Home Gardening: Unlock the secrets to growing your own delicious and nutritious collard greens right in your backyard! Have you ever dreamed of stepping outside and harvesting fresh, vibrant greens for a healthy and flavorful meal? Well, dream no more! This DIY guide is packed with simple, yet effective tricks and hacks that will transform your garden into a collard green paradise, even if you’re a complete beginner.
Collard greens have a rich history, deeply rooted in Southern American cuisine and culture. Brought over by enslaved Africans, these leafy greens became a staple, symbolizing resilience, resourcefulness, and community. They’re not just food; they’re a connection to the past and a celebration of heritage.
But beyond their cultural significance, collard greens are nutritional powerhouses, packed with vitamins, minerals, and antioxidants. In today’s world, where healthy eating is more important than ever, growing your own collard greens offers a fantastic way to ensure you have access to fresh, organic produce. Plus, let’s be honest, store-bought collard greens just don’t compare to the flavor and satisfaction of harvesting your own. I’m excited to share these easy-to-follow tips that will help you master collard greens home gardening and enjoy a bountiful harvest all season long!
Growing Collard Greens: A Beginner’s Guide to a Bountiful Harvest
Hey there, fellow gardening enthusiasts! I’m so excited to share my experience with growing collard greens. These leafy greens are not only packed with nutrients but also surprisingly easy to cultivate at home. Whether you’re a seasoned gardener or just starting out, this guide will walk you through every step, from planting to harvesting, ensuring you have a thriving collard green patch. Let’s get our hands dirty!
Choosing the Right Variety and Location
Before we even think about planting, it’s crucial to select the right collard green variety for your climate and growing conditions. Some popular choices include ‘Georgia Southern,’ ‘Vates,’ and ‘Champion.’ ‘Georgia Southern’ is a classic, heat-tolerant variety, while ‘Vates’ is known for its cold hardiness. ‘Champion’ offers a good balance of both.
* Consider your climate: If you live in a warmer region, opt for heat-tolerant varieties. If you experience cold winters, choose cold-hardy ones.
* Think about space: Collard greens can grow quite large, so make sure you have enough room in your garden.
* Check for disease resistance: Some varieties are more resistant to common collard green diseases, which can save you a lot of trouble down the line.
Once you’ve chosen your variety, it’s time to find the perfect location. Collard greens thrive in full sun, meaning they need at least 6 hours of direct sunlight per day. They also prefer well-drained soil that’s rich in organic matter.
* Sunlight is key: Ensure your chosen spot gets plenty of sunlight throughout the day.
* Well-drained soil is essential: Collard greens don’t like soggy roots, so make sure the soil drains well. Amend heavy clay soil with compost or other organic matter.
* Soil pH: Collard greens prefer a slightly acidic to neutral soil pH, around 6.0 to 7.0. You can test your soil pH with a home testing kit or send a sample to your local agricultural extension office.
Preparing the Soil
Now that we’ve got our variety and location sorted, let’s get the soil ready for planting. This is a crucial step, as healthy soil is the foundation for healthy plants.
1. Clear the area: Remove any weeds, rocks, or debris from the planting area.
2. Amend the soil: Incorporate plenty of organic matter, such as compost, aged manure, or leaf mold, into the soil. This will improve drainage, fertility, and water retention. I usually add a generous layer of compost, about 2-3 inches thick, and mix it in thoroughly.
3. Till or dig the soil: Loosen the soil to a depth of at least 12 inches. This will allow the roots to penetrate easily and access nutrients. You can use a garden fork, tiller, or shovel for this step.
4. Smooth the surface: Rake the soil to create a smooth, even surface. This will make planting easier and ensure good seed-to-soil contact.
Planting Collard Greens
You can start collard greens from seeds or transplants. Starting from seeds is more economical, but transplants will give you a head start and are less susceptible to pests and diseases.
Starting from Seeds
1. Sow seeds indoors (optional): If you want to get a head start, you can sow seeds indoors 6-8 weeks before the last expected frost. Use seed-starting trays or small pots filled with seed-starting mix. Plant the seeds about 1/4 inch deep and keep the soil moist.
2. Direct sow seeds outdoors: Once the soil has warmed up to at least 60掳F (around 15掳C), you can direct sow seeds outdoors. Plant the seeds about 1/2 inch deep and 1-2 inches apart in rows that are 18-24 inches apart.
3. Thin seedlings: Once the seedlings emerge and have a few true leaves, thin them to 12-18 inches apart. This will give them enough room to grow and prevent overcrowding.
Planting Transplants
1. Harden off transplants: Before planting transplants outdoors, you need to harden them off. This means gradually exposing them to outdoor conditions over a period of 7-10 days. Start by placing them in a sheltered spot for a few hours each day, gradually increasing the amount of time they spend outdoors.
2. Plant transplants: Dig holes that are slightly larger than the root balls of the transplants. Space the holes 12-18 inches apart in rows that are 18-24 inches apart.
3. Remove transplants from pots: Gently remove the transplants from their pots, being careful not to damage the roots.
4. Place transplants in holes: Place the transplants in the holes, making sure the top of the root ball is level with the soil surface.
5. Fill holes with soil: Fill the holes with soil and gently firm the soil around the base of the plants.
6. Water thoroughly: Water the transplants thoroughly after planting.
Caring for Collard Greens
Once your collard greens are planted, it’s important to provide them with the care they need to thrive. This includes watering, fertilizing, and pest control.
* Watering: Collard greens need consistent moisture, especially during hot, dry weather. Water deeply and regularly, aiming to keep the soil consistently moist but not waterlogged. I usually water my collard greens every 2-3 days, depending on the weather.
* Fertilizing: Collard greens are heavy feeders, so they need regular fertilization. Apply a balanced fertilizer, such as 10-10-10, every 4-6 weeks. You can also side-dress with compost or aged manure.
* Weeding: Keep the area around your collard greens free of weeds. Weeds compete with collard greens for water, nutrients, and sunlight. Hand-pull weeds regularly or use a hoe to cultivate the soil.
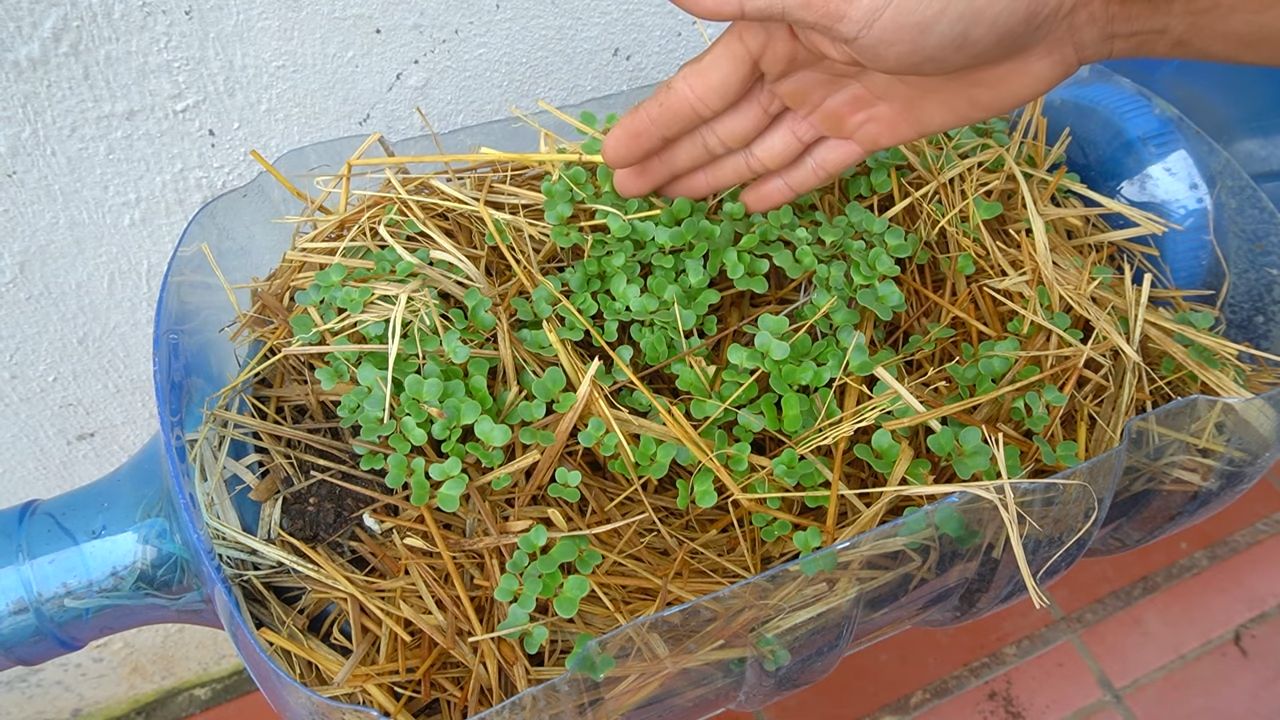
* Mulching: Apply a layer of mulch around your collard greens to help retain moisture, suppress weeds, and regulate soil temperature. Organic mulches, such as straw, wood chips, or shredded leaves, are a good choice.
* Pest Control: Collard greens are susceptible to several pests, including cabbage worms, aphids, and flea beetles. Inspect your plants regularly for signs of pests and take action promptly.
* Cabbage worms: These green caterpillars can devour collard green leaves. Handpick them off the plants or use Bacillus thuringiensis (Bt), a natural insecticide.
* Aphids: These small, sap-sucking insects can weaken plants. Spray them off with a strong stream of water or use insecticidal soap.
* Flea beetles: These tiny beetles can create small holes in collard green leaves. Cover the plants with row covers or use insecticidal soap.
Harvesting Collard Greens
You can start harvesting collard greens when the leaves are about 10-12 inches long. The lower leaves are usually the first to mature.
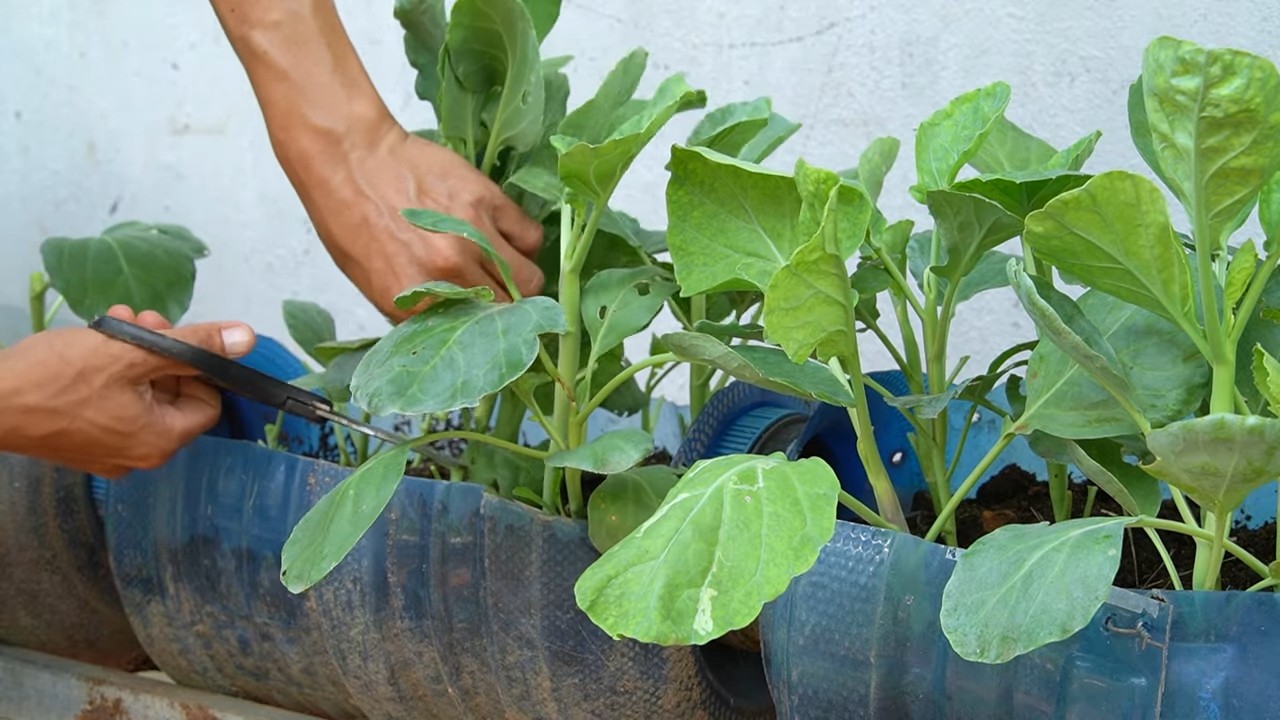
1. Harvest outer leaves: Harvest the outer leaves by cutting them off at the base of the plant. Leave the inner leaves to continue growing.
2. Harvest regularly: Harvest collard greens regularly to encourage continued production.
3. Harvest after frost: Collard greens taste even better after a light frost. The cold temperatures convert starches into sugars, making the leaves sweeter.
Enjoying Your Harvest
Collard greens are incredibly versatile and can be used in a variety of dishes. They can be steamed, boiled, saut茅ed, or added to soups and stews. They’re also a great source of vitamins, minerals, and fiber.
* Storage: Store collard greens in the refrigerator for up to a week. Wrap them in a damp paper towel and place them in a plastic bag.
* Cooking: Wash collard greens thoroughly before cooking. Remove the tough stems and ribs.
* Recipes: There are countless collard green recipes available online and in cookbooks. Experiment with different flavors and seasonings to find your favorites.
Growing collard greens is a rewarding experience that can provide you with a steady supply of fresh, nutritious greens. With a little planning and care, you can enjoy a bountiful harvest of these delicious and versatile vegetables. Happy gardening!
Conclusion
So, there you have it! Cultivating your own collard greens at home isn’t just a gardening project; it’s an investment in fresh, flavorful, and nutritious meals. We’ve explored the simple yet rewarding process, from selecting the right seeds to harvesting your bountiful crop. The benefits extend far beyond the kitchen table. Imagine the satisfaction of serving a dish made with ingredients you nurtured from tiny seeds, knowing exactly where they came from and what went into their growth.
This DIY approach to collard greens offers a level of control and customization you simply can’t achieve with store-bought produce. You can choose heirloom varieties for unique flavors, experiment with different planting times to extend your harvest season, and, most importantly, avoid the pesticides and herbicides often used in commercial farming. The result is a healthier, tastier, and more sustainable source of this leafy green powerhouse.
But the advantages don’t stop there. Home-grown collard greens are incredibly versatile in the kitchen. While traditionally simmered low and slow with smoked meats, don’t be afraid to experiment! Try adding them to smoothies for a nutrient boost, saut茅ing them with garlic and olive oil for a quick and healthy side dish, or even using them as wraps for your favorite fillings. The possibilities are endless.
Consider these variations to personalize your collard greens growing experience:
* Succession Planting: Plant a new batch of seeds every few weeks to ensure a continuous supply of fresh greens throughout the growing season.
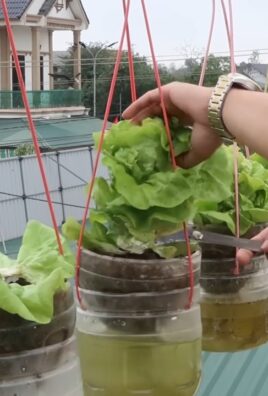
* Container Gardening: If you’re short on space, collard greens thrive in containers. Choose a large pot with good drainage and use a high-quality potting mix.
* Companion Planting: Plant collard greens alongside herbs like rosemary and thyme to deter pests and enhance their flavor.
* Different Varieties: Explore different collard green varieties like ‘Georgia Southern’, ‘Vates’, or ‘Champion’ to find your favorite flavor and texture.
Ultimately, growing your own collard greens is a journey of discovery and a celebration of fresh, healthy food. It’s a chance to connect with nature, learn new skills, and enjoy the fruits (or rather, the leaves) of your labor.
We strongly encourage you to give this DIY trick a try. Start small, be patient, and don’t be afraid to experiment. The rewards are well worth the effort. And most importantly, we want to hear about your experience! Share your photos, tips, and recipes in the comments below. Let’s create a community of home gardeners who are passionate about growing their own delicious and nutritious collard greens. Let us know what kind of soil you used, what kind of fertilizer you used, and how long it took for your collard greens to grow. We are excited to hear from you!
Frequently Asked Questions (FAQ)
What is the best time of year to plant collard greens?
The ideal time to plant collard greens depends on your climate. In regions with mild winters, you can plant them in the fall for a winter or early spring harvest. In colder climates, start seeds indoors 6-8 weeks before the last expected frost and transplant them outdoors in the spring. You can also plant them in late summer for a fall harvest. The key is to avoid planting during the hottest part of the summer, as high temperatures can cause the plants to bolt (go to seed).
How much sunlight do collard greens need?
Collard greens thrive in full sun, which means they need at least 6 hours of direct sunlight per day. However, they can tolerate partial shade, especially in hotter climates. If you’re growing them in containers, make sure to place them in a sunny location. If you notice that your plants are leggy or have pale leaves, it could be a sign that they’re not getting enough sunlight.
What kind of soil is best for collard greens?
Collard greens prefer well-drained, fertile soil with a pH between 6.0 and 7.5. Before planting, amend your soil with compost or other organic matter to improve its drainage and nutrient content. If your soil is heavy clay, consider adding sand or perlite to improve drainage. A soil test can help you determine the pH of your soil and identify any nutrient deficiencies.
How often should I water collard greens?
Collard greens need consistent moisture, especially during hot weather. Water them deeply whenever the top inch of soil feels dry to the touch. Avoid overwatering, as this can lead to root rot. Mulching around the plants can help retain moisture and suppress weeds.
What are some common pests and diseases that affect collard greens?
Common pests that affect collard greens include aphids, cabbage worms, flea beetles, and slugs. You can control these pests with organic methods such as handpicking, insecticidal soap, or Bacillus thuringiensis (Bt). Common diseases include black rot, downy mildew, and clubroot. To prevent these diseases, choose disease-resistant varieties, practice crop rotation, and avoid overhead watering.
How do I harvest collard greens?
You can start harvesting collard greens when the leaves are about 6-8 inches long. Harvest the outer leaves first, leaving the inner leaves to continue growing. This will allow you to harvest continuously throughout the growing season. Use a sharp knife or scissors to cut the leaves close to the stem.
How do I store collard greens?
Freshly harvested collard greens can be stored in the refrigerator for up to a week. Wrap them loosely in a damp paper towel and place them in a plastic bag. You can also freeze collard greens for longer storage. Blanch them in boiling water for 2-3 minutes, then plunge them into ice water to stop the cooking process. Drain them well and pack them into freezer bags or containers.
Can I grow collard greens indoors?
Yes, you can grow collard greens indoors, but you’ll need to provide them with plenty of light. Use grow lights or place them near a sunny window. Choose a large container with good drainage and use a high-quality potting mix. Water them regularly and fertilize them every few weeks.
Are collard greens a good source of nutrients?
Yes, collard greens are an excellent source of vitamins A, C, and K, as well as calcium, iron, and fiber. They are also rich in antioxidants, which can help protect against chronic diseases. Adding collard greens to your diet is a great way to boost your overall health.
How can I make my collard greens taste less bitter?
Some people find collard greens to be bitter. To reduce the bitterness, try blanching them in boiling water for a few minutes before cooking them. You can also add an acid, such as vinegar or lemon juice, to the cooking water. Cooking them with smoked meats or other flavorful ingredients can also help to mask the bitterness.

Leave a Comment