

Pineapple growing doesn’t have to be an exotic dream reserved for tropical climates! I’m here to tell you that with a little ingenuity and some upcycling magic, you can cultivate your own sweet, juicy pineapple right in your backyard, even if you’re short on space. And the best part? We’re going to use something you probably already have lying around: plastic chairs!
For centuries, pineapples have symbolized hospitality and welcome, a tradition rooted in their rarity and deliciousness. Imagine offering a homegrown pineapple to your guests – a true testament to your green thumb and resourcefulness! But let’s face it, traditional gardening can be expensive and demanding. That’s where our DIY trick comes in.
This article isn’t just about pineapple growing; it’s about embracing sustainable practices and transforming discarded items into thriving ecosystems. We’ll show you how to repurpose those old plastic chairs into innovative planters, creating a warm microclimate perfect for your pineapple to flourish. Forget complicated setups and expensive equipment. This method is budget-friendly, space-saving, and incredibly rewarding. Ready to turn trash into treasure and enjoy the taste of homegrown pineapple? Let’s get started!
Growing Pineapples in Plastic Chairs: A Quirky DIY Project
Hey there, fellow DIY enthusiasts! Ever thought about combining your love for gardening with a touch of upcycling? Well, get ready to have your mind blown because today, we’re diving into a super fun and slightly unconventional project: growing pineapples in plastic chairs! Yes, you read that right. We’re turning those trusty (or maybe slightly worn-out) plastic chairs into mini pineapple plantations.
Why plastic chairs, you ask? Well, they offer excellent drainage, are lightweight, and let’s be honest, they’re often readily available. Plus, it’s a fantastic way to give old chairs a new lease on life. So, grab your gardening gloves, and let’s get started!
What You’ll Need
Before we jump into the nitty-gritty, let’s gather our supplies. This is crucial for a smooth and enjoyable DIY experience.
* Plastic Chairs: Obviously! Choose chairs that are sturdy enough to hold the weight of the soil and the pineapple plant. Chairs with a mesh or slatted seat work best for drainage. I recommend starting with at least two chairs for a decent-sized project.
* Pineapple Top: You’ll need the top of a pineapple. You can get this from a store-bought pineapple. Make sure the leaves are healthy and green.
* Potting Mix: A well-draining potting mix is essential. I prefer a mix of equal parts potting soil, perlite, and compost. This ensures good drainage and provides the necessary nutrients for your pineapple plant.
* Rooting Hormone (Optional): This can help speed up the rooting process, but it’s not strictly necessary.
* Gravel or Small Stones: For drainage at the bottom of the chair.
* Landscape Fabric or Burlap: To line the chair and prevent soil from falling through.
* Watering Can: For, well, watering!
* Gloves: To protect your hands.
* Scissors or a Knife: For preparing the pineapple top.
* Spray Bottle: For misting the plant.
* Fertilizer: A balanced, slow-release fertilizer is ideal.
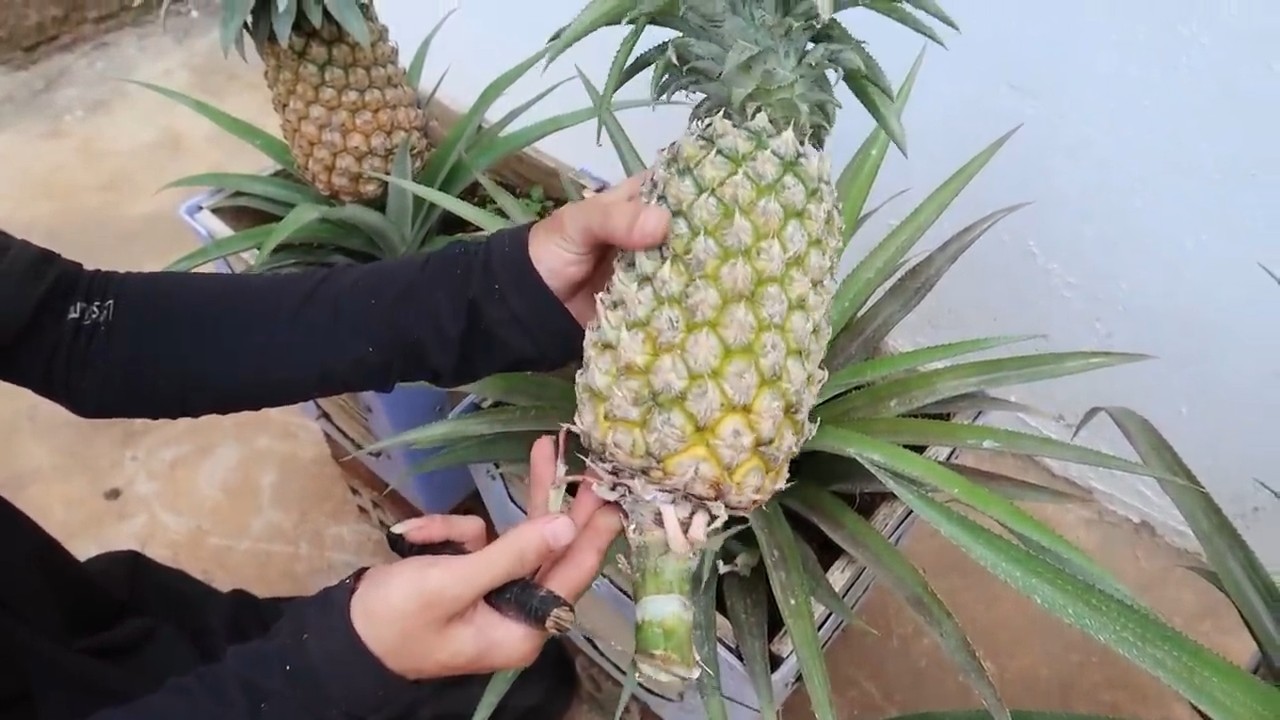
Preparing the Pineapple Top
This is a crucial step, so pay close attention! A healthy start is key to a successful pineapple plant.
1. Remove the Fruit Flesh: Carefully cut away all the remaining fruit flesh from the base of the pineapple top. Any remaining flesh can rot and cause problems. I usually use a sharp knife and work my way around the base, making sure to remove every last bit.
2. Peel Back the Lower Leaves: Gently peel back the bottom few layers of leaves from the base of the pineapple top. This will expose the root nodes, where the roots will eventually emerge. Don’t be afraid to pull them off; they’re meant to come off easily.
3. Let it Dry: Allow the pineapple top to dry out for a few days (3-7 days) in a cool, dry place. This helps to prevent rot. I usually leave mine on a paper towel in my garage. You’ll know it’s ready when the cut end has formed a callus.
4. Apply Rooting Hormone (Optional): If you’re using rooting hormone, dip the base of the pineapple top into the powder or liquid according to the product instructions. This can help encourage root growth.
Preparing the Plastic Chair
Now, let’s get our “planter” ready! This part is surprisingly easy.
1. Clean the Chair: Give the plastic chair a good cleaning to remove any dirt or debris. A simple wipe-down with soap and water will do the trick.
2. Line the Chair: Line the inside of the chair seat with landscape fabric or burlap. This will prevent the soil from falling through the holes or slats. Make sure the fabric covers the entire inside of the seat and extends a few inches up the sides. I usually secure the fabric with a few staples or tacks to keep it in place.
3. Add Drainage: Place a layer of gravel or small stones at the bottom of the lined chair. This will improve drainage and prevent the roots from sitting in water. A layer of about 2-3 inches is usually sufficient.
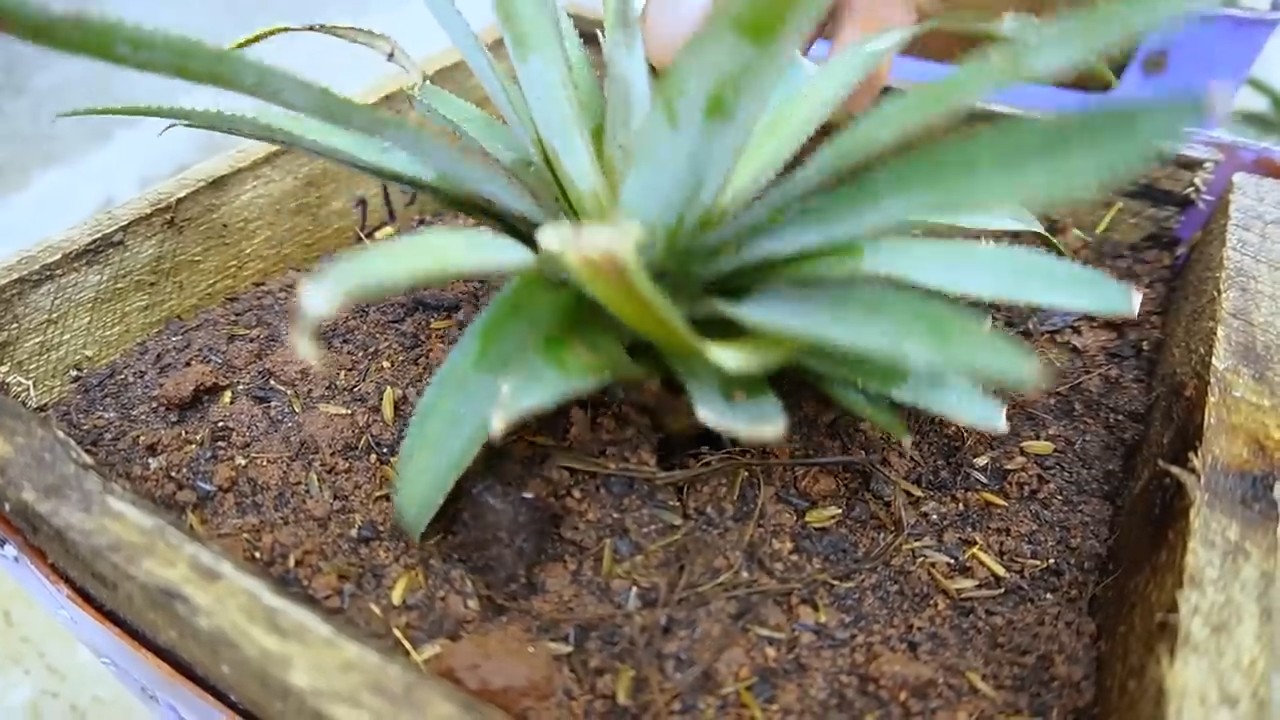
Planting the Pineapple Top
The moment we’ve been waiting for! Time to get that pineapple top in its new home.
1. Fill with Potting Mix: Fill the lined chair with your well-draining potting mix. Leave a few inches of space at the top.
2. Create a Hole: Dig a hole in the center of the potting mix, large enough to accommodate the base of the pineapple top.
3. Plant the Pineapple Top: Carefully place the pineapple top into the hole, ensuring that the base is buried in the soil and the leaves are above the surface.
4. Firm the Soil: Gently firm the soil around the base of the pineapple top to secure it in place.
5. Water Thoroughly: Water the newly planted pineapple top thoroughly until the water drains out of the bottom of the chair. This will help settle the soil and encourage root growth.
Caring for Your Pineapple Plant
Now that your pineapple is planted, it’s time to provide the right care to help it thrive.
1. Sunlight: Pineapples need plenty of sunlight, so place your chair in a location that receives at least 6-8 hours of direct sunlight per day. A south-facing location is ideal.
2. Watering: Water your pineapple plant regularly, but be careful not to overwater. Allow the soil to dry out slightly between waterings. I usually water mine about once a week, but this will depend on the weather and the drainage of your chair.
3. Fertilizing: Fertilize your pineapple plant every 2-3 months with a balanced, slow-release fertilizer. Follow the instructions on the fertilizer packaging.
4. Misting: Mist the leaves of your pineapple plant regularly, especially during dry weather. This will help to keep the plant hydrated and prevent the leaves from drying out.
5. Temperature: Pineapples are tropical plants and prefer warm temperatures. Protect your plant from frost and freezing temperatures. If you live in a colder climate, you may need to bring your chair indoors during the winter months.
6. Patience: Growing a pineapple from a top takes time and patience. It can take anywhere from 2-3 years for your plant to produce a fruit. Don’t get discouraged if you don’t see results right away. Just keep providing the right care, and eventually, you’ll be rewarded with a delicious homegrown pineapple!
Troubleshooting
Even with the best care, you might encounter a few challenges along the way. Here are some common problems and how to address them:
* Rotting: If the base of the pineapple top starts to rot, it’s usually due to overwatering or poor drainage. Remove the affected leaves and allow the base to dry out completely before replanting. Make sure your chair has good drainage and avoid overwatering.
* Yellowing Leaves: Yellowing leaves can be a sign of nutrient deficiency or underwatering. Fertilize your plant with a balanced fertilizer and make sure you’re watering it regularly.
* Pests: Pineapples can be susceptible to pests such as mealybugs and scale. Inspect your plant regularly and treat any infestations promptly with insecticidal soap or neem oil.
Encouraging Fruiting
After a year or two, you might be wondering when your pineapple plant will finally produce a fruit. Here are a few tips to encourage fruiting:
* Ethylene Gas: Pineapples are stimulated to fruit by ethylene gas. You can encourage fruiting by placing a ripe apple or banana near the plant. The ripening fruit will release ethylene gas, which can trigger flowering.
* Magnesium Sulfate (Epsom Salts): Some gardeners recommend applying magnesium sulfate (Epsom salts) to the soil to encourage fruiting. Dissolve 1 tablespoon of Epsom salts in 1 gallon of water and apply it to the soil every few months.
Harvesting Your Pineapple
After all your hard work and patience, the moment has finally arrived! Your pineapple is ripe and ready to be harvested.
1. Check for Ripeness: A ripe pineapple will have a sweet aroma and a slightly golden color. The “eyes” of the pineapple should be relatively flat.
2. Harvesting: Use a sharp knife to cut the pineapple from the plant, leaving a few inches of stem attached.
3. Enjoy! Now, sit back, relax, and enjoy the fruits (literally!) of your labor. Your homegrown pineapple will be the sweetest and most rewarding pineapple you’ve ever tasted.
And there you have it! Growing pineapples in plastic chairs is a fun, quirky, and rewarding DIY project that anyone can try. So, grab those old chairs, get your hands dirty, and get ready to enjoy some homegrown pineapple goodness! Happy gardening!
Conclusion
So, there you have it! Transforming those ubiquitous plastic chairs into thriving pineapple planters is not just a quirky upcycling project; it’s a surprisingly effective and rewarding way to cultivate your own tropical treat. We’ve shown you how to repurpose something readily available – those plastic chairs that might otherwise end up discarded – into a functional and aesthetically pleasing garden feature. This DIY project is a testament to the power of resourcefulness and a fantastic way to bring a touch of the tropics to your backyard, balcony, or even indoor space.
But why is this method a must-try? Firstly, it’s incredibly cost-effective. Instead of investing in expensive planters, you’re giving new life to something you likely already own. Secondly, the design of many plastic chairs, with their slatted seats and backs, provides excellent drainage and aeration, crucial for healthy pineapple growth. The plastic material also helps retain warmth, creating a microclimate that pineapples adore. Finally, it’s a conversation starter! Imagine the delight of your guests when they learn that your delicious pineapple came from a repurposed plastic chair.
Don’t feel limited to just one type of pineapple. Experiment with different varieties! Consider growing ‘Smooth Cayenne’ for its classic flavor, ‘Golden Sweet’ for its extra sweetness, or even a dwarf variety if space is a concern. You can also personalize your planters by painting the chairs in vibrant colors or adding decorative elements. Think about creating a tiered pineapple garden by stacking multiple chairs of varying heights. The possibilities are truly endless!
We’ve covered the basics, but the real magic happens when you get your hands dirty and start experimenting. Remember to choose a sunny location, use well-draining soil, and water regularly. Be patient, as pineapples take time to mature, but the reward of harvesting your own homegrown fruit is well worth the wait.
We are confident that this pineapple growing hack will not only save you money but also provide you with a unique and satisfying gardening experience. So, gather your plastic chairs, grab your pineapple tops, and get ready to embark on this exciting horticultural adventure. We can’t wait to see your creations!
Now, it’s your turn! We encourage you to try this DIY trick and share your experience with us. Post photos of your pineapple chair planters on social media using #PineappleChairPlanter and tag us. We’d love to see your creative variations and hear about your successes (and even your challenges – we’re all learning together!). Let’s build a community of resourceful gardeners who are transforming the ordinary into the extraordinary, one pineapple chair at a time. Happy growing!
Frequently Asked Questions (FAQ)
What type of plastic chair is best for growing pineapples?
Ideally, you want a sturdy plastic chair with a slatted seat and back. The slats provide excellent drainage, which is crucial for pineapple health. Avoid chairs with solid seats, as they can lead to waterlogging and root rot. Chairs made from durable, UV-resistant plastic are preferable, as they will withstand the elements and last longer. The color of the chair doesn’t matter much, but darker colors might absorb more heat, which could be beneficial in cooler climates. However, be mindful of overheating in extremely hot regions.
How do I prepare the plastic chair for planting?
Preparing the chair is simple. First, thoroughly clean the chair to remove any dirt, debris, or algae. This will help prevent the spread of diseases to your pineapple plant. If the chair has any sharp edges or protruding pieces, you can sand them down to prevent injury. You might also consider drilling a few extra drainage holes in the seat if you’re concerned about water retention, although the slats usually provide sufficient drainage. No other special preparation is typically needed.
What kind of soil should I use for growing pineapples in a plastic chair?
Pineapples need well-draining soil to thrive. A mixture of equal parts potting soil, perlite, and coarse sand is an excellent choice. This combination provides good drainage, aeration, and nutrient retention. Avoid using heavy clay soil, as it can become waterlogged and suffocate the roots. You can also amend the soil with compost or other organic matter to improve its fertility. A slightly acidic soil pH (around 6.0) is ideal for pineapples.
How often should I water my pineapple plant in a plastic chair?
Watering frequency depends on the climate, the type of soil, and the size of the plant. Generally, you should water your pineapple plant when the top inch of soil feels dry to the touch. Water thoroughly until water drains out of the drainage holes. Avoid overwatering, as this can lead to root rot. In hot, dry weather, you may need to water more frequently. In cooler, wetter weather, you may need to water less often. Check the soil moisture regularly to determine the appropriate watering schedule.
How much sunlight does a pineapple plant need in a plastic chair?
Pineapples need at least six hours of direct sunlight per day to thrive. Choose a sunny location for your plastic chair planter. If you live in a region with intense sunlight, you may need to provide some afternoon shade to prevent the leaves from scorching. If you’re growing your pineapple plant indoors, place it near a south-facing window or use a grow light to supplement the natural light. Insufficient sunlight can lead to slow growth and reduced fruit production.
How long does it take to grow a pineapple in a plastic chair?
Growing a pineapple from a top can take anywhere from 18 months to 3 years, depending on the variety, climate, and growing conditions. Be patient! It’s a long-term project, but the reward of harvesting your own homegrown pineapple is well worth the wait. Provide your plant with the proper care, including adequate sunlight, water, and nutrients, to encourage healthy growth and fruit production.
How do I fertilize my pineapple plant in a plastic chair?
Pineapples are heavy feeders and benefit from regular fertilization. Use a balanced fertilizer (e.g., 10-10-10) or a fertilizer specifically formulated for pineapples. Apply the fertilizer according to the package instructions. You can also use organic fertilizers, such as compost tea or fish emulsion. Fertilize your pineapple plant every 2-3 months during the growing season (spring and summer). Reduce or stop fertilizing during the dormant season (fall and winter).
How do I know when my pineapple is ripe and ready to harvest?
Several signs indicate that your pineapple is ripe and ready to harvest. The fruit will change color from green to yellow or golden-brown. The bottom of the pineapple will have a sweet, fragrant aroma. The eyes (the individual segments of the fruit) will become flatter and more prominent. The leaves at the top of the pineapple will be easy to pull out. Gently tug on the pineapple; if it comes off easily, it’s ripe. Use a sharp knife to cut the pineapple from the plant.
Can I grow pineapples in plastic chairs indoors?
Yes, you can grow pineapples in plastic chairs indoors, but you’ll need to provide them with adequate sunlight and warmth. Place the chair near a south-facing window or use a grow light to supplement the natural light. Maintain a temperature between 65°F and 80°F. Ensure good air circulation to prevent fungal diseases. Water regularly and fertilize as needed. Indoor-grown pineapples may take longer to mature than those grown outdoors.
What are some common problems when growing pineapples in plastic chairs, and how can I prevent them?
Some common problems include root rot (due to overwatering), pests (such as mealybugs and scale), and diseases (such as heart rot). To prevent root rot, ensure good drainage and avoid overwatering. To control pests, inspect your plant regularly and treat any infestations with insecticidal soap or neem oil. To prevent diseases, provide good air circulation and avoid overhead watering. If you notice any signs of problems, address them promptly to prevent them from spreading.
Leave a Comment