

Beginner Tomato Growing Shortcut: Dreaming of juicy, sun-ripened tomatoes bursting with flavor, fresh from your own garden? I know I am! But the thought of all the work involved can be a little daunting, especially if you’re new to gardening. Let’s face it, traditional tomato growing can feel like a science experiment, with complicated pruning techniques and constant monitoring for pests and diseases.
For centuries, tomatoes have been a staple in cuisines around the world, from the vibrant sauces of Italy to the refreshing salads of the Mediterranean. They’ve become synonymous with summer and the joy of homegrown goodness. But what if I told you there’s a way to enjoy that homegrown goodness without all the fuss?
That’s right! This article is all about a beginner tomato growing shortcut that will have you harvesting delicious tomatoes in no time, even if you’ve never planted a seed before. We’ll ditch the complicated jargon and focus on a simple, effective method that’s perfect for busy people and gardening newbies. Imagine biting into a perfectly ripe tomato, knowing you grew it yourself with minimal effort. Sounds good, right? Let’s get started!
Tomatenanbau für Anfänger: Der ultimative Shortcut!
Hallo liebe Gartenfreunde! Ich weiß, der Gedanke an saftige, selbstgezogene Tomaten lässt das Herz höherschlagen. Aber die Vorstellung von stundenlanger Arbeit, komplizierten Anleitungen und möglichen Fehlern kann auch ganz schön einschüchternd sein. Keine Sorge! Ich zeige euch einen super einfachen Weg, wie ihr auch ohne grünen Daumen und viel Zeitaufwand zu einer reichen Tomatenernte kommt. Dieser Shortcut ist perfekt für Anfänger und alle, die es unkompliziert mögen.
Was du für diesen Tomaten-Hack brauchst:
* Tomatenpflanzen-Setzlinge: Kaufe vorgezogene Tomatenpflanzen im Gartencenter oder online. Achte auf robuste Sorten, die für dein Klima geeignet sind. Buschtomaten sind besonders pflegeleicht.
* Große Pflanzgefäße: Wähle Töpfe oder Kübel mit einem Durchmesser von mindestens 30 cm. Je größer, desto besser! So haben die Wurzeln genug Platz.
* Hochwertige Pflanzerde: Verwende spezielle Tomatenerde oder eine Mischung aus Blumenerde und Kompost. Das sorgt für die richtige Nährstoffversorgung.
* Langzeitdünger: Langzeitdünger versorgt deine Tomatenpflanzen über einen längeren Zeitraum mit Nährstoffen.
* Gießkanne oder Gartenschlauch: Zum regelmäßigen Gießen.
* Stützstäbe oder Tomatenkäfige: Besonders wichtig für Stabtomaten, um sie vor dem Umknicken zu bewahren.
* Mulchmaterial (optional): Rindenmulch, Stroh oder Grasschnitt helfen, die Feuchtigkeit im Boden zu halten und Unkraut zu unterdrücken.
Schritt-für-Schritt-Anleitung für deinen Tomaten-Shortcut:
1. Die richtige Vorbereitung:
* Wähle den Standort: Tomaten lieben die Sonne! Suche einen sonnigen Platz in deinem Garten oder auf deinem Balkon, der mindestens 6 Stunden direkte Sonneneinstrahlung pro Tag bekommt.
* Bereite die Pflanzgefäße vor: Fülle die Töpfe oder Kübel mit der Pflanzerde. Lasse etwa 5 cm Platz bis zum Rand.
* Dünge die Erde: Mische den Langzeitdünger gemäß den Anweisungen auf der Verpackung unter die Erde. Das ist wichtig, damit deine Tomatenpflanzen von Anfang an gut versorgt sind.
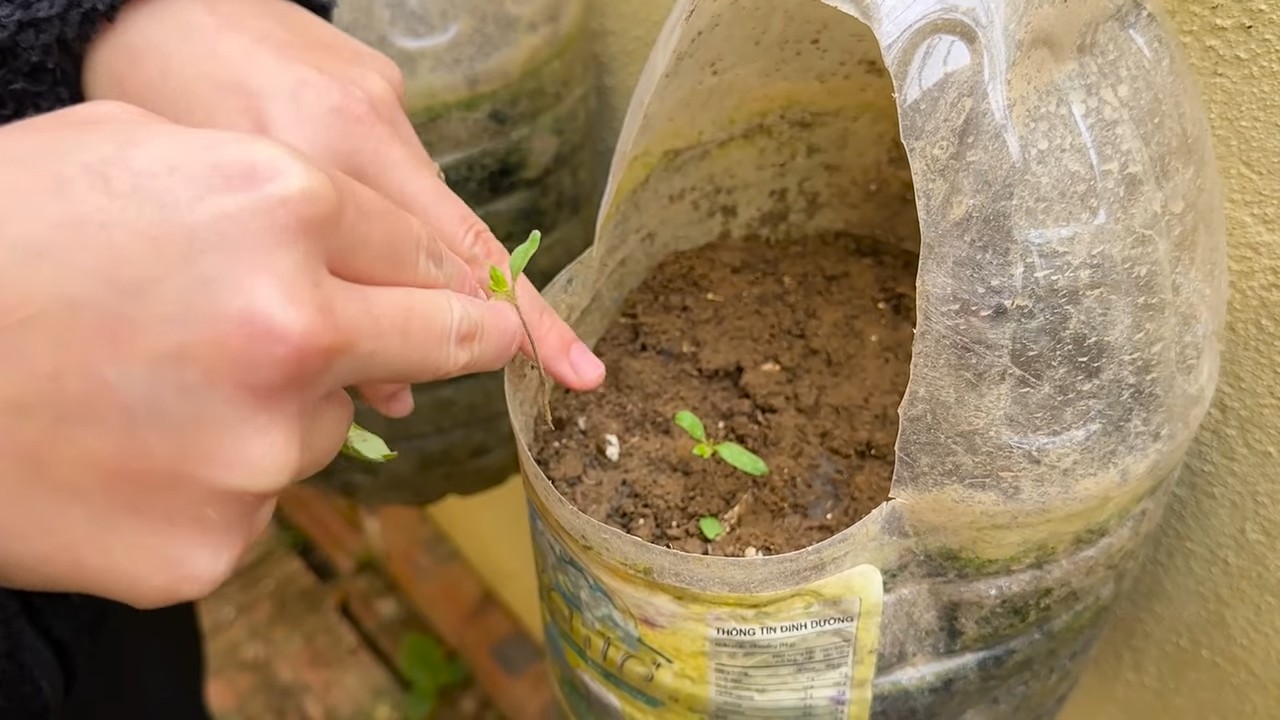
2. Das Einpflanzen der Tomaten:
* Hole die Tomatenpflanzen aus ihren Töpfen: Drücke vorsichtig auf den Topf, um die Pflanze herauszulösen. Achte darauf, die Wurzeln nicht zu beschädigen.
* Pflanze die Tomaten tief ein: Setze die Tomatenpflanzen tiefer in die Erde, als sie vorher im Topf standen. Das fördert die Wurzelbildung und macht die Pflanzen stabiler. Entferne die untersten Blätter, die in die Erde kommen würden.
* Fülle die Töpfe mit Erde auf: Fülle die Töpfe mit Erde auf und drücke sie leicht an.
* Gieße die Pflanzen gründlich: Gieße die Tomatenpflanzen nach dem Einpflanzen gründlich an. Das hilft ihnen, sich an ihren neuen Standort zu gewöhnen.
3. Die richtige Pflege:
* Regelmäßiges Gießen: Tomaten brauchen viel Wasser, besonders während der heißen Sommermonate. Gieße sie am besten morgens oder abends, wenn die Sonne nicht scheint. Vermeide es, die Blätter zu gießen, da dies Pilzkrankheiten fördern kann. Die Erde sollte immer leicht feucht sein, aber nicht nass.
* Stützen der Pflanzen: Sobald die Tomatenpflanzen größer werden, brauchen sie Unterstützung. Stecke Stützstäbe neben die Pflanzen oder verwende Tomatenkäfige. Binde die Triebe vorsichtig an den Stäben fest.
* Ausgeizen (optional, aber empfehlenswert): Beim Ausgeizen werden die Seitentriebe (Geiztriebe) entfernt, die sich in den Blattachseln bilden. Das fördert das Wachstum der Haupttriebe und sorgt für größere Früchte. Bei Buschtomaten ist das Ausgeizen nicht unbedingt notwendig.
* Düngen (bei Bedarf): Obwohl du Langzeitdünger verwendet hast, kann es sein, dass deine Tomatenpflanzen im Laufe der Saison zusätzliche Nährstoffe benötigen. Beobachte die Pflanzen genau. Wenn die Blätter gelb werden oder die Früchte schlecht wachsen, dünge sie mit einem speziellen Tomatendünger.
* Schutz vor Krankheiten und Schädlingen: Kontrolliere deine Tomatenpflanzen regelmäßig auf Krankheiten und Schädlinge. Bei Bedarf kannst du biologische Pflanzenschutzmittel einsetzen.
Zusätzliche Tipps für eine reiche Ernte:
* Mulchen: Eine Mulchschicht aus Rindenmulch, Stroh oder Grasschnitt hilft, die Feuchtigkeit im Boden zu halten, Unkraut zu unterdrücken und die Bodentemperatur zu regulieren.
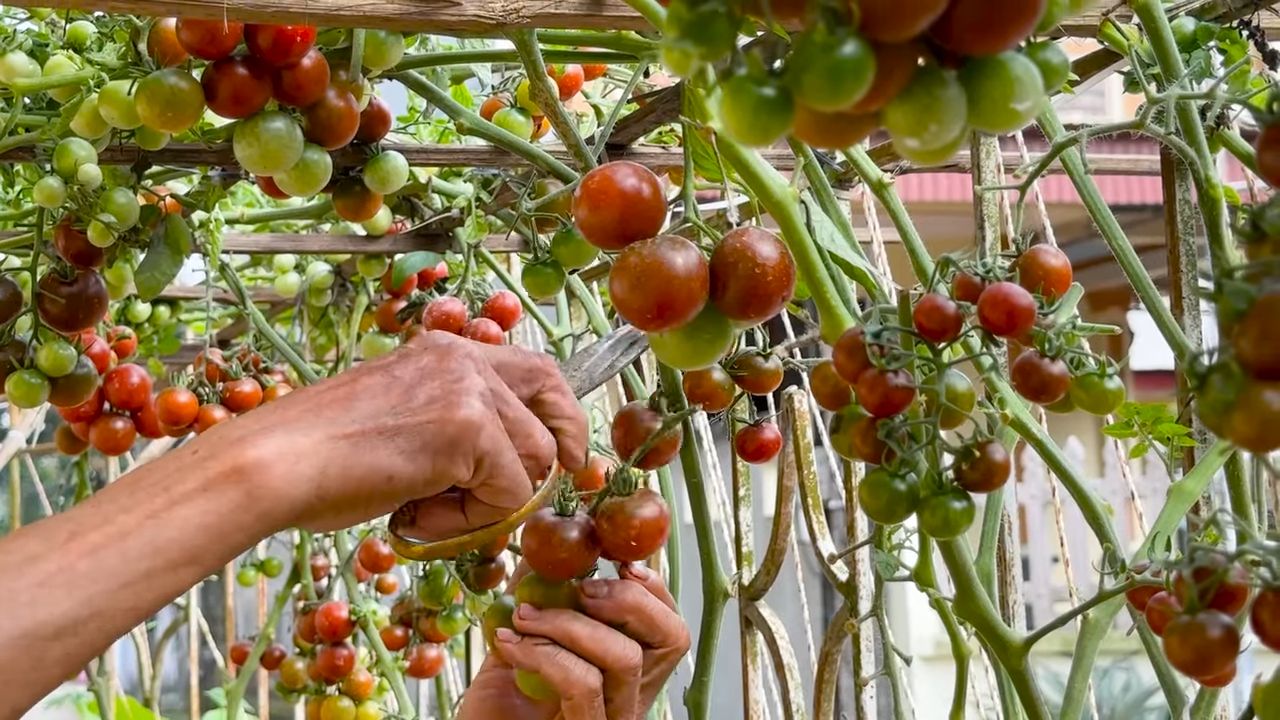
* Regelmäßiges Ernten: Ernte die Tomaten, sobald sie reif sind. Das fördert die Bildung neuer Früchte.
* Sonnenschutz: An besonders heißen Tagen kann es sinnvoll sein, die Tomatenpflanzen mit einem Sonnensegel oder einem Schattiernetz vor zu viel Sonne zu schützen.
* Belüftung: Sorge für eine gute Belüftung der Pflanzen, um Pilzkrankheiten vorzubeugen. Stelle die Töpfe nicht zu eng nebeneinander.
Häufige Fehler vermeiden:
* Zu wenig Sonne: Tomaten brauchen viel Sonne, um gut zu wachsen und reife Früchte zu produzieren.
* Zu wenig Wasser: Tomaten sind durstig! Achte darauf, sie regelmäßig zu gießen, besonders während der heißen Sommermonate.
* Zu viel Dünger: Zu viel Dünger kann die Pflanzen schädigen. Halte dich an die Anweisungen auf der Verpackung.
* Falsche Erde: Verwende spezielle Tomatenerde oder eine Mischung aus Blumenerde und Kompost. Normale Gartenerde ist oft zu schwer und nährstoffarm.
* Vernachlässigung: Tomaten brauchen regelmäßige Pflege. Kontrolliere sie regelmäßig auf Krankheiten und Schädlinge, gieße sie ausreichend und dünge sie bei Bedarf.
Sortenempfehlungen für Anfänger:
* Buschtomaten: Buschtomaten sind besonders pflegeleicht und eignen sich gut für den Anbau in Töpfen. Beliebte Sorten sind ‘Roma’, ‘Tiny Tim’ und ‘Vilma’.
* Cocktailtomaten: Cocktailtomaten sind klein, süß und aromatisch. Sie sind ideal zum Naschen und für Salate. Beliebte Sorten sind ‘Cherry Belle’, ‘Sungold’ und ‘Sweet Million’.
* Fleischtomaten: Fleischtomaten sind groß, saftig und haben ein intensives Aroma. Sie eignen sich gut für Saucen und Suppen. Beliebte Sorten sind ‘Ochsenherz’, ‘Marmande’ und ‘Berner Rose’.
Noch ein paar persönliche Tipps:
Ich habe mit diesem Shortcut selbst super Erfahrungen gemacht. Am Anfang war ich auch etwas unsicher, aber es ist wirklich einfacher als man denkt. Wichtig ist, dass du dir robuste Pflanzen aussuchst und auf die richtige Erde achtest. Und keine Angst vor Fehlern! Jeder Gärtner macht mal Fehler. Das Wichtigste ist, daraus zu lernen und es beim nächsten Mal besser zu machen.
Geduld ist der Schlüssel: Tomaten brauchen Zeit, um zu wachsen und reife Früchte zu produzieren. Sei geduldig und lass dich nicht entmutigen, wenn es nicht sofort klappt.
Beobachte deine Pflanzen: Beobachte deine Tomatenpflanzen genau. Achte auf Veränderungen in Farbe und Form der Blätter und Früchte. So kannst du Probleme frühzeitig erkennen und beheben.
Genieße die Ernte: Wenn deine Tomaten reif sind, ernte sie und genieße den Geschmack von selbstgezogenem Gemüse. Es gibt nichts Besseres!
Ich hoffe, dieser Shortcut hilft dir dabei, deine eigenen Tomaten anzubauen. Viel Spaß und eine reiche Ernte!
Conclusion
So, there you have it! This beginner tomato growing shortcut isn’t just a time-saver; it’s a game-changer for anyone looking to enjoy the unparalleled taste of homegrown tomatoes without the usual hassle. We’ve walked you through a simple, effective method that bypasses some of the more challenging aspects of traditional tomato cultivation, allowing you to focus on the joy of watching your plants thrive and, ultimately, savoring the delicious fruits of your labor.
Why is this a must-try? Because it democratizes tomato growing. It removes the intimidation factor, making it accessible to apartment dwellers with limited space, busy professionals with limited time, and gardening novices who might otherwise be hesitant to dive in. It’s about maximizing your yield with minimal effort, ensuring that even if you’ve struggled with tomatoes in the past, you can achieve success this time around.
But don’t think this method is set in stone. Feel free to experiment! For instance, if you’re using containers, consider adding a slow-release fertilizer at planting time to give your tomatoes an extra boost. You could also try different varieties of tomatoes suited to container growing, such as bush or dwarf varieties, to optimize your space. If you’re in a particularly hot climate, providing some afternoon shade can prevent sunscald and keep your plants happy. Another variation is to use different types of support systems. While a simple stake works well, you might find a tomato cage or even a trellis more suitable for larger, more vigorous plants.
And remember, the key to successful tomato growing, even with this shortcut, is consistent watering and monitoring for pests or diseases. Check your plants regularly, and address any issues promptly. A little attention goes a long way.
We are confident that this beginner tomato growing shortcut will transform your gardening experience. It’s about simplifying the process, increasing your chances of success, and ultimately, enjoying the incredible flavor of fresh, homegrown tomatoes.
Now, it’s your turn! We wholeheartedly encourage you to give this method a try. Plant those seedlings, follow the steps, and watch your tomatoes flourish. And most importantly, share your experience with us! We’d love to hear about your successes, your challenges, and any variations you’ve tried. Post your photos, share your tips, and let’s create a community of thriving tomato growers. Happy gardening!
Frequently Asked Questions (FAQ)
What kind of tomatoes are best for this beginner tomato growing shortcut?
The beauty of this method is its versatility. However, for beginners, we recommend starting with determinate or bush varieties. These types of tomatoes are naturally more compact and require less pruning, making them ideal for containers and smaller spaces. Popular choices include Roma, Celebrity, and Better Bush. Indeterminate varieties, which grow continuously throughout the season, can also be used, but they will require more pruning and support. If you’re using indeterminate varieties, be sure to choose a sturdy support system and prune regularly to maintain airflow and prevent overcrowding. Ultimately, the best tomato variety depends on your personal preference and growing conditions. Consider factors like disease resistance, fruit size, and flavor when making your selection.
How often should I water my tomato plants using this method?
Watering frequency depends on several factors, including the weather, the size of your container, and the type of soil you’re using. As a general rule, water deeply whenever the top inch of soil feels dry to the touch. During hot, dry weather, you may need to water daily, while during cooler, wetter periods, you may only need to water every few days. Avoid overwatering, as this can lead to root rot. A good way to check if your plants need water is to stick your finger into the soil. If the soil feels dry an inch or two below the surface, it’s time to water. When you water, water deeply, allowing the water to soak down to the roots. Avoid watering the foliage, as this can encourage fungal diseases.
What kind of fertilizer should I use for my tomato plants?
Tomatoes are heavy feeders, so regular fertilization is essential for healthy growth and abundant fruit production. A balanced fertilizer with an NPK ratio of 10-10-10 or 5-10-5 is a good starting point. You can also use a fertilizer specifically formulated for tomatoes. Apply fertilizer according to the package directions, typically every 2-3 weeks. In addition to granular fertilizer, you can also use liquid fertilizers or compost tea to provide your plants with a boost of nutrients. Organic fertilizers, such as compost and worm castings, are also excellent choices. Avoid over-fertilizing, as this can lead to excessive foliage growth and reduced fruit production.
How do I deal with pests and diseases on my tomato plants?
Prevention is key when it comes to pests and diseases. Start by choosing disease-resistant tomato varieties. Ensure good air circulation around your plants by spacing them properly and pruning regularly. Monitor your plants regularly for signs of pests or diseases. Common tomato pests include aphids, whiteflies, and tomato hornworms. These can be controlled with insecticidal soap, neem oil, or handpicking. Common tomato diseases include early blight, late blight, and blossom end rot. These can be prevented by using disease-resistant varieties, providing good air circulation, and avoiding overhead watering. If you do encounter pests or diseases, treat them promptly with appropriate organic or chemical controls.
Can I grow tomatoes indoors using this beginner tomato growing shortcut?
Yes, you can grow tomatoes indoors using this method, but you’ll need to provide adequate light. Tomatoes require at least 6-8 hours of direct sunlight per day. If you don’t have a sunny window, you’ll need to supplement with grow lights. Choose a grow light that emits a full spectrum of light. You’ll also need to pollinate your tomato flowers manually, as there won’t be any bees or other pollinators indoors. You can do this by gently shaking the plants or using a small paintbrush to transfer pollen from one flower to another. Indoor tomato growing can be a bit more challenging than outdoor growing, but it’s definitely possible with the right conditions and care.
What is blossom end rot and how do I prevent it?
Blossom end rot is a common problem in tomatoes, characterized by a dark, leathery spot on the bottom of the fruit. It’s caused by a calcium deficiency, which can be due to inconsistent watering, poor soil drainage, or a lack of calcium in the soil. To prevent blossom end rot, ensure consistent watering, especially during fruit development. Amend your soil with calcium-rich amendments, such as bone meal or crushed eggshells. Avoid over-fertilizing with nitrogen, as this can interfere with calcium uptake. If you’re growing tomatoes in containers, use a potting mix that contains calcium.
How do I know when my tomatoes are ripe?
The best way to tell if a tomato is ripe is by its color and firmness. Ripe tomatoes will be fully colored and slightly soft to the touch. The exact color will depend on the variety of tomato. Gently squeeze the tomato; it should give slightly but not be mushy. Ripe tomatoes will also have a characteristic aroma. The stem should easily detach from the vine when the tomato is ripe. Avoid picking tomatoes that are still green or hard, as they won’t ripen properly off the vine.
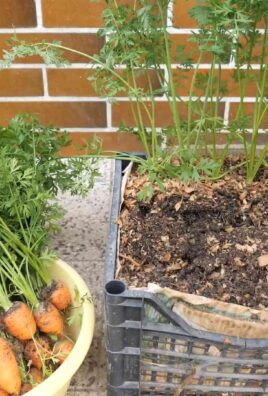
Can I use this method for other vegetables besides tomatoes?
While this method is specifically tailored for tomatoes, the principles can be applied to other vegetables as well. The key is to choose varieties that are well-suited to container growing and require similar growing conditions. Peppers, eggplants, and herbs are all good candidates for this method. Just be sure to research the specific needs of each vegetable and adjust your watering, fertilizing, and pruning accordingly.


Leave a Comment