

Bottle gardening mustard greens: sounds intriguing, right? I know, it might seem a little unconventional, but trust me, this DIY project is a game-changer for anyone looking to enjoy fresh, peppery mustard greens, even with limited space or a tight budget. Forget those expensive grocery store greens that wilt before you can even use them!
Mustard greens have a rich history, cultivated for centuries across Asia and Europe, not just for their culinary uses but also for their medicinal properties. They were a staple in many cultures, providing essential vitamins and minerals, especially during colder months. Now, you can bring that tradition into your own home, no matter how small your living space is.
Why should you try this bottle gardening trick? Well, think about it: fresh, organic mustard greens at your fingertips, grown sustainably in recycled bottles! It’s a fantastic way to reduce waste, learn about plant life, and enjoy delicious, healthy food. Plus, it’s incredibly rewarding to watch your little bottle garden thrive. I’m going to show you how to easily create your own thriving bottle gardening mustard greens setup, step-by-step. Get ready to unleash your inner gardener and enjoy the freshest mustard greens you’ve ever tasted!
Senfgrün im Flaschengarten: Dein DIY-Projekt für frische Blätter
Hey Gartenfreunde! Habt ihr Lust auf knackig-frische Senfblätter direkt aus eurer Küche? Dann ist dieser DIY-Flaschengarten genau das Richtige für euch. Es ist super einfach, platzsparend und eine tolle Möglichkeit, auch ohne Garten frisches Grün zu ziehen. Ich zeige euch, wie ihr aus einer einfachen Plastikflasche einen kleinen Senfgrün-Paradies zaubert. Los geht’s!
Was du brauchst:
* Eine leere Plastikflasche (am besten eine 1,5- oder 2-Liter-Flasche)
* Ein scharfes Messer oder eine Schere
* Erde (am besten Anzuchterde oder Kräutererde)
* Senfgrün-Samen
* Wasser
* Optional: Sprühflasche
* Optional: Kleine Steine oder Kies für die Drainage
Schritt-für-Schritt-Anleitung:
1. Die Flasche vorbereiten: Zuerst reinige ich die Plastikflasche gründlich mit warmem Wasser und Spülmittel. Achte darauf, dass keine Rückstände mehr vorhanden sind. Dann lasse ich sie gut trocknen.
2. Die Flasche zuschneiden: Jetzt kommt der knifflige Teil. Mit dem Messer oder der Schere schneide ich die Flasche in zwei Teile. Wo genau du schneidest, hängt davon ab, wie hoch dein Flaschengarten werden soll. Ich empfehle, die Flasche etwa ein Drittel vom Flaschenhals entfernt zu teilen. So hast du genug Platz für die Erde und die Pflanzen. Achtung: Sei vorsichtig beim Schneiden, um dich nicht zu verletzen!
3. Drainage schaffen (optional): Um Staunässe zu vermeiden, gebe ich eine Schicht kleine Steine oder Kies in den unteren Teil der Flasche. Das sorgt dafür, dass überschüssiges Wasser ablaufen kann und die Wurzeln nicht faulen. Das ist besonders wichtig, wenn du keine Löcher in den Boden der Flasche bohrst.
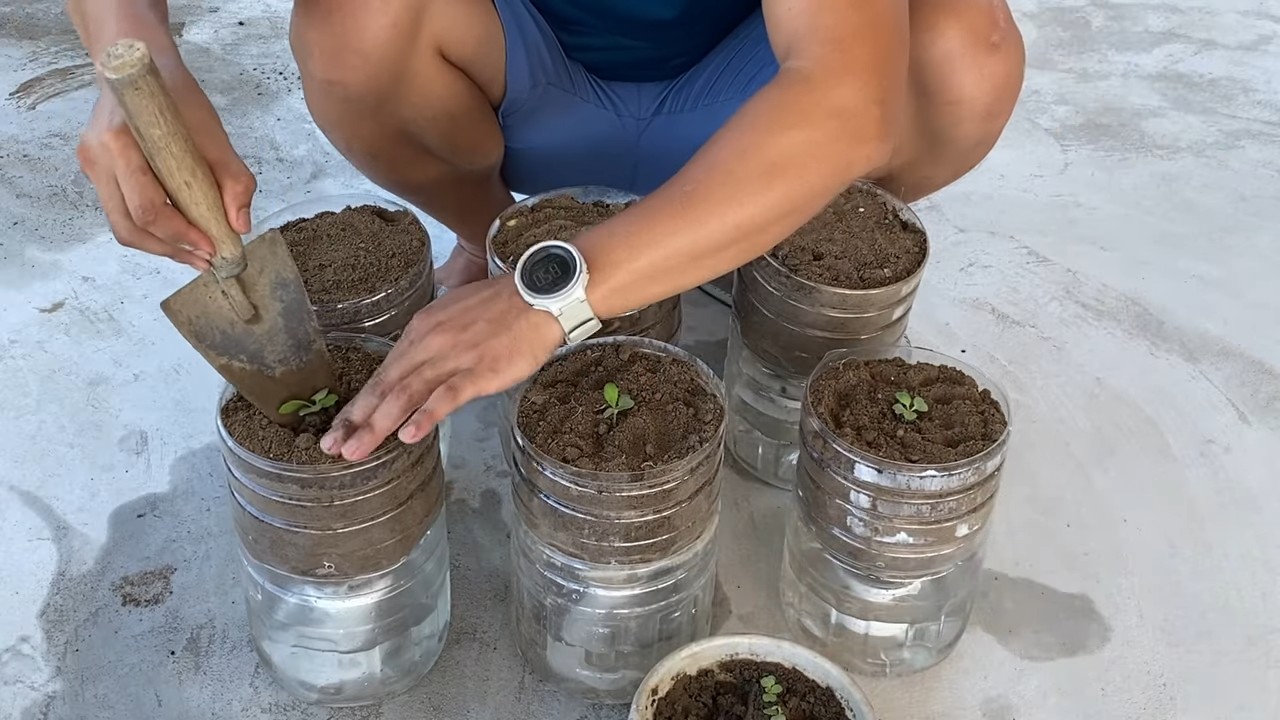
4. Erde einfüllen: Nun fülle ich den oberen Teil der Flasche mit Erde. Ich verwende am liebsten Anzuchterde, da sie besonders locker und nährstoffreich ist. Du kannst aber auch Kräutererde oder eine Mischung aus beidem verwenden. Achte darauf, dass die Erde nicht zu fest angedrückt wird, damit die Wurzeln später gut wachsen können. Ich lasse etwa 2-3 cm Platz bis zum Rand der Flasche.
5. Samen aussäen: Jetzt kommen die Senfgrün-Samen ins Spiel! Ich verteile sie gleichmäßig auf der Erde. Senfgrün ist ein Lichtkeimer, das bedeutet, die Samen brauchen Licht zum Keimen. Deshalb bedecke ich sie nur ganz leicht mit einer dünnen Schicht Erde oder drücke sie einfach nur leicht an.
6. Angießen: Nach dem Aussäen gieße ich die Erde vorsichtig an. Am besten verwende ich dafür eine Sprühflasche, damit die Samen nicht weggeschwemmt werden. Die Erde sollte gut durchfeuchtet sein, aber nicht triefend nass sein.
7. Flaschenteile zusammenfügen: Jetzt setze ich den oberen Teil der Flasche (mit der Erde und den Samen) verkehrt herum in den unteren Teil der Flasche. So entsteht ein Mini-Gewächshaus. Der untere Teil dient als Wasserreservoir.
8. Standort wählen: Ich stelle meinen Flaschengarten an einen hellen, aber nicht zu sonnigen Ort. Ein Fensterbrett ist ideal. Direkte Mittagssonne kann die zarten Keimlinge verbrennen.
9. Pflege: In den nächsten Tagen achte ich darauf, dass die Erde immer feucht bleibt. Ich sprühe sie bei Bedarf mit Wasser ein. Wenn sich Kondenswasser an den Wänden der Flasche bildet, ist das ein gutes Zeichen. Das bedeutet, dass die Luftfeuchtigkeit hoch genug ist. Wenn es zu viel Kondenswasser ist, lüfte ich den Flaschengarten kurz, indem ich den oberen Teil der Flasche abnehme.
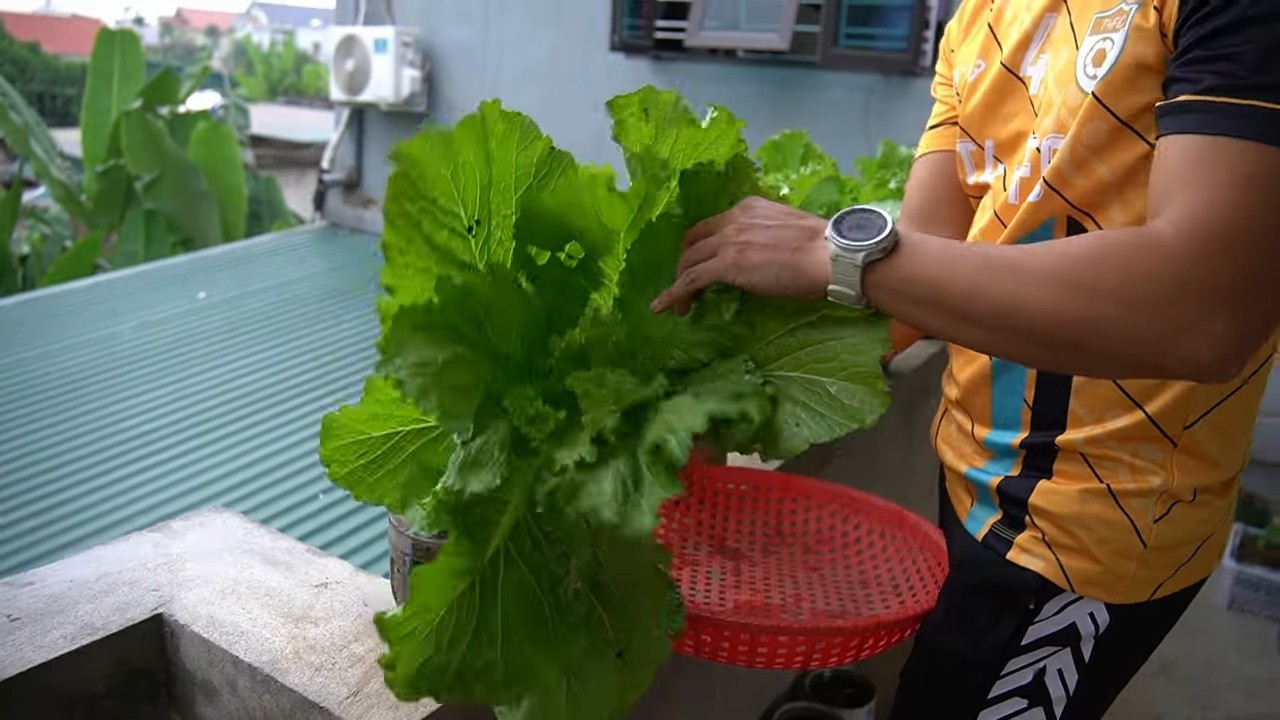
10. Ernten: Nach etwa 1-2 Wochen kannst du die ersten Senfblätter ernten. Schneide sie einfach mit einer Schere ab. Die Pflanze wird weiterwachsen und neue Blätter bilden. So kannst du über mehrere Wochen frisches Senfgrün ernten.
Tipps und Tricks für deinen Senfgrün-Flaschengarten:
* Belüftung: Um Schimmelbildung zu vermeiden, solltest du deinen Flaschengarten regelmäßig lüften. Nimm dazu einfach den oberen Teil der Flasche ab und lasse ihn für ein paar Stunden offen stehen.
* Düngen: Senfgrün ist nicht sehr anspruchsvoll, aber wenn du möchtest, kannst du es ab und zu mit einem milden Flüssigdünger düngen.
* Schneiden: Durch regelmäßiges Schneiden förderst du das Wachstum der Pflanze und verhinderst, dass sie zu lang und dünn wird.
* Sortenvielfalt: Es gibt verschiedene Senfgrün-Sorten mit unterschiedlichen Geschmacksrichtungen und Blattfarben. Probiere einfach verschiedene Sorten aus, um deinen Favoriten zu finden.
* Upcycling: Du kannst auch andere Plastikbehälter für deinen Flaschengarten verwenden, z.B. Joghurtbecher oder Eisdosen. Achte aber darauf, dass sie sauber und lebensmittelecht sind.
Häufige Probleme und Lösungen:
* Schimmelbildung: Wenn sich Schimmel im Flaschengarten bildet, ist die Luftfeuchtigkeit zu hoch. Lüfte den Flaschengarten regelmäßig und entferne befallene Blätter.
* Gelbe Blätter: Gelbe Blätter können ein Zeichen für Nährstoffmangel oder zu viel Wasser sein. Dünge die Pflanze oder reduziere die Wassermenge.
* Langsames Wachstum: Wenn das Senfgrün langsam wächst, kann das an zu wenig Licht liegen. Stelle den Flaschengarten an einen helleren Ort.
* Trauermücken: Trauermücken sind kleine, schwarze Fliegen, die sich gerne in feuchter Erde aufhalten. Du kannst sie mit Gelbtafeln oder Nematoden bekämpfen.
Senfgrün ernten und verwenden:
Senfgrün ist super vielseitig und schmeckt leicht scharf und würzig. Ich liebe es, es in Salaten, Suppen oder Smoothies zu verwenden. Du kannst es aber auch als Topping für Sandwiches oder als Beilage zu Fleisch- und Fischgerichten verwenden. Die jungen Blätter sind am zartesten und haben den mildesten Geschmack. Ältere Blätter können etwas schärfer sein.
Hier sind ein paar Ideen, wie du dein selbstgezogenes Senfgrün verwenden kannst:
* Salat: Mische Senfgrün mit anderen Blattsalaten, Tomaten, Gurken und einem leckeren Dressing.
* Suppe: Gib kurz vor dem Servieren eine Handvoll Senfgrün in deine Suppe.
* Smoothie: Mixe Senfgrün mit Obst, Gemüse und Joghurt zu einem gesunden Smoothie.
* Sandwich: Belege dein Sandwich mit Senfgrün, Käse, Wurst oder Gemüse.
* Beilage: Serviere Senfgrün als Beilage zu gegrilltem Fleisch oder Fisch.
Warum Senfgrün so gesund ist:
Senfgrün ist nicht nur lecker, sondern auch super gesund. Es ist reich an Vitaminen, Mineralstoffen und Antioxidantien. Besonders hervorzuheben ist der hohe Gehalt an Vitamin K, Vitamin C und Beta-Carotin. Außerdem enthält Senfgrün Senfölglykoside, die entzündungshemmend und antibakteriell wirken können.
Fazit:
Mit diesem DIY-Flaschengarten kannst du ganz einfach und platzsparend frisches Senfgrün zu Hause ziehen. Es ist ein tolles Projekt für Anfänger und eine super Möglichkeit, auch ohne Garten frisches Grün zu genießen. Probiert es aus und lasst es euch schmecken! Ich hoffe, meine Anleitung hat euch gefallen und ihr habt viel Spaß beim Gärtnern!
Conclusion
So, there you have it! Transforming a simple plastic bottle into a thriving mini-garden for mustard greens is not just a fun project; it’s a sustainable, space-saving, and incredibly rewarding way to enjoy fresh, peppery greens right at your fingertips. We’ve walked you through the process, highlighting the ease and accessibility of this DIY trick. But why is this a must-try?
Firstly, it’s about reclaiming and repurposing. In a world grappling with plastic waste, finding creative ways to reuse these materials is crucial. This bottle gardening method gives those discarded bottles a new lease on life, turning potential pollutants into productive planters. Secondly, it democratizes gardening. You don’t need a sprawling backyard or expensive equipment to grow your own food. This method is perfect for apartment dwellers, urban gardeners, or anyone with limited space. Imagine the satisfaction of snipping fresh mustard greens for your salad, knowing you grew them yourself in a recycled bottle!
Thirdly, it’s incredibly cost-effective. Once you have the initial bottle, the other materials – soil, seeds, and water – are relatively inexpensive. Compared to buying pre-packaged mustard greens at the grocery store, you’ll save money in the long run. Plus, you’ll have the added benefit of knowing exactly where your food comes from and how it was grown – no pesticides, no hidden ingredients, just pure, fresh goodness.
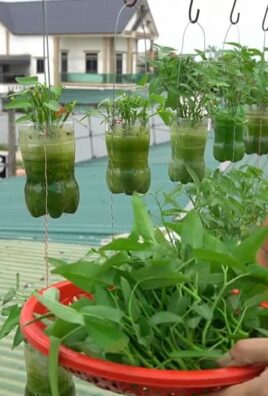
But the beauty of this DIY project lies in its adaptability. Feel free to experiment with different types of bottles. Larger bottles can accommodate more plants, while smaller bottles are perfect for individual servings. You can also get creative with the design. Paint the bottles, decorate them with stencils, or even create a vertical garden by hanging multiple bottles together.
Consider these variations to elevate your bottle gardening experience:
* Spicy Mustard Greens Mix: Combine different varieties of mustard green seeds, such as Red Giant, Green Wave, and Southern Giant Curled, for a diverse flavor profile.
* Companion Planting: Plant small herbs like chives or parsley alongside your mustard greens to deter pests and enhance the flavor.
* Hydroponic Bottle Garden: Explore a soil-less version by using a nutrient-rich water solution instead of soil. This requires a bit more monitoring but can yield impressive results.
* Indoor Lighting: If you don’t have a sunny windowsill, supplement with a grow light to ensure your mustard greens receive adequate light.
We strongly encourage you to give this bottle gardening method a try. It’s a simple, sustainable, and satisfying way to connect with nature and enjoy fresh, homegrown mustard greens. Don’t be afraid to experiment, adapt the method to your own needs and preferences, and most importantly, have fun!
Once you’ve created your own bottle garden, we’d love to hear about your experience. Share your photos, tips, and challenges in the comments below. Let’s build a community of bottle gardeners and inspire others to embrace this eco-friendly and rewarding hobby. What are you waiting for? Grab a bottle, some seeds, and get growing! Let us know how your **bottle gardening** project turns out!
Frequently Asked Questions (FAQ)
What kind of plastic bottle is best for bottle gardening mustard greens?
Ideally, you should use food-grade plastic bottles, such as those that previously contained water, juice, or soda. These are generally made from PET (polyethylene terephthalate) or HDPE (high-density polyethylene), which are considered safe for growing food. Avoid using bottles that contained harsh chemicals or cleaning products, as these may leach into the soil and contaminate your plants. Thoroughly wash and rinse the bottle before using it for planting. The size of the bottle depends on how many mustard greens you want to grow. A 2-liter bottle is a good starting point.
How much sunlight do mustard greens need when grown in a bottle?
Mustard greens thrive in full sun, which means they need at least 6 hours of direct sunlight per day. If you’re growing them indoors, place the bottle garden near a sunny windowsill that receives ample sunlight. If you don’t have enough natural light, consider using a grow light to supplement. Position the grow light about 6-12 inches above the plants and keep it on for 12-16 hours per day. Insufficient light can lead to leggy growth and reduced yields.
What type of soil is recommended for growing mustard greens in a bottle?
A well-draining potting mix is essential for growing healthy mustard greens in a bottle. Avoid using garden soil, as it can be too heavy and compact, leading to poor drainage and root rot. A good potting mix should contain a blend of peat moss, perlite, and vermiculite. You can also add some compost to provide extra nutrients. Ensure the soil is loose and airy to allow for proper root development. You can also consider using a soilless mix like coco coir.
How often should I water my bottle garden mustard greens?
The frequency of watering depends on several factors, including the size of the bottle, the type of soil, the temperature, and the humidity. Generally, you should water your mustard greens when the top inch of soil feels dry to the touch. Avoid overwatering, as this can lead to root rot. When watering, make sure to saturate the soil evenly, allowing excess water to drain out of the drainage holes. Check the soil moisture regularly and adjust the watering schedule accordingly.
How do I prevent pests and diseases in my bottle garden?
Prevention is key when it comes to pests and diseases. Start by using clean soil and seeds. Regularly inspect your plants for any signs of pests or diseases, such as aphids, whiteflies, or powdery mildew. If you spot any problems, address them promptly. You can use organic pest control methods, such as insecticidal soap or neem oil, to control pests. Ensure good air circulation around the plants to prevent fungal diseases. Remove any dead or decaying leaves to prevent the spread of disease.
How long does it take for mustard greens to grow in a bottle garden?
Mustard greens are relatively fast-growing and can be harvested in as little as 3-4 weeks after planting. The exact time depends on the variety of mustard greens, the growing conditions, and your desired size. You can start harvesting the outer leaves when they are about 4-6 inches long. Continue harvesting as needed, allowing the inner leaves to continue growing. Regular harvesting encourages continued growth and prolongs the harvest period.
Can I grow other vegetables or herbs in a bottle garden besides mustard greens?
Yes, you can grow a variety of other vegetables and herbs in a bottle garden, depending on the size of the bottle and the growing conditions. Some good options include lettuce, spinach, kale, arugula, chives, parsley, and basil. Choose plants that have shallow root systems and don’t require a lot of space. Consider the light and water requirements of each plant and group them accordingly.
How do I fertilize my bottle garden mustard greens?
Mustard greens benefit from regular fertilization, especially when grown in a bottle where nutrients can be limited. Use a balanced liquid fertilizer, such as a 10-10-10 or 20-20-20, diluted to half strength. Fertilize every 2-3 weeks, following the instructions on the fertilizer label. You can also use organic fertilizers, such as compost tea or fish emulsion. Avoid over-fertilizing, as this can lead to excessive growth and nutrient imbalances.
What do I do with the bottle garden when the mustard greens are finished growing?
Once the mustard greens have finished growing and you’ve harvested all the leaves, you have several options. You can compost the soil and plant remains. You can also reuse the bottle for another planting of mustard greens or other vegetables or herbs. Alternatively, you can recycle the bottle if it’s no longer needed. Remember to clean the bottle thoroughly before reusing it to prevent the spread of diseases.
Leave a Comment