

Grow Cucumbers Fast and enjoy the crisp, refreshing taste of homegrown goodness sooner than you ever thought possible! Imagine biting into a juicy cucumber, bursting with flavor, just weeks after planting. Sounds like a dream? It doesn’t have to be! This article is your ultimate guide to unlocking the secrets of rapid cucumber cultivation, transforming your garden into a cucumber paradise in record time.
Cucumbers have a rich history, dating back thousands of years to ancient India. They’ve been cultivated and enjoyed across cultures, from the Romans to the Chinese, prized for their refreshing qualities and versatility. But let’s face it, waiting for those first cucumbers to appear can feel like an eternity. That’s where these DIY tricks and hacks come in!
In today’s busy world, who has time to wait? We all crave instant gratification, and gardening is no exception. Whether you’re a seasoned gardener or just starting out, these simple yet effective techniques will help you grow cucumbers fast, maximizing your yield and minimizing your wait time. From soil preparation to clever watering strategies, I’ll share my favorite tips and tricks to get you harvesting those delicious cucumbers in no time. Get ready to impress your friends and family with your green thumb and enjoy a summer filled with fresh, homegrown cucumbers!
Gurken-Turbo: So bringst du deine Gurken zum Wachstums-Marathon!
Hey Gartenfreunde! Ich liebe Gurken, und ich liebe es noch mehr, wenn ich sie nicht erst im Hochsommer ernten kann, sondern schon viel früher. Deshalb zeige ich euch heute meine bewährten Tricks, mit denen ihr eure Gurkenpflanzen so richtig auf Touren bringt und eine frühe und reiche Ernte einfahrt. Keine Angst, es ist einfacher als ihr denkt!
Die Vorbereitung ist das A und O
Bevor wir loslegen, müssen wir sicherstellen, dass unsere Gurken den bestmöglichen Start haben. Das fängt schon bei der Auswahl der Sorte an.
* Frühreife Sorten wählen: Achtet beim Kauf auf Sortenbezeichnungen wie “Frühe Ernte”, “Mini-Gurke” oder “Gewächshausgurke”. Diese sind speziell darauf gezüchtet, schneller zu wachsen und früher Früchte zu tragen. Ich persönlich schwöre auf ‘Marketmore 76’ oder ‘Beth Alpha’.
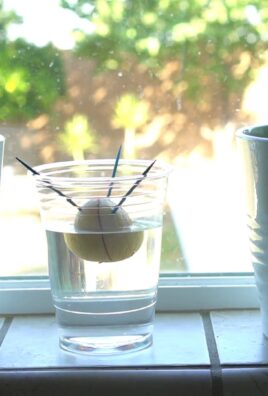
* Vorkultur im Haus: Das ist mein absoluter Geheimtipp! Gurken sind frostempfindlich, deshalb säe ich sie nicht direkt ins Freiland. Stattdessen ziehe ich sie ab April im Haus vor.
* Das richtige Substrat: Verwendet Anzuchterde. Sie ist nährstoffarm und verhindert, dass die jungen Pflänzchen “verfetten”. Ich mische sie gerne noch mit etwas Kokosfaser, das macht sie schön locker.
* Die passenden Töpfe: Nehmt am besten kleine Töpfe mit einem Durchmesser von etwa 8-10 cm. So haben die Wurzeln genug Platz, sich zu entwickeln.
* Der perfekte Standort: Stellt die Töpfe an einen hellen und warmen Ort. Ein Südfenster ist ideal.
Schritt-für-Schritt-Anleitung zur Vorkultur
1. Töpfe vorbereiten: Füllt die Töpfe mit Anzuchterde und drückt sie leicht an.
2. Aussaat: Legt pro Topf 1-2 Gurkensamen etwa 1-2 cm tief in die Erde.
3. Angießen: Gießt die Erde vorsichtig an, sodass sie gut durchfeuchtet ist. Vermeidet Staunässe!
4. Warm und hell stellen: Stellt die Töpfe an einen warmen und hellen Ort. Die ideale Keimtemperatur liegt bei 20-25°C.
5. Feucht halten: Haltet die Erde gleichmäßig feucht, aber nicht nass.
6. Geduld haben: Nach etwa 5-10 Tagen sollten die ersten Keimlinge zu sehen sein.
7. Pikieren (optional): Wenn ihr zwei Samen pro Topf gesät habt und beide aufgegangen sind, könnt ihr den schwächeren Keimling entfernen oder ihn in einen eigenen Topf pikieren.
Die Umzug ins Freie: Abhärtung und Pflanzung
Nach etwa 3-4 Wochen, wenn die Gurkenpflanzen kräftig genug sind (etwa 15-20 cm hoch und mit 3-4 echten Blättern), können sie ins Freiland umziehen. Aber Achtung, nicht überstürzen!
* Abhärten: Bevor ihr die Pflanzen ins Freiland setzt, müsst ihr sie langsam an die neuen Bedingungen gewöhnen. Stellt sie dazu tagsüber für ein paar Stunden ins Freie (an einen geschützten Ort) und holt sie abends wieder rein. Steigert die Zeit im Freien jeden Tag, bis sie schließlich die ganze Nacht draußen bleiben können. Das härtet die Pflanzen ab und verhindert einen Schock beim Auspflanzen.
* Der richtige Zeitpunkt: Wartet mit dem Auspflanzen, bis keine Frostgefahr mehr besteht. Das ist in der Regel Mitte Mai, nach den Eisheiligen.
* Der ideale Standort: Gurken lieben die Sonne! Wählt einen sonnigen und windgeschützten Standort. Der Boden sollte locker, humos und nährstoffreich sein.
* Boden vorbereiten: Lockert den Boden gut auf und reichert ihn mit Kompost oder gut verrottetem Mist an. Das sorgt für eine gute Nährstoffversorgung.
* Pflanzabstand: Haltet einen Pflanzabstand von etwa 50-60 cm zwischen den Pflanzen ein.
* Rankhilfe: Gurken sind Kletterpflanzen und brauchen eine Rankhilfe. Ihr könnt ein Rankgitter, einen Zaun oder einfach nur Stäbe verwenden.
Schritt-für-Schritt-Anleitung zum Auspflanzen
1. Pflanzlöcher ausheben: Grabt Pflanzlöcher, die etwas größer sind als die Wurzelballen der Gurkenpflanzen.
2. Pflanzen einsetzen: Setzt die Gurkenpflanzen vorsichtig in die Pflanzlöcher. Achtet darauf, dass der Wurzelballen nicht beschädigt wird.
3. Mit Erde auffüllen: Füllt die Pflanzlöcher mit Erde auf und drückt sie leicht an.
4. Angießen: Gießt die Pflanzen gründlich an.
5. Mulchen: Mulcht den Boden um die Pflanzen herum mit Stroh oder Rasenschnitt. Das hält den Boden feucht und unterdrückt Unkraut.
6. Rankhilfe anbringen: Bringt die Rankhilfe an und leitet die Gurkenpflanzen daran entlang.
Die Wachstums-Booster: Pflege für eine reiche Ernte
Jetzt, wo unsere Gurken im Freiland stehen, geht es darum, sie optimal zu pflegen, damit sie schnell wachsen und viele Früchte tragen.
* Regelmäßiges Gießen: Gurken brauchen viel Wasser, besonders während der Fruchtbildung. Gießt sie regelmäßig, am besten morgens oder abends, damit das Wasser nicht so schnell verdunstet. Vermeidet es, die Blätter zu gießen, da dies Pilzkrankheiten fördern kann.
* Düngen: Gurken sind Starkzehrer und brauchen regelmäßige Düngergaben. Verwendet einen organischen Gemüsedünger oder Komposttee. Ich dünge meine Gurken alle 2-3 Wochen.
* Ausgeizen: Entfernt regelmäßig die Seitentriebe, die aus den Blattachseln wachsen. Das fördert das Wachstum der Haupttriebe und die Fruchtbildung. Lasst aber ein paar Seitentriebe stehen, damit die Pflanze genügend Blätter hat, um Photosynthese zu betreiben.
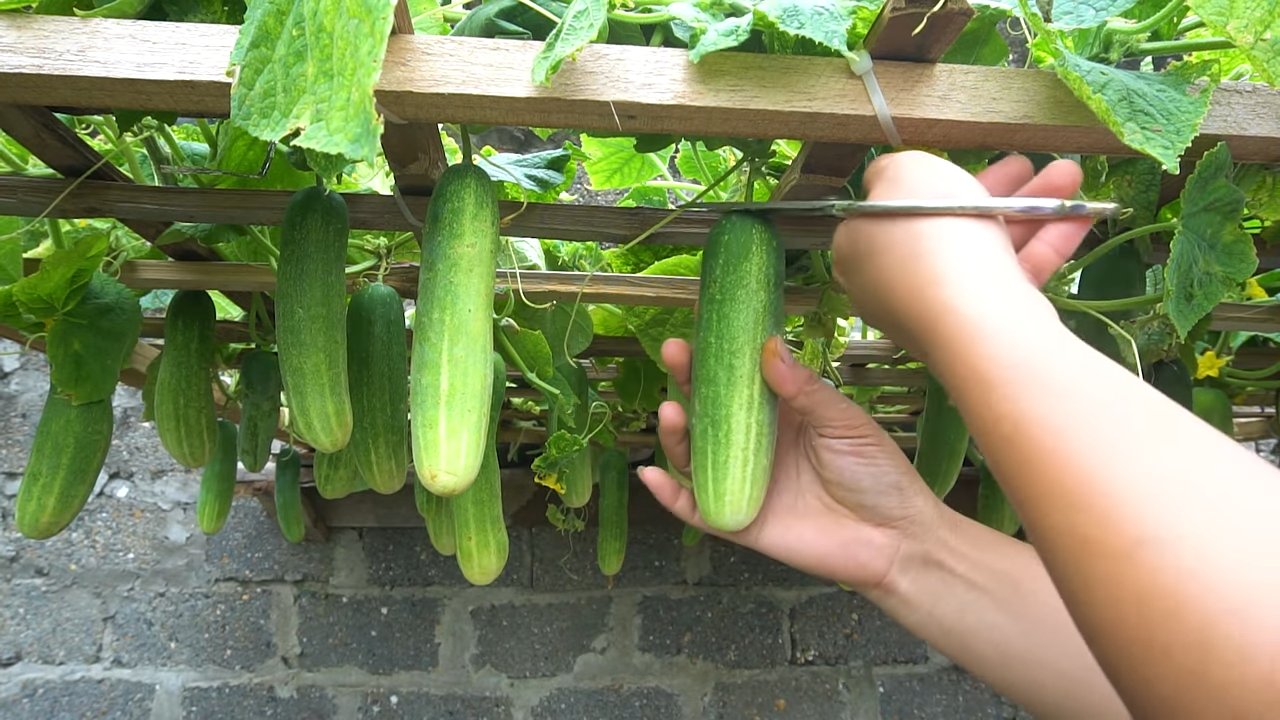
* Regelmäßige Ernte: Erntet die Gurken regelmäßig, sobald sie die gewünschte Größe erreicht haben. Das regt die Pflanze an, weitere Früchte zu bilden. Lasst die Gurken nicht zu groß werden, da sie sonst bitter werden können.
* Schutz vor Schädlingen und Krankheiten: Achtet auf Schädlinge wie Blattläuse oder Spinnmilben und bekämpft sie bei Bedarf mit natürlichen Mitteln. Auch Pilzkrankheiten wie Mehltau können auftreten. Sorgt für eine gute Belüftung der Pflanzen und entfernt befallene Blätter.
Spezial-Tipps für den Gurken-Turbo
* Schwarze Mulchfolie: Legt schwarze Mulchfolie um die Gurkenpflanzen. Die Folie erwärmt den Boden und speichert die Wärme, was das Wachstum beschleunigt.
* Vliesabdeckung: Decken Sie die Gurkenpflanzen in den ersten Wochen mit einem Vlies ab. Das schützt sie vor Kälte und Schädlingen.
* Gurken-Tee: Bereitet einen Gurken-Tee zu, indem ihr Gurkenschalen und -enden in Wasser kocht. Lasst den Tee abkühlen und gießt damit die Gurkenpflanzen. Der Tee enthält wertvolle Nährstoffe, die das Wachstum fördern.
* Bienenfreundliche Pflanzen: Pflanzt bienenfreundliche Pflanzen in der Nähe der Gurken. Bienen bestäuben die Gurkenblüten und sorgen für eine bessere Fruchtbildung.
* Regelmäßige Kontrolle: Kontrolliert die Gurkenpflanzen regelmäßig auf Schädlinge und Krankheiten. Je früher ihr Probleme erkennt, desto besser könnt ihr sie bekämpfen.
Zusätzliche Tricks für noch mehr Erfolg
* Bewässerungssystem: Ein automatisches Bewässerungssystem spart Zeit und sorgt für eine gleichmäßige Bewässerung.
* Hochbeet: Ein Hochbeet erwärmt sich schneller als der normale Gartenboden und bietet den Gurken optimale Bedingungen.
* Gewächshaus: Im Gewächshaus können Gurken noch früher ausgesät und geerntet werden.
Mit diesen Tipps und Tricks steht einer frühen und reichen Gur
Conclusion
So, there you have it! Unlocking the secret to growing cucumbers fast isn’t about magic; it’s about understanding their needs and providing the right environment. This DIY trick, focusing on strategic soil preparation, consistent watering, and optimal sunlight exposure, is a game-changer for any gardener, regardless of experience level. It’s more than just a method; it’s an investment in your garden’s bounty and your own satisfaction.
Why is this a must-try? Because it works! Imagine harvesting crisp, juicy cucumbers weeks earlier than you ever thought possible. Think of the fresh salads, the tangy pickles, and the sheer joy of sharing your homegrown produce with friends and family. This method minimizes the risk of common cucumber ailments, promotes vigorous growth, and ultimately, maximizes your yield. It’s a simple, cost-effective way to transform your cucumber patch from a struggling plot to a thriving oasis.
But don’t stop there! Experiment with different variations to tailor the technique to your specific climate and garden conditions. Try adding compost tea to your watering routine for an extra boost of nutrients. Consider using companion planting, such as marigolds or nasturtiums, to deter pests naturally. Explore different cucumber varieties to find the ones that thrive best in your area. The possibilities are endless!
We’ve shared our secrets to help you grow cucumbers fast, and now we want to hear from you. Give this DIY trick a try and share your results in the comments below. Let us know what worked, what didn’t, and any modifications you made along the way. Your experiences will not only inspire other gardeners but also help us refine and improve this method even further. Gardening is a collaborative effort, and we’re all in this together. So, grab your gardening gloves, get your hands dirty, and prepare to be amazed by the abundance of your cucumber harvest! We are confident that with a little effort and this simple trick, you’ll be enjoying delicious, homegrown cucumbers in no time. Happy gardening!
Frequently Asked Questions (FAQ)
Q: How long does it typically take to grow cucumbers using this method?
A: While the exact timeframe can vary depending on your climate, cucumber variety, and specific growing conditions, this method aims to significantly accelerate the process. Typically, you can expect to harvest cucumbers within 50-60 days from planting the seeds or transplanting seedlings. This is often weeks faster than traditional methods that don’t focus on optimizing soil, water, and sunlight. The key is consistent care and attention to detail throughout the growing season. Remember to monitor your plants regularly and adjust your approach as needed.
Q: What type of soil is best for growing cucumbers fast?
A: Cucumbers thrive in well-drained, fertile soil that is rich in organic matter. A slightly acidic to neutral pH (between 6.0 and 7.0) is ideal. Before planting, amend your soil with plenty of compost, well-rotted manure, or other organic materials to improve drainage, aeration, and nutrient content. Avoid heavy clay soils, as they can become waterlogged and hinder root development. If you have clay soil, consider growing your cucumbers in raised beds or containers filled with a suitable potting mix. A good soil mix should retain moisture but also drain well to prevent root rot.
Q: How often should I water my cucumber plants?
A: Consistent watering is crucial for growing cucumbers fast. Aim to keep the soil consistently moist, but not waterlogged. Water deeply and regularly, especially during hot, dry weather. A good rule of thumb is to water when the top inch of soil feels dry to the touch. Avoid overhead watering, as this can promote fungal diseases. Instead, water at the base of the plants, using a soaker hose or drip irrigation system. Mulching around the plants can also help retain moisture and suppress weeds. During periods of heavy rain, you may need to reduce watering to prevent overwatering.
Q: How much sunlight do cucumbers need to grow fast?
A: Cucumbers are sun-loving plants and require at least 6-8 hours of direct sunlight per day to grow fast and produce abundant fruit. Choose a planting location that receives full sun throughout the day. If you live in a particularly hot climate, some afternoon shade may be beneficial to prevent the plants from overheating. Insufficient sunlight can lead to stunted growth, reduced fruit production, and increased susceptibility to diseases. If you don’t have a sunny spot in your garden, consider using grow lights to supplement the natural sunlight.
Q: What are some common pests and diseases that affect cucumbers, and how can I prevent them?
A: Cucumbers are susceptible to several pests and diseases, including aphids, cucumber beetles, squash bugs, powdery mildew, and downy mildew. To prevent these problems, practice good garden hygiene, such as removing plant debris and weeds regularly. Use insecticidal soap or neem oil to control aphids and other pests. Cover your plants with row covers to protect them from cucumber beetles and squash bugs. Ensure good air circulation around the plants to prevent fungal diseases. Water at the base of the plants to avoid wetting the foliage. If powdery mildew or downy mildew appears, treat it with a fungicide specifically labeled for use on cucumbers. Companion planting with marigolds or nasturtiums can also help deter pests naturally.
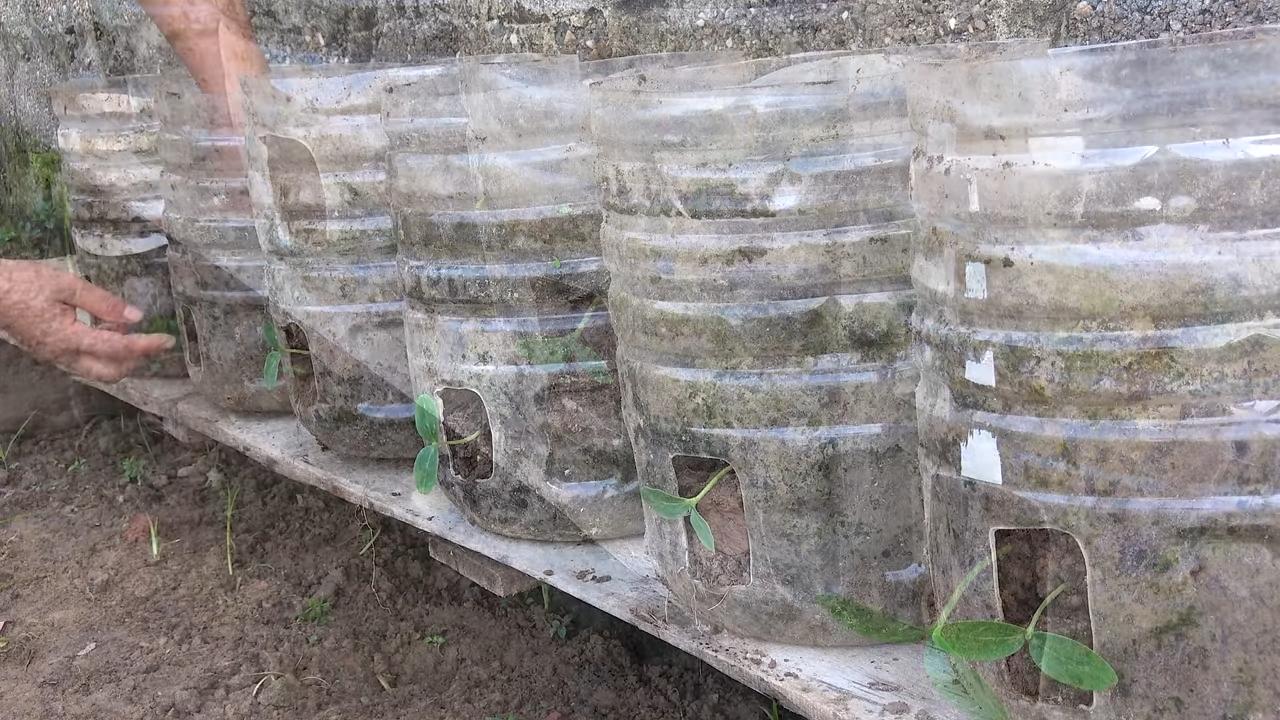
Q: Can I grow cucumbers in containers using this method?
A: Yes, absolutely! Growing cucumbers in containers is a great option, especially if you have limited garden space. Choose a large container (at least 5 gallons) with good drainage holes. Fill the container with a high-quality potting mix that is rich in organic matter. Follow the same watering and fertilizing guidelines as you would for cucumbers grown in the ground. Provide a trellis or other support for the vines to climb. Container-grown cucumbers may require more frequent watering and fertilizing than those grown in the ground, as the soil in containers tends to dry out more quickly.
Q: What are some good companion plants for cucumbers?
A: Companion planting can be a beneficial way to improve the health and productivity of your cucumber plants. Some good companion plants for cucumbers include:
* **Marigolds:** Deter pests such as nematodes and whiteflies.
* **Nasturtiums:** Attract aphids away from cucumber plants.
* **Dill:** Attract beneficial insects such as ladybugs and lacewings.
* **Radishes:** Repel cucumber beetles.
* **Beans:** Fix nitrogen in the soil, which benefits cucumber plants.
* **Corn:** Provides shade and support for cucumber vines.
Avoid planting cucumbers near aromatic herbs like sage, as they can inhibit cucumber growth.
Q: How do I know when my cucumbers are ready to harvest?
A: Cucumbers are typically ready to harvest when they are firm, green, and have reached the desired size for their variety. Check the seed packet or plant tag for specific size guidelines. Overripe cucumbers will turn yellow or orange and become seedy and bitter. Harvest cucumbers regularly to encourage continued production. Use a sharp knife or pruning shears to cut the cucumbers from the vine, leaving a short stem attached. Handle the cucumbers gently to avoid bruising them.
Q: What kind of fertilizer should I use to grow cucumbers fast?
A: Cucumbers are heavy feeders and benefit from regular fertilization. Start by amending your soil with compost or well-rotted manure before planting. During the growing season, fertilize your cucumber plants every 2-3 weeks with a balanced fertilizer (e.g., 10-10-10) or a fertilizer specifically formulated for vegetables. You can also use a liquid fertilizer, such as fish emulsion or seaweed extract, to provide a quick boost of nutrients. Avoid over-fertilizing, as this can lead to excessive foliage growth and reduced fruit production. Follow the instructions on the fertilizer label carefully.


Leave a Comment