

Growing Watermelon at Home might seem like a summer dream reserved for sprawling farms, but I’m here to tell you it’s totally achievable, even in a small backyard or container garden! Forget those grocery store watermelons that lack that vine-ripened sweetness; imagine biting into a juicy, homegrown watermelon bursting with flavor, knowing you nurtured it from seed to fruit.
Watermelons have a rich history, dating back thousands of years to Africa, where they were initially cultivated for their water content. Over time, they spread across the globe, becoming a symbol of summer refreshment and community gatherings. Think about those classic picnic scenes – what’s missing without a big, red watermelon?
But let’s be honest, the thought of growing watermelon at home can be intimidating. Where do you even start? That’s where this DIY guide comes in! I’ll share my tried-and-true tricks and hacks to help you successfully cultivate these delicious fruits, regardless of your gardening experience. From choosing the right variety for your space to mastering the art of watering and fertilizing, I’ll break down the process into easy-to-follow steps. So, ditch the store-bought disappointment and get ready to enjoy the sweet taste of success with your very own homegrown watermelons!
Wassermelonen selbst anbauen: Dein ultimativer DIY-Guide für den Garten
Hey Gartenfreunde! Habt ihr euch jemals vorgestellt, eine saftige, selbst angebaute Wassermelone direkt aus eurem Garten zu ernten? Klingt traumhaft, oder? Ich zeige euch, wie ihr diesen Traum Wirklichkeit werden lassen könnt. Es ist einfacher, als ihr denkt, und mit ein wenig Geduld und den richtigen Tipps könnt auch ihr bald eure eigene Wassermelone genießen. Los geht’s!
Die Grundlagen: Was Wassermelonen lieben
Bevor wir ins Detail gehen, lasst uns kurz darüber sprechen, was Wassermelonen wirklich brauchen, um zu gedeihen.
* Sonne: Wassermelonen sind Sonnenanbeter. Sie brauchen mindestens 6-8 Stunden direkte Sonneneinstrahlung pro Tag.
* Wärme: Sie lieben warmes Wetter. Die Bodentemperatur sollte idealerweise zwischen 21°C und 32°C liegen.
* Wasser: Regelmäßige Bewässerung ist entscheidend, besonders während der Fruchtbildung.
* Nährstoffreicher Boden: Ein gut durchlässiger, nährstoffreicher Boden ist das A und O.
* Platz: Wassermelonenpflanzen brauchen viel Platz, da ihre Ranken sich weit ausbreiten.
Schritt-für-Schritt-Anleitung: Vom Samen zur saftigen Frucht
Hier ist eine detaillierte Anleitung, wie ihr eure eigenen Wassermelonen anbauen könnt. Ich habe den Prozess in verschiedene Phasen unterteilt, um es euch so einfach wie möglich zu machen.
Phase 1: Die Vorbereitung – Samen aussäen und vorziehen
1. Samen auswählen: Zuerst müsst ihr euch für eine Wassermelonensorte entscheiden. Es gibt viele verschiedene Sorten, von kleinen, kernlosen Melonen bis hin zu riesigen, traditionellen Sorten. Informiert euch, welche Sorte am besten zu eurem Klima und eurem Garten passt. Ich persönlich mag die ‘Sugar Baby’ Sorte, da sie relativ klein ist und schnell reift.
2. Samen vorziehen (optional, aber empfohlen): Wassermelonen haben eine relativ lange Wachstumsperiode. Um einen Vorsprung zu haben, könnt ihr die Samen etwa 4-6 Wochen vor dem letzten Frost im Haus vorziehen.
* Materialien: Ihr benötigt kleine Anzuchttöpfe (ca. 8-10 cm Durchmesser), Anzuchterde und eine Sprühflasche.
* Aussaat: Füllt die Töpfe mit Anzuchterde und befeuchtet sie leicht. Legt 2-3 Samen pro Topf etwa 1-2 cm tief in die Erde.
* Befeuchten: Besprüht die Erde vorsichtig mit Wasser, um sie feucht zu halten.
* Wärme und Licht: Stellt die Töpfe an einen warmen Ort (idealerweise 24-27°C) und sorgt für ausreichend Licht. Ein beheiztes Anzuchtgewächshaus oder eine helle Fensterbank sind ideal.
* Keimung: Die Samen sollten innerhalb von 7-10 Tagen keimen. Sobald die Keimlinge erscheinen, entfernt ihr den schwächsten Keimling pro Topf.
3. Direktsaat (Alternative): Wenn ihr in einer Region mit langen, warmen Sommern lebt, könnt ihr die Samen auch direkt ins Freiland säen. Wartet, bis die Bodentemperatur mindestens 21°C erreicht hat.
* Vorbereitung: Lockert den Boden gut auf und entfernt Unkraut.
* Aussaat: Säet die Samen etwa 2-3 cm tief in den Boden. Achtet darauf, dass der Abstand zwischen den Samen etwa 60-90 cm beträgt.
* Befeuchten: Gießt die Samen vorsichtig an.
Phase 2: Auspflanzen und Standort vorbereiten
1. Standort auswählen: Wählt einen sonnigen Standort mit gut durchlässigem Boden. Wassermelonen brauchen viel Platz, also plant entsprechend.
2. Boden vorbereiten: Lockert den Boden gründlich auf und entfernt Unkraut. Mischt Kompost oder gut verrotteten Mist unter, um den Boden mit Nährstoffen anzureichern. Wassermelonen sind Starkzehrer, also brauchen sie eine gute Grundlage.
3. Auspflanzen: Sobald die Frostgefahr vorüber ist und die Bodentemperatur mindestens 21°C beträgt, könnt ihr die vorgezogenen Pflanzen ins Freiland auspflanzen.
* Abstand: Achtet darauf, dass der Abstand zwischen den Pflanzen etwa 60-90 cm beträgt. Der Abstand zwischen den Reihen sollte etwa 1,5-2 Meter betragen.
* Vorsichtiges Auspflanzen: Nehmt die Pflanzen vorsichtig aus den Anzuchttöpfen und pflanzt sie in die vorbereiteten Löcher. Achtet darauf, die Wurzeln nicht zu beschädigen.
* Angießen: Gießt die Pflanzen nach dem Auspflanzen gründlich an.
4. Mulchen (optional, aber empfohlen): Eine Mulchschicht aus Stroh oder dunkler Mulchfolie hilft, die Feuchtigkeit im Boden zu halten, Unkraut zu unterdrücken und den Boden zu erwärmen. Dunkle Mulchfolie ist besonders nützlich, um die Bodentemperatur zu erhöhen und das Wachstum zu fördern.
Phase 3: Pflege und Bewässerung
1. Bewässerung: Wassermelonen brauchen regelmäßige Bewässerung, besonders während der Fruchtbildung. Gießt die Pflanzen am besten früh morgens, damit die Blätter Zeit haben, abzutrocknen, bevor die Sonne aufgeht. Vermeidet es, die Blätter direkt zu gießen, da dies Pilzkrankheiten fördern kann. Eine Tröpfchenbewässerung ist ideal.
2. Düngung: Düngt die Pflanzen regelmäßig mit einem ausgewogenen Dünger. Beginnt etwa 2-3 Wochen nach dem Auspflanzen und wiederholt die Düngung alle 2-3 Wochen. Achtet darauf, einen Dünger zu verwenden, der reich an Kalium und Phosphor ist, da diese Nährstoffe für die Fruchtbildung wichtig sind. Ich verwende gerne organischen Flüssigdünger.
3. Unkrautbekämpfung: Haltet den Bereich um die Pflanzen unkrautfrei. Unkraut konkurriert mit den Wassermelonen um Nährstoffe und Wasser.
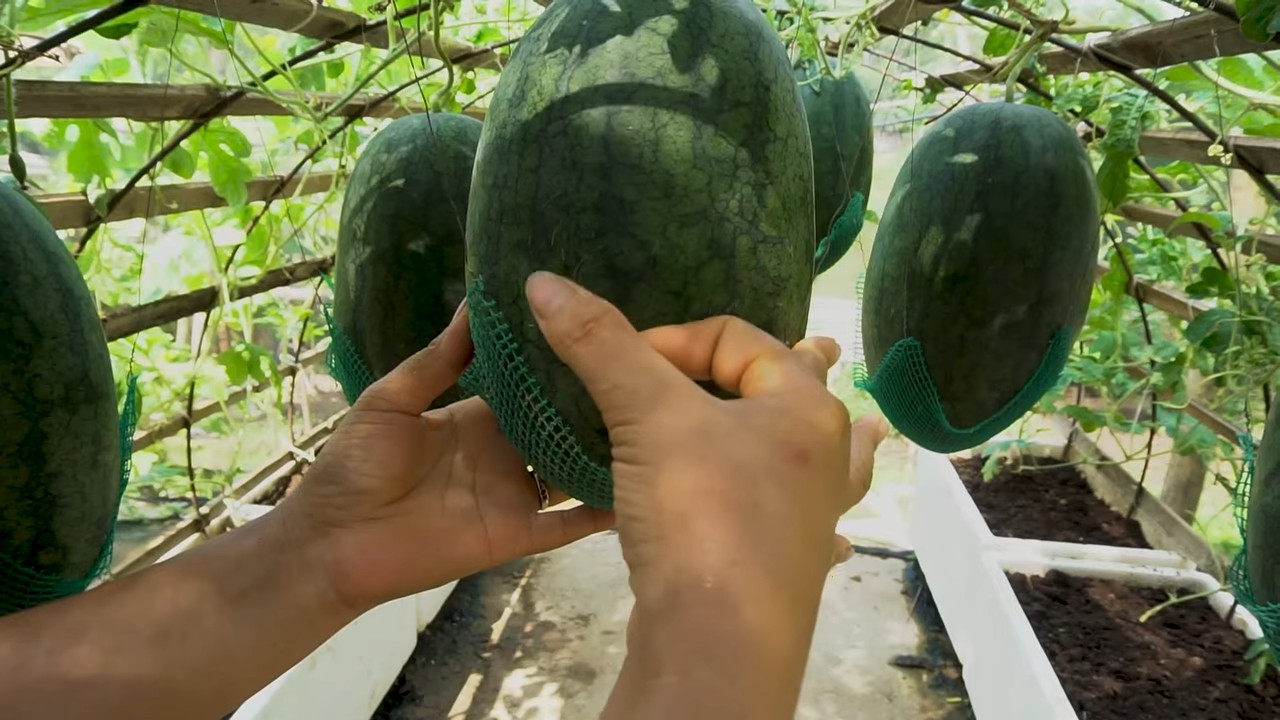
4. Ranken leiten (optional): Wenn ihr wenig Platz habt, könnt ihr die Ranken der Wassermelonen leiten, indem ihr sie an einem Rankgitter oder Zaun befestigt. Dies hilft auch, die Früchte vor Bodenkontakt zu schützen.
5. Bestäubung: Wassermelonen sind auf die Bestäubung durch Bienen und andere Insekten angewiesen. Wenn ihr wenig Bienen in eurem Garten habt, könnt ihr die Blüten auch von Hand bestäuben.
* Handbestäubung: Nehmt einen kleinen Pinsel und übertragt den Pollen von den männlichen Blüten (dünner Stiel) auf die weiblichen Blüten (kleine Fruchtansätze). Macht dies am besten am frühen Morgen, wenn der Pollen am aktivsten ist.
Phase 4: Fruchtbildung und Reife
1. Fruchtansatz: Sobald die Blüten bestäubt sind, beginnen sich die Früchte zu entwickeln. Achtet darauf, die Pflanzen weiterhin regelmäßig zu gießen und zu düngen.
2. Fruchtschutz (optional): Um die Früchte vor Schädlingen und Bodenkontakt zu schützen, könnt ihr sie auf Stroh oder Holzbretter legen.
3. Reifezeit: Die Reifezeit von Wassermelonen variiert je nach Sorte und Klima. In der Regel dauert es etwa 80-100 Tage von der Aussaat bis zur Ernte.
4. Reife erkennen: Es gibt verschiedene Anzeichen, die darauf hindeuten, dass eine Wassermelone reif ist:
* Der Stiel, der die Frucht mit der Ranke verbindet, wird trocken und braun.
* Die Stelle, an der die Frucht auf dem Boden aufliegt, verfärbt sich von weiß nach gelblich.
* Wenn man auf die Frucht klopft, sollte sie hohl klingen.
Phase 5: Ernte und Genuss
1. Ernte: Schneidet die reife Wassermelone vorsichtig mit einem scharfen Messer vom Stiel ab. Lasst dabei etwa 5-10 cm Stiel an der Frucht.

Conclusion
So, there you have it! Growing watermelons at home, while it might seem daunting at first, is an incredibly rewarding experience. Imagine biting into a juicy, sweet watermelon that you nurtured from a tiny seed, knowing exactly where it came from and what went into its growth. It’s a taste of summer satisfaction that store-bought melons simply can’t replicate.
This isn’t just about saving a few dollars; it’s about connecting with nature, learning new skills, and enjoying the fruits (literally!) of your labor. The vibrant green vines sprawling across your garden, the anticipation as the melons swell, and the triumphant moment of harvest – these are all part of the joy of homegrown watermelons.
But the best part? You have complete control over the process. You can choose heirloom varieties with unique flavors and colors, experiment with different growing techniques, and ensure that your watermelons are grown organically, free from harmful pesticides and chemicals. Think about the possibilities: a crisp, refreshing ‘Sugar Baby’ watermelon for a quick snack, a vibrant yellow ‘Golden Midget’ for a stunning salad, or a classic ‘Crimson Sweet’ for a crowd-pleasing picnic.
Don’t be afraid to get creative! Try training your watermelon vines up a trellis to save space, or experiment with companion planting to deter pests and attract pollinators. You could even try growing watermelons in containers if you have limited garden space. The key is to adapt the techniques to your specific environment and preferences.
Growing watermelons at home is more than just a gardening project; it’s an adventure. It’s a chance to learn, to experiment, and to connect with the natural world. And the reward? A delicious, homegrown watermelon that will make all your efforts worthwhile.
We urge you to give it a try! Start small, be patient, and don’t be afraid to ask for help. There are countless resources available online and in your local community to guide you along the way. And most importantly, have fun!
Once you’ve harvested your first homegrown watermelon, we’d love to hear about your experience. Share your photos, tips, and stories in the comments below. Let’s create a community of watermelon growers and inspire others to embark on this rewarding journey. What variety did you choose? What challenges did you face? What tips did you learn along the way? Your insights could be invaluable to other aspiring watermelon growers. So, get your hands dirty, plant those seeds, and get ready to enjoy the sweet taste of success!
Frequently Asked Questions (FAQ)
What is the best time to start growing watermelons?
The ideal time to start growing watermelons depends on your climate. Watermelons are warm-season crops and require a long growing season of at least 70-90 days. In general, you should start seeds indoors about 6-8 weeks before the last expected frost. If you live in a warmer climate with a longer growing season, you can direct sow seeds into the garden after the soil has warmed up to at least 70°F (21°C). Check your local frost dates and adjust your planting schedule accordingly. Starting seeds indoors gives you a head start and allows you to transplant healthy seedlings into the garden once the weather is favorable.
What kind of soil is best for growing watermelons?
Watermelons thrive in well-drained, sandy loam soil that is rich in organic matter. The soil should have a pH between 6.0 and 6.8. Before planting, amend the soil with compost, aged manure, or other organic matter to improve drainage, fertility, and water retention. Avoid heavy clay soils, as they can become waterlogged and hinder root growth. If you have clay soil, consider growing watermelons in raised beds or containers with a well-draining potting mix. Proper soil preparation is crucial for healthy watermelon growth and abundant fruit production.
How much sunlight do watermelons need?
Watermelons require at least 6-8 hours of direct sunlight per day to thrive. Choose a planting location that receives full sun throughout the day. Insufficient sunlight can lead to weak growth, poor fruit development, and reduced yields. If you live in a particularly hot climate, some afternoon shade may be beneficial to prevent sunburn on the fruits. However, ensure that the plants still receive ample sunlight during the morning and early afternoon hours.
How often should I water my watermelon plants?
Watermelons need consistent moisture, especially during fruit development. Water deeply and regularly, aiming to keep the soil consistently moist but not waterlogged. Water at the base of the plants to avoid wetting the foliage, which can increase the risk of fungal diseases. During hot, dry weather, you may need to water daily. As the fruits ripen, you can reduce watering slightly to improve their sweetness. Monitor the soil moisture regularly and adjust your watering schedule accordingly.
How do I know when my watermelon is ripe?
Determining when a watermelon is ripe can be tricky, but there are several indicators to look for. First, check the tendril closest to the fruit stem. When this tendril turns brown and dries out, it’s a good sign that the watermelon is nearing ripeness. Second, examine the spot where the watermelon rests on the ground. This spot, called the ground spot, should turn from white to a creamy yellow color. Finally, thump the watermelon with your knuckles. A ripe watermelon will have a deep, hollow sound. With practice, you’ll learn to recognize the subtle cues that indicate a perfectly ripe watermelon.
What are some common pests and diseases that affect watermelons?
Watermelons can be susceptible to various pests and diseases, including aphids, squash bugs, vine borers, powdery mildew, and fusarium wilt. Regularly inspect your plants for signs of infestation or disease. Use organic pest control methods, such as insecticidal soap or neem oil, to control aphids and squash bugs. Protect your plants from vine borers by wrapping the stems with aluminum foil or netting. Prevent powdery mildew by ensuring good air circulation and avoiding overhead watering. Choose disease-resistant watermelon varieties to minimize the risk of fusarium wilt. Early detection and prompt treatment are essential for maintaining healthy watermelon plants.
Can I grow watermelons in containers?
Yes, you can grow watermelons in containers, but you’ll need to choose a large container (at least 20 gallons) and select a compact or bush-type watermelon variety. Ensure that the container has drainage holes and use a well-draining potting mix. Water container-grown watermelons regularly and fertilize them every 2-3 weeks with a balanced fertilizer. Provide a trellis or support for the vines to climb. Container growing allows you to grow watermelons even if you have limited garden space.
How can I improve the sweetness of my watermelons?
Several factors can influence the sweetness of watermelons. Choose a watermelon variety known for its sweetness. Ensure that your plants receive adequate sunlight and water. Avoid over-watering as the fruits ripen, as this can dilute their flavor. Fertilize your plants with a fertilizer that is high in potassium, which promotes sugar production. Allow the watermelons to ripen fully on the vine before harvesting. By following these tips, you can maximize the sweetness of your homegrown watermelons.

Leave a Comment