

Grow Chayote Easily and unlock a world of culinary possibilities right in your backyard! Have you ever dreamt of harvesting your own fresh, crisp chayote squash? It’s easier than you think, and this DIY guide will show you exactly how to do it. Forget those bland, store-bought vegetables; imagine the satisfaction of serving a dish made with chayote you nurtured from seedling to harvest.
Chayote, also known as mirliton or vegetable pear, boasts a rich history, particularly in Mesoamerica, where it has been cultivated for centuries. The Aztecs and Mayans revered it not only for its delicious flavor but also for its nutritional value. Today, this versatile squash is enjoyed worldwide, but growing it yourself offers unparalleled freshness and control over its cultivation.
Why should you learn to grow chayote easily? Well, for starters, it’s a fantastic way to reduce your grocery bill and embrace a more sustainable lifestyle. Plus, chayote is incredibly adaptable and relatively low-maintenance, making it perfect for beginner gardeners. I’m excited to share my tried-and-true tips and tricks that will help you successfully cultivate this unique and rewarding vegetable, even if you have limited space or experience. Let’s get started and transform your garden into a chayote haven!
Chayote Anbauen: Dein Einfacher DIY-Leitfaden für eine Reiche Ernte
Hey Gartenfreunde! Habt ihr schon mal von Chayote gehört? Diese vielseitige Kürbisart ist nicht nur superlecker, sondern auch unglaublich einfach anzubauen – selbst wenn ihr keinen grünen Daumen habt! Ich zeige euch, wie ihr mit ein paar einfachen Schritten eure eigene Chayote-Pflanze zum Leben erwecken und eine reiche Ernte einfahren könnt. Los geht’s!
Was du für den Chayote-Anbau brauchst:
* Eine reife Chayote-Frucht: Das ist das A und O! Achtet darauf, dass die Frucht reif ist, am besten schon leicht keimt. Ihr erkennt das an kleinen Trieben, die aus der Frucht sprießen.
* Einen Topf (ca. 20-30 cm Durchmesser): Für die Voranzucht.
* Gute Blumenerde: Am besten eine Mischung aus Gartenerde, Kompost und etwas Sand.
* Einen sonnigen Standort: Chayote liebt die Sonne!
* Eine Rankhilfe: Chayote ist ein Kletterkünstler und braucht etwas zum Festhalten.
* Geduld: Rom wurde auch nicht an einem Tag erbaut!
Chayote-Anbau: Schritt-für-Schritt-Anleitung
Phase 1: Die Voranzucht im Topf
1. Die Chayote vorbereiten: Sucht euch eine reife Chayote-Frucht aus. Sie sollte keine Druckstellen oder Beschädigungen haben. Wenn ihr eine Frucht mit bereits sichtbaren Trieben findet, umso besser!
2. Den Topf vorbereiten: Füllt den Topf mit eurer Blumenerde. Lasst oben ca. 2-3 cm Platz. Die Erde sollte locker und gut durchlässig sein.
3. Die Chayote einpflanzen: Legt die Chayote-Frucht horizontal in den Topf. Die Triebe (falls vorhanden) sollten nach oben zeigen. Bedeckt die Frucht mit Erde, sodass nur noch die Spitze mit den Trieben herausschaut.
4. Angießen: Gießt die Erde vorsichtig an, sodass sie gut durchfeuchtet ist. Achtet darauf, dass ihr nicht zu viel gießt, da die Frucht sonst faulen könnte.
5. Der richtige Standort: Stellt den Topf an einen warmen und hellen Ort. Ein Fensterbrett mit direkter Sonneneinstrahlung ist ideal.
6. Geduld haben: Jetzt heißt es warten! Es kann einige Wochen dauern, bis die Chayote richtig austreibt. Haltet die Erde feucht, aber nicht nass.
Phase 2: Die Chayote ins Freie pflanzen
1. Der richtige Zeitpunkt: Wartet, bis die Chayote-Pflanze kräftig genug ist und keine Frostgefahr mehr besteht. Das ist in der Regel nach den Eisheiligen (Mitte Mai) der Fall.
2. Den Standort vorbereiten: Sucht euch einen sonnigen Standort im Garten aus. Der Boden sollte locker und gut durchlässig sein. Chayote ist ein Starkzehrer, daher ist es ratsam, den Boden vorher mit Kompost oder organischem Dünger anzureichern.
3. Die Rankhilfe anbringen: Chayote ist ein Kletterkünstler und braucht unbedingt eine Rankhilfe. Das kann ein Zaun, ein Spalier, eine Pergola oder ein stabiles Gerüst sein. Achtet darauf, dass die Rankhilfe stabil genug ist, um das Gewicht der Pflanze und der Früchte zu tragen.
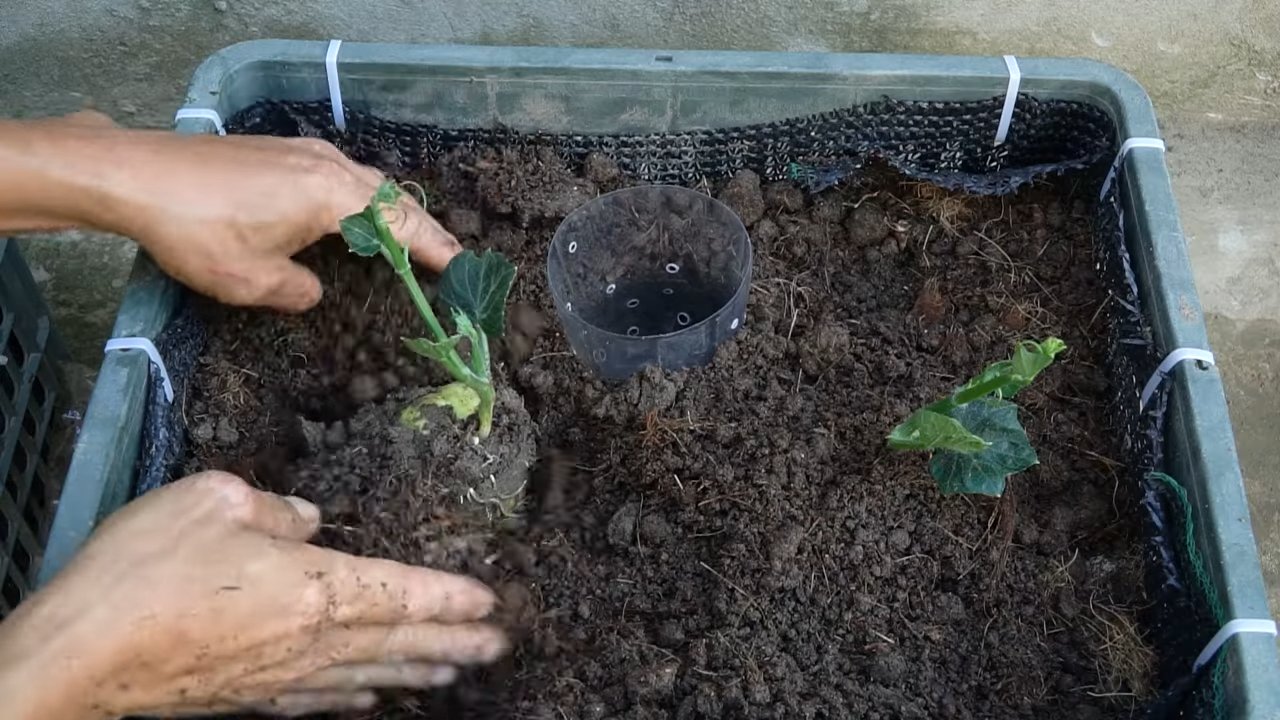
4. Das Pflanzloch ausheben: Grabt ein Pflanzloch, das etwas größer ist als der Topf, in dem die Chayote vorgezogen wurde.
5. Die Chayote einpflanzen: Nehmt die Chayote-Pflanze vorsichtig aus dem Topf und setzt sie in das Pflanzloch. Achtet darauf, die Wurzeln nicht zu beschädigen.
6. Das Pflanzloch auffüllen: Füllt das Pflanzloch mit Erde auf und drückt sie leicht an.
7. Angießen: Gießt die Pflanze gründlich an.
8. An die Rankhilfe führen: Führt die Triebe der Chayote vorsichtig an die Rankhilfe heran und befestigt sie gegebenenfalls mit etwas Bindematerial.
Phase 3: Pflege und Ernte
1. Gießen: Gießt die Chayote-Pflanze regelmäßig, besonders während trockener Perioden. Achtet darauf, dass die Erde immer leicht feucht ist.
2. Düngen: Düngt die Chayote-Pflanze regelmäßig mit einem organischen Dünger. Das fördert das Wachstum und die Fruchtbildung.
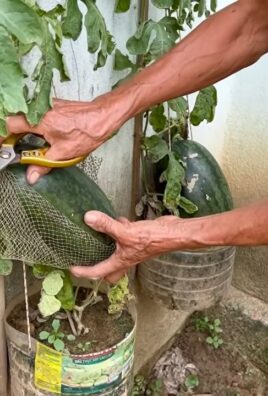
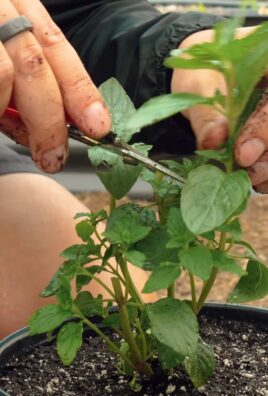
3. Schneiden: Ihr könnt die Chayote-Pflanze bei Bedarf schneiden, um sie in Form zu halten und die Fruchtbildung zu fördern. Entfernt abgestorbene oder kranke Triebe.
4. Schutz vor Schädlingen: Chayote ist relativ resistent gegen Schädlinge. Trotzdem solltet ihr die Pflanze regelmäßig auf Schädlinge kontrollieren und gegebenenfalls Maßnahmen ergreifen.
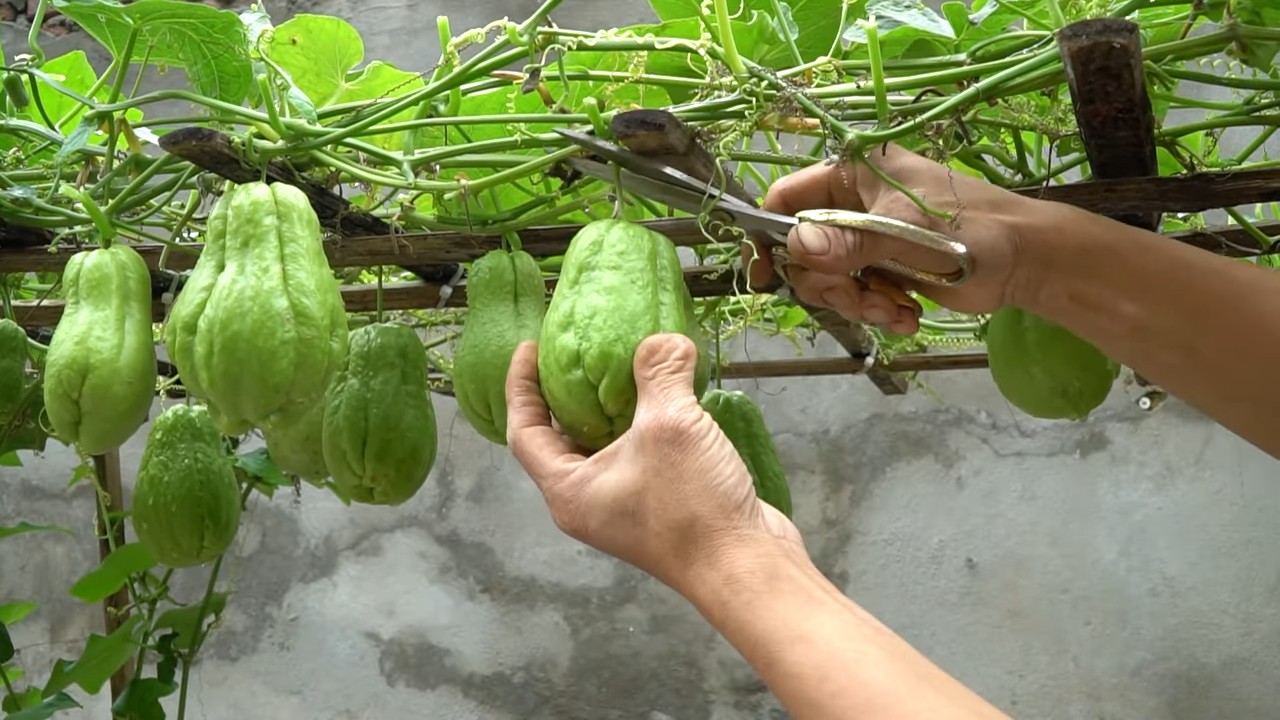
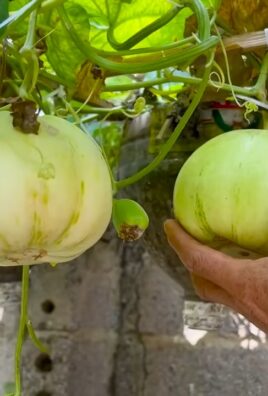
5. Die Ernte: Die Chayote-Früchte sind erntereif, wenn sie eine hellgrüne Farbe haben und sich fest anfühlen. Die Erntezeit ist in der Regel im Herbst. Erntet die Früchte regelmäßig, um die Pflanze zur weiteren Fruchtbildung anzuregen.
Zusätzliche Tipps für eine erfolgreiche Chayote-Ernte:
* Sonnenschein ist Trumpf: Chayote liebt die Sonne! Je mehr Sonne die Pflanze bekommt, desto besser wird die Ernte.
* Gute Drainage: Achtet darauf, dass der Boden gut durchlässig ist, damit sich keine Staunässe bildet.
* Regelmäßiges Gießen: Chayote braucht regelmäßig Wasser, besonders während der Wachstums- und Fruchtbildungsphase.
* Die richtige Rankhilfe: Eine stabile Rankhilfe ist unerlässlich, da die Chayote-Pflanze sehr schwer werden kann.
* Geduld: Chayote braucht etwas Zeit, um zu wachsen und Früchte zu tragen. Gebt nicht auf, wenn es nicht sofort klappt!
Was du mit deiner Chayote-Ernte anfangen kannst:
Chayote ist unglaublich vielseitig und kann in der Küche auf vielfältige Weise verwendet werden. Hier ein paar Ideen:
* Roh: Chayote kann roh in Salaten gegessen werden. Sie hat einen milden, leicht süßlichen Geschmack.
* Gekocht: Chayote kann gekocht, gedünstet, gebraten oder gegrillt werden. Sie passt gut zu Fleisch, Fisch und Gemüse.
* Gefüllt: Chayote kann gefüllt und im Ofen gebacken werden.
* Eingelegt: Chayote kann eingelegt werden und als Beilage zu verschiedenen Gerichten serviert werden.
* Suppe: Chayote kann in Suppen und Eintöpfen verwendet werden.
Ich hoffe, dieser Leitfaden hat euch geholfen, eure eigene Chayote-Pflanze anzubauen. Mit ein wenig Geduld und Pflege werdet ihr bald eine reiche Ernte einfahren können. Viel Spaß beim Gärtnern!
Conclusion
So, there you have it! Growing chayote easily is not just a pipe dream; it’s an achievable reality with a little know-how and a dash of patience. We’ve explored the simple yet effective method of sprouting your chayote squash, bypassing the often-frustrating direct planting route. This DIY trick is a must-try for several compelling reasons.
First and foremost, it significantly increases your chances of success. By nurturing the sprout indoors, you’re providing a controlled environment, shielding it from harsh weather conditions, hungry pests, and the unpredictable nature of the great outdoors. This head start gives your chayote plant a robust foundation, setting it up for vigorous growth and abundant yields.
Secondly, it’s incredibly rewarding! There’s something deeply satisfying about witnessing the miracle of life unfold before your eyes. Watching that little sprout emerge from the squash, reaching for the light, is a testament to your nurturing care and a promise of delicious chayote dishes to come.
But the beauty of this method lies not only in its effectiveness but also in its adaptability. Feel free to experiment with different potting mixes to find what works best for your local climate and soil conditions. Consider adding a slow-release fertilizer to the potting mix to provide your young plant with a steady stream of nutrients. You can also try different types of containers, from traditional pots to repurposed buckets, as long as they offer adequate drainage.
For those living in colder climates, you might want to consider growing your chayote in a large container that can be moved indoors during the winter months. This will allow you to enjoy fresh chayote even when the weather outside is frightful. Alternatively, if you have a greenhouse, that’s an ideal environment for cultivating chayote year-round.
Don’t be afraid to get creative with your trellis system either. While a sturdy fence or arbor is a classic choice, you can also use a pergola, a shed, or even a large, strong tree as a support structure. Just make sure the structure is strong enough to handle the weight of the mature vine, which can become quite substantial.
And finally, remember that growing chayote is a journey, not a destination. There will be challenges along the way, but don’t let them discourage you. Embrace the learning process, adapt to the needs of your plant, and celebrate your successes, no matter how small.
We wholeheartedly encourage you to try this DIY trick for growing chayote easily. It’s a simple, effective, and rewarding way to cultivate this versatile and delicious vegetable. Once you’ve given it a go, we’d love to hear about your experience! Share your tips, tricks, and triumphs in the comments below. Let’s build a community of chayote enthusiasts and learn from each other’s successes and failures. Happy growing!
Frequently Asked Questions (FAQ)
What is the best time of year to start sprouting my chayote squash?
The ideal time to start sprouting your chayote squash is typically in late winter or early spring, about 6-8 weeks before the last expected frost. This allows the sprout to develop a strong root system before being transplanted outdoors once the weather warms up. Starting early gives the plant a longer growing season, which is crucial for chayote, as it requires a significant amount of time to mature and produce fruit. If you live in a warmer climate with a longer growing season, you can start the process a bit later in the spring.
How long does it take for a chayote squash to sprout?
Sprouting time can vary depending on several factors, including the freshness of the squash, the temperature, and the humidity levels. Generally, you can expect to see a sprout emerge within 2-4 weeks. However, it’s not uncommon for some squash to take longer, even up to 6 weeks. Patience is key! Ensure the squash is kept in a warm, humid environment to encourage sprouting.
What kind of potting mix should I use for the sprouted chayote?
A well-draining potting mix is essential for healthy chayote growth. A good option is a mix of equal parts peat moss, perlite, and vermiculite. This combination provides good aeration, moisture retention, and drainage, preventing the roots from becoming waterlogged. You can also add some compost to the mix for added nutrients. Avoid using garden soil, as it can be too heavy and may contain pests or diseases.
How often should I water the sprouted chayote?
Water the sprouted chayote regularly, keeping the potting mix consistently moist but not soggy. Check the moisture level of the soil by sticking your finger about an inch deep. If it feels dry, it’s time to water. Avoid overwatering, as this can lead to root rot. During hot, dry weather, you may need to water more frequently.
When is the right time to transplant the sprouted chayote outdoors?
Transplant the sprouted chayote outdoors once all danger of frost has passed and the soil has warmed up. Choose a sunny location with well-draining soil. Before transplanting, harden off the plant by gradually exposing it to outdoor conditions for a week or two. Start by placing it in a sheltered spot for a few hours each day, gradually increasing the amount of time it spends outdoors.
What kind of support structure does chayote need?
Chayote vines are vigorous climbers and require a strong support structure to grow on. A sturdy fence, arbor, trellis, or pergola are all good options. The support structure should be at least 6-8 feet tall and strong enough to support the weight of the mature vine, which can become quite heavy.
How do I fertilize my chayote plant?
Chayote plants are heavy feeders and benefit from regular fertilization. Use a balanced fertilizer, such as 10-10-10, every 4-6 weeks during the growing season. You can also amend the soil with compost or well-rotted manure to provide a slow-release source of nutrients. Avoid over-fertilizing, as this can lead to excessive foliage growth and reduced fruit production.
Why is my chayote plant not producing fruit?
There are several reasons why your chayote plant may not be producing fruit. One common reason is a lack of pollination. Chayote plants are monoecious, meaning they have separate male and female flowers on the same plant. Pollination is typically carried out by insects, so ensure there are plenty of pollinators in your garden. You can also hand-pollinate the flowers by transferring pollen from the male flowers to the female flowers using a small brush. Other reasons for lack of fruit production include insufficient sunlight, poor soil fertility, and inadequate watering.
Can I grow chayote in a container?
Yes, you can grow chayote in a container, but you’ll need a large container, at least 20 gallons in size, to accommodate the plant’s extensive root system. Choose a container with good drainage and use a well-draining potting mix. Provide a strong support structure for the vine to climb on. Container-grown chayote plants may require more frequent watering and fertilization than those grown in the ground.
How do I store chayote squash?
Chayote squash can be stored in the refrigerator for several weeks. Wrap them in a plastic bag to prevent them from drying out. You can also freeze chayote squash. To freeze, peel and dice the squash, then blanch it in boiling water for 2-3 minutes. Drain and cool the squash, then pack it into freezer bags or containers. Frozen chayote squash can be stored for up to 6 months.
Leave a Comment