

Growing Onions at Home can seem daunting, but trust me, it’s more rewarding (and less tear-inducing!) than you might think. Have you ever imagined stepping into your backyard and harvesting fresh, flavorful onions for your favorite recipes? It’s a dream within reach, and this DIY guide will show you exactly how to make it a reality.
Onions have a rich history, dating back thousands of years. Ancient Egyptians revered them, even using them in burial rituals, believing their concentric layers symbolized eternal life. From humble beginnings to culinary staples, onions have nourished and flavored dishes across cultures for centuries. Today, we’re bringing that tradition home, literally!
Why bother growing onions at home? Well, for starters, the taste of a homegrown onion is simply unmatched – sweeter, fresher, and bursting with flavor compared to store-bought varieties. Plus, you’ll know exactly what went into growing them, avoiding harmful pesticides and supporting sustainable practices. But beyond the flavor and health benefits, there’s a deep satisfaction in nurturing a plant from seed to harvest. This DIY guide will equip you with simple, effective tricks and hacks to cultivate a thriving onion patch, even if you’re a complete beginner. Let’s get our hands dirty and unlock the secrets to successful home onion gardening!

Zwiebeln selbst anbauen: Ein umfassender DIY-Leitfaden
Hallo Gartenfreunde! Ich liebe es, frische Zutaten direkt aus meinem Garten zu verwenden, und Zwiebeln sind da keine Ausnahme. Sie sind vielseitig, einfach zu lagern und schmecken einfach besser, wenn man sie selbst gezogen hat. In diesem Artikel zeige ich euch, wie ihr ganz einfach eure eigenen Zwiebeln zu Hause anbauen könnt – egal ob im Garten, im Hochbeet oder sogar im Topf auf dem Balkon. Los geht’s!
Was du brauchst: Die richtige Vorbereitung
Bevor wir loslegen, ist es wichtig, dass wir alles vorbereitet haben. Hier ist eine Liste der Dinge, die du benötigst:
* Zwiebelsamen oder Steckzwiebeln: Du kannst entweder mit Samen beginnen oder vorgezogene Steckzwiebeln verwenden. Steckzwiebeln sind einfacher, da sie bereits einen Vorsprung haben.
* Gute Erde: Zwiebeln lieben lockere, gut durchlässige Erde. Eine Mischung aus Gartenerde, Kompost und etwas Sand ist ideal.
* Dünger: Ein ausgewogener Dünger, der reich an Stickstoff, Phosphor und Kalium ist, hilft den Zwiebeln beim Wachsen.
* Gießkanne oder Schlauch: Regelmäßiges Gießen ist wichtig, besonders während der Wachstumsphase.
* Gartenwerkzeug: Eine Schaufel, eine Harke und eventuell ein Pflanzholz sind hilfreich.
* Standort: Ein sonniger Standort ist entscheidend für den Erfolg. Zwiebeln brauchen mindestens 6 Stunden Sonne pro Tag.
* Geduld: Zwiebeln brauchen Zeit zum Wachsen, also sei geduldig und gib nicht auf!
Schritt-für-Schritt-Anleitung: Zwiebeln aus Samen ziehen
Wenn du dich für den Anbau aus Samen entscheidest, brauchst du etwas mehr Geduld, aber es ist eine sehr lohnende Erfahrung.
1. Aussaat vorbereiten: Beginne am besten im Frühjahr (März/April) mit der Aussaat im Haus. Fülle kleine Anzuchttöpfe oder eine Anzuchtschale mit Anzuchterde.
2. Samen aussäen: Verteile die Zwiebelsamen gleichmäßig auf der Erde und bedecke sie leicht mit einer dünnen Schicht Erde (ca. 0,5 cm).
3. Gießen: Befeuchte die Erde vorsichtig mit einer Sprühflasche oder einer Gießkanne mit feinem Brausekopf. Die Erde sollte feucht, aber nicht nass sein.
4. Warm stellen: Stelle die Anzuchttöpfe an einen warmen, hellen Ort (z.B. auf eine Fensterbank). Eine Temperatur von 18-20°C ist ideal für die Keimung.
5. Feucht halten: Halte die Erde während der Keimung feucht. Du kannst die Töpfe mit Frischhaltefolie abdecken, um die Feuchtigkeit zu erhöhen. Vergiss aber nicht, die Folie regelmäßig zu lüften, um Schimmelbildung zu vermeiden.
6. Keimung abwarten: Die Keimung dauert in der Regel 1-2 Wochen. Sobald die ersten Keimlinge erscheinen, kannst du die Frischhaltefolie entfernen.
7. Pikieren: Wenn die Zwiebelpflänzchen groß genug sind (ca. 5-7 cm hoch), kannst du sie pikieren. Das bedeutet, dass du sie vorsichtig aus den Anzuchttöpfen nimmst und in größere Töpfe oder direkt ins Beet pflanzt. Achte darauf, die Wurzeln nicht zu beschädigen.
8. Abhärten: Bevor du die Zwiebelpflänzchen ins Freie pflanzt, solltest du sie abhärten. Das bedeutet, dass du sie für einige Tage stundenweise nach draußen stellst, um sie an die äußeren Bedingungen zu gewöhnen.
9. Auspflanzen: Pflanze die Zwiebelpflänzchen im Mai/Juni ins Beet. Achte auf einen Abstand von ca. 10-15 cm zwischen den Pflanzen und 20-30 cm zwischen den Reihen.
Schritt-für-Schritt-Anleitung: Zwiebeln mit Steckzwiebeln anbauen
Steckzwiebeln sind eine einfache und schnelle Möglichkeit, Zwiebeln anzubauen.
1. Vorbereitung des Beets: Lockere die Erde im Beet auf und entferne Unkraut. Arbeite Kompost und Dünger in die Erde ein.
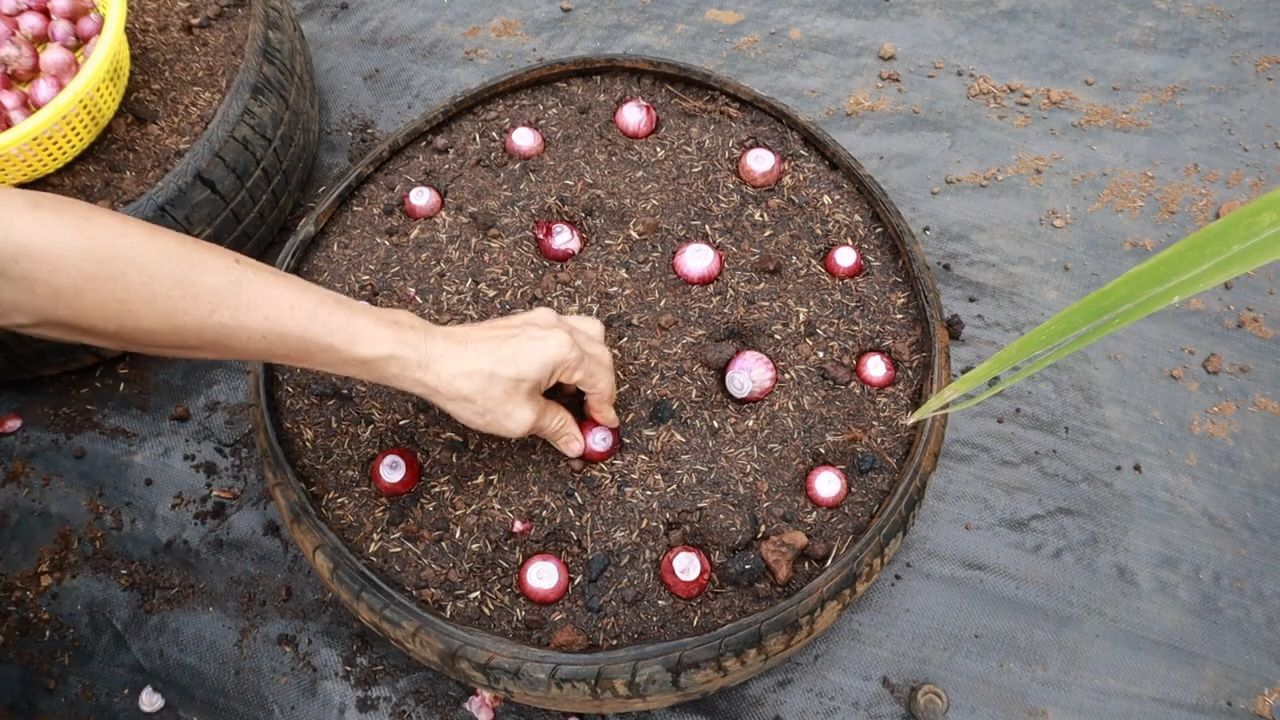
2. Steckzwiebeln setzen: Drücke die Steckzwiebeln mit der Spitze nach oben in die Erde. Die Spitze sollte gerade noch aus der Erde herausschauen. Achte auf einen Abstand von ca. 10-15 cm zwischen den Zwiebeln und 20-30 cm zwischen den Reihen.
3. Gießen: Gieße die Steckzwiebeln nach dem Pflanzen gründlich an.
4. Pflege: Halte das Beet unkrautfrei und gieße die Zwiebeln regelmäßig, besonders während der Wachstumsphase.
Die richtige Pflege: So bleiben deine Zwiebeln gesund und kräftig
Die richtige Pflege ist entscheidend für eine reiche Ernte. Hier sind einige Tipps:
* Gießen: Zwiebeln brauchen regelmäßige Bewässerung, besonders während der Wachstumsphase. Achte darauf, dass die Erde nicht austrocknet, aber vermeide Staunässe.
* Düngen: Dünge die Zwiebeln regelmäßig mit einem ausgewogenen Dünger. Eine Düngung alle 2-3 Wochen ist ideal.
* Unkraut entfernen: Halte das Beet unkrautfrei, da Unkraut den Zwiebeln Nährstoffe und Wasser entzieht.
* Schädlinge und Krankheiten: Achte auf Schädlinge und Krankheiten. Zwiebelfliegen und Zwiebelrost können Probleme verursachen. Bei Bedarf kannst du biologische Schädlingsbekämpfungsmittel einsetzen.
* Häufeln: Häufle die Zwiebeln regelmäßig an, um sie vor Sonnenbrand zu schützen und das Wachstum zu fördern.
Erntezeit: Wann sind die Zwiebeln reif?
Die Erntezeit hängt von der Sorte und den Anbaubedingungen ab. In der Regel sind Zwiebeln reif, wenn das Laub gelb wird und umknickt.
1. Ernte vorbereiten: Wähle einen trockenen Tag für die Ernte.
2. Zwiebeln aus der Erde ziehen: Ziehe die Zwiebeln vorsichtig aus der Erde.
3. Trocknen: Lasse die Zwiebeln einige Tage an einem trockenen, luftigen Ort trocknen. Du kannst sie entweder auf dem Beet liegen lassen oder an einem Schnur aufhängen.
4. Lagern: Schneide das Laub ab und lagere die Zwiebeln an einem kühlen, trockenen und dunklen Ort. So halten sie sich mehrere Monate.
Zusätzliche Tipps und Tricks für den Zwiebelanbau
* Fruchtfolge beachten: Pflanze Zwiebeln nicht jedes Jahr am selben Standort, um Krankheiten vorzubeugen.
* Mischkultur: Zwiebeln vertragen sich gut mit Karotten, Kamille und Ringelblumen.
* Zwiebelblüten entfernen: Wenn Zwiebeln blühen, bilden sie keine großen Knollen. Entferne die Blütenstände, um das Wachstum der Knollen zu fördern.
* Verschiedene Sorten anbauen: Probiere verschiedene Zwiebelsorten aus, um herauszufinden, welche dir am besten schmecken und in deinem Garten am besten wachsen.
Häufige Probleme und Lösungen
* Zwiebelfliegen: Diese Schädlinge legen ihre Eier in die Zwiebeln, was zu Fäulnis führen kann. Verwende Insektenschutznetze oder biologische Schädlingsbekämpfungsmittel.
* Zwiebelrost: Diese Pilzkrankheit verursacht orangefarbene Flecken auf den Blättern. Sorge für gute Belüftung und vermeide Staunässe. Bei Bedarf kannst du Fungizide einsetzen.
* Kleine Zwiebeln: Wenn die Zwiebeln nicht groß genug werden, kann das an Nährstoffmangel, Wassermangel oder zu dichtem Stand liegen. Dünge regelmäßig, gieße ausreichend und achte auf den richtigen Abstand zwischen den Pflanzen.
Zwiebeln im Topf anbauen: Auch auf dem Balkon
Conclusion
So, there you have it! Growing onions at home, especially using our simple DIY trick, is not just a gardening endeavor; it’s an investment in flavor, freshness, and a more sustainable lifestyle. Forget those bland, mass-produced onions from the supermarket. Imagine the satisfaction of harvesting plump, juicy onions that you nurtured from tiny seedlings or even repurposed scraps. The difference in taste is undeniable – a vibrant, pungent flavor that elevates every dish you create.
But the benefits extend far beyond the kitchen. By growing your own onions, you’re reducing your carbon footprint, minimizing your reliance on commercial agriculture, and gaining a deeper connection to the food you eat. Plus, it’s incredibly rewarding to watch your little onion patch thrive, knowing that you played a direct role in bringing that bounty to your table.
This DIY trick, in particular, simplifies the process, making it accessible even to novice gardeners. Whether you’re starting from seed, sets, or even regrowing from the base of a store-bought onion, this method provides a solid foundation for success. It’s about maximizing space, optimizing soil conditions, and providing the right environment for your onions to flourish.
Don’t be afraid to experiment! Try different varieties of onions to discover your favorites. From the sweet Walla Walla to the pungent red onion, each offers a unique flavor profile that can enhance your culinary creations. You can also explore companion planting, pairing your onions with other vegetables and herbs that benefit from their presence, such as carrots, chamomile, or rosemary.
Consider adding a layer of mulch around your onion plants to help retain moisture, suppress weeds, and regulate soil temperature. Organic mulches like straw or shredded leaves will also break down over time, enriching the soil with valuable nutrients.
Another variation to consider is growing onions in containers. This is a great option if you have limited space or want to protect your onions from pests or diseases. Choose a large container with good drainage and use a high-quality potting mix.
We wholeheartedly encourage you to give this DIY trick for growing onions at home a try. It’s a simple, effective, and incredibly rewarding experience. And most importantly, don’t keep your success (or even your challenges!) to yourself. Share your experiences, tips, and photos with us and the wider gardening community. Let’s learn from each other and inspire more people to embrace the joy of growing their own food. Use the hashtag #HomeGrownOnions and tag us in your social media posts. We can’t wait to see your onion-growing adventures! Let’s cultivate a community of thriving home gardeners, one onion at a time.
Frequently Asked Questions (FAQ)
What is the best time of year to plant onions?
The timing for planting onions depends largely on your climate and the type of onion you’re growing. Onions are typically classified as long-day, short-day, or day-neutral varieties. Long-day onions need 14-16 hours of daylight to form bulbs and are best suited for northern regions. Short-day onions need 10-12 hours of daylight and are ideal for southern regions. Day-neutral onions are more adaptable and can be grown in a wider range of climates.
As a general rule, plant onion sets or transplants 4-6 weeks before the last expected frost in spring for long-day varieties. For short-day varieties, plant in the fall for a spring harvest. Day-neutral onions can be planted in either spring or fall, depending on your local climate. Always check with your local agricultural extension office for specific recommendations for your area.
How much sunlight do onions need?
Onions are sun-loving plants and require at least 6-8 hours of direct sunlight per day to thrive. Insufficient sunlight can result in small bulbs and reduced yields. Choose a planting location that receives full sun throughout the day. If you’re growing onions in containers, make sure to place them in a sunny spot or supplement with grow lights if necessary.
What kind of soil is best for growing onions?
Onions prefer well-drained, fertile soil that is rich in organic matter. The ideal soil pH is between 6.0 and 7.0. Before planting, amend your soil with compost, aged manure, or other organic materials to improve drainage, fertility, and water retention. Avoid heavy clay soils, as they can become waterlogged and inhibit bulb development. If you have clay soil, consider growing onions in raised beds or containers with a well-draining potting mix.
How often should I water my onions?
Onions need consistent moisture, especially during bulb formation. Water deeply and regularly, aiming to keep the soil consistently moist but not waterlogged. Avoid overhead watering, as this can promote fungal diseases. Instead, water at the base of the plants using a soaker hose or drip irrigation system. During hot, dry weather, you may need to water more frequently. Reduce watering as the bulbs mature and the tops begin to fall over.
What are common pests and diseases that affect onions?
Onions can be susceptible to various pests and diseases, including onion maggots, thrips, onion downy mildew, and white rot. To prevent pest and disease problems, practice good garden hygiene, such as removing plant debris and weeds. Rotate your crops each year to avoid building up soilborne pathogens. Use insecticidal soap or neem oil to control pests like thrips and onion maggots. Apply a fungicide if you notice signs of fungal diseases like downy mildew. Choose disease-resistant onion varieties whenever possible.
How do I know when my onions are ready to harvest?
Onions are typically ready to harvest when the tops begin to fall over and turn yellow or brown. This usually occurs in late summer or early fall, depending on the variety and planting time. Once the tops have fallen over, stop watering and allow the bulbs to dry out in the ground for a few days. Then, carefully dig up the onions, being careful not to damage the bulbs.
How should I store my harvested onions?
After harvesting, cure your onions by laying them out in a single layer in a well-ventilated area for 2-3 weeks. This allows the outer layers to dry and toughen, which helps prevent spoilage. Once the onions are cured, store them in a cool, dry, and dark place, such as a basement or pantry. Braiding the tops together and hanging them is a traditional storage method that also looks attractive. Properly cured and stored onions can last for several months.
Can I grow onions from scraps?
Yes, you can regrow onions from the base of a store-bought onion. Simply cut off the bottom inch or two of the onion, making sure to include the roots. Place the onion base in a shallow dish of water, with the cut side facing up. Change the water every day or two. After a few days, you should see new roots and green shoots emerging. Once the roots are well-developed, transplant the onion base into a pot or directly into the garden. While the resulting onion bulb may not be as large as one grown from seed or set, it’s a fun and easy way to recycle food scraps and grow your own onions.


Leave a Comment