

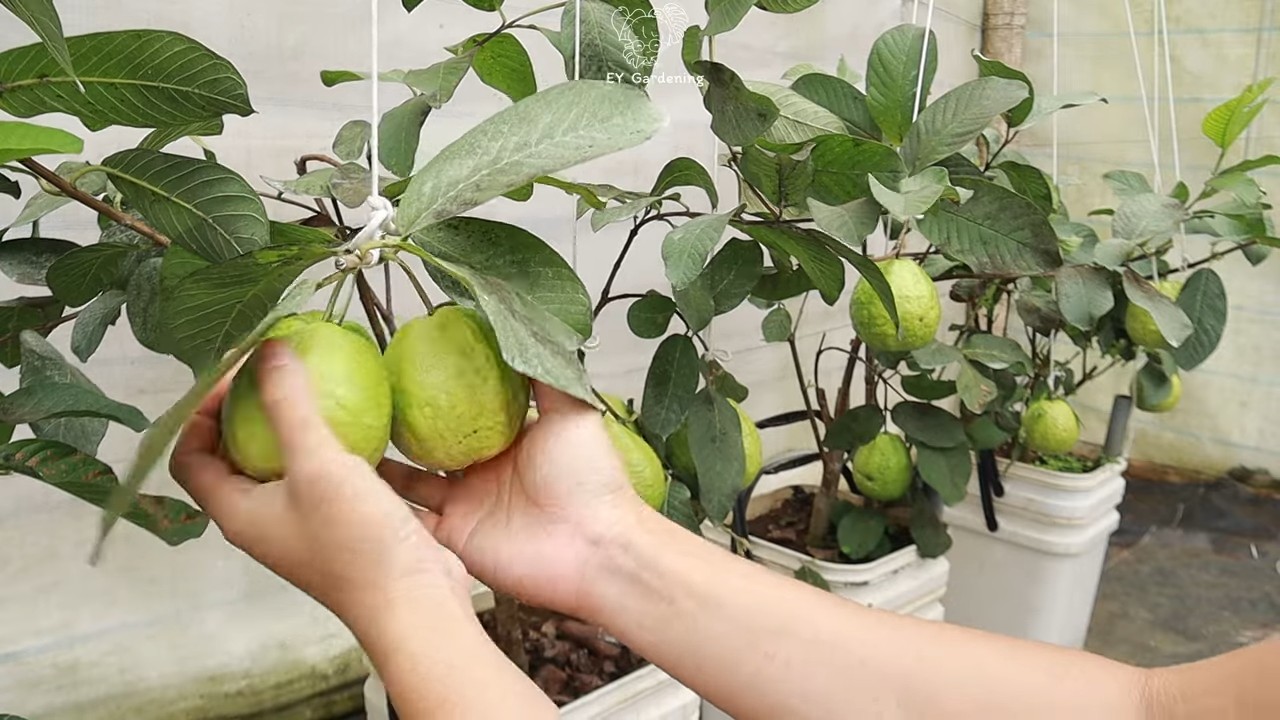
Terrace guava tree planting might seem daunting, especially if you’re picturing sprawling orchards and acres of land. But guess what? You absolutely *can* cultivate your own delicious guavas right on your terrace, balcony, or even a sunny patio! Imagine plucking fresh, juicy guavas, bursting with tropical flavor, just steps from your kitchen. That’s the magic we’re unlocking today!
For centuries, guava trees have been cherished in tropical and subtropical regions, not only for their delectable fruit but also for their medicinal properties. From ancient Ayurvedic practices to modern-day cuisine, the guava holds a special place in many cultures. Now, you can bring a piece of that rich history and vibrant flavor to your own home.
Why should you embark on this terrace guava tree planting adventure? Well, beyond the sheer joy of growing your own food, it’s a fantastic way to connect with nature, reduce your carbon footprint, and enjoy the unparalleled taste of homegrown produce. Plus, let’s be honest, store-bought guavas just don’t compare to the sweetness and aroma of a tree you’ve nurtured yourself. In this article, I’ll share my tried-and-true DIY tricks and hacks to ensure your terrace guava tree thrives, even in limited spaces. Get ready to transform your terrace into a mini-tropical paradise!
Guavenbaum auf der Terrasse pflanzen: Mein DIY-Leitfaden für tropisches Flair!
Ich liebe es, ein Stück Tropen in meinen Garten zu holen, und was gibt es da Besseres als einen Guavenbaum? Ich habe mir gedacht, ich teile meine Erfahrungen mit euch, wie ihr einen Guavenbaum erfolgreich auf eurer Terrasse pflanzen und pflegen könnt. Es ist einfacher, als man denkt, und das Ergebnis ist einfach fantastisch – frische, aromatische Guaven direkt vor der Haustür!
Die richtige Guavensorte wählen
Bevor wir loslegen, ist es wichtig, die richtige Guavensorte für die Kübelhaltung auszuwählen. Nicht alle Guavenbäume eignen sich gleich gut für Töpfe. Ich empfehle folgende Sorten:
* Zwerg-Guave (Psidium guajava ‘Nana’): Diese Sorte bleibt relativ klein und kompakt, was sie ideal für die Terrasse macht. Sie trägt trotzdem reichlich Früchte.
* Erdbeer-Guave (Psidium littorale var. cattleianum): Auch diese Sorte ist kleiner und verträgt Kübelhaltung gut. Die Früchte sind kleiner als bei der normalen Guave, haben aber einen süßen, erdbeerartigen Geschmack.
* Indische Guave (Psidium guajava): Wenn du eine größere Guave möchtest, ist die indische Guave eine gute Wahl. Achte aber darauf, einen ausreichend großen Topf zu verwenden und den Baum regelmäßig zu beschneiden.
Was du brauchst: Die Materialliste
Hier ist eine Liste aller Materialien, die du für dein Guavenbaum-Projekt benötigst:
* Guavenbaum-Setzling: Am besten in einer Baumschule oder einem Gartencenter kaufen. Achte auf einen gesunden, kräftigen Setzling.
* Großer Topf: Der Topf sollte mindestens 40-50 cm Durchmesser haben, besser noch größer. Denk daran, dass der Baum wachsen wird!
* Hochwertige Blumenerde: Eine gut durchlässige Blumenerde ist entscheidend. Ich mische gerne Blumenerde mit etwas Sand und Kompost.
* Drainagematerial: Blähton, Kies oder Tonscherben für den Topfboden.
* Gießkanne: Zum Bewässern des Baumes.
* Gartenschere: Zum Beschneiden des Baumes.
* Dünger: Ein spezieller Zitrusdünger oder ein Langzeitdünger für Obstbäume.
* Mulch: Rindenmulch oder Pinienrinde, um die Feuchtigkeit im Boden zu halten.
* Handschuhe: Zum Schutz deiner Hände.
* Optional: Rankhilfe, falls der Baum Unterstützung benötigt.
Schritt-für-Schritt-Anleitung: Guavenbaum pflanzen
Jetzt geht’s ans Eingemachte! Hier ist meine detaillierte Anleitung, wie du deinen Guavenbaum erfolgreich in einen Topf pflanzt:
1. Topf vorbereiten: Zuerst legst du eine Schicht Drainagematerial (Blähton, Kies oder Tonscherben) auf den Boden des Topfes. Das sorgt dafür, dass das Wasser gut ablaufen kann und die Wurzeln nicht faulen.
2. Erde einfüllen: Fülle den Topf mit einer Schicht Blumenerde. Achte darauf, dass die Erde locker und gut durchlässig ist.
3. Setzling vorbereiten: Nimm den Guavenbaum-Setzling vorsichtig aus dem Anzuchttopf. Lockere die Wurzeln etwas auf, damit sie sich besser im neuen Topf ausbreiten können.
4. Baum einsetzen: Setze den Setzling mittig in den Topf. Die Oberkante des Wurzelballens sollte etwa 2-3 cm unter dem Topfrand liegen.
5. Mit Erde auffüllen: Fülle den Topf mit Blumenerde auf und drücke die Erde leicht an. Achte darauf, dass der Baum stabil steht.
6. Angießen: Gieße den Baum gründlich an, bis das Wasser aus dem Abzugsloch des Topfes läuft. Das hilft, die Erde zu setzen und die Wurzeln zu befeuchten.
7. Mulchen: Verteile eine Schicht Mulch (Rindenmulch oder Pinienrinde) um den Baum herum. Das hilft, die Feuchtigkeit im Boden zu halten und Unkraut zu unterdrücken.
8. Standort wählen: Stelle den Topf an einen sonnigen und warmen Standort. Guavenbäume lieben die Sonne!
Die richtige Pflege: So bleibt dein Guavenbaum glücklich
Ein Guavenbaum braucht natürlich auch die richtige Pflege, um gesund zu wachsen und viele Früchte zu tragen. Hier sind meine Tipps:
* Bewässerung: Gieße den Baum regelmäßig, besonders während der Wachstumsperiode. Die Erde sollte immer leicht feucht sein, aber nicht nass. Vermeide Staunässe! Im Winter kannst du die Wassergaben reduzieren.
* Düngung: Dünge den Baum regelmäßig mit einem speziellen Zitrusdünger oder einem Langzeitdünger für Obstbäume. Ich dünge meinen Baum etwa alle 2-3 Monate während der Wachstumsperiode.
* Beschneidung: Beschneide den Baum regelmäßig, um ihn in Form zu halten und die Fruchtbildung zu fördern. Entferne abgestorbene oder kranke Äste. Du kannst den Baum auch etwas auslichten, damit mehr Licht ins Innere gelangt.
* Überwinterung: Guavenbäume sind nicht winterhart und müssen frostfrei überwintert werden. Stelle den Baum an einen hellen und kühlen Ort (ca. 5-10 Grad Celsius). Gieße den Baum während der Überwinterung nur sparsam.
* Schädlinge und Krankheiten: Achte auf Schädlinge und Krankheiten. Guavenbäume können von Blattläusen, Spinnmilben oder Schildläusen befallen werden. Bei Bedarf kannst du ein geeignetes Pflanzenschutzmittel verwenden.
Häufige Probleme und Lösungen
Auch bei der Guavenbaum-Pflege können mal Probleme auftreten. Hier sind einige häufige Probleme und meine Lösungen:
* Gelbe Blätter: Gelbe Blätter können ein Zeichen für Nährstoffmangel, Überwässerung oder Staunässe sein. Überprüfe die Bewässerung und dünge den Baum gegebenenfalls.
* Blattfall: Blattfall kann durch Stress, Trockenheit oder Kälte verursacht werden. Stelle sicher, dass der Baum ausreichend Wasser bekommt und vor Frost geschützt ist.
* Keine Früchte: Wenn der Baum keine Früchte trägt, kann das an mangelnder Bestäubung, Nährstoffmangel oder zu wenig Sonne liegen. Du kannst die Bestäubung unterstützen, indem du die Blüten mit einem Pinsel bestäubst. Dünge den Baum regelmäßig und stelle sicher, dass er ausreichend Sonne bekommt.
Erntezeit: Die Früchte deiner Arbeit genießen
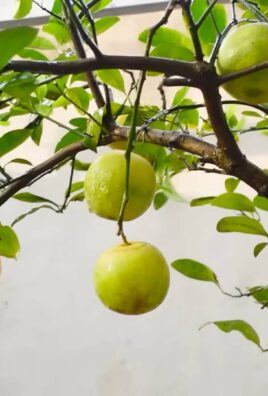
Nach einiger Zeit (je nach Sorte und Standort) wird dein Guavenbaum Früchte tragen. Die Früchte sind reif, wenn sie sich leicht vom Baum lösen lassen und einen angenehmen Duft verströmen. Die Farbe der Früchte variiert je nach Sorte.
Ich liebe es, meine eigenen Guaven zu ernten und sie frisch zu essen oder zu Marmelade zu verarbeiten. Es ist einfach ein tolles Gefühl, die Früchte seiner eigenen Arbeit zu genießen!
Zusätzliche Tipps und Tricks
Hier sind noch ein paar zusätzliche Tipps, die dir bei der Guavenbaum-Pflege helfen können:
* Regelmäßiges Umtopfen: Topfe den Baum alle 2-3 Jahre in einen größeren Topf um. Das gibt den Wurzeln mehr Platz zum Wachsen und sorgt für eine bessere Nährstoffversorgung.
* Bodenprobe: Lass regelmäßig eine Bodenprobe machen, um den pH-Wert und den Nährstoffgehalt des Bodens zu überprüfen.
* Luftfeuchtigkeit erhöhen: Guavenbäume lieben eine hohe Luftfeuchtigkeit. Du kannst die Luftfeuchtigkeit erhöhen, indem du den Baum regelmäßig mit Wasser besprühst oder eine Schale mit Wasser in die Nähe des Baumes stellst.
* Schutz vor Wind: Stelle den Baum an einen windgeschützten Standort, um Schäden durch starken Wind zu vermeiden.
Ich hoffe, meine Anleitung hilft dir dabei, deinen eigenen Guavenbaum erfolgreich auf der Terrasse zu pflanzen und zu pflegen. Es ist ein lohnendes Projekt, das dir viele Jahre Freude bereiten wird. Viel Erfolg und viel Spaß beim Gärtnern!

Conclusion
So, there you have it! Transforming your terrace into a guava haven is not only achievable but also incredibly rewarding. This DIY terrace guava tree planting method empowers you to cultivate your own delicious and nutritious fruit, right at your doorstep. Forget the bland, store-bought guavas; imagine biting into a juicy, sun-ripened guava that you nurtured from a sapling. The difference in flavor and freshness is simply unparalleled.
This method isn’t just about the fruit, though. It’s about creating a vibrant, green space on your terrace, attracting beneficial insects and pollinators, and adding a touch of tropical beauty to your urban environment. It’s a sustainable way to enjoy fresh produce and connect with nature, even in the heart of the city.
Why is this DIY trick a must-try? Because it’s cost-effective, environmentally friendly, and yields incredibly flavorful results. You’re in control of the entire process, from selecting the variety of guava that best suits your taste to ensuring it receives the optimal care and attention. Plus, it’s a fantastic learning experience that can be shared with family and friends.
Looking for variations? Consider experimenting with different guava varieties. Pink guavas, white guavas, and even lemon guavas offer unique flavor profiles. You can also explore companion planting, adding herbs and flowers around your guava tree to deter pests and attract beneficial insects. Think basil, marigolds, or even some low-growing succulents to add visual appeal and ecological benefits. Another variation is to use different types of containers. While we’ve focused on larger pots, you could also explore raised beds or even repurposed containers like old bathtubs or troughs, ensuring proper drainage, of course.
Don’t be intimidated by the process. Terrace guava tree planting is surprisingly straightforward, and the rewards are well worth the effort. With a little planning, preparation, and consistent care, you’ll be harvesting your own delicious guavas in no time.
We wholeheartedly encourage you to give this DIY trick a try. Embrace the challenge, get your hands dirty, and experience the joy of growing your own food. And most importantly, share your experience with us! We’d love to hear about your successes, challenges, and any tips or tricks you discover along the way. Post photos of your guava tree, share your favorite guava recipes, and let’s create a community of terrace guava growers! Let’s transform our urban spaces, one guava tree at a time.
Now, let’s address some frequently asked questions to ensure your terrace guava tree planting journey is a resounding success.
Frequently Asked Questions (FAQ)
What is the best time of year to plant a guava tree on my terrace?
The ideal time to plant a guava tree is during the late spring or early summer, after the last frost has passed. This allows the tree ample time to establish its roots before the onset of winter. However, in warmer climates with mild winters, you can plant guava trees year-round, provided you protect them from extreme heat or cold. Avoid planting during the peak of summer heat or during periods of heavy rainfall.
What size pot should I use for my guava tree?
The size of the pot depends on the variety of guava you choose and its expected mature size. Generally, a pot that is at least 24 inches in diameter and 24 inches deep is a good starting point. As the tree grows, you may need to transplant it into a larger container. Ensure the pot has adequate drainage holes to prevent waterlogging, which can lead to root rot.
What type of soil is best for guava trees?
Guava trees thrive in well-draining soil that is rich in organic matter. A good potting mix for guava trees should consist of a combination of garden soil, compost, and perlite or vermiculite. The compost provides essential nutrients, while the perlite or vermiculite improves drainage and aeration. Avoid using heavy clay soils, as they can retain too much moisture and suffocate the roots. A slightly acidic to neutral pH (6.0-7.0) is ideal.
How often should I water my guava tree?
Watering frequency depends on the climate, the size of the pot, and the age of the tree. Young guava trees need more frequent watering than mature trees. Generally, water deeply whenever the top inch of soil feels dry to the touch. Avoid overwatering, as this can lead to root rot. During the hot summer months, you may need to water daily, while during the cooler months, you can reduce watering frequency. Ensure proper drainage to prevent water from accumulating at the bottom of the pot.
How much sunlight does a guava tree need?
Guava trees require at least 6-8 hours of direct sunlight per day to thrive and produce fruit. Choose a location on your terrace that receives ample sunlight throughout the day. If your terrace is partially shaded, try to position the tree where it receives morning sun, which is less intense than afternoon sun. Insufficient sunlight can result in poor fruit production and stunted growth.
How do I fertilize my guava tree?
Guava trees benefit from regular fertilization, especially during the growing season. Use a balanced fertilizer with a ratio of 10-10-10 or 14-14-14. Apply the fertilizer according to the manufacturer’s instructions, typically every 2-3 months during the spring and summer. You can also supplement with organic fertilizers such as compost tea or fish emulsion. Avoid over-fertilizing, as this can burn the roots.
How do I prune my guava tree?
Pruning is essential for maintaining the shape and size of your guava tree, as well as promoting fruit production. Prune your guava tree in late winter or early spring, before new growth begins. Remove any dead, diseased, or crossing branches. Thin out the canopy to allow for better air circulation and sunlight penetration. You can also prune to shape the tree and control its size. Guava trees fruit on new growth, so avoid excessive pruning that removes too much of the current year’s growth.
How do I protect my guava tree from pests and diseases?
Guava trees are generally resistant to pests and diseases, but they can be susceptible to certain problems, such as aphids, scale, and fruit flies. Regularly inspect your tree for signs of infestation or disease. If you notice any problems, treat them promptly with appropriate insecticides or fungicides. You can also use organic pest control methods, such as neem oil or insecticidal soap. Good air circulation and proper watering can also help prevent disease. Consider using netting to protect the fruit from birds and fruit flies.
How long does it take for a guava tree to produce fruit?
The time it takes for a guava tree to produce fruit depends on the variety, the age of the tree, and the growing conditions. Generally, guava trees grown from seed can take 3-5 years to produce fruit, while grafted trees can start producing fruit in 1-2 years. Proper care, including adequate sunlight, watering, and fertilization, can help accelerate fruit production.
Can I grow different varieties of guava in the same pot?
While it’s technically possible to graft different varieties of guava onto a single tree, it’s generally not recommended to grow multiple varieties in the same pot. Each variety has its own growth habits and nutrient requirements, which can make it difficult to manage in a confined space. It’s best to grow each variety in its own separate pot to ensure optimal growth and fruit production.
What do I do if my guava tree is not fruiting?
There are several reasons why your guava tree may not be fruiting. First, ensure that it is receiving enough sunlight (at least 6-8 hours per day). Second, check the soil pH and nutrient levels. Guava trees prefer slightly acidic to neutral soil and benefit from regular fertilization. Third, make sure the tree is properly pruned to encourage new growth, where the fruit develops. Fourth, consider the age of the tree; young trees may take several years to mature and produce fruit. Finally, ensure the tree is receiving adequate water, especially during flowering and fruit development. If you’ve addressed all these factors and the tree still isn’t fruiting, it may be a pollination issue. You can try hand-pollinating the flowers to improve fruit set.
Leave a Comment