

Growing Cauliflower and Broccoli can seem daunting, right? I get it! You envision vibrant, healthy heads bursting from your garden, but the reality can sometimes be… less than impressive. Maybe you’ve battled pests, nutrient deficiencies, or just plain old confusion about when and how to plant. But don’t worry, I’m here to tell you that with a few clever DIY tricks and hacks, you can absolutely master the art of cultivating these nutritional powerhouses in your own backyard!
For centuries, cauliflower and broccoli have been staples in diets around the world. Originating in the Mediterranean, these cruciferous vegetables were prized for their health benefits and versatility. From Roman emperors to modern-day foodies, people have recognized the value of incorporating these veggies into their meals. But you don’t need to be a seasoned farmer to enjoy the fruits (or rather, vegetables!) of your labor.
In today’s world, where we’re increasingly conscious of where our food comes from, growing cauliflower and broccoli at home offers a fantastic way to connect with nature, reduce your carbon footprint, and enjoy the freshest, most delicious produce imaginable. Plus, let’s be honest, there’s something incredibly satisfying about harvesting something you’ve nurtured from seed to table. This article is packed with simple, effective DIY solutions to common gardening challenges, ensuring you’ll be harvesting beautiful, bountiful crops in no time. So, grab your gardening gloves, and let’s get started!
Kopfkohl-Anbau leicht gemacht: Blumenkohl und Brokkoli im eigenen Garten
Hallo Gartenfreunde! Ich zeige euch heute, wie ihr ganz einfach Blumenkohl und Brokkoli in eurem eigenen Garten anbauen könnt. Keine Angst, es ist gar nicht so schwer, wie es aussieht! Mit ein bisschen Planung und Pflege werdet ihr bald eure eigene, frische Ernte genießen können. Los geht’s!
Die Grundlagen: Was Blumenkohl und Brokkoli lieben
Bevor wir loslegen, ist es wichtig zu verstehen, was Blumenkohl und Brokkoli zum Gedeihen brauchen. Hier eine kurze Zusammenfassung:
* Sonne: Beide Gemüsesorten lieben die Sonne! Mindestens 6 Stunden direkte Sonneneinstrahlung pro Tag sind ideal.
* Boden: Ein gut durchlässiger, nährstoffreicher Boden ist das A und O. Der pH-Wert sollte idealerweise zwischen 6,0 und 7,0 liegen.
* Wasser: Regelmäßige Bewässerung ist wichtig, besonders während der Kopfbildung. Achtet darauf, dass der Boden nicht austrocknet.
* Nährstoffe: Blumenkohl und Brokkoli sind Starkzehrer. Eine gute Düngung ist daher unerlässlich.
* Kühle Temperaturen: Beide Gemüsesorten bevorzugen kühle Temperaturen. Ideal sind Temperaturen zwischen 15°C und 20°C.
Schritt-für-Schritt-Anleitung: Von der Aussaat bis zur Ernte
Hier ist eine detaillierte Anleitung, die euch durch den gesamten Prozess führt:
1. Die Aussaat: Der Grundstein für eine reiche Ernte
* Zeitpunkt: Der Zeitpunkt der Aussaat hängt von eurem Klima ab. In kälteren Regionen solltet ihr die Samen im Haus vorziehen, etwa 6-8 Wochen vor dem letzten Frost. In milderen Regionen könnt ihr die Samen direkt ins Freiland säen, sobald der Boden bearbeitbar ist.
* Vorkultur im Haus:
1. Füllt kleine Anzuchttöpfe mit Anzuchterde.
2. Legt 2-3 Samen pro Topf etwa 1 cm tief in die Erde.
3. Gießt die Erde vorsichtig an.
4. Stellt die Töpfe an einen hellen, warmen Ort (ca. 20°C).
5. Haltet die Erde feucht, aber nicht nass.
6. Sobald die Sämlinge gekeimt sind (nach etwa 7-10 Tagen), entfernt ihr den schwächsten Sämling pro Topf.
* Direktsaat im Freiland:
1. Bereitet den Boden vor, indem ihr ihn lockert und mit Kompost anreichert.
2. Zieht Saatrillen im Abstand von etwa 45 cm.
3. Legt die Samen etwa 1 cm tief in die Rillen.
4. Bedeckt die Samen mit Erde und gießt sie vorsichtig an.
5. Sobald die Sämlinge aufgegangen sind, vereinzelt ihr sie auf einen Abstand von etwa 45 cm.
2. Das Auspflanzen: Ab ins Beet!
* Vorbereitung: Bevor ihr die Jungpflanzen ins Beet setzt, solltet ihr den Boden gut vorbereiten. Lockert ihn auf, entfernt Unkraut und reichert ihn mit Kompost oder organischem Dünger an.
* Der richtige Zeitpunkt: Die Jungpflanzen können ins Beet gesetzt werden, sobald keine Frostgefahr mehr besteht und die Pflanzen etwa 10-15 cm groß sind.
* Das Auspflanzen:
1. Hebt Pflanzlöcher im Abstand von etwa 45 cm aus.
2. Setzt die Jungpflanzen vorsichtig in die Löcher.
3. Füllt die Löcher mit Erde und drückt sie leicht an.
4. Gießt die Pflanzen gründlich an.
* Schutz vor Schädlingen: Um die jungen Pflanzen vor Schädlingen wie Kohlweißlingen zu schützen, könnt ihr ein Insektenschutznetz über das Beet spannen.
3. Die Pflege: Gießen, Düngen, Unkraut jäten
* Bewässerung: Blumenkohl und Brokkoli brauchen regelmäßige Bewässerung, besonders während der Kopfbildung. Achtet darauf, dass der Boden immer leicht feucht ist, aber nicht nass. Gießt am besten morgens, damit die Blätter bis zum Abend abtrocknen können.
* Düngung: Da Blumenkohl und Brokkoli Starkzehrer sind, ist eine regelmäßige Düngung wichtig. Verwendet am besten organischen Dünger wie Kompost, Hornspäne oder Gemüsedünger. Düngt die Pflanzen etwa alle 2-3 Wochen.
* Unkraut jäten: Haltet das Beet unkrautfrei, damit die Pflanzen nicht um Nährstoffe und Wasser konkurrieren müssen. Jätet regelmäßig Unkraut und lockert den Boden auf.
* Mulchen: Eine Mulchschicht aus Stroh, Rasenschnitt oder Laub hilft, den Boden feucht zu halten, Unkraut zu unterdrücken und den Boden zu düngen.
* Kopfbildung unterstützen: Bei Blumenkohl könnt ihr die Köpfe vor direkter Sonneneinstrahlung schützen, indem ihr einige Blätter darüber bindet. Dadurch bleiben die Köpfe schön weiß.
4. Die Ernte: Endlich frisches Gemüse!
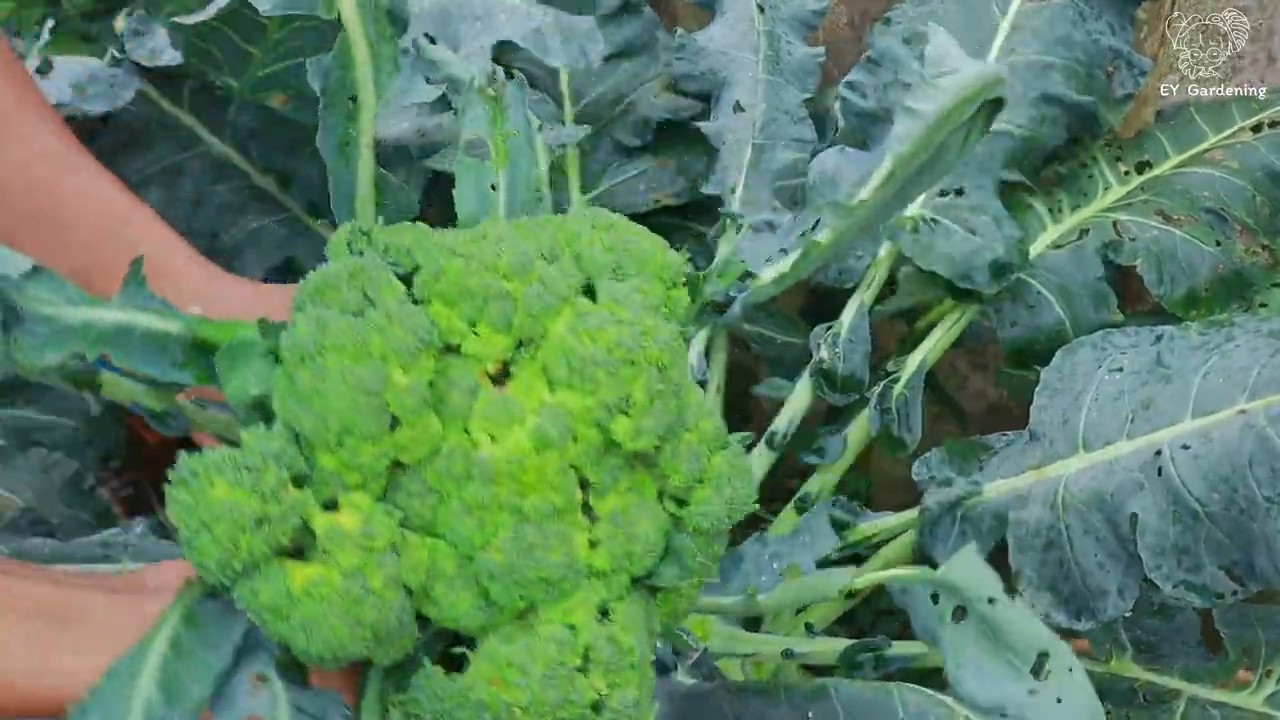
* Der richtige Zeitpunkt: Der Zeitpunkt der Ernte hängt von der Sorte und den Wachstumsbedingungen ab. Blumenkohl ist erntereif, wenn der Kopf fest und kompakt ist und eine Größe von etwa 15-20 cm erreicht hat. Brokkoli ist erntereif, wenn die Röschen fest und geschlossen sind.
* Die Ernte: Schneidet den Blumenkohl- oder Brokkolikopf mit einem scharfen Messer ab. Lasst dabei einige Blätter am Strunk, um die Haltbarkeit zu verlängern.
* Nach der Ernte: Bei Brokkoli bilden sich oft Seitentriebe, die ihr ebenfalls ernten könnt.
Herausforderungen und Lösungen: Was tun, wenn es nicht klappt?
Auch beim Anbau von Blumenkohl und Brokkoli kann es zu Problemen kommen. Hier sind einige häufige Herausforderungen und mögliche Lösungen:
* Kohlhernie: Diese Krankheit wird durch einen Pilz verursacht und führt zu Wucherungen an den Wurzeln. Um Kohlhernie vorzubeugen, solltet ihr eine Fruchtfolge einhalten und den Boden kalken.
* Kohlweißling: Die Raupen des Kohlweißlings fressen die Blätter der Pflanzen. Um sie zu bekämpfen, könnt ihr ein Insektenschutznetz verwenden oder die Raupen absammeln.
* Erdflöhe: Diese kleinen Käfer fressen Löcher in die Blätter. Um sie zu bekämpfen, könnt ihr den Boden feucht halten und die Pflanzen mit einem Insektizid behandeln.
* Blattläuse: Blattläuse saugen Pflanzensaft und können die Pflanzen schwächen. Um sie zu bekämpfen, könnt ihr die Pflanzen mit einem Wasserstrahl abspritzen oder Nützlinge wie Marienkäfer einsetzen.
* Schnecken: Schnecken fressen gerne an den Blättern von Blumenkohl und Brokkoli. Um sie zu bekämpfen, könnt ihr Schneckenkorn streuen oder Schneckenzäune aufstellen.
Sortenempfehlungen: Für jeden Geschmack etwas dabei
Es gibt viele verschiedene Sorten von Blumenkohl und Brokkoli. Hier sind einige Empfehlungen:
* Blumenkohl: ‘Erfurter Zwerg’, ‘Neckarperle’, ‘Snowball’
* Brokkoli: ‘Calabrese’, ‘Romanesco’, ‘Purple Sprouting’
Zusätzliche Tipps und Tricks: Für eine noch bessere Ernte
* Fruchtfolge: Achtet auf eine gute Fruchtfolge, um Krankheiten und Schädlingen vorzubeugen. Baut Blumenkohl und Brokkoli nicht jedes Jahr am selben Standort an.
* Mischkultur: Pflanzt Blumenkohl und Brokkoli in Mischkultur mit anderen Gemüsesorten, die sich gegenseitig fördern. Gute Partner sind zum Beispiel Salat, Spinat, Radieschen und Kräuter wie Dill und Salbei.
* Bodenverbesserung: Verbessert den Boden regelmäßig mit Kompost oder organischem Dünger.
* Regelmäßige Kontrolle: Kontrolliert die Pflanzen regelmäßig auf Schädlinge und Krankheiten. Je früher ihr Probleme erkennt, desto einfacher lassen sie

Conclusion
So, there you have it! Mastering the art of growing cauliflower and broccoli doesn’t have to be an intimidating endeavor. By implementing these simple yet effective DIY tricks, you’re not just planting vegetables; you’re cultivating a thriving garden ecosystem that yields delicious, nutritious harvests. We’ve covered everything from soil preparation and seed starting to pest control and harvesting, equipping you with the knowledge to confidently nurture your cauliflower and broccoli plants from seed to table.
Why is this a must-try? Because fresh, homegrown cauliflower and broccoli offer a flavor profile that simply can’t be matched by store-bought varieties. Imagine the crisp, clean taste of broccoli florets steamed to perfection, or the creamy, nutty flavor of roasted cauliflower, all grown with your own two hands. Beyond the taste, you’ll also have the satisfaction of knowing exactly what went into your food, free from harmful pesticides and chemicals. Plus, gardening is a fantastic way to connect with nature, reduce stress, and get some much-needed vitamin D.
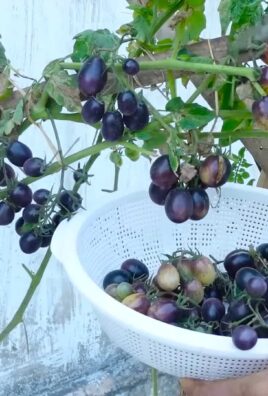
Looking for variations? Consider experimenting with different cauliflower and broccoli varieties. Purple cauliflower adds a vibrant splash of color to your plate, while Romanesco broccoli boasts a unique fractal pattern and a slightly milder flavor. You can also try succession planting, staggering your planting dates to ensure a continuous harvest throughout the growing season. For those with limited space, container gardening is an excellent option. Choose dwarf varieties and use large pots filled with well-draining potting mix. Companion planting is another great way to enhance your garden’s health and productivity. Plant marigolds near your cauliflower and broccoli to deter pests, or interplant with herbs like rosemary and thyme to attract beneficial insects.
Don’t be afraid to get your hands dirty and embrace the learning process. Gardening is a journey, and there will be challenges along the way. But with patience, persistence, and a little bit of know-how, you can successfully grow your own cauliflower and broccoli. Remember to monitor your plants regularly, address any issues promptly, and celebrate your successes, no matter how small.
We wholeheartedly encourage you to try these DIY tricks for growing cauliflower and broccoli. The rewards are well worth the effort. From the satisfaction of harvesting your own produce to the health benefits of eating fresh, homegrown vegetables, you’ll be amazed at what you can achieve. So, grab your gardening gloves, gather your supplies, and get ready to embark on a rewarding gardening adventure.
And most importantly, we want to hear about your experiences! Share your tips, tricks, and triumphs in the comments below. Let us know what worked for you, what challenges you faced, and what you learned along the way. Your insights can help other gardeners succeed and inspire them to try growing their own cauliflower and broccoli. Let’s create a community of passionate gardeners who are dedicated to growing healthy, delicious food. Happy gardening!
Frequently Asked Questions (FAQ)
What is the best time of year to plant cauliflower and broccoli?
The timing depends on your climate. Both cauliflower and broccoli are cool-season crops, meaning they thrive in temperatures between 60°F and 70°F (15°C and 21°C). For spring crops, start seeds indoors 6-8 weeks before the last expected frost. Transplant seedlings outdoors 2-3 weeks before the last frost. For fall crops, start seeds indoors in mid-summer and transplant seedlings outdoors in late summer or early fall. Check your local frost dates to determine the optimal planting time for your region.
How much sunlight do cauliflower and broccoli need?
Cauliflower and broccoli require at least 6 hours of direct sunlight per day. Choose a planting location that receives ample sunlight throughout the day. If you live in a particularly hot climate, some afternoon shade can be beneficial to prevent the plants from bolting (going to seed prematurely).
What type of soil is best for growing cauliflower and broccoli?
Cauliflower and broccoli prefer well-drained, fertile soil that is rich in organic matter. Amend your soil with compost or well-rotted manure before planting to improve its fertility and drainage. The ideal soil pH for cauliflower and broccoli is between 6.0 and 7.0. You can test your soil pH using a soil testing kit and adjust it accordingly with lime (to raise pH) or sulfur (to lower pH).
How often should I water cauliflower and broccoli?
Cauliflower and broccoli need consistent moisture to thrive. Water deeply and regularly, especially during dry periods. Aim to keep the soil consistently moist but not waterlogged. A good rule of thumb is to water when the top inch of soil feels dry to the touch. Mulching around your plants can help retain moisture and suppress weeds.
What are some common pests and diseases that affect cauliflower and broccoli?
Common pests that affect cauliflower and broccoli include cabbage worms, aphids, flea beetles, and cabbage root maggots. Common diseases include clubroot, black rot, and downy mildew. To prevent pest and disease problems, practice good garden hygiene, such as removing plant debris and weeds. Use row covers to protect your plants from pests. Inspect your plants regularly for signs of pests or diseases and take action promptly. Organic pest control methods, such as insecticidal soap or neem oil, can be effective for controlling many pests.
How do I prevent cauliflower from turning yellow?
Cauliflower heads can turn yellow if they are exposed to too much sunlight. To prevent this, blanch the heads by tying the outer leaves together over the developing head when it reaches about 2-3 inches in diameter. This will protect the head from the sun and keep it white.
When is cauliflower and broccoli ready to harvest?
Cauliflower is ready to harvest when the head is firm, compact, and about 6-8 inches in diameter. Broccoli is ready to harvest when the flower buds are tight and green. Cut the main head of broccoli with a sharp knife, leaving several inches of stem. Side shoots will continue to develop after the main head is harvested, providing you with a continuous harvest.
Can I grow cauliflower and broccoli in containers?
Yes, you can grow cauliflower and broccoli in containers, but you will need to choose dwarf varieties and use large pots (at least 5 gallons) filled with well-draining potting mix. Container-grown plants will need more frequent watering and fertilization than plants grown in the ground.
What are some good companion plants for cauliflower and broccoli?
Good companion plants for cauliflower and broccoli include marigolds (to deter pests), rosemary and thyme (to attract beneficial insects), onions and garlic (to repel pests), and lettuce and spinach (to provide ground cover and suppress weeds). Avoid planting cauliflower and broccoli near other members of the brassica family, such as cabbage, kale, and Brussels sprouts, as they can attract the same pests and diseases.
How do I store cauliflower and broccoli after harvesting?
Store cauliflower and broccoli in the refrigerator. Wrap the heads in plastic wrap or place them in a plastic bag. Cauliflower will keep for up to a week in the refrigerator, while broccoli will keep for up to 3-5 days. You can also freeze cauliflower and broccoli for longer storage. Blanch the vegetables in boiling water for 3-5 minutes, then cool them in ice water before freezing.

Leave a Comment