

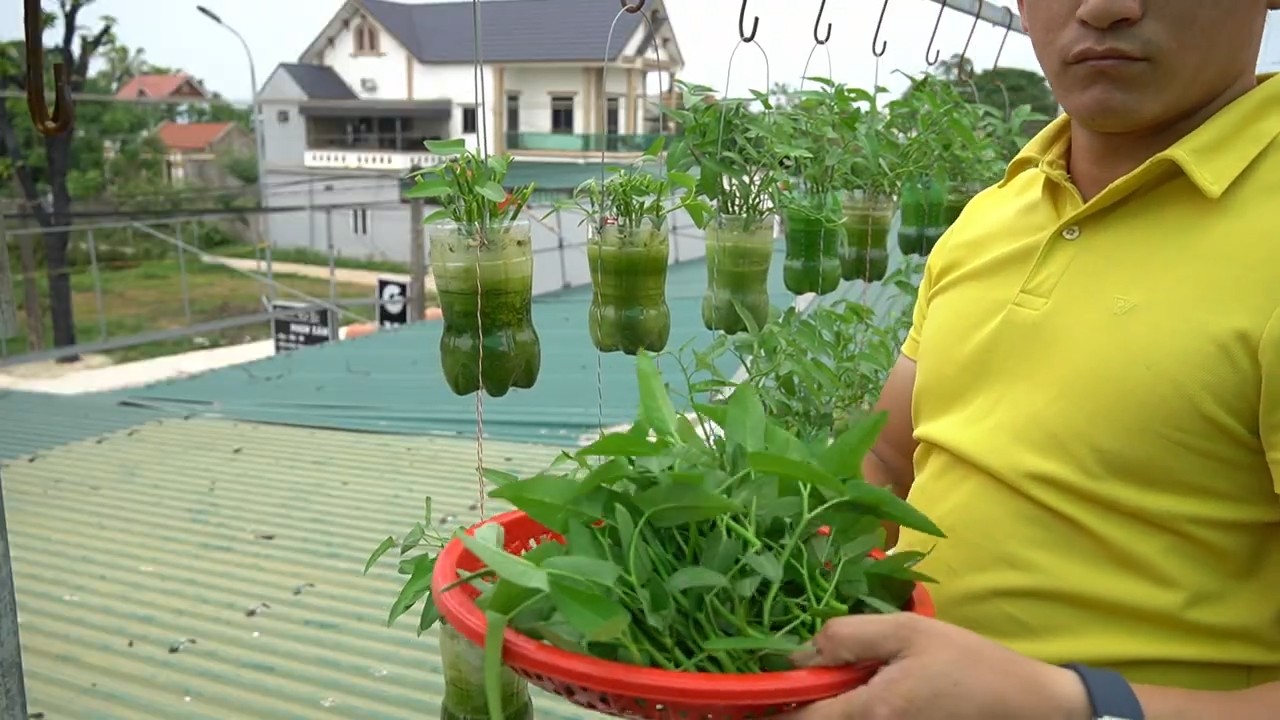
Growing Spinach in Plastic Bottles: Unlock a world of fresh, homegrown goodness right at your fingertips! Have you ever dreamed of harvesting your own vibrant, nutrient-packed spinach but felt limited by space or a lack of a traditional garden? Well, dream no more! This DIY guide is your passport to a thriving spinach patch, even if you only have a sunny balcony or a small patio.
The concept of container gardening, a practice deeply rooted in resourcefulness, dates back centuries. From ancient rooftop gardens in arid climates to the modern-day urban farming movement, people have always found innovative ways to cultivate food in limited spaces. Today, we’re taking that ingenuity a step further by repurposing everyday plastic bottles into miniature spinach havens.
Why should you embrace this clever DIY trick? Because growing spinach in plastic bottles is not only incredibly space-efficient and budget-friendly, but it’s also a fantastic way to reduce waste and connect with nature. Imagine the satisfaction of snipping fresh spinach leaves for your salads, smoothies, or stir-fries, knowing you nurtured them from seed to plate. Plus, it’s a fun and educational project for the whole family! Let’s dive in and transform those discarded bottles into a flourishing green oasis.
Spinat im Plastikflaschen-Garten: Eine DIY-Anleitung
Hallo liebe Gartenfreunde! Habt ihr Lust auf frischen Spinat, aber wenig Platz? Dann habe ich genau das Richtige für euch: Spinat anbauen in Plastikflaschen! Das ist nicht nur super platzsparend, sondern auch eine tolle Möglichkeit, Plastikmüll wiederzuverwerten. Ich zeige euch, wie ihr mit einfachen Mitteln euren eigenen kleinen Spinatgarten zaubern könnt. Los geht’s!
Was ihr braucht:
* Plastikflaschen: Am besten eignen sich 1,5-Liter- oder 2-Liter-Flaschen. Je nachdem, wie viele Pflanzen ihr anbauen wollt, braucht ihr entsprechend viele Flaschen. Achtet darauf, dass sie sauber und leer sind.
* Erde: Ich empfehle eine gute, nährstoffreiche Blumenerde. Ihr könnt auch Gartenerde mit Kompost mischen.
* Spinatsamen: Wählt eine Sorte, die für den Anbau im Topf geeignet ist. Es gibt viele verschiedene Sorten, die sich in Geschmack und Wachstumszeit unterscheiden.
* Messer oder Schere: Zum Zuschneiden der Plastikflaschen.
* Bohrmaschine oder Nagel und Hammer: Für die Entwässerungslöcher.
* Gießkanne oder Sprühflasche: Zum Bewässern der Pflanzen.
* Optional: Kieselsteine oder Tonscherben für die Drainage.
* Optional: Etiketten und Stift zum Beschriften der Flaschen.
Die Vorbereitung der Plastikflaschen
1. Reinigung: Zuerst müsst ihr die Plastikflaschen gründlich reinigen. Entfernt alle Etiketten und spült die Flaschen mit warmem Wasser und Spülmittel aus. Achtet darauf, dass keine Spülmittelreste zurückbleiben.
2. Zuschneiden: Jetzt kommt der spaßige Teil: das Zuschneiden der Flaschen. Es gibt verschiedene Möglichkeiten, wie ihr die Flaschen zuschneiden könnt. Ich zeige euch zwei Varianten:
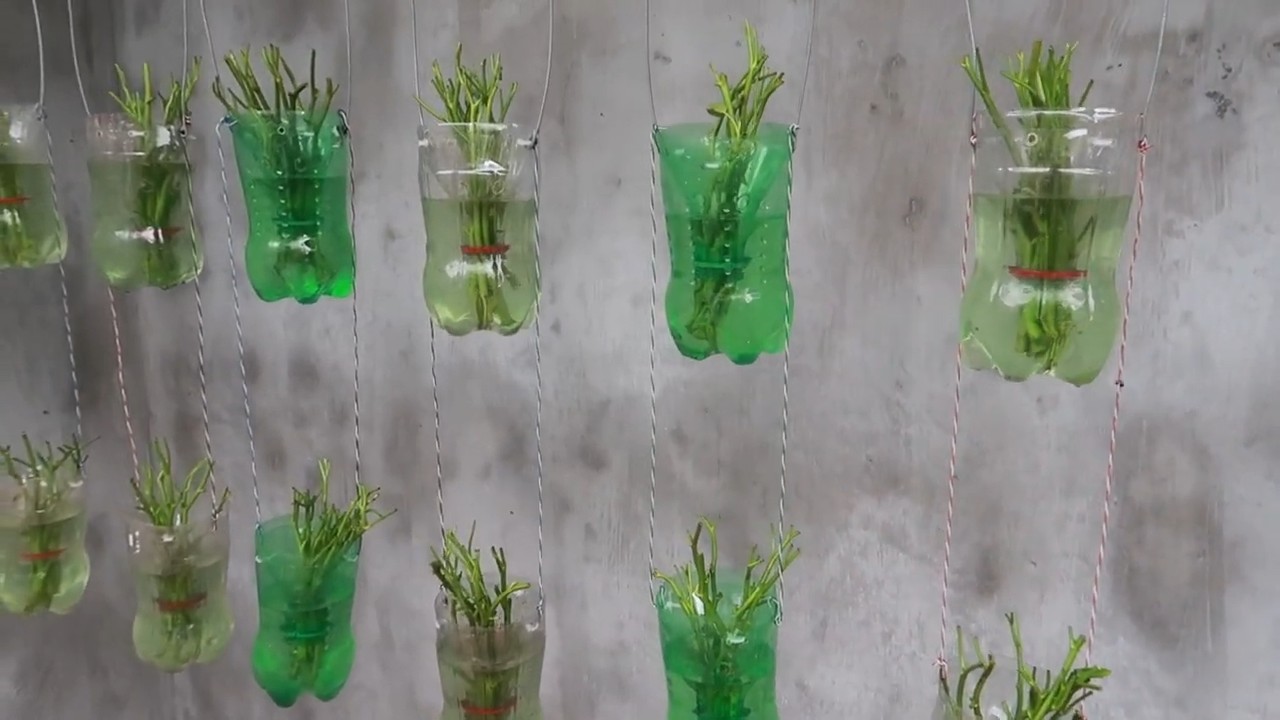
* Variante 1: Horizontaler Schnitt: Schneidet die Flasche horizontal in der Mitte durch. Der obere Teil wird später umgedreht und in den unteren Teil gesteckt. So entsteht ein kleiner Topf.
* Variante 2: Vertikaler Schnitt: Schneidet die Flasche vertikal auf einer Seite auf. Lasst dabei am Boden etwa 5-10 cm stehen. So entsteht eine Art “Balkonkasten”. Diese Variante eignet sich gut, wenn ihr mehrere Pflanzen nebeneinander anbauen wollt.
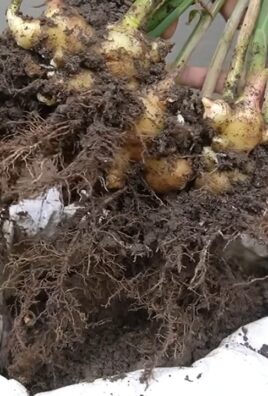
3. Entwässerungslöcher: Damit das Wasser gut ablaufen kann und keine Staunässe entsteht, müsst ihr Entwässerungslöcher in den Boden der Flaschen bohren. Nehmt dazu eine Bohrmaschine oder einen Nagel und Hammer. Macht 3-4 Löcher pro Flasche. Achtet darauf, dass die Löcher nicht zu groß sind, damit keine Erde herausfällt.
Das Befüllen der Flaschen und Aussaat
1. Drainage (optional): Wenn ihr wollt, könnt ihr eine Drainageschicht in den Boden der Flaschen geben. Dazu füllt ihr eine Schicht Kieselsteine oder Tonscherben in die Flaschen. Das verhindert Staunässe und sorgt für eine gute Belüftung der Wurzeln.
2. Erde einfüllen: Füllt die Flaschen mit Erde. Lasst dabei etwa 2-3 cm Platz bis zum Rand. Drückt die Erde leicht an.
3. Aussaat: Verteilt die Spinatsamen gleichmäßig auf der Erde. Beachtet dabei die Angaben auf der Samenpackung bezüglich der Aussaattiefe und des Abstands zwischen den Samen. In der Regel werden Spinatsamen etwa 1-2 cm tief in die Erde gelegt.
4. Bedecken: Bedeckt die Samen mit einer dünnen Schicht Erde. Drückt die Erde leicht an.
5. Bewässern: Gießt die Erde vorsichtig mit einer Gießkanne oder Sprühflasche an. Achtet darauf, dass die Erde gleichmäßig feucht ist, aber nicht zu nass.
Die Pflege des Spinats
1. Standort: Spinat braucht einen hellen Standort, aber keine direkte Sonneneinstrahlung. Ein halbschattiger Platz ist ideal. Stellt die Flaschen an einen Ort, an dem sie vor Wind und Regen geschützt sind.
2. Bewässerung: Spinat braucht regelmäßig Wasser. Die Erde sollte immer leicht feucht sein. Gießt die Pflanzen am besten morgens oder abends, wenn die Sonne nicht scheint. Vermeidet Staunässe.
3. Düngung: Spinat ist ein Starkzehrer und braucht regelmäßig Dünger. Ihr könnt einen organischen Flüssigdünger verwenden oder Komposttee. Düngt die Pflanzen alle 2-3 Wochen.
4. Schutz vor Schädlingen: Spinat kann von verschiedenen Schädlingen befallen werden, wie z.B. Blattläusen oder Schnecken. Kontrolliert die Pflanzen regelmäßig und entfernt Schädlinge bei Bedarf. Ihr könnt auch natürliche Schädlingsbekämpfungsmittel verwenden, wie z.B. Brennnesseljauche.
5. Ernte: Je nach Sorte und Standort ist der Spinat nach etwa 6-8 Wochen erntereif. Erntet die Blätter, sobald sie groß genug sind. Ihr könnt entweder einzelne Blätter ernten oder die ganze Pflanze abschneiden. Wenn ihr nur einzelne Blätter erntet, wächst die Pflanze weiter und ihr könnt mehrmals ernten.
Tipps und Tricks
* Sortenwahl: Wählt eine Spinatsorte, die für den Anbau im Topf geeignet ist. Es gibt viele verschiedene Sorten, die sich in Geschmack und Wachstumszeit unterscheiden. Einige Sorten sind auch resistenter gegen Krankheiten und Schädlinge.
* Aussaatzeitpunkt: Spinat kann im Frühjahr oder im Herbst ausgesät werden. Im Sommer ist es oft zu heiß für Spinat.
* Fruchtfolge: Spinat sollte nicht jedes Jahr am selben Standort angebaut werden. Wechselt den Standort, um Krankheiten und Schädlingen vorzubeugen.
* Mulchen: Mulchen hilft, die Feuchtigkeit im Boden zu halten und Unkraut zu unterdrücken. Ihr könnt die Erde mit Stroh, Heu oder Rasenschnitt mulchen.
* Beschriftung: Beschriftet die Flaschen mit dem Namen der Spinatsorte und dem Aussaatdatum. So behaltet ihr den Überblick.
* Kreative Gestaltung: Bemalt die Plastikflaschen oder beklebt sie mit bunten Papieren. So wird euer Spinatgarten zu einem echten Hingucker.
Weitere Ideen für den Plastikflaschen-Garten
* Kräuter anbauen: In Plastikflaschen könnt ihr auch andere Kräuter anbauen, wie z.B. Petersilie, Schnittlauch oder Basilikum.
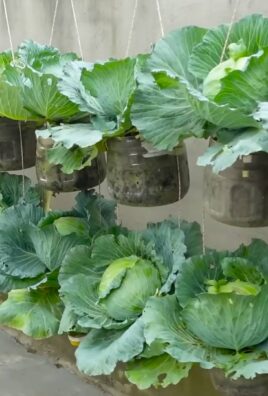
* Salat anbauen: Auch Salat lässt sich gut in Plastikflaschen anbauen.
* Erdbeeren anbauen: Mit etwas Geschick könnt ihr sogar Erdbeeren in Plastikflaschen anbauen.
* Vertikaler Garten: Befestigt die Plastikflaschen an einer Wand oder einem Zaun und gestaltet einen vertikalen Garten.
Ich hoffe, diese Anleitung hat euch gefallen und inspiriert, euren eigenen Spinatgarten in Plastikflaschen anzulegen. Es ist wirklich einfach und macht Spaß! Probiert es aus und genießt bald euren eigenen frischen Spinat. Viel Erfolg!
Conclusion
So, there you have it! Growing spinach in plastic bottles isn’t just a quirky gardening experiment; it’s a genuinely effective and rewarding way to cultivate fresh, nutritious greens, even if you’re short on space or dealing with less-than-ideal soil conditions. This method transforms discarded plastic into a thriving mini-garden, reducing waste and providing you with a constant supply of delicious spinach.
Why is this a must-try? Because it’s accessible, affordable, and incredibly satisfying. Imagine stepping outside your door and harvesting crisp, vibrant spinach leaves for your salad, smoothie, or stir-fry, knowing you grew them yourself in a recycled container. It’s a small act with a big impact, both on your plate and on the environment.
But the beauty of this DIY project lies in its adaptability. Feel free to experiment with different types of plastic bottles. Larger bottles can accommodate more spinach plants, while smaller bottles are perfect for starting seeds or growing baby spinach. You can also explore different potting mixes to find what works best for your local climate and spinach variety. Consider adding a slow-release fertilizer to the soil for an extra boost of nutrients.
For those looking to take their bottle garden to the next level, try creating a vertical garden by stacking multiple bottles on top of each other. This maximizes space and creates a visually stunning display. You can also add drainage holes to the bottom of each bottle to prevent waterlogging.
Don’t be afraid to get creative with your bottle garden! Paint the bottles with vibrant colors, add decorative labels, or even create a small trellis for the spinach to climb. The possibilities are endless.
The key to success with growing spinach in plastic bottles is consistent care. Ensure your plants receive adequate sunlight, water, and nutrients. Regularly check the soil moisture and adjust your watering schedule accordingly. And don’t forget to harvest your spinach regularly to encourage continued growth.
We are confident that you’ll find this DIY trick to be a game-changer for your gardening endeavors. It’s a simple, sustainable, and incredibly rewarding way to enjoy fresh, homegrown spinach. So, gather your plastic bottles, grab some potting mix, and get ready to experience the joy of growing your own food.
Now it’s your turn! We encourage you to try this method of **growing spinach in plastic bottles** and share your experiences with us. Post photos of your bottle gardens on social media using #BottleSpinachGarden and let us know what tips and tricks you discover along the way. We can’t wait to see your creations and learn from your experiences. Happy gardening!
Frequently Asked Questions (FAQ)
What type of plastic bottles are best for growing spinach?
Ideally, you should use food-grade plastic bottles, such as those used for water, juice, or soda. Avoid using bottles that have contained harsh chemicals or pesticides. Clear or translucent bottles are preferable as they allow sunlight to reach the soil. Make sure to thoroughly clean and rinse the bottles before using them to remove any residue. PET (Polyethylene Terephthalate) bottles are a common and suitable choice.
How do I prepare the plastic bottles for planting?
First, thoroughly clean the bottles with soap and water. Remove any labels or adhesive residue. Next, cut the bottle in half horizontally. You can either use the top half as a mini-greenhouse by inverting it over the bottom half, or discard it. Drill or poke drainage holes in the bottom of the bottle to prevent waterlogging. These holes are crucial for healthy root development.
What type of soil should I use for growing spinach in plastic bottles?
A well-draining potting mix is essential. You can use a commercially available potting mix or create your own by combining equal parts of garden soil, compost, and perlite or vermiculite. The compost provides nutrients, while the perlite or vermiculite improves drainage and aeration. Avoid using heavy clay soil, as it can become waterlogged and suffocate the roots.
How much sunlight does spinach need when grown in plastic bottles?
Spinach thrives in partial to full sunlight, requiring at least 4-6 hours of direct sunlight per day. If you live in a hot climate, provide some afternoon shade to prevent the leaves from wilting. Place your bottle garden in a sunny location, such as a windowsill, balcony, or patio. If you don’t have enough natural light, you can supplement with grow lights.
How often should I water my spinach plants in plastic bottles?
Water your spinach plants regularly, keeping the soil consistently moist but not waterlogged. Check the soil moisture by sticking your finger about an inch into the soil. If it feels dry, it’s time to water. Water deeply, allowing the water to drain out of the drainage holes. Avoid overhead watering, as it can promote fungal diseases.
What are some common pests and diseases that affect spinach, and how can I prevent them?
Common pests that affect spinach include aphids, spider mites, and leaf miners. You can prevent these pests by regularly inspecting your plants and removing any infested leaves. You can also use insecticidal soap or neem oil to control infestations. Common diseases include downy mildew and powdery mildew. Prevent these diseases by providing good air circulation and avoiding overhead watering.
When is the best time to harvest spinach grown in plastic bottles?
You can start harvesting spinach leaves when they are about 4-6 inches long. Harvest the outer leaves first, leaving the inner leaves to continue growing. Regular harvesting encourages continued growth and prevents the plants from bolting (going to seed). Spinach is typically ready to harvest about 4-6 weeks after planting.
Can I grow other vegetables or herbs in plastic bottles alongside spinach?
Yes, you can grow other compatible vegetables and herbs in plastic bottles alongside spinach. Good companion plants for spinach include lettuce, radishes, and herbs like basil and mint. Avoid planting spinach near plants that compete for nutrients or attract pests, such as beans and tomatoes.
How do I deal with bolting (premature flowering) in spinach?
Bolting is a common problem in spinach, especially during hot weather. Once spinach bolts, the leaves become bitter and unpalatable. To prevent bolting, choose bolt-resistant varieties, provide shade during hot weather, and harvest regularly. If your spinach plants start to bolt, you can still harvest the leaves, but they may not taste as good.
Can I reuse the soil from my plastic bottle garden for future plantings?
Yes, you can reuse the soil from your plastic bottle garden, but it’s important to replenish the nutrients. After harvesting your spinach, remove any plant debris and add compost or other organic matter to the soil. You can also add a slow-release fertilizer to provide a boost of nutrients for the next planting.

Leave a Comment