

Grow Giant Mustard Greens and transform your garden into a vibrant, edible landscape! Have you ever dreamed of harvesting mustard greens so large they practically feed the whole neighborhood? Well, you’re in the right place! This isn’t just about growing greens; it’s about unlocking the secrets to cultivating colossal, flavorful leaves that will elevate your culinary creations and impress your gardening buddies.
Mustard greens have a rich history, deeply rooted in Asian and African cuisines for centuries. They’re not just delicious; they’re packed with vitamins and minerals, making them a nutritional powerhouse. But let’s be honest, sometimes those store-bought greens can be a little… underwhelming. That’s where this DIY guide comes in!
I’m going to share my tried-and-true tricks and hacks to help you grow giant mustard greens right in your own backyard. Whether you’re a seasoned gardener or just starting out, these simple techniques will help you achieve impressive results. Imagine the satisfaction of harvesting massive, vibrant leaves, knowing you nurtured them from seed to spectacular size. Forget those puny greens – it’s time to cultivate a mustard green jungle! So, grab your gardening gloves, and let’s get started!
“`html
Riesige Senfblätter selbst anbauen: Ein umfassender Leitfaden
Hallo Gartenfreunde! Habt ihr jemals davon geträumt, riesige, saftige Senfblätter in eurem eigenen Garten zu ernten? Ich zeige euch, wie ihr diesen Traum verwirklichen könnt! Senfblätter sind nicht nur unglaublich lecker, sondern auch reich an Vitaminen und Mineralstoffen. Und das Beste daran? Sie sind relativ einfach anzubauen, selbst wenn ihr keine erfahrenen Gärtner seid. Lasst uns gemeinsam in dieses spannende Projekt eintauchen!
Was ihr für den Anbau riesiger Senfblätter benötigt
Bevor wir loslegen, hier eine Liste der Dinge, die ihr braucht:
* Senfsamen: Wählt eine Sorte, die für große Blätter bekannt ist. ‘Giant Southern Curled’ oder ‘Florida Broadleaf’ sind gute Optionen.
* Hochwertige Erde: Senfblätter lieben nährstoffreiche, gut durchlässige Erde.
* Kompost oder organischer Dünger: Um die Erde zusätzlich anzureichern.
* Gartengeräte: Spaten, Harke, Gießkanne oder Gartenschlauch.
* Mulch: Stroh, Holzhackschnitzel oder ähnliches, um die Feuchtigkeit zu halten und Unkraut zu unterdrücken.
* Sonniger Standort: Senfblätter brauchen mindestens 6 Stunden Sonne pro Tag.
* Geduld: Riesige Senfblätter brauchen Zeit und Pflege!
Schritt-für-Schritt-Anleitung zum Anbau riesiger Senfblätter
1. Den Boden vorbereiten:
* Wählt einen sonnigen Standort in eurem Garten.
* Lockert den Boden mit einem Spaten oder einer Grabegabel auf. Entfernt Steine, Wurzeln und Unkraut.
* Mischt reichlich Kompost oder organischen Dünger in den Boden. Senfblätter sind hungrig und brauchen viele Nährstoffe, um groß und stark zu werden. Ich verwende immer eine ordentliche Portion Kompost, das macht wirklich einen Unterschied!
* Harkt den Boden glatt, um eine ebene Oberfläche zu schaffen.
2. Die Samen säen:
* Senfsamen können direkt ins Freiland gesät werden, sobald die Frostgefahr vorüber ist. Ich säe meine Samen gerne im Frühjahr oder Spätsommer für eine reiche Ernte.
* Sät die Samen etwa 1 cm tief und mit einem Abstand von etwa 5-10 cm zueinander. Wenn ihr die Samen zu dicht säet, müsst ihr sie später ausdünnen.
* Bedeckt die Samen leicht mit Erde und gießt sie vorsichtig an. Achtet darauf, dass der Boden feucht, aber nicht durchnässt ist.
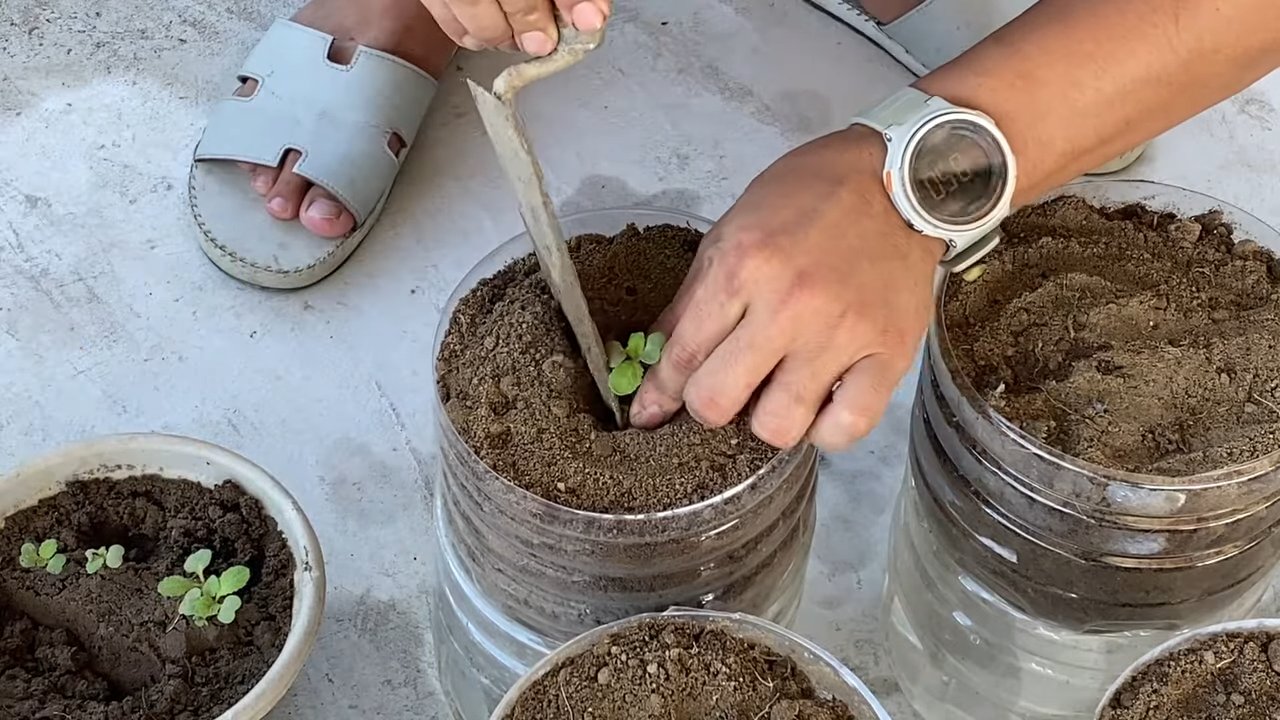
3. Die Keimung und das Ausdünnen:
* Die Samen sollten innerhalb von 5-10 Tagen keimen.
* Sobald die Sämlinge ein paar Zentimeter groß sind, müsst ihr sie ausdünnen, damit die verbleibenden Pflanzen genügend Platz zum Wachsen haben. Ich dünne meine Sämlinge auf einen Abstand von etwa 20-30 cm aus. Das mag viel erscheinen, aber glaubt mir, die Pflanzen brauchen diesen Platz, um riesig zu werden!
* Entfernt die schwächsten Sämlinge und lasst die stärksten stehen.
4. Die Pflege der Senfblätter:
* Gießen: Senfblätter brauchen regelmäßige Bewässerung, besonders während trockener Perioden. Achtet darauf, dass der Boden immer feucht ist, aber vermeidet Staunässe. Ich gieße meine Pflanzen am liebsten früh am Morgen, damit die Blätter Zeit haben, bis zum Abend abzutrocknen.
* Düngen: Düngt die Pflanzen alle paar Wochen mit einem organischen Dünger oder Komposttee. Das hilft ihnen, schnell zu wachsen und große, saftige Blätter zu entwickeln.
* Unkrautbekämpfung: Haltet den Bereich um die Senfblätter frei von Unkraut. Unkraut konkurriert mit den Pflanzen um Nährstoffe und Wasser. Ich jäte mein Beet regelmäßig und mulche es, um das Unkrautwachstum zu unterdrücken.
* Schutz vor Schädlingen: Senfblätter können von verschiedenen Schädlingen befallen werden, wie z.B. Blattläusen, Kohlweißlingen und Schnecken. Kontrolliert eure Pflanzen regelmäßig auf Schädlinge und ergreift bei Bedarf Maßnahmen. Ich verwende gerne natürliche Schädlingsbekämpfungsmittel wie Neemöl oder Insektizidseife.
5. Mulchen für optimale Bedingungen:
* Sobald die Sämlinge etwas größer sind, mulcht den Bereich um die Pflanzen mit Stroh, Holzhackschnitzeln oder ähnlichem Material.
* Mulch hilft, die Feuchtigkeit im Boden zu halten, Unkraut zu unterdrücken und den Boden kühl zu halten. Ich finde, dass Mulchen einen riesigen Unterschied macht, besonders in heißen Sommern.
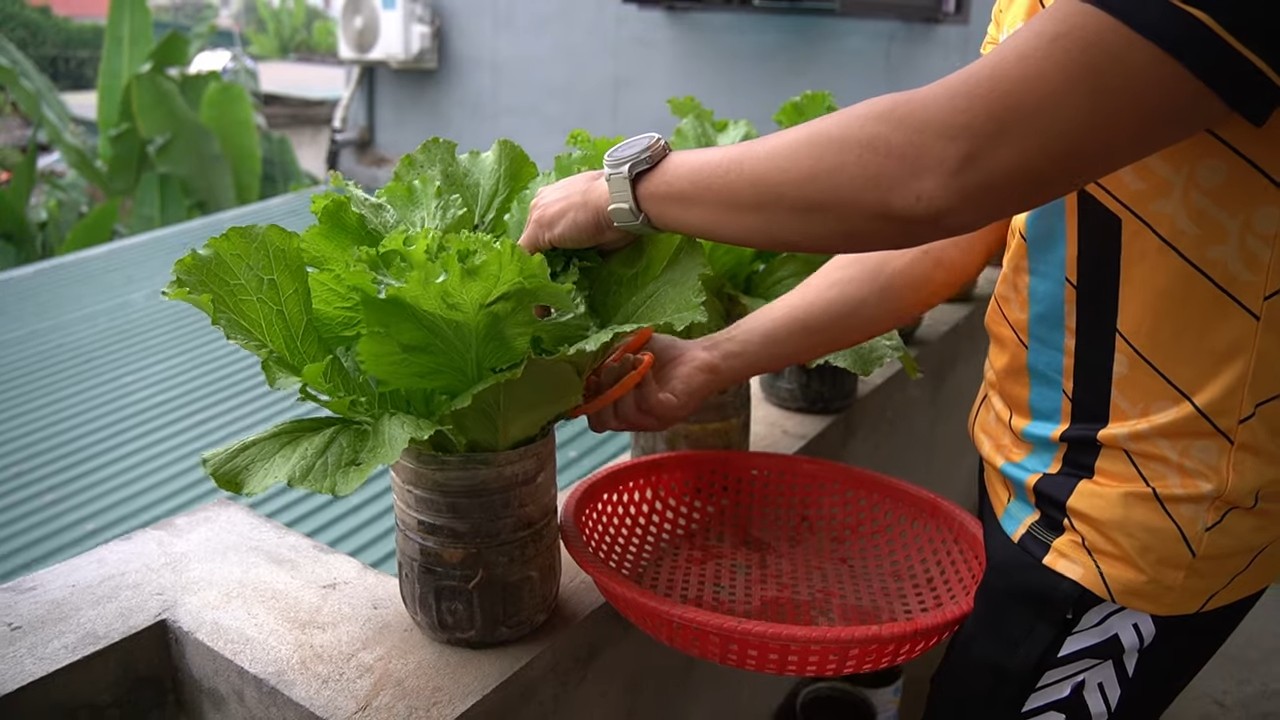
Die Ernte der riesigen Senfblätter
* Senfblätter können geerntet werden, sobald sie groß genug sind, um sie zu essen. Ich ernte meine Blätter gerne, wenn sie etwa 20-30 cm lang sind.
* Schneidet die äußeren Blätter mit einem Messer oder einer Schere ab. Lasst die inneren Blätter stehen, damit die Pflanze weiterwachsen kann.
* Senfblätter können mehrmals geerntet werden, solange die Pflanze gesund und kräftig ist.
* Die geernteten Blätter sollten sofort gewaschen und verwendet werden. Sie können roh in Salaten gegessen, gedünstet, gekocht oder in Suppen und Eintöpfen verwendet werden.
Tipps und Tricks für noch größere Senfblätter
* Wählt die richtige Sorte: Einige Senfsorten sind von Natur aus größer als andere. ‘Giant Southern Curled’ und ‘Florida Broadleaf’ sind gute Optionen für riesige Blätter.
* Sorgt für ausreichend Nährstoffe: Senfblätter brauchen viele Nährstoffe, um groß zu werden. Mischt reichlich Kompost oder organischen Dünger in den Boden und düngt die Pflanzen regelmäßig.
* Gießt regelmäßig: Senfblätter brauchen regelmäßige Bewässerung, besonders während trockener Perioden.
* Schützt die Pflanzen vor Schädlingen: Schädlinge können das Wachstum der Senfblätter beeinträchtigen. Kontrolliert eure Pflanzen regelmäßig auf Schädlinge und ergreift bei Bedarf Maßnahmen.
* Erntet regelmäßig: Durch regelmäßiges Ernten der Blätter fördert ihr das Wachstum neuer Blätter.
Mögliche Probleme und Lösungen
* Blattläuse: Diese kleinen Schädlinge saugen Pflanzensaft und können das Wachstum der Senfblätter beeinträchtigen. Sprüht die Pflanzen mit Insektizidseife oder Neemöl ein.
* Kohlweißlinge: Die Raupen dieser Schmetterlinge fressen an den Blättern und können sie stark beschädigen. Sammelt die Raupen ab oder verwendet ein biologisches Insektizid wie Bacillus thuringiensis (Bt).
* Schnecken: Schnecken fressen ebenfalls an den Blättern und können sie über Nacht kahl fressen. Stellt Schneckenfallen auf oder streut Schneckenkorn um die Pflanzen.
* Gelbe Blätter: Gelbe Blätter können ein Zeichen für Nährstoffmangel, Überwässerung oder Schädlingsbefall sein. Überprüft die Bodenfeuchtigkeit, düngt die Pflanzen und kontrolliert sie auf Schädlinge.
Die Verwendung eurer riesigen Senfblätter
Nachdem ihr eure riesigen Senfblätter geerntet habt, fragt ihr euch vielleicht, was ihr damit anfangen sollt. Hier sind ein paar Ideen:
* Salate: Junge, zarte Senfblätter können roh in Salaten gegessen werden. Sie verleihen dem Salat eine würzige Note.
* Gedünstet oder gekocht: Senfblätter können gedünstet oder gekocht als Beilage serviert werden. Sie passen gut zu Fleisch, Fisch oder Geflügel.
* Suppen und Eintöpfe: Senfblätter können Suppen und Eintöpfen hinzugefügt werden, um ihnen Geschmack und Nährstoffe zu verleihen.
* Smoothies: Gebt eine Handvoll Senfblätter in euren Smoothie für einen gesunden Kick.
Ich hoffe, dieser Leitfaden hat euch geholfen, eure eigenen riesigen Senfblätter anzubauen. Mit etwas Geduld und Pflege könnt ihr eine reiche Ernte erzielen und die köstlichen und ges
Conclusion
So, there you have it! Growing giant mustard greens isn’t just a gardening experiment; it’s a gateway to a more vibrant, flavorful, and sustainable kitchen. We’ve walked through the simple steps, from selecting the right seeds and preparing the soil to nurturing your plants and harvesting those impressive leaves. The beauty of this DIY trick lies not only in the sheer size of the mustard greens you’ll produce but also in the satisfaction of knowing you cultivated something truly special with your own two hands.
Why is this a must-try? Because it’s more than just bigger greens. It’s about maximizing your garden space, minimizing waste, and unlocking a whole new level of culinary creativity. Imagine the stunning salads, the hearty stir-fries, and the flavorful braises you can create with these colossal leaves. Think of the bragging rights you’ll earn among your gardening friends!
But the journey doesn’t end here. Feel free to experiment with different varieties of mustard greens. Some, like ‘Giant Red,’ offer a beautiful color contrast, while others, like ‘Florida Broadleaf,’ boast a milder flavor. You can also play around with companion planting. Marigolds, for instance, can help deter pests, while dill can attract beneficial insects. Consider succession planting to ensure a continuous harvest throughout the growing season. Plant a new batch of seeds every few weeks to keep those giant mustard greens coming!
Don’t be afraid to get creative with your fertilizer choices, too. While we recommended a balanced organic fertilizer, you can also supplement with compost tea or fish emulsion for an extra boost of nutrients. Just remember to monitor your plants closely and adjust your feeding schedule as needed.
And if you’re feeling particularly adventurous, why not try saving your own seeds from your giant mustard greens? This is a fantastic way to perpetuate your favorite varieties and become even more self-sufficient. Just allow a few plants to bolt (flower) and collect the seeds once they’ve dried.
Ultimately, the success of this DIY trick hinges on your willingness to experiment and adapt. Every garden is unique, and what works for one person may not work for another. So, embrace the learning process, pay attention to your plants, and don’t be discouraged by the occasional setback.
We are confident that you can achieve impressive results with this method. We encourage you to embark on this exciting gardening adventure and discover the joy of growing your own giant mustard greens.
Most importantly, we want to hear about your experiences! Share your photos, tips, and challenges in the comments below. Let’s create a community of giant mustard green enthusiasts and learn from each other. What varieties did you try? What fertilizers did you use? What challenges did you overcome? Your insights could be invaluable to other gardeners. So, get growing, get sharing, and let’s celebrate the bounty of our gardens together! This **DIY trick** is a game changer.
FAQ
What exactly makes mustard greens “giant”?
Giant mustard greens are simply varieties that have been specifically bred or cultivated to produce significantly larger leaves than standard mustard greens. This often involves selecting for traits like rapid growth, large leaf size, and robust overall plant structure. While the specific size can vary depending on the variety and growing conditions, expect leaves that are easily several times larger than those of typical mustard greens.
How much space do I really need to grow giant mustard greens?
While they are called “giant,” you don’t need acres of land! Each plant will need about 12-18 inches of space to spread out comfortably. If you’re growing in raised beds or containers, make sure they are large enough to accommodate the mature size of the plants. Crowding can lead to smaller leaves and increased susceptibility to pests and diseases.
What kind of soil is best for growing giant mustard greens?
Mustard greens thrive in well-drained, fertile soil that is rich in organic matter. A slightly acidic to neutral pH (around 6.0 to 7.0) is ideal. Before planting, amend your soil with compost, aged manure, or other organic materials to improve its structure, drainage, and nutrient content. If your soil is heavy clay, consider adding sand or perlite to improve drainage.
How often should I water my giant mustard greens?
Consistent moisture is crucial for healthy growth, especially when you’re aiming for giant leaves. Water deeply whenever the top inch of soil feels dry to the touch. Avoid overwatering, as this can lead to root rot. During hot, dry weather, you may need to water more frequently. Mulching around the plants can help retain moisture and suppress weeds.
What kind of fertilizer should I use?
A balanced organic fertilizer is a great choice for feeding your giant mustard greens. Look for a fertilizer with an NPK ratio (nitrogen, phosphorus, potassium) that is relatively even, such as 10-10-10 or 5-5-5. You can also supplement with compost tea or fish emulsion for an extra boost of nutrients. Avoid over-fertilizing, as this can lead to excessive leaf growth at the expense of flavor.
Are there any common pests or diseases that affect mustard greens?
Yes, mustard greens can be susceptible to a few common pests and diseases, including aphids, flea beetles, cabbage worms, and downy mildew. Regularly inspect your plants for signs of infestation or disease. You can control aphids and flea beetles with insecticidal soap or neem oil. Cabbage worms can be handpicked or controlled with Bacillus thuringiensis (Bt). To prevent downy mildew, ensure good air circulation and avoid overhead watering.
When is the best time to harvest my giant mustard greens?
You can start harvesting mustard greens as soon as the leaves are large enough to use, typically when they are about 6-8 inches long. For giant leaves, wait until they reach their full size, which can be up to 18 inches or more. Harvest by cutting the outer leaves, leaving the inner leaves to continue growing. This will allow you to enjoy a continuous harvest over several weeks.
Can I grow giant mustard greens in containers?
Absolutely! Container gardening is a great option for those with limited space. Choose a large container (at least 12 inches in diameter) with good drainage. Use a high-quality potting mix and follow the same watering and fertilizing guidelines as you would for growing in the ground. Be sure to place your container in a sunny location.
How do I store harvested mustard greens?
To store harvested mustard greens, wash them thoroughly and pat them dry. Wrap them loosely in a paper towel and store them in a plastic bag in the refrigerator. They should keep for several days. For longer storage, you can blanch and freeze them.
Can I eat the stems of giant mustard greens?
Yes, the stems of giant mustard greens are edible, but they can be a bit tough. To make them more palatable, remove the tough outer layer with a vegetable peeler. You can then chop the stems and add them to stir-fries, soups, or stews. They will take longer to cook than the leaves, so add them earlier in the cooking process.


Leave a Comment