

Growing gourds smart isn’t just about tossing some seeds in the ground and hoping for the best; it’s about unlocking a world of creative possibilities right in your own backyard! Have you ever imagined crafting your own birdhouses, unique bowls, or even musical instruments from something you grew yourself? That’s the magic of gourds! For centuries, gourds have held a special place in cultures around the globe, serving as essential tools, decorative art, and even spiritual symbols. From the intricate carvings of African calabashes to the practical uses of bottle gourds in ancient civilizations, these versatile plants have a rich and fascinating history.
But why should you care about growing gourds smart today? Well, in a world increasingly focused on sustainability and DIY projects, gourds offer a fantastic opportunity to connect with nature, reduce waste, and unleash your inner artist. Plus, let’s be honest, who wouldn’t want to impress their friends and family with a one-of-a-kind creation grown entirely from their own garden? This article will guide you through simple yet effective DIY tricks and hacks that will transform your gourd-growing experience from a gamble to a guaranteed success. Get ready to cultivate not just gourds, but also a whole new level of creativity and self-sufficiency!
Kürbisse Clever Anbauen: Dein DIY-Guide für eine Reiche Ernte
Hallo liebe Gartenfreunde! Ich bin total begeistert von Kürbissen – von den kleinen Zierkürbissen bis zu den riesigen Halloween-Exemplaren. Und ich möchte euch zeigen, wie ihr mit ein paar cleveren Tricks eine fantastische Kürbisernte erzielen könnt. Keine Angst, es ist einfacher als ihr denkt!
Die Vorbereitung ist Alles: Der Grundstein für deinen Kürbis-Erfolg
Bevor wir loslegen, ist eine gute Vorbereitung das A und O. Kürbisse sind nämlich kleine Diven, wenn es um ihre Bedürfnisse geht. Aber keine Sorge, ich helfe euch, sie zu verwöhnen!
* Der Richtige Standort: Kürbisse lieben die Sonne! Sucht euch einen Platz in eurem Garten aus, der mindestens 6-8 Stunden direkte Sonneneinstrahlung pro Tag bekommt. Je mehr Sonne, desto besser!
* Der Perfekte Boden: Kürbisse sind Starkzehrer, das heißt, sie brauchen einen nährstoffreichen Boden. Am besten ist ein lockerer, humoser Boden, der gut Wasser speichern kann.
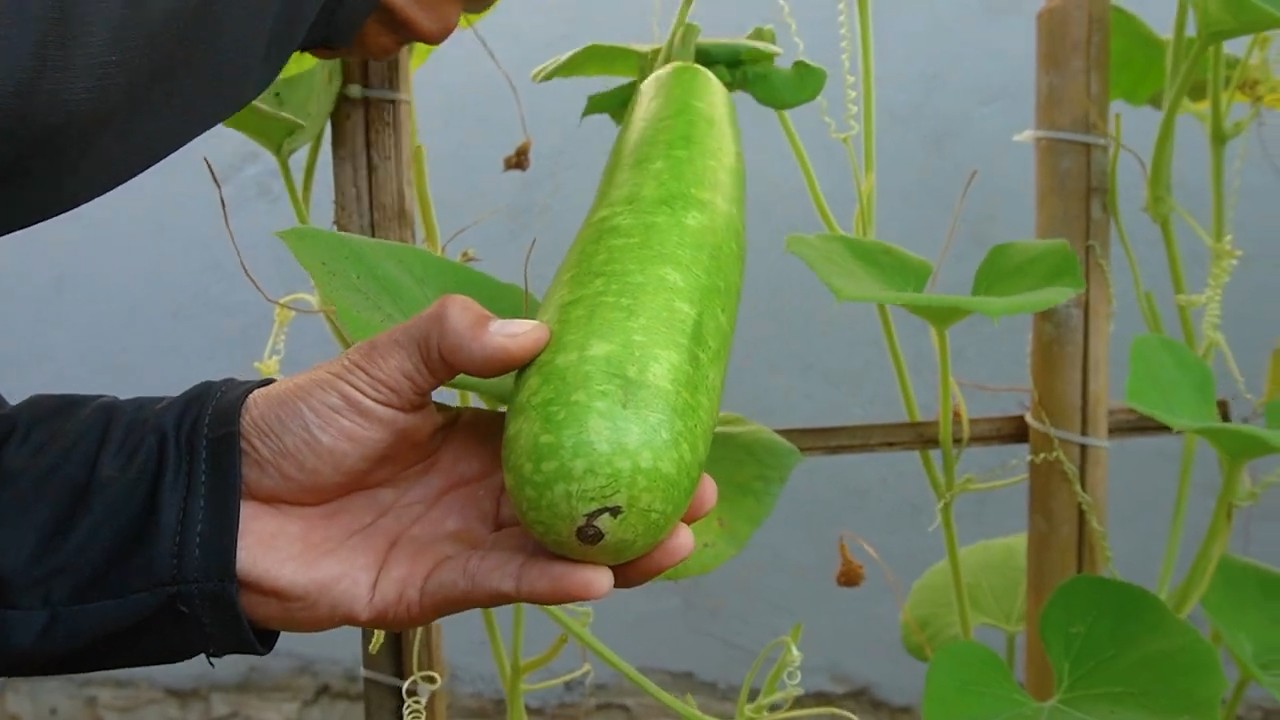
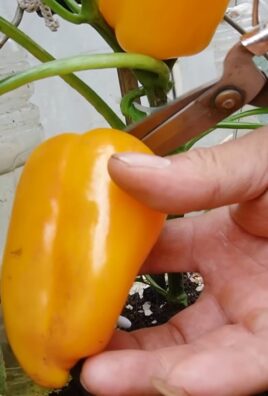
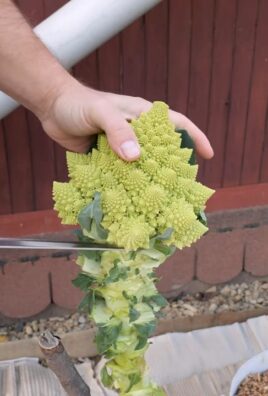
* Die Richtige Sorte: Überlegt euch, welche Kürbisse ihr anbauen möchtet. Es gibt unzählige Sorten, von Speisekürbissen wie Hokkaido und Butternut bis zu Zierkürbissen in allen Formen und Farben. Informiert euch vorher, welche Sorte für euer Klima und eure Platzverhältnisse am besten geeignet ist.
* Vorkultur oder Direktsaat: Ihr könnt Kürbisse entweder vorziehen oder direkt ins Beet säen. Vorziehen ist besonders in kühleren Regionen empfehlenswert, um den Kürbissen einen Vorsprung zu verschaffen.
Schritt-für-Schritt Anleitung: So Ziehst du deine Kürbisse Vor
Ich persönlich ziehe meine Kürbisse gerne vor, weil ich finde, dass sie dann einfach schneller wachsen und widerstandsfähiger sind. Hier ist, wie ich es mache:
1. Die Aussaat: Füllt kleine Töpfe (ca. 8-10 cm Durchmesser) mit Anzuchterde. Legt pro Topf 1-2 Kürbiskerne ca. 2-3 cm tief in die Erde.
2. Das Angießen: Gießt die Erde vorsichtig an, sodass sie gut durchfeuchtet ist, aber nicht zu nass.
3. Der Warme Platz: Stellt die Töpfe an einen warmen, hellen Ort. Ideal ist eine Fensterbank oder ein Gewächshaus. Die Keimtemperatur sollte zwischen 20 und 25 Grad Celsius liegen.
4. Das Warten: Haltet die Erde feucht, aber vermeidet Staunässe. Nach ca. 1-2 Wochen sollten die ersten Keimlinge zu sehen sein.
5. Das Vereinzeln: Wenn in einem Topf zwei Keimlinge aufgegangen sind, entfernt den schwächeren, damit der stärkere genug Platz zum Wachsen hat.
6. Das Abhärten: Bevor ihr die Kürbispflanzen ins Freie pflanzt, solltet ihr sie abhärten. Das bedeutet, dass ihr sie für einige Tage tagsüber für ein paar Stunden nach draußen stellt, damit sie sich an die Sonne und den Wind gewöhnen können.
Die Direktsaat: Kürbisse Direkt ins Beet Säen
Wenn ihr euch das Vorziehen sparen möchtet, könnt ihr die Kürbisse auch direkt ins Beet säen. Das geht am besten, wenn die Bodentemperatur mindestens 15 Grad Celsius beträgt.
1. Die Bodenvorbereitung: Lockert den Boden gut auf und entfernt Unkraut. Mischt Kompost oder gut verrotteten Mist unter die Erde, um sie mit Nährstoffen anzureichern.
2. Die Aussaat: Legt pro Pflanzstelle 2-3 Kürbiskerne ca. 2-3 cm tief in die Erde. Der Abstand zwischen den Pflanzstellen sollte je nach Sorte zwischen 80 cm und 1,5 m betragen.
3. Das Angießen: Gießt die Erde vorsichtig an, sodass sie gut durchfeuchtet ist, aber nicht zu nass.
4. Der Schutz: Schützt die jungen Keimlinge vor Schnecken und anderen Schädlingen. Ihr könnt zum Beispiel Schneckenkragen um die Pflanzen legen.
5. Das Vereinzeln: Wenn mehrere Keimlinge aufgegangen sind, entfernt die schwächeren, damit der stärkste genug Platz zum Wachsen hat.
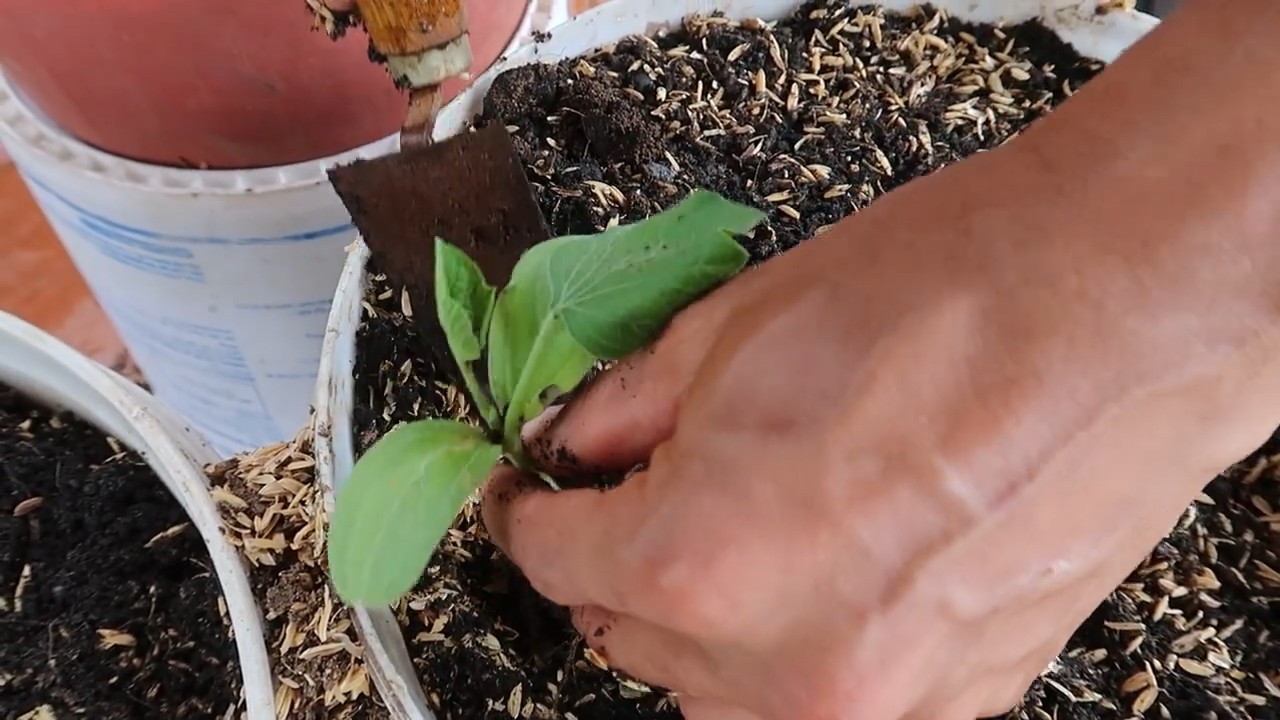
Das Auspflanzen: Ab ins Freie mit den Kleinen!
Sobald die Kürbispflanzen groß genug sind (ca. 15-20 cm hoch) und keine Frostgefahr mehr besteht, können sie ins Freie gepflanzt werden.
1. Die Vorbereitung: Sucht euch einen sonnigen Platz in eurem Garten aus und lockert den Boden gut auf.
2. Das Pflanzen: Grabt ein Loch, das etwas größer ist als der Wurzelballen der Kürbispflanze. Setzt die Pflanze vorsichtig in das Loch und füllt es mit Erde auf. Drückt die Erde leicht an.
3. Das Angießen: Gießt die Pflanze gründlich an.
4. Der Abstand: Achtet darauf, dass die Pflanzen genügend Abstand zueinander haben. Je nach Sorte sollten es zwischen 80 cm und 1,5 m sein.
5. Der Schutz: Schützt die jungen Pflanzen vor Schnecken und anderen Schädlingen.
Die Pflege: So bleiben deine Kürbisse Gesund und Stark
Kürbisse brauchen regelmäßige Pflege, damit sie gut wachsen und viele Früchte tragen.
* Das Gießen: Gießt die Kürbispflanzen regelmäßig, besonders bei Trockenheit. Achtet darauf, dass die Erde immer feucht ist, aber vermeidet Staunässe. Gießt am besten morgens oder abends, damit das Wasser nicht so schnell verdunstet.
* Das Düngen: Kürbisse sind Starkzehrer und brauchen regelmäßige Düngergaben. Düngt die Pflanzen am besten alle 2-3 Wochen mit einem organischen Dünger oder Kompost.
* Das Ausgeizen: Entfernt regelmäßig Seitentriebe, damit die Pflanze ihre Energie in die Fruchtbildung stecken kann.
* Das Mulchen: Mulcht den Boden um die Kürbispflanzen mit Stroh oder Rasenschnitt. Das hält den Boden feucht, unterdrückt Unkraut und schützt die Früchte vor Fäulnis.
* Die Bestäubung: Kürbisse sind auf die Bestäubung durch Insekten angewiesen. Wenn es wenig Insekten gibt, könnt ihr die Blüten auch selbst bestäuben. Nehmt dazu einen Pinsel und übertragt den Blütenstaub von den männlichen auf die weiblichen Blüten. Die männlichen Blüten erkennt man daran, dass sie keinen Fruchtansatz haben. Die weiblichen Blüten haben einen kleinen Fruchtansatz unterhalb der Blüte.
Spezialtipps für eine Rekordernte: So holst du das Maximum raus!
Ich habe im Laufe der Jahre ein paar Tricks gelernt, die mir geholfen haben, besonders große und gesunde Kürbisse zu ernten. Hier sind meine Geheimnisse:
* Die Fruchtselektion: Wenn die Kürbispflanze viele Früchte trägt, solltet ihr einige davon entfernen, damit die verbleibenden Früchte mehr Energie bekommen und größer werden können. Wählt die schönsten und gesündesten Früchte aus und entfernt die restlichen.
* Die Unterlage: Legt unter die Kürbisse eine Unterlage aus Stroh oder Holz, damit sie nicht direkt auf dem feuchten Boden liegen und faulen.
* Der Sonnenschutz: Wenn die Sonne sehr stark scheint, könnt ihr die Kürbisse mit einem Tuch oder einem Sonnenschirm vor Verbrennungen schützen.
* Die Schädlingsbekämpfung: Kontrolliert die Kürbispflanzen regelmäßig auf Schädlinge wie Schnecken, Blattläuse oder Kürbisfliegen. Bekämpft die Schädlinge frühzeitig mit natürlichen Mitteln.
* Die Geduld: Kürbisse brauchen Zeit, um zu reifen. Habt Geduld und erntet die Früchte erst, wenn sie voll ausgereift sind. Die Reife erkennt man daran, dass die Schale hart ist und der Stiel trocken und verholzt ist.
Die Ernte: Der Lohn für deine Mühe!
Endlich ist es soweit: Die Kürbisse sind reif und können geerntet werden!
1. Der Zeitpunkt: Erntet die Kürbisse, bevor der erste Frost kommt.
2. Das Abschneiden: Schneidet die Kürbisse mit einem
Conclusion
So, there you have it! Growing gourds doesn’t have to be a gamble against pests, diseases, and unpredictable weather. This simple, yet incredibly effective DIY trick – creating a supportive and well-ventilated growing environment – is a game-changer for anyone serious about harvesting a bountiful crop of these fascinating fruits. It’s more than just a gardening hack; it’s an investment in the health and productivity of your gourd vines.
Think about it: no more gourds rotting on the damp ground, no more battling squash bugs and vine borers with limited success, and no more heartbreaking losses just before harvest. This method elevates your gourds, literally and figuratively, allowing them to bask in the sunlight, breathe freely, and develop into the impressive specimens you’ve always dreamed of.
But the beauty of this DIY approach lies in its adaptability. Feel free to experiment with different materials for your supports. Instead of wooden frames, consider using sturdy metal trellises or even repurposing old ladders. For smaller gourds, hanging baskets can provide excellent support and create a visually stunning display. You can also tailor the height of your supports to suit the specific variety of gourd you’re growing. Larger gourds, like the giant pumpkins, will require more robust and taller structures.
Don’t be afraid to get creative with your watering and feeding schedule, too. While good drainage is crucial, gourds are thirsty plants, especially during the peak growing season. Supplement your watering with a balanced fertilizer to provide them with the nutrients they need to thrive. Consider adding compost tea to your watering routine for an extra boost of beneficial microbes.
This DIY trick is not just about growing gourds; it’s about fostering a deeper connection with your garden and understanding the needs of your plants. It’s about taking control of the growing process and reaping the rewards of your hard work.
We wholeheartedly encourage you to try this method for growing gourds this season. You’ll be amazed at the difference it makes. And more importantly, we want to hear about your experiences! Share your photos, tips, and variations in the comments below. Let’s build a community of gourd growers who are passionate about sharing their knowledge and helping each other succeed. Let us know what worked for you, what challenges you faced, and what you learned along the way. Together, we can unlock the full potential of these incredible plants and enjoy a harvest that is both abundant and rewarding. Happy growing!
Frequently Asked Questions (FAQ)
What types of gourds benefit most from this DIY support system?
This method is beneficial for virtually all types of gourds, from the small ornamental varieties to the large, heavy pumpkins. However, it’s particularly helpful for gourds that are prone to rotting on the ground, such as bottle gourds, dipper gourds, and swan gourds. The support system provides better air circulation and prevents moisture from accumulating around the developing fruit, reducing the risk of fungal diseases and rot. Even pumpkins, while often grown directly on the ground, can benefit from being elevated, especially in areas with high humidity or frequent rainfall. The key is to ensure that the support structure is strong enough to handle the weight of the mature gourd.
How do I protect my gourds from pests once they are elevated?
Elevating your gourds is a great first step in pest control, but it’s not a complete solution. You’ll still need to be vigilant about monitoring your plants for signs of pests like squash bugs, vine borers, and cucumber beetles. Regularly inspect the leaves, stems, and fruits for any damage or insect activity. Handpicking pests is an effective method for small infestations. You can also use insecticidal soap or neem oil to control larger populations. Consider using row covers early in the season to protect young plants from pests. Companion planting with herbs like marigolds and nasturtiums can also help deter pests. Remember to always follow the instructions on any pesticide product and avoid spraying during the hottest part of the day or when pollinators are active.
What kind of soil is best for growing gourds?
Gourds thrive in well-drained, fertile soil that is rich in organic matter. Before planting, amend your soil with compost, aged manure, or other organic materials to improve its structure and nutrient content. Gourds prefer a slightly acidic to neutral soil pH (around 6.0 to 7.0). If your soil is heavy clay, consider adding sand or perlite to improve drainage. If your soil is sandy, add organic matter to help it retain moisture. A soil test can help you determine the pH and nutrient levels of your soil and guide you in making the necessary amendments.
How often should I water my gourds?
Gourds need consistent moisture, especially during the peak growing season. Water deeply and regularly, aiming to keep the soil consistently moist but not waterlogged. The frequency of watering will depend on the weather conditions, soil type, and the size of your plants. Check the soil moisture regularly by sticking your finger into the soil a few inches deep. If the soil feels dry, it’s time to water. Avoid overhead watering, as this can increase the risk of fungal diseases. Instead, water at the base of the plants, using a soaker hose or drip irrigation system. Mulching around the plants can also help retain moisture and suppress weeds.
Can I grow gourds in containers using this DIY support method?
Yes, you can absolutely grow gourds in containers using this DIY support method, especially for smaller gourd varieties. Choose a large container with good drainage holes. Fill the container with a high-quality potting mix that is rich in organic matter. Provide a sturdy trellis or support structure for the vines to climb. Water regularly and fertilize with a balanced fertilizer. Container-grown gourds may require more frequent watering and fertilizing than those grown in the ground. Be sure to choose a container that is large enough to accommodate the mature size of the gourd variety you are growing.
How do I know when my gourds are ready to harvest?
The timing of harvest depends on the specific gourd variety you are growing. Generally, gourds are ready to harvest when the stems have dried and turned brown, and the skin is hard and tough. You should not be able to easily puncture the skin with your fingernail. Cut the gourds from the vine, leaving a few inches of stem attached. Handle the gourds carefully to avoid bruising or damaging the skin. Cure the gourds in a warm, dry, well-ventilated place for several weeks to allow them to dry and harden completely. This curing process is essential for preserving the gourds and preventing them from rotting.
What are some creative ways to use my harvested gourds?
The possibilities are endless! Ornamental gourds can be used in fall decorations, centerpieces, and crafts. Bottle gourds can be dried and used as birdhouses, dippers, or musical instruments. Luffa gourds can be used as natural sponges. Pumpkin gourds can be used for carving jack-o’-lanterns or making pies and other culinary delights. Get creative and explore the many ways to incorporate your harvested gourds into your home and garden. You can paint them, carve them, decorate them with beads or shells, or simply display them in their natural beauty.
What if my gourds are too heavy for the support structure I’ve built?
If you find that your gourds are becoming too heavy for your support structure, you can reinforce it by adding additional supports or using stronger materials. You can also use slings made from fabric or netting to provide extra support to the individual gourds. Tie the slings to the support structure to help distribute the weight of the gourds. Monitor the support structure regularly and make adjustments as needed to ensure that it is strong enough to handle the weight of the growing gourds.

Leave a Comment