

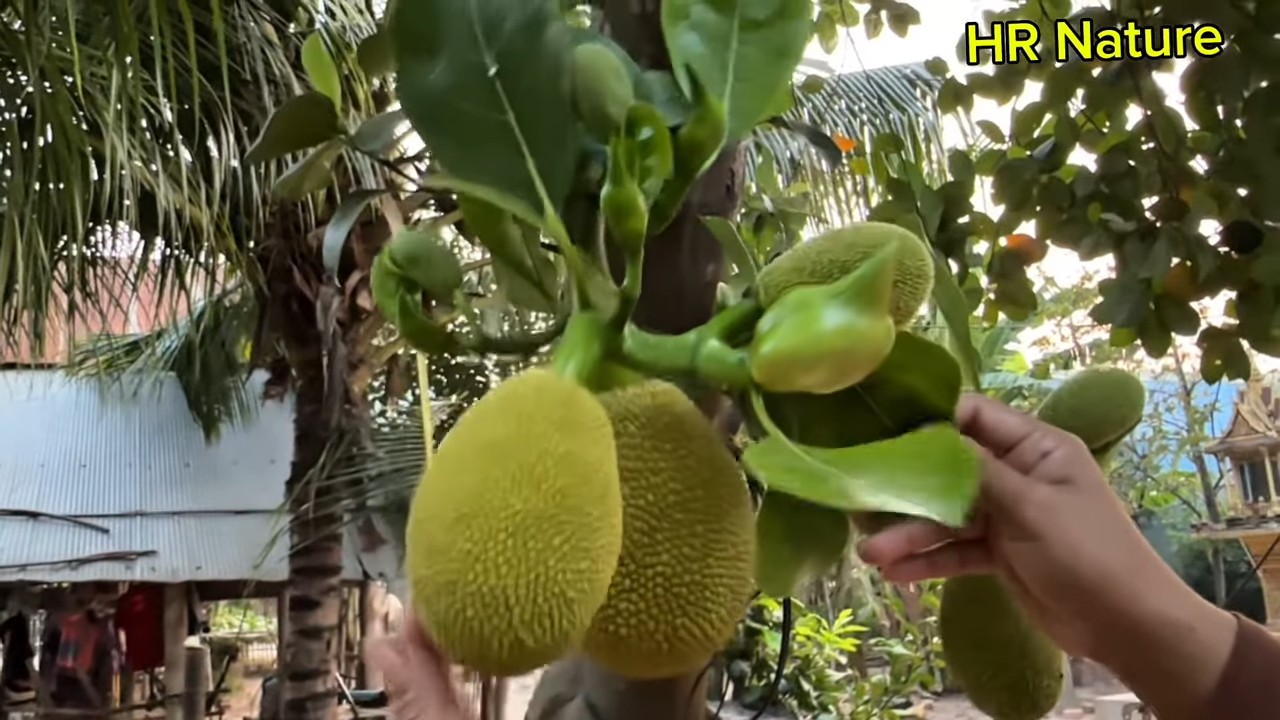
Jackfruit tree grafting technique: Ever dreamed of harvesting your own juicy, sweet jackfruit right in your backyard? Imagine the satisfaction of plucking a perfectly ripe fruit from a tree you nurtured yourself! Well, you don’t need to be a seasoned horticulturist to make that dream a reality. This DIY guide unveils the secrets to successfully grafting your own jackfruit tree, bringing the taste of the tropics closer to home.
Grafting, an ancient horticultural practice dating back centuries, has been used to propagate desirable traits in plants. It’s a technique that allows us to combine the best qualities of two different jackfruit trees – perhaps a disease-resistant rootstock with a scion that produces exceptionally flavorful fruit. Think of it as a botanical marriage, resulting in offspring that inherit the best of both parents!
Why should you learn this jackfruit tree grafting technique? Because it’s a game-changer! Instead of waiting years for a seedling to mature and potentially produce inferior fruit, grafting allows you to fast-track the process and guarantee the quality of your harvest. Plus, it’s incredibly rewarding to witness the magic of grafting firsthand. I’m excited to share these simple, step-by-step instructions that will empower you to create your own thriving jackfruit tree. Let’s get started and unlock the secrets to a bountiful jackfruit harvest!
Jackfruchtbaumveredelung: Dein DIY-Leitfaden für üppige Ernten
Hallo Gartenfreunde! Habt ihr euch jemals gefragt, wie man die Ernte eurer Jackfruchtbäume verbessern kann? Oder vielleicht habt ihr einen Jackfruchtbaum mit Früchten, die nicht euren Erwartungen entsprechen? Die Lösung könnte in der Veredelung liegen! Keine Sorge, es klingt komplizierter als es ist. Ich zeige euch, wie ihr das ganz einfach selbst machen könnt. Mit dieser DIY-Anleitung könnt ihr eure Jackfruchtbäume veredeln und euch auf eine reiche Ernte freuen. Los geht’s!
Was ist Veredelung und warum ist sie nützlich?
Veredelung ist im Grunde genommen eine Art “Chirurgie” für Pflanzen. Wir verbinden zwei Pflanzen miteinander, so dass sie als eine einzige Pflanze weiterwachsen. Der Vorteil? Wir können die besten Eigenschaften beider Pflanzen kombinieren! Bei Jackfruchtbäumen bedeutet das:
* Verbesserte Fruchtqualität: Ihr könnt einen Baum mit minderwertigen Früchten mit einem Edelreis eines Baumes mit köstlichen, großen Früchten veredeln.
* Schnellere Ernte: Veredelte Bäume tragen oft früher Früchte als Bäume, die aus Samen gezogen wurden.
* Krankheitsresistenz: Wenn eure Unterlage (der Baum, auf den ihr veredelt) resistent gegen bestimmte Krankheiten ist, profitiert auch der veredelte Baum davon.
* Erhaltung seltener Sorten: Veredelung ist eine tolle Möglichkeit, seltene oder gefährdete Jackfruchtsorten zu erhalten.
Die Grundlagen der Jackfruchtbaumveredelung
Bevor wir loslegen, hier ein paar wichtige Begriffe und Konzepte:
* Unterlage (Rootstock): Das ist der Baum, auf den ihr veredelt. Er liefert das Wurzelsystem und einen Teil des Stammes. Wählt eine gesunde, kräftige Unterlage, die gut an eure Boden- und Klimabedingungen angepasst ist.
* Edelreis (Scion): Das ist der Teil des Baumes, den ihr auf die Unterlage veredelt. Es ist ein Trieb oder Zweig mit Knospen, der die gewünschten Eigenschaften (z.B. Fruchtqualität) trägt.
* Kambium: Das ist eine dünne Schicht lebender Zellen direkt unter der Rinde. Für eine erfolgreiche Veredelung müssen die Kambiumschichten von Unterlage und Edelreis eng aneinander liegen.
* Veredelungsband/Veredelungswachs: Diese Materialien werden verwendet, um die Veredelungsstelle zu schützen und feucht zu halten, damit sie gut verheilen kann.
Welche Veredelungsmethode ist die richtige für mich?
Es gibt verschiedene Veredelungsmethoden, aber für Jackfruchtbäume sind zwei besonders geeignet:
* Chip-Veredelung (Chip Budding): Diese Methode ist ideal für jüngere Bäume und wenn ihr nur wenig Edelreismaterial habt. Sie ist relativ einfach und hat eine hohe Erfolgsrate.
* Keil-Veredelung (Cleft Grafting): Diese Methode eignet sich gut für dickere Unterlagen und wenn ihr einen stärkeren Edelreis verwenden möchtet. Sie erfordert etwas mehr Geschick, ist aber auch sehr effektiv.
In dieser Anleitung konzentrieren wir uns auf die **Chip-Veredelung**, da sie für Anfänger einfacher zu erlernen ist.
Benötigte Materialien und Werkzeuge
Bevor wir mit der Veredelung beginnen, stellt sicher, dass ihr alle notwendigen Materialien und Werkzeuge zur Hand habt:
* Eine gesunde Jackfruchtbaum-Unterlage: Wählt einen Baum, der mindestens bleistiftdick ist und keine Anzeichen von Krankheiten oder Schädlingen aufweist.
* Ein Edelreis von einem bewährten Jackfruchtbaum: Wählt einen Trieb mit gesunden Knospen. Der Trieb sollte etwa so dick sein wie ein Bleistift und von einem Baum stammen, der Früchte von hoher Qualität produziert. Sammelt den Edelreis am besten kurz vor der Veredelung, um die Frische zu gewährleisten.
* Ein scharfes Veredelungsmesser oder ein scharfes Messer: Ein scharfes Messer ist entscheidend für saubere Schnitte, die für eine erfolgreiche Veredelung unerlässlich sind.
* Veredelungsband oder selbstklebende Folie: Zum sicheren Verbinden von Edelreis und Unterlage und zum Schutz vor Austrocknung.
* Veredelungswachs (optional): Kann verwendet werden, um die Veredelungsstelle zusätzlich zu versiegeln und vor dem Eindringen von Wasser und Krankheitserregern zu schützen.
* Alkohol oder Desinfektionsmittel: Zum Reinigen der Werkzeuge, um die Ausbreitung von Krankheiten zu verhindern.
* Sprühflasche mit Wasser: Um die Edelreiser feucht zu halten, bevor sie verwendet werden.
* Etikett und Stift: Zum Beschriften des veredelten Baumes mit der Sorte des Edelreises und dem Datum der Veredelung.
Schritt-für-Schritt-Anleitung zur Chip-Veredelung von Jackfruchtbäumen
Jetzt kommt der spannende Teil! Hier ist eine detaillierte Anleitung zur Chip-Veredelung eures Jackfruchtbaums:
1. Vorbereitung der Werkzeuge und Materialien
1. Reinigt eure Werkzeuge: Desinfiziert euer Veredelungsmesser oder Messer gründlich mit Alkohol oder Desinfektionsmittel. Dies ist wichtig, um die Ausbreitung von Krankheiten zu verhindern.
2. Bereitet das Veredelungsband vor: Schneidet Stücke Veredelungsband oder Folie in der passenden Länge zurecht.
3. Sammelt den Edelreis: Wählt einen gesunden Trieb von eurem gewünschten Jackfruchtbaum. Entfernt die Blätter vom Trieb, lasst aber die Knospen intakt. Wickelt den Trieb in ein feuchtes Tuch oder sprüht ihn mit Wasser ein, um ihn feucht zu halten.
2. Vorbereitung der Unterlage
1. Wählt eine geeignete Stelle: Wählt eine glatte, gerade Stelle am Stamm der Unterlage, etwa 15-30 cm über dem Boden.
2. Schneidet einen Chip aus der Unterlage: Mit eurem scharfen Messer macht ihr einen abwärts gerichteten Schnitt in die Rinde der Unterlage, etwa 2,5 cm lang. Am unteren Ende des Schnitts macht ihr einen zweiten, aufwärts gerichteten Schnitt, um einen Chip Rinde zu entfernen. Der Chip sollte etwa 1 cm breit sein. Achtet darauf, nicht zu tief ins Holz zu schneiden.
3. Entfernt den Chip: Hebelt den Chip vorsichtig mit der Messerspitze ab.
3. Vorbereitung des Edelreises
1. Schneidet einen Chip aus dem Edelreis: Nehmt euren vorbereiteten Edelreis und macht einen ähnlichen Schnitt wie bei der Unterlage. Der Chip vom Edelreis sollte genau in die entstandene Öffnung in der Unterlage passen. Achtet darauf, dass sich eine gesunde Knospe in der Mitte des Chips befindet.
2. Passt den Chip an: Probiert, ob der Chip vom Edelreis gut in die Öffnung in der Unterlage passt. Die Kambiumschichten von Edelreis und Unterlage sollten möglichst eng aneinander liegen.
4. Einsetzen des Edelreises und Fixierung
1. Setzt den Chip ein: Setzt den Chip vom Edelreis vorsichtig in die Öffnung in der Unterlage ein. Achtet darauf, dass die Kambiumschichten so gut wie möglich übereinstimmen.
2. Fixiert die Veredelungsstelle: Wickelt die Veredelungsstelle fest mit Veredelungsband oder Folie ein. Beginnt unterhalb des Chips und arbeitet euch nach oben. Achtet darauf, dass der Chip fest an der Unterlage anliegt und keine Luft oder Wasser eindringen kann. Lasst die Knospe frei.
3. Versiegelt die Veredelungsstelle (optional): Wenn ihr Veredelungswachs verwendet, tragt eine dünne Schicht Wachs auf die Ränder des Veredelungsbandes auf, um die Veredelungsstelle zusätzlich zu versiegeln.
5. Nachsorge und Beobachtung
1. Schützt die Veredelungsstelle: Schützt die Veredelungsstelle vor direkter Sonneneinstrahlung und starkem Wind. Ihr könnt einen kleinen Schirm oder eine Abdeckung verwenden.
2. Beobachtet die Veredelungsstelle: Überprüft die Veredelungsstelle regelmäßig auf Anzeichen von Wachstum. Nach einigen Wochen

Conclusion
So, there you have it! Mastering the jackfruit tree grafting technique isn’t just about propagating a plant; it’s about unlocking a world of possibilities for your garden and your taste buds. We’ve walked through the process, highlighting the key steps and offering insights to ensure your success. But why is this DIY trick a must-try?
Firstly, grafting allows you to bypass the often lengthy and unpredictable process of growing jackfruit from seed. You’re essentially taking a shortcut to fruit production, potentially harvesting delicious jackfruit much sooner than you would otherwise. Imagine enjoying the sweet, tropical flavor of homegrown jackfruit in just a few years, a reward well worth the initial effort.
Secondly, grafting provides a powerful tool for preserving desirable traits. If you have a jackfruit tree that consistently produces exceptional fruit – perhaps it’s exceptionally sweet, has a unique texture, or is particularly resistant to disease – grafting allows you to clone that tree, ensuring that future generations inherit those same qualities. This is invaluable for maintaining the quality and consistency of your jackfruit harvest.
Thirdly, grafting opens the door to experimentation and customization. You can graft different varieties of jackfruit onto a single rootstock, creating a “multi-variety” tree that offers a diverse range of flavors and textures. This is a fantastic way to maximize your garden space and enjoy a wider selection of jackfruit.
Variations and Suggestions:
Don’t be afraid to experiment with different grafting techniques. While we’ve focused on cleft grafting, other methods like wedge grafting or side veneer grafting can also be successful. The best technique for you will depend on your skill level and the size of the scion and rootstock.
Consider the rootstock carefully. A healthy, vigorous rootstock is essential for successful grafting. Choose a rootstock that is well-suited to your local climate and soil conditions. You can even use closely related species as rootstock, though success rates may vary.
Pay close attention to sanitation. Cleanliness is crucial to prevent infection and ensure a successful graft. Always sterilize your grafting tools with alcohol before and after each use.
Finally, be patient. Grafting is not always successful on the first try. Don’t get discouraged if your initial attempts fail. Keep practicing, and you’ll eventually master the technique.
We wholeheartedly encourage you to try this jackfruit tree grafting technique. It’s a rewarding and empowering experience that will transform your relationship with this amazing fruit. Once you’ve given it a go, we’d love to hear about your experience! Share your successes, your challenges, and any tips you’ve learned along the way in the comments below. Let’s build a community of jackfruit grafting enthusiasts!
Frequently Asked Questions (FAQ)
What is the best time of year to graft jackfruit trees?
The ideal time for grafting jackfruit trees is typically during the late spring or early summer, just as the trees are beginning to actively grow. This is when the sap flow is strong, which promotes successful union between the scion and rootstock. Avoid grafting during the hottest or coldest months, as extreme temperatures can hinder the healing process. In tropical climates with consistent temperatures, grafting can be attempted year-round, but success rates may be higher during periods of moderate rainfall and humidity.
How long does it take for a grafted jackfruit tree to produce fruit?
One of the biggest advantages of grafting is that it significantly reduces the time it takes for a jackfruit tree to bear fruit. Seed-grown jackfruit trees can take 5-7 years (or even longer) to produce their first fruit. Grafted trees, on the other hand, can often start producing fruit within 2-4 years after grafting. The exact time will depend on factors such as the variety of jackfruit, the health of the rootstock, and the overall growing conditions.
What type of rootstock should I use for grafting jackfruit?
The best rootstock for grafting jackfruit is typically a seedling jackfruit tree that is 1-2 years old. The rootstock should be healthy, vigorous, and free from disease. It’s also important to choose a rootstock that is well-adapted to your local climate and soil conditions. In some cases, closely related species, such as *Artocarpus heterophyllus* (jackfruit) seedlings, can be used as rootstock, but success rates may vary. Ensure the rootstock is compatible with the scion variety you intend to graft.
How do I care for a newly grafted jackfruit tree?
Caring for a newly grafted jackfruit tree requires patience and attention to detail. Here are some key tips:
* Protection: Protect the graft union from direct sunlight and heavy rain. You can use grafting tape, plastic wrap, or a small bag to cover the graft.
* Watering: Water the tree regularly, but avoid overwatering. The soil should be moist but not soggy.
* Fertilizing: Apply a balanced fertilizer every few months to promote healthy growth.
* Pest and Disease Control: Monitor the tree for pests and diseases, and take appropriate action if necessary.
* Support: Provide support for the newly grafted branch to prevent it from breaking under its own weight.
* Remove Suckers: Regularly remove any suckers that grow from the rootstock below the graft union. These suckers will compete with the scion for nutrients and water.
What if my graft fails?
Grafting is not always successful, and it’s important to be prepared for the possibility of failure. If your graft fails, don’t get discouraged. Analyze what might have gone wrong and try again. Common reasons for graft failure include:
* Incompatibility: The scion and rootstock may not be compatible.
* Poor Technique: The grafting technique may have been performed incorrectly.
* Infection: The graft union may have become infected with bacteria or fungi.
* Environmental Stress: The tree may have been exposed to extreme temperatures or drought.
If your graft fails, you can try grafting again on a different part of the rootstock. Alternatively, you can allow the rootstock to grow and use it for grafting in the future.
Can I graft different varieties of jackfruit onto the same tree?
Yes, you can absolutely graft different varieties of jackfruit onto the same tree. This is a great way to create a “multi-variety” jackfruit tree that offers a diverse range of flavors and textures. When grafting multiple varieties, make sure to space the grafts adequately to allow each branch to grow and develop properly. Also, consider the growth habits of each variety to ensure that one variety doesn’t overshadow the others.
What tools do I need for jackfruit tree grafting?
To successfully perform jackfruit tree grafting, you’ll need the following tools:
* Grafting Knife: A sharp, clean grafting knife is essential for making precise cuts.
* Pruning Shears: Pruning shears are used to cut the scion and rootstock to the desired size.
* Grafting Tape or Wrap: Grafting tape or wrap is used to secure the graft union and protect it from the elements.
* Sterilizing Alcohol: Sterilizing alcohol is used to clean your tools and prevent infection.
* Grafting Wax (Optional): Grafting wax can be used to seal the graft union and prevent moisture loss.
* Protective Gloves: Wearing gloves can help protect your hands from thorns and sap.
Where can I find scion wood for grafting?
Obtaining high-quality scion wood is crucial for successful grafting. You can obtain scion wood from:
* Established Jackfruit Trees: If you have access to a jackfruit tree with desirable traits, you can collect scion wood from it.
* Nurseries: Some nurseries specialize in grafting and may sell scion wood.
* Other Gardeners: Connect with other gardeners in your area who may be willing to share scion wood.
* Online Sources: There are online sources that sell scion wood, but be sure to purchase from reputable vendors.
When collecting scion wood, choose healthy, vigorous branches that are free from disease. The scion wood should be collected during the dormant season or just before the tree begins to actively grow.
How do I store scion wood if I can’t graft immediately?
If you can’t graft the scion wood immediately after collecting it, you can store it in the refrigerator to keep it fresh. Wrap the scion wood in moist paper towels or sphagnum moss and place it in a plastic bag. Store the bag in the crisper drawer of your refrigerator. The scion wood can be stored for several weeks using this method. Before grafting, inspect the scion wood to ensure that it is still healthy and viable. Discard any scion wood that shows signs of drying out or decay.

Leave a Comment