

Growing Broccoli from Seed might seem daunting, but trust me, it’s incredibly rewarding and easier than you think! Imagine harvesting your own crisp, green broccoli heads, knowing you nurtured them from tiny seeds right in your backyard. Forget those bland, overpriced heads at the grocery store – we’re talking about fresh, flavorful broccoli bursting with nutrients.
For centuries, broccoli has been a staple in gardens and kitchens worldwide. Originating in Italy, its name even comes from the Italian word “broccolo,” meaning “the flowering crest of a cabbage.” This humble vegetable has a rich history, and now, you can be a part of it by cultivating your own!
Why bother with growing broccoli from seed yourself? Well, for starters, you gain complete control over the growing process, ensuring your broccoli is free from harmful pesticides and chemicals. Plus, you’ll save money and have access to unique varieties not typically found in stores. But the real magic lies in the satisfaction of watching your garden flourish and enjoying the fruits (or rather, vegetables!) of your labor. So, let’s dive into the secrets of successfully growing broccoli from seed and unlock the potential of your green thumb!
Brokkoli aus Samen ziehen: Dein DIY-Leitfaden für eine reiche Ernte
Hey Gartenfreunde! Ich liebe es, mein eigenes Gemüse anzubauen, und Brokkoli ist da keine Ausnahme. Es ist nicht nur supergesund, sondern schmeckt auch frisch aus dem Garten einfach unschlagbar. In diesem Artikel zeige ich dir, wie du Brokkoli ganz einfach selbst aus Samen ziehen kannst – Schritt für Schritt. Keine Angst, es ist einfacher als du denkst!
Was du brauchst: Die Vorbereitung
Bevor wir loslegen, lass uns sicherstellen, dass wir alles Nötige parat haben. Hier ist eine Liste der Dinge, die du brauchst:
* Brokkolisamen: Wähle eine Sorte, die für dein Klima geeignet ist. Es gibt frühe, mittlere und späte Sorten.
* Anzuchterde: Diese ist feiner und nährstoffärmer als normale Blumenerde und ideal für junge Keimlinge.
* Anzuchtgefäße: Kleine Töpfe, Anzuchtschalen oder Eierkartons funktionieren super.
* Sprühflasche: Zum Befeuchten der Erde.
* Pflanzetiketten: Damit du den Überblick behältst, welche Sorte wo wächst.
* Mini-Gewächshaus oder Frischhaltefolie: Um die Feuchtigkeit zu halten.
* Gießkanne: Mit feinem Brausekopf.
* Gartenhandschuhe: Um deine Hände sauber zu halten.
* Kompost oder organischer Dünger: Für später, wenn die Pflanzen größer sind.
* Gartenschaufel oder Kelle: Zum Umtopfen.
Der richtige Zeitpunkt: Wann Brokkoli säen?
Der Zeitpunkt der Aussaat hängt stark von deinem Klima und der Brokkolisorte ab. Generell gilt:
* Für eine Frühjahrsernte: Starte die Aussaat im Haus etwa 6-8 Wochen vor dem letzten erwarteten Frost.
* Für eine Herbsternten: Säe die Samen im Sommer direkt ins Freiland oder in Anzuchtgefäße.
Ich persönlich säe meine Brokkolisamen meistens im März für eine Frühjahrsernte und im Juli für eine Herbsternten. Informiere dich am besten über die spezifischen Empfehlungen für deine Region.
Aussaat im Haus: Schritt für Schritt
Wenn du dich für die Aussaat im Haus entscheidest, um den Pflanzen einen Vorsprung zu verschaffen, folge diesen Schritten:
1. Anzuchtgefäße vorbereiten: Fülle die Anzuchtgefäße mit Anzuchterde. Drücke die Erde leicht an, aber nicht zu fest.
2. Samen aussäen: Lege pro Gefäß 2-3 Samen auf die Erde. Bedecke die Samen mit einer dünnen Schicht Erde (ca. 0,5 cm).
3. Befeuchten: Besprühe die Erde vorsichtig mit Wasser, bis sie feucht, aber nicht nass ist.
4. Mini-Gewächshaus schaffen: Decke die Anzuchtgefäße mit einem Mini-Gewächshaus oder Frischhaltefolie ab, um die Luftfeuchtigkeit zu erhöhen.
5. Warm und hell stellen: Stelle die Anzuchtgefäße an einen warmen und hellen Ort. Eine Temperatur von 18-24°C ist ideal.
6. Regelmäßig lüften: Lüfte das Mini-Gewächshaus oder die Folie täglich, um Schimmelbildung zu vermeiden.
7. Feucht halten: Achte darauf, dass die Erde immer leicht feucht bleibt. Besprühe sie bei Bedarf mit Wasser.
8. Pikieren: Sobald die Keimlinge ihre ersten richtigen Blätter (nach den Keimblättern) entwickelt haben, ist es Zeit zum Pikieren. Das bedeutet, dass du die stärksten Pflanzen in separate Töpfe umpflanzt.
Pikieren: Den Keimlingen mehr Platz geben
Das Pikieren ist ein wichtiger Schritt, um sicherzustellen, dass deine Brokkolipflanzen genügend Platz zum Wachsen haben.
1. Vorbereitung: Fülle kleine Töpfe (ca. 8-10 cm Durchmesser) mit Anzuchterde.
2. Keimlinge vorsichtig ausheben: Löse die Keimlinge vorsichtig mit einem Pikierstab oder einem Löffel aus der Anzuchtschale. Achte darauf, die Wurzeln nicht zu beschädigen.
3. Einpflanzen: Setze jeden Keimling in einen separaten Topf. Die Wurzeln sollten gut mit Erde bedeckt sein.
4. Angießen: Gieße die Keimlinge vorsichtig an.
5. Heller Standort: Stelle die pikierten Pflanzen an einen hellen, aber nicht vollsonnigen Standort.
Aussaat im Freiland: Direktsaat
Wenn du dich für die Direktsaat im Freiland entscheidest, beachte folgende Punkte:
1. Boden vorbereiten: Lockere den Boden gründlich auf und entferne Unkraut. Arbeite Kompost oder organischen Dünger ein, um den Boden mit Nährstoffen anzureichern.
2. Saatrillen ziehen: Ziehe Saatrillen mit einem Abstand von ca. 45-60 cm.
3. Samen aussäen: Lege die Samen in die Saatrillen und bedecke sie mit einer dünnen Schicht Erde (ca. 1-2 cm).
4. Befeuchten: Gieße die Saatrillen vorsichtig an.
5. Feucht halten: Halte die Erde feucht, bis die Samen keimen.
6. Vereinzeln: Sobald die Keimlinge groß genug sind, vereinzele sie auf einen Abstand von ca. 45-60 cm. Das bedeutet, dass du die schwächeren Pflanzen entfernst, damit die stärkeren genügend Platz zum Wachsen haben.
Die Pflege: Was Brokkoli zum Wachsen braucht
Egal, ob du die Pflanzen im Haus vorgezogen oder direkt ins Freiland gesät hast, die richtige Pflege ist entscheidend für eine reiche Ernte.
* Gießen: Brokkoli braucht regelmäßig Wasser, besonders während trockener Perioden. Achte darauf, dass die Erde immer leicht feucht ist, aber vermeide Staunässe.
* Düngen: Dünge die Pflanzen regelmäßig mit Kompost oder organischem Dünger. Beginne damit etwa 2-3 Wochen nach dem Auspflanzen.
* Unkraut jäten: Halte den Bereich um die Pflanzen frei von Unkraut. Unkraut konkurriert mit dem Brokkoli um Nährstoffe und Wasser.
* Schutz vor Schädlingen: Brokkoli kann von verschiedenen Schädlingen befallen werden, wie z.B. Kohlweißlingen, Erdflöhen oder Blattläusen. Kontrolliere die Pflanzen regelmäßig und ergreife bei Bedarf Maßnahmen. Du kannst z.B. ein Netz über die Pflanzen spannen oder natürliche Schädlingsbekämpfungsmittel verwenden.
* Mulchen: Eine Mulchschicht aus Stroh oder Rasenschnitt hilft, die Feuchtigkeit im Boden zu halten und Unkraut zu unterdrücken.
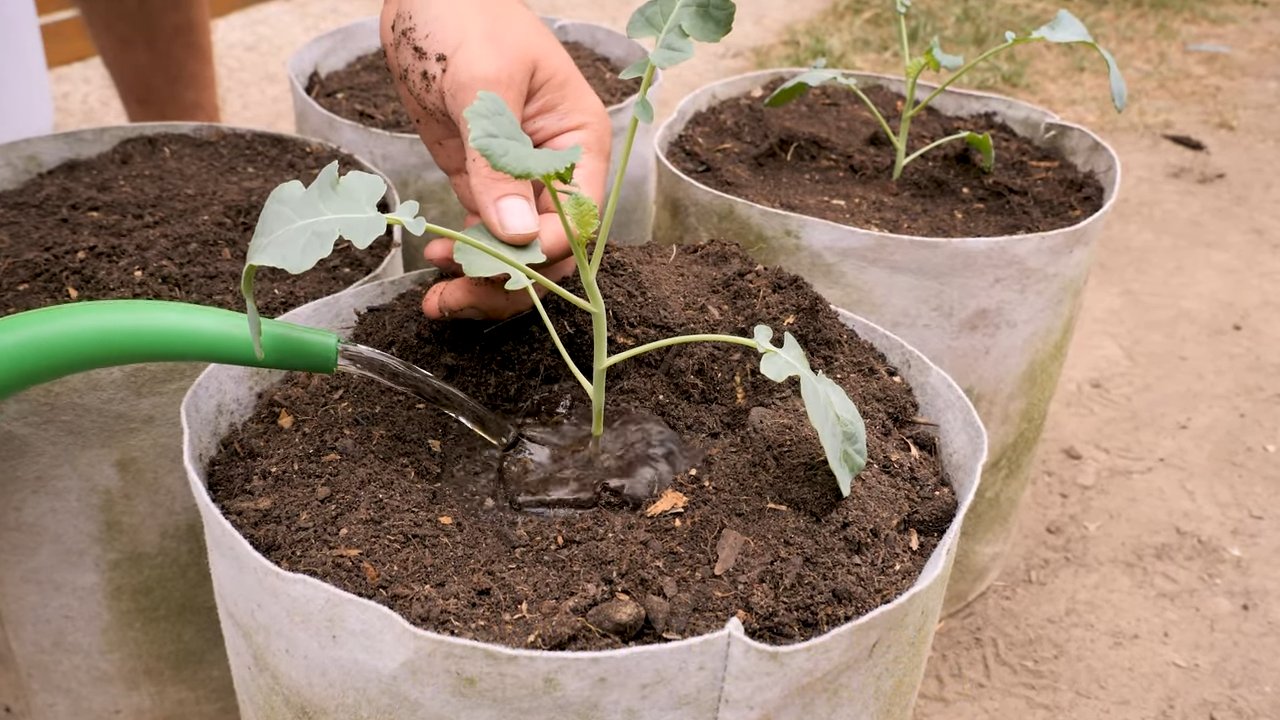
Auspflanzen: Ab ins Beet!
Wenn deine vorgezogenen Brokkolipflanzen kräftig genug sind (ca. 15-20 cm hoch), ist es Zeit, sie ins Beet auszupflanzen.
1. Abhärten: Bevor du die Pflanzen ins Beet pflanzt, solltest du sie einige Tage lang abhärten. Das bedeutet, dass du sie tagsüber für einige Stunden ins Freie stellst, damit sie sich an die Bedingungen gewöhnen können.
2. Pflanzlöcher vorbereiten: Grabe Pflanzlöcher mit einem Abstand von ca. 45-60 cm.
3. Pflanzen einsetzen: Setze die Pflanzen in die Pflanzlöcher und fülle sie mit Erde auf. Die Wurzeln sollten gut mit Erde bedeckt sein.
4. Angießen: Gieße die Pflanzen gründlich an.
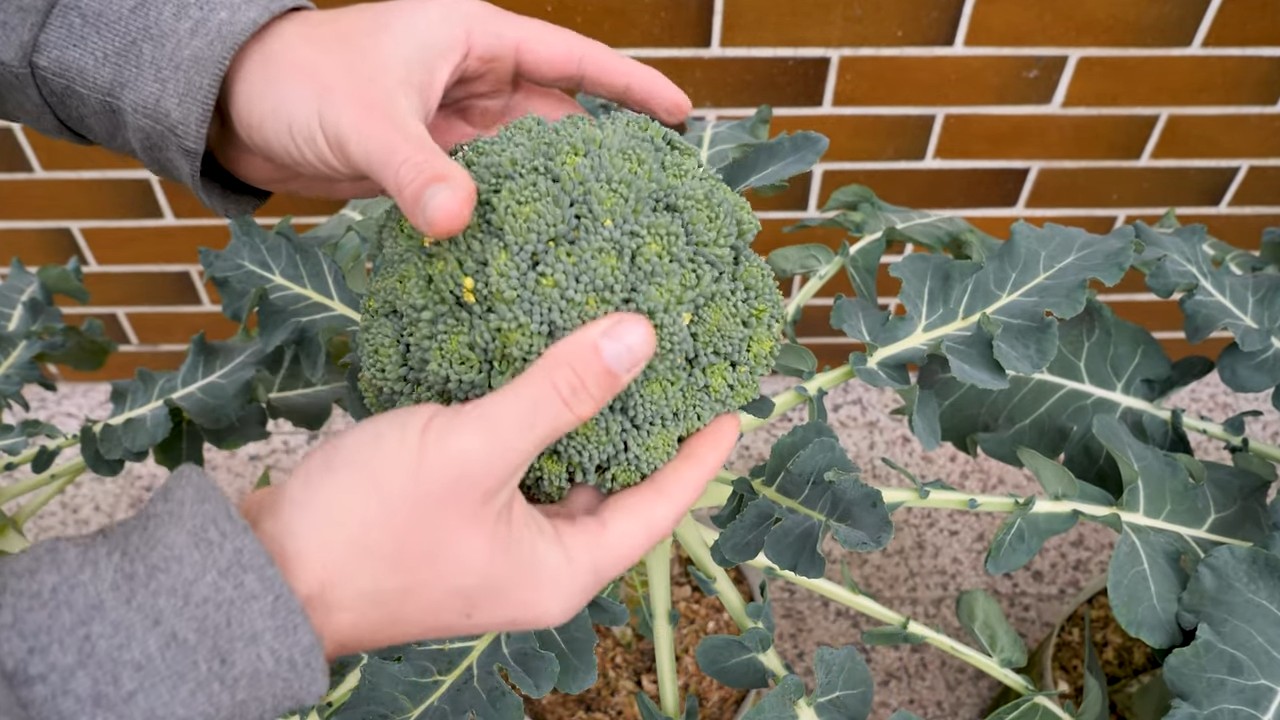
Die Ernte: Wann ist der Brokkoli reif?
Die Erntezeit hängt von der Brokkolisorte und den Wetterbedingungen ab. Generell gilt:
* Erntezeitpunkt: Ernte den Brokkoli, wenn die Röschen fest und geschlossen sind. Wenn die Röschen gelb werden oder sich öffnen, ist der Brokkoli überreif.
* Erntetechnik: Schneide den Brokkolikopf mit einem scharfen Messer ab. Lasse dabei einige Blätter an der Pflanze, damit sie Seitentriebe bilden kann
Conclusion
So, there you have it! Growing broccoli from seed might seem daunting at first, but with a little patience and the right approach, you can enjoy a bountiful harvest of fresh, delicious broccoli right from your own garden. This DIY trick isn’t just about saving money; it’s about connecting with your food, understanding the growing process, and experiencing the unparalleled satisfaction of nurturing a plant from a tiny seed to a thriving vegetable.
Why is this a must-try? Because store-bought broccoli simply can’t compare to the flavor and freshness of homegrown. You control the growing conditions, ensuring your broccoli is free from unwanted chemicals and pesticides. Plus, you get to harvest it at its peak ripeness, maximizing its nutritional value and taste. Think sweeter, more tender florets that are perfect for roasting, steaming, or adding to your favorite dishes.
But the benefits don’t stop there. Growing broccoli from seed allows you to experiment with different varieties. Forget the standard green broccoli you find in the supermarket. Explore the world of purple sprouting broccoli, Romanesco broccoli with its fractal patterns, or even broccoli raab with its slightly bitter, leafy greens. Each variety offers a unique flavor profile and texture, adding excitement and variety to your meals.
Consider these variations to personalize your broccoli-growing experience:
* Succession Planting: Plant seeds every few weeks to ensure a continuous harvest throughout the growing season. This is especially useful if you have a large family or enjoy eating broccoli regularly.
* Companion Planting: Plant broccoli alongside beneficial companion plants like marigolds (to deter pests), onions (to repel cabbage moths), or dill (to attract beneficial insects).
* Container Gardening: If you have limited space, you can successfully grow broccoli in containers. Choose a large pot (at least 12 inches in diameter) and use a well-draining potting mix.
* Hydroponics: For the adventurous gardener, consider growing broccoli hydroponically. This method allows you to control the nutrient supply and growing environment, potentially leading to faster growth and higher yields.
Don’t be afraid to experiment and adapt the techniques to suit your specific climate and growing conditions. The key is to observe your plants closely and learn from your experiences.
We wholeheartedly encourage you to give this DIY trick a try. Start small, perhaps with just a few seeds, and see how it goes. The rewards are well worth the effort. Imagine the pride you’ll feel when you serve a meal featuring broccoli that you grew yourself.
And most importantly, we want to hear about your experiences! Share your successes, your challenges, and your tips in the comments below. Let’s create a community of broccoli-growing enthusiasts and learn from each other. Did you try a unique variety? Did you discover a particularly effective pest control method? Your insights could be invaluable to other gardeners. So, grab your seeds, get your hands dirty, and embark on your broccoli-growing adventure today! Let’s cultivate a greener, healthier, and more delicious world, one broccoli plant at a time. Remember, mastering the art of growing broccoli from seed is an investment in your health, your garden, and your overall well-being.
Frequently Asked Questions (FAQ)
Q: How long does it take to grow broccoli from seed?
A: The time it takes to grow broccoli from seed to harvest can vary depending on the variety, climate, and growing conditions. Generally, it takes about 50 to 80 days from transplanting seedlings to harvesting the broccoli head. Starting seeds indoors can give you a head start, especially in regions with short growing seasons. Keep in mind that sprouting the seeds can take anywhere from 5-10 days.
Q: What are the best conditions for growing broccoli?
A: Broccoli thrives in cool weather, ideally between 60°F and 70°F (15°C and 21°C). It requires at least 6 hours of direct sunlight per day and well-drained, fertile soil with a pH between 6.0 and 7.0. Amend the soil with compost or other organic matter to improve its fertility and drainage. Consistent watering is crucial, especially during hot weather.
Q: How often should I water my broccoli plants?
A: Broccoli plants need consistent moisture to thrive. Water deeply whenever the top inch of soil feels dry to the touch. Avoid overhead watering, as this can lead to fungal diseases. Instead, water at the base of the plants. During hot, dry weather, you may need to water daily. Mulching around the plants can help retain moisture in the soil.
Q: What are some common pests and diseases that affect broccoli?
A: Broccoli is susceptible to several pests and diseases, including cabbage worms, aphids, flea beetles, clubroot, and downy mildew. Regularly inspect your plants for signs of infestation or disease. Use organic pest control methods, such as insecticidal soap or neem oil, to control pests. Ensure good air circulation around the plants to prevent fungal diseases. Crop rotation can also help reduce the risk of soilborne diseases.
Q: How do I know when my broccoli is ready to harvest?
A: Broccoli is ready to harvest when the central head is firm and the florets are tightly closed. If the florets start to open and turn yellow, it’s a sign that the broccoli is overripe. Use a sharp knife to cut the head from the plant, leaving a few inches of stem. Side shoots may develop after the main head is harvested, providing you with additional broccoli.
Q: Can I grow broccoli in containers?
A: Yes, you can successfully grow broccoli in containers, but you’ll need to choose a large pot (at least 12 inches in diameter) and use a well-draining potting mix. Ensure the container has drainage holes to prevent waterlogging. Place the container in a sunny location that receives at least 6 hours of direct sunlight per day. Water regularly and fertilize every few weeks with a balanced fertilizer.
Q: What kind of fertilizer should I use for broccoli?
A: Broccoli is a heavy feeder and benefits from regular fertilization. Use a balanced fertilizer with equal amounts of nitrogen, phosphorus, and potassium (e.g., 10-10-10) or a fertilizer specifically formulated for vegetables. Apply the fertilizer according to the package instructions. You can also amend the soil with compost or other organic matter to provide a slow-release source of nutrients.
Q: Can I save seeds from my broccoli plants?
A: Saving seeds from broccoli can be challenging, as broccoli is a biennial plant, meaning it typically takes two years to produce seeds. Furthermore, broccoli is cross-pollinated, so the seeds you save may not produce plants that are true to type. If you want to save seeds, you’ll need to isolate your broccoli plants from other members of the Brassica family (e.g., cabbage, cauliflower, kale) to prevent cross-pollination. Allow the plants to overwinter and flower in the second year. Once the seed pods are dry and brown, you can harvest the seeds.
Q: What are some good companion plants for broccoli?
A: Several plants can benefit broccoli when planted nearby. Marigolds deter pests, onions repel cabbage moths, and dill attracts beneficial insects. Other good companion plants include rosemary, thyme, and sage. Avoid planting broccoli near strawberries, as they can inhibit each other’s growth.
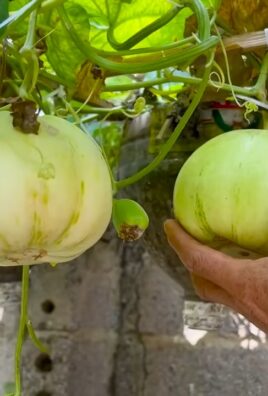
Q: My broccoli head is small. What could be the reason?
A: Several factors can contribute to small broccoli heads. Insufficient sunlight, poor soil fertility, inadequate watering, and overcrowding can all limit the growth of the broccoli head. Ensure your plants receive at least 6 hours of direct sunlight per day, amend the soil with compost or fertilizer, water regularly, and thin out the plants if they are too close together.

Leave a Comment