

Grow Spinach Planter: Your Guide to a Bountiful Harvest
I’ve always loved the taste of fresh spinach, but grocery store spinach just doesn’t compare to homegrown. That’s why I’m so excited to share my Grow Spinach Planter DIY project with you! This isn’t just about planting spinach; it’s about connecting with nature, enjoying the satisfaction of nurturing your own food, and savoring the unparalleled flavor of homegrown greens. For centuries, people have cultivated spinach, tracing its roots back to ancient Persia. It’s a testament to its enduring popularity and nutritional value. But let’s be honest, buying pre-packaged spinach can be expensive and often lacks the vibrant freshness you get from your own garden.
That’s where my Grow Spinach Planter comes in. This simple, yet effective DIY project allows you to create the perfect environment for growing lush, healthy spinach, even if you have limited space. Whether you have a sprawling backyard or a tiny balcony, this guide will empower you to cultivate your own spinach patch. You’ll learn how to build a planter tailored to your needs, selecting the right materials and optimizing the growing conditions for a bountiful harvest. This Grow Spinach Planter project isn’t just about saving money; it’s about gaining a deeper appreciation for where your food comes from and the joy of watching something you’ve nurtured grow from seed to plate.
Why You Need a DIY Grow Spinach Planter
Beyond the deliciousness of homegrown spinach, a DIY Grow Spinach Planter offers several advantages. It allows for better control over the growing environment, ensuring optimal conditions for healthy growth. You can choose organic soil and avoid potentially harmful pesticides, resulting in healthier, tastier spinach. Plus, it’s a fantastic way to involve the whole family in a rewarding and educational experience. So, let’s get started on your journey to a thriving spinach garden with this easy-to-follow Grow Spinach Planter guide!
My Amazing DIY Spinach Planter: A Step-by-Step Guide
I love fresh spinach, but grocery store prices can be a bit steep. So, I decided to build my own spinach planter! It’s super easy, inexpensive, and lets you enjoy delicious, homegrown spinach all season long. Here’s how I did it:
Phase 1: Gathering Your Supplies
- A large plastic storage container (at least 18 inches long, 12 inches wide, and 8 inches deep – the bigger, the better!)
- Potting soil (enough to fill your container almost to the top)
- Spinach seeds (choose a variety that suits your climate)
- Small trowel or gardening hand tool
- Watering can or hose with a gentle rose attachment
- Measuring tape
- Pencil
- Optional: A small amount of compost or other organic matter to enrich the soil
- Optional: Row markers (small sticks or plant labels)
Phase 2: Preparing the Container
- Clean your container thoroughly. Wash it with soap and water to remove any residue. Let it dry completely. This prevents the growth of mold or mildew and ensures a clean start for your spinach.
- Drill drainage holes (if needed). Check your container for existing drainage holes. If it doesn’t have them, use a drill with a 1/4-inch or larger bit to drill several holes in the bottom. This is crucial for preventing root rot. Space the holes evenly across the bottom.
- Optional: Add a layer of gravel or pebbles. For extra drainage, you can add a 1-2 inch layer of gravel or small pebbles to the bottom of the container before adding the soil. This helps with aeration and prevents waterlogging.
Phase 3: Planting Your Spinach
- Fill the container with potting soil. Leave about an inch of space from the top of the container to allow for watering. If using compost, gently mix it into the soil.
- Prepare the seedbed. Use your trowel or fingers to lightly loosen the top inch or two of soil. This will help the seeds make better contact with the soil and germinate more easily.
- Sow the spinach seeds. Follow the instructions on your spinach seed packet for spacing. Generally, spinach seeds should be sown about 1/2 inch deep and 1-2 inches apart. I like to sow them in rows for easier management. Use your pencil to lightly mark rows if you wish.
- Cover the seeds. Gently cover the seeds with soil, ensuring they are adequately covered but not buried too deeply.
- Water gently. Use your watering can or hose to gently water the soil. Avoid using a strong stream, as this could wash away the seeds. Water until the soil is evenly moist but not soggy.
- Label your planter (optional). If you’re planting multiple varieties of spinach, use plant labels to keep track of which is which.
Phase 4: Spinach Care and Maintenance
- Provide adequate sunlight. Spinach needs at least 6 hours of sunlight per day. Place your container in a sunny location.
- Water regularly. Keep the soil consistently moist but not waterlogged. Check the soil moisture daily, especially during hot and dry weather. Water deeply when the top inch of soil feels dry.
- Weed regularly. Remove any weeds that appear in your planter. This prevents competition for nutrients and water.
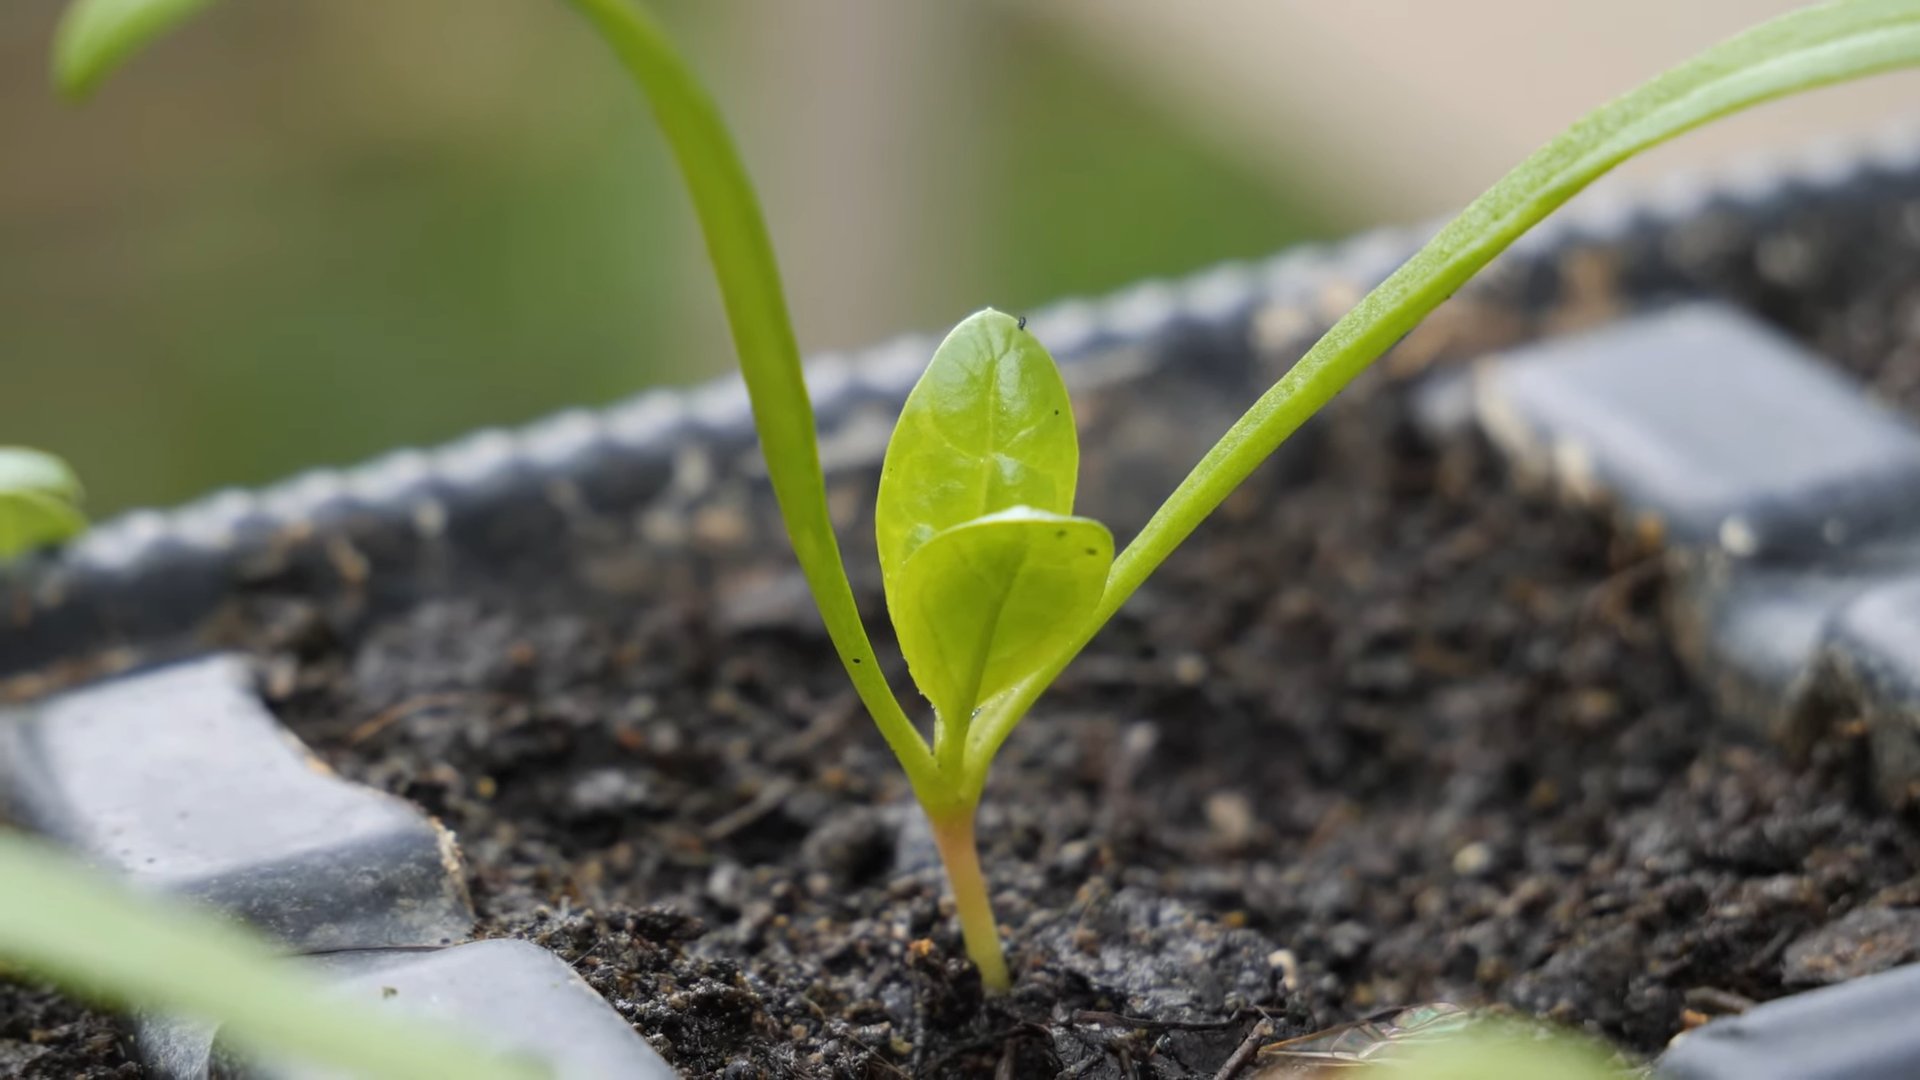
- Thin seedlings. Once your spinach seedlings have a few true leaves (the leaves that appear after the initial cotyledons), thin them out to the recommended spacing on the seed packet. This gives the remaining plants more room to grow.
- Fertilize (optional). You can fertilize your spinach with a balanced liquid fertilizer every 2-3 weeks, following the instructions on the fertilizer label. This isn’t strictly necessary, but it can promote faster growth and larger yields.
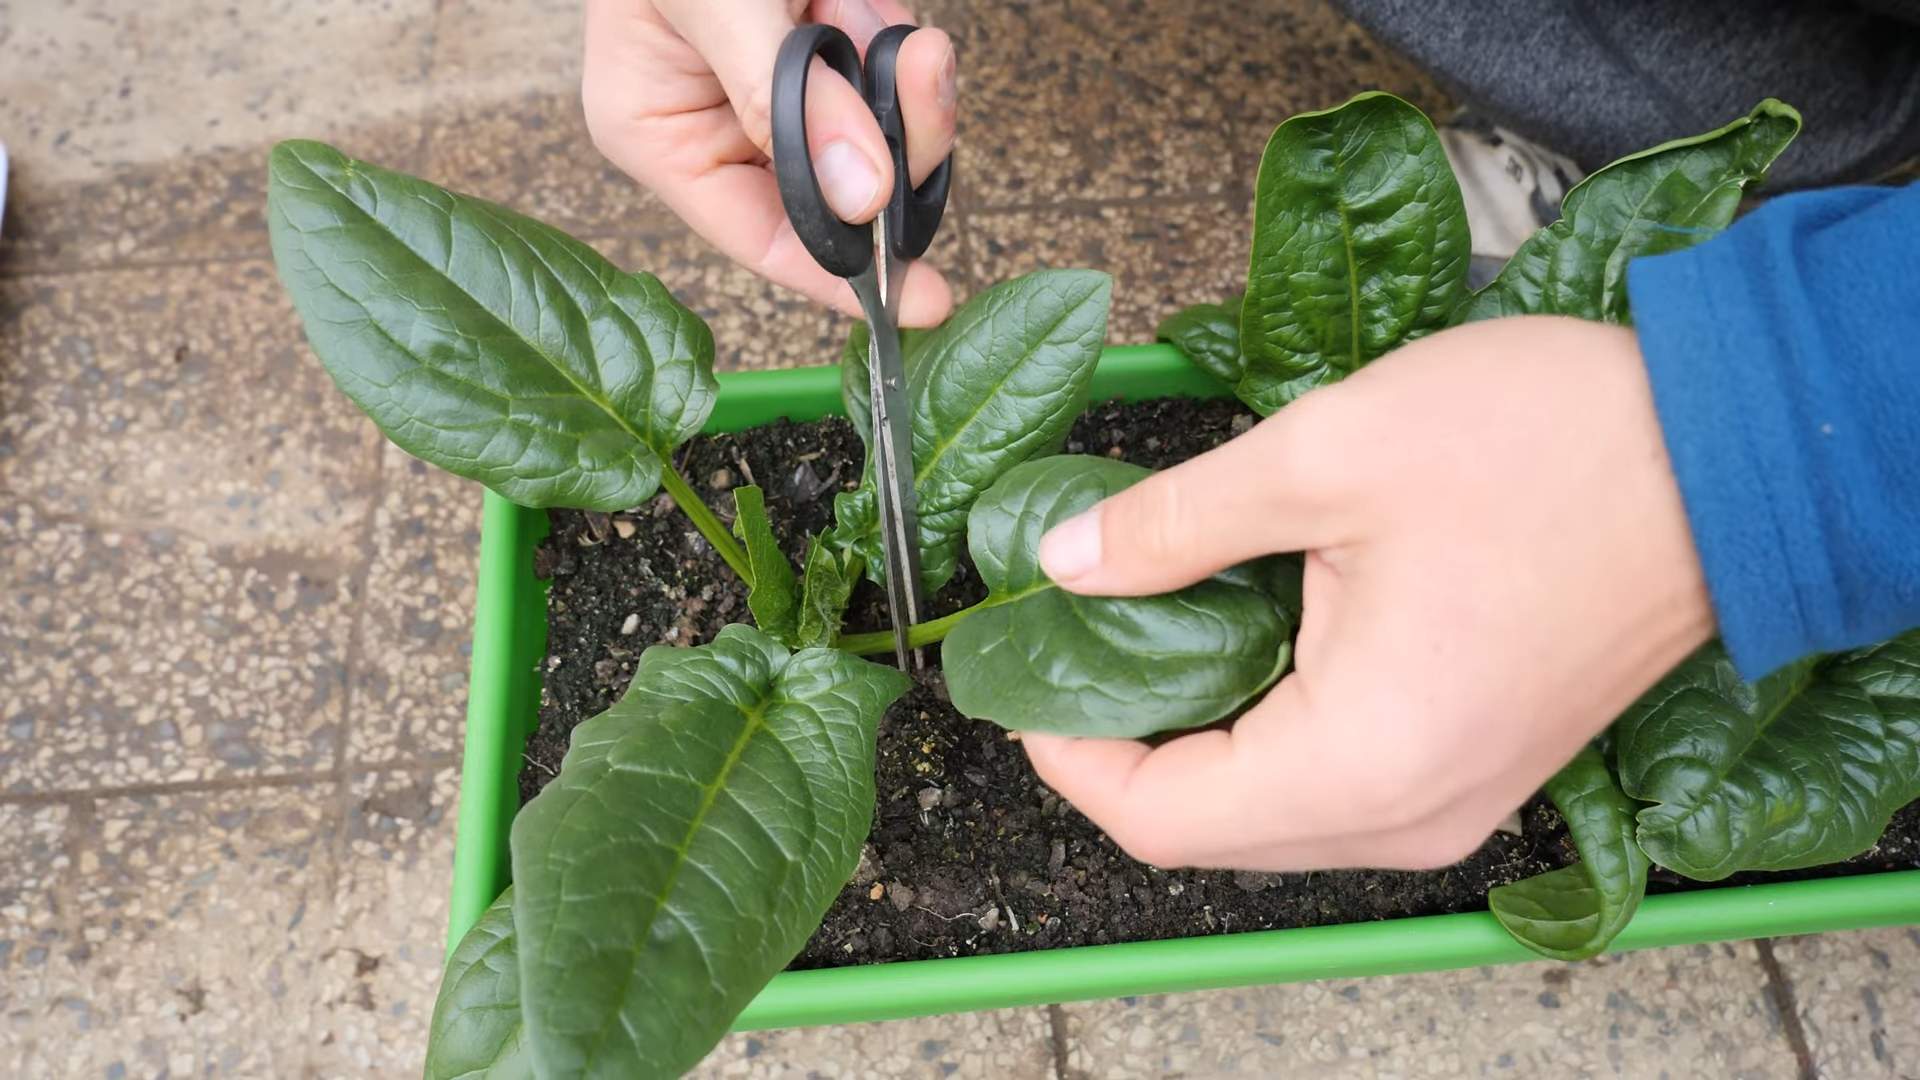
- Harvest your spinach. You can start harvesting your spinach when the leaves are large enough. Harvest by cutting the outer leaves, leaving the inner leaves to continue growing. This allows for a continuous harvest.
- Pest and disease control. Regularly inspect your spinach plants for pests and diseases. Take appropriate action if you notice any problems. This might involve using organic pest control methods or removing affected plants.
Phase 5: Troubleshooting
Problem: Yellowing leaves
This could indicate nutrient deficiencies, overwatering, or underwatering. Check your watering schedule and consider adding fertilizer if needed.
Problem: Bolting (premature flowering)
This often happens in hot weather. Try to provide some shade during the hottest part of the day. Harvest frequently to prevent bolting.
Problem: Pests
Common spinach pests include aphids and slugs. Use organic pest control methods such as insecticidal soap or diatomaceous earth to manage pests.
Problem: Diseases
Downy mildew is a common spinach disease. Ensure good air circulation around your plants and avoid overhead watering to prevent this.
Remember: The success of your spinach planter depends on consistent care and attention. Enjoy the process and the delicious rewards of your homegrown spinach!
Conclusion
So there you have it – a complete guide to creating your own thriving Grow Spinach Planter! This DIY project isn’t just about saving money; it’s about connecting with nature, understanding the growth cycle of your food, and enjoying the unparalleled freshness of homegrown spinach. The satisfaction of harvesting your own leafy greens, knowing exactly where they came from and how they were grown, is truly rewarding. This method offers unparalleled control over the growing environment, allowing you to optimize conditions for maximum yield and vibrant, healthy spinach. From seed to plate, the journey is incredibly fulfilling, and the taste? Unmatched. This simple yet effective Grow Spinach Planter is a must-try for beginner and experienced gardeners alike. It’s a testament to the fact that growing your own food doesn’t require vast spaces or complicated equipment; just a little ingenuity and a passion for fresh produce.
Beyond the basic design, the possibilities for customization are endless. Experiment with different types of spinach – there are countless varieties with unique flavors and textures to explore! Consider adding companion plants, such as nasturtiums or marigolds, to deter pests and enhance the overall health of your planter. You can also adapt the size and shape of your planter to fit your available space, whether it’s a sunny balcony, a small patio, or even a windowsill. For those with limited sunlight, consider supplementing with grow lights to ensure optimal growth. The beauty of this DIY project lies in its adaptability; you can tailor it to your specific needs and preferences.
We strongly encourage you to try this Grow Spinach Planter and experience the joy of homegrown goodness. Share your experiences with us! Post pictures of your thriving spinach plants on social media using the hashtag #GrowSpinachPlanter and tag us. We’d love to see your creations and hear about your successes (and even your challenges – learning from mistakes is part of the process!). Let’s build a community of home gardeners, sharing tips, tricks, and the delicious rewards of our labor. Remember, even a small planter can yield a significant amount of fresh, nutritious spinach, enough to add a vibrant green boost to your salads, soups, and other culinary creations. So, what are you waiting for? Get your hands dirty and start growing!
Frequently Asked Questions
What type of spinach is best for a Grow Spinach Planter?
Many spinach varieties thrive in containers. Look for compact varieties that are less prone to bolting (going to seed prematurely) in warmer weather. ‘Bloomsdale Long Standing’ and ‘Tyee’ are popular choices known for their tolerance to heat and their consistent yield. However, feel free to experiment and find your favorite!
How much sunlight does my Grow Spinach Planter need?
Spinach needs at least six hours of sunlight per day for optimal growth. Choose a location that receives ample sunlight, preferably morning sun. If you have limited sunlight, consider supplementing with grow lights, especially during the shorter days of winter.
How often should I water my Grow Spinach Planter?
Keep the soil consistently moist but not waterlogged. Water thoroughly when the top inch of soil feels dry. The frequency of watering will depend on factors such as temperature, humidity, and the type of container you are using. Check the soil moisture regularly and adjust your watering schedule accordingly.
What kind of soil is best for growing spinach in a container?
Use a well-draining potting mix specifically formulated for containers. Avoid using garden soil, as it can become compacted and poorly aerated in a container. A good quality potting mix will provide the necessary nutrients and drainage for healthy spinach growth.
What are some common problems I might encounter when growing spinach in a Grow Spinach Planter?
Common issues include pests (aphids, slugs, snails), diseases (downy mildew), and bolting (premature flowering). Regularly inspect your plants for pests and diseases, and take appropriate action if necessary. Choosing a heat-tolerant variety and providing adequate shade during the hottest part of the day can help prevent bolting.
Can I use this method to grow other leafy greens?
Absolutely! This Grow Spinach Planter method can be easily adapted to grow other leafy greens such as lettuce, kale, chard, and arugula. Adjust the planting density and spacing according to the specific needs of the chosen plant.
How long does it take to harvest spinach from a Grow Spinach Planter?
The time it takes to harvest spinach depends on the variety and growing conditions. Generally, you can start harvesting baby spinach leaves about 4-6 weeks after sowing seeds. For larger leaves, allow 6-8 weeks or longer.
What should I do with my harvested spinach?
Enjoy your fresh, homegrown spinach! Add it to salads, soups, smoothies, or sauté it as a side dish. You can also freeze excess spinach for later use. Remember to wash your spinach thoroughly before consuming.
What if my spinach plants aren’t growing as expected?
Don’t be discouraged! Gardening is a learning process. If your spinach plants aren’t thriving, consider factors such as sunlight, watering, soil quality, and potential pests or diseases. Research the specific issues you are encountering and take appropriate corrective measures. Remember to consult online resources or experienced gardeners for additional advice.


Leave a Comment