

Grow celery at home? Absolutely! Imagine plucking crisp, juicy celery stalks straight from your own backyard, ready to be dipped in hummus or tossed into a refreshing salad. Forget those limp, store-bought bunches – we’re talking about vibrant, flavorful celery grown with your own two hands. This isn’t just about saving money; it’s about connecting with nature and enjoying the unparalleled taste of homegrown goodness.
Celery, with its distinctive crunch and subtle sweetness, has been cultivated for centuries. Originating in the Mediterranean region, it was initially valued more for its medicinal properties than its culinary uses. Over time, however, it evolved into the versatile vegetable we know and love today. But let’s be honest, buying celery can be a gamble. Sometimes it’s perfect, other times it’s stringy and bitter. That’s where our DIY tricks come in!
In this article, I’m going to share some simple, yet effective, DIY hacks to help you grow celery at home successfully, even if you’re a complete beginner. We’ll cover everything from choosing the right variety to providing the perfect growing conditions. These tips will not only save you trips to the grocery store but also give you the satisfaction of nurturing your own food. Ready to get your hands dirty and enjoy the freshest celery imaginable? Let’s dive in!
Growing Celery From Kitchen Scraps: A Beginner’s Guide
Hey there, fellow gardening enthusiasts! Ever thought about growing your own celery? It’s surprisingly easy, and you can start right from the celery you buy at the grocery store. I’m going to walk you through the whole process, step-by-step, so you can enjoy fresh, homegrown celery in no time. Get ready to turn kitchen scraps into a thriving plant!
What You’ll Need
Before we dive in, let’s gather our supplies. This is a pretty low-cost project, which is always a win in my book!
* Celery Stalk: Choose a healthy-looking celery stalk from the grocery store. Make sure the base (where the stalks are connected) is intact and firm. Avoid stalks that are wilted, discolored, or mushy.
* Shallow Dish or Bowl: Something to hold water and the celery base. A pie plate, a small plastic container, or even a saucer will work perfectly.
* Water: Tap water is fine.
* Potting Soil: A good quality potting mix is essential for healthy growth.
* Pot: Choose a pot that’s at least 6-8 inches in diameter and depth. Celery needs room for its roots to grow.
* Spray Bottle (Optional): For misting the celery leaves.
* Sunny Location: Celery needs plenty of sunlight, so find a spot that gets at least 6 hours of direct sunlight per day. A south-facing window is ideal.
* Gardening Gloves (Optional): To keep your hands clean.
Reviving Your Celery Base: The Water Propagation Phase
This is where the magic begins! We’re going to coax our celery base into sprouting new roots.
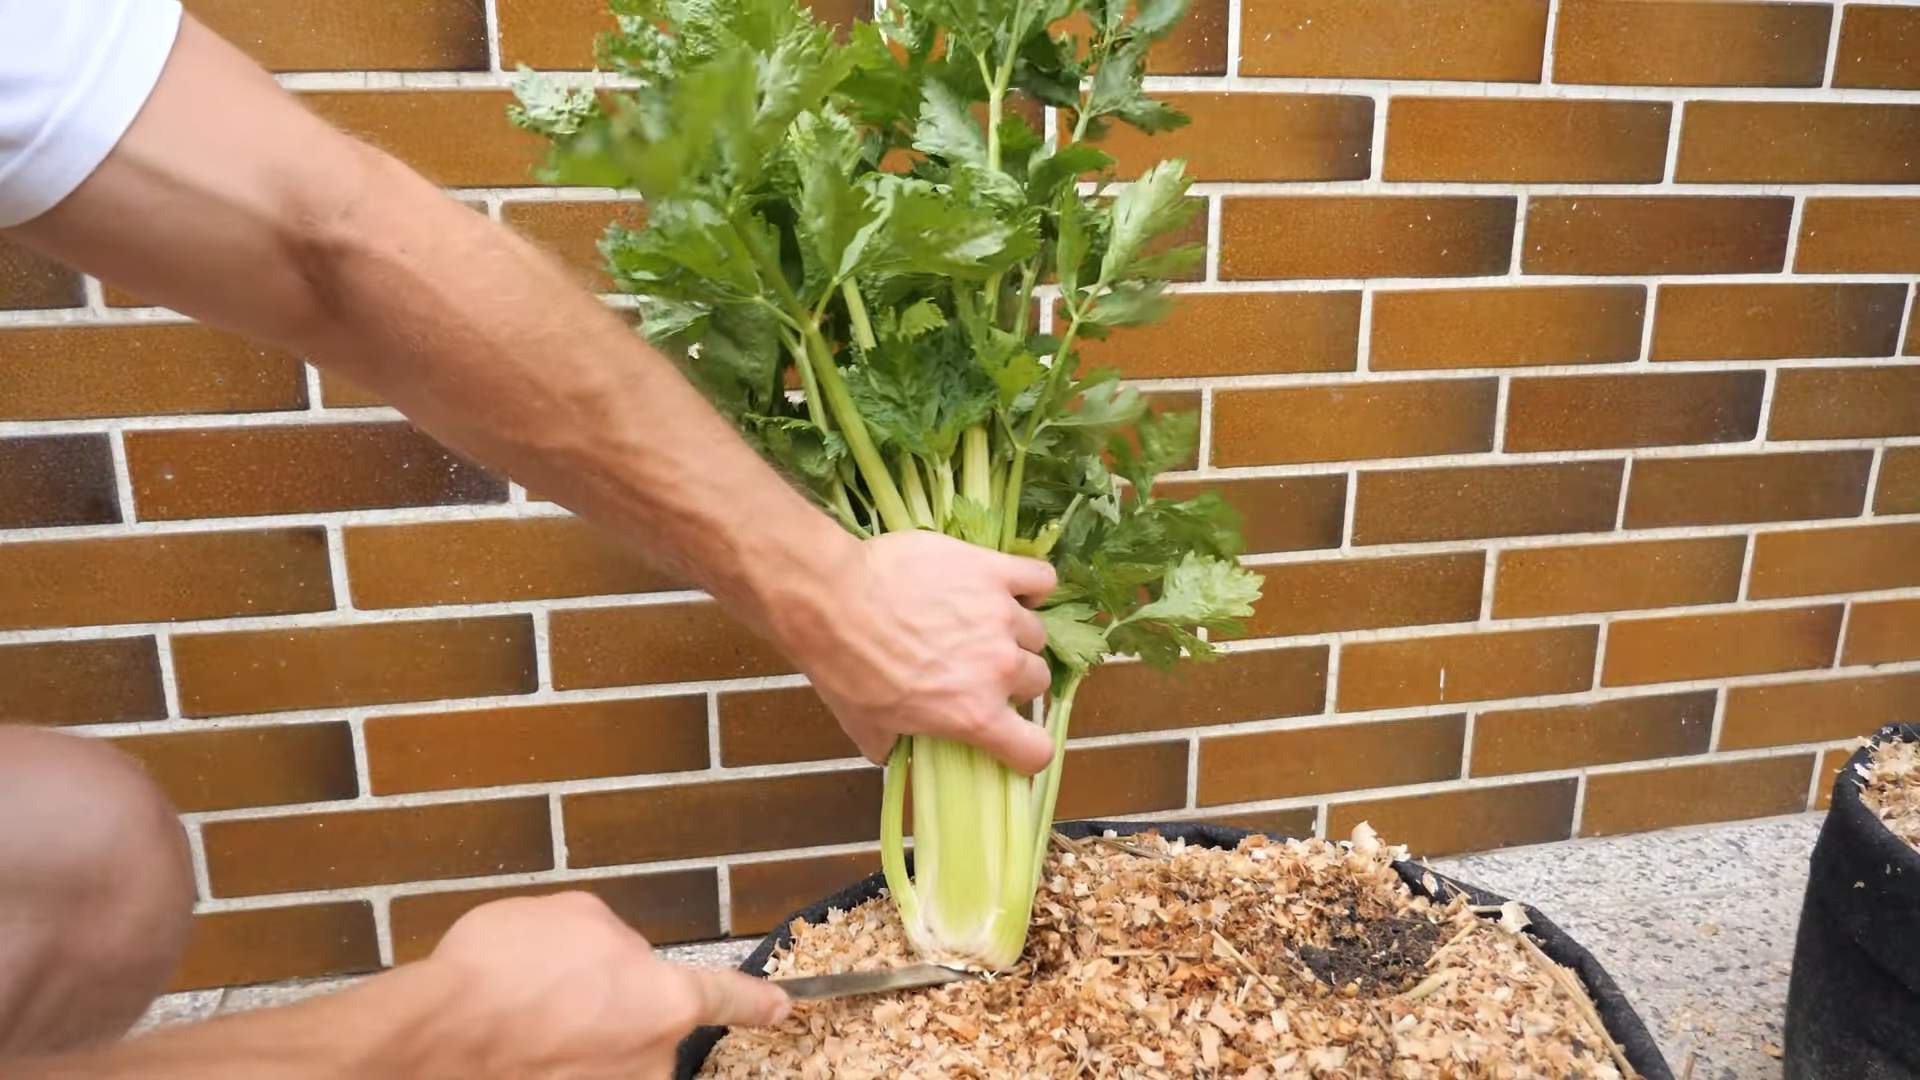
1. Prepare the Celery Base: Carefully cut off the celery stalks about 2 inches from the base. You can use these stalks for cooking or snacking – no waste here! You should be left with the celery base, which looks like a little stump.
2. Place in Water: Put the celery base in your shallow dish or bowl. Add enough water to cover the bottom inch or so of the base. You don’t want to submerge the entire base, just the bottom part where the roots will emerge.
3. Find a Sunny Spot: Place the dish with the celery base in a sunny location. Remember, at least 6 hours of direct sunlight is ideal.
4. Change the Water Regularly: This is crucial! Change the water every 1-2 days to prevent bacteria growth and keep the water fresh. This will encourage healthy root development.
5. Observe and Wait: Now comes the waiting game. Over the next few days, you should start to see small roots emerging from the bottom of the celery base. You might also notice new leaves sprouting from the top. This usually takes about 5-7 days, but it can vary depending on the celery and the environmental conditions. Be patient!
6. Keep it Moist: Make sure the water level stays consistent. The bottom of the celery base should always be submerged in water.
Transplanting to Soil: Giving Your Celery a Home
Once your celery base has developed a good network of roots (about an inch or two long), it’s time to transplant it to soil. This is a big step, so let’s do it right!
1. Prepare the Pot: Fill your pot with potting soil, leaving about an inch of space at the top. Gently pat down the soil to remove any air pockets.
2. Create a Hole: Use your finger or a small trowel to create a hole in the center of the pot, large enough to accommodate the celery base and its roots.
3. Carefully Remove the Celery Base: Gently lift the celery base from the water, being careful not to damage the delicate roots.
4. Plant the Celery Base: Place the celery base in the hole, ensuring that the top of the base is level with the soil surface. Gently backfill the hole with potting soil, pressing lightly to secure the celery base in place.
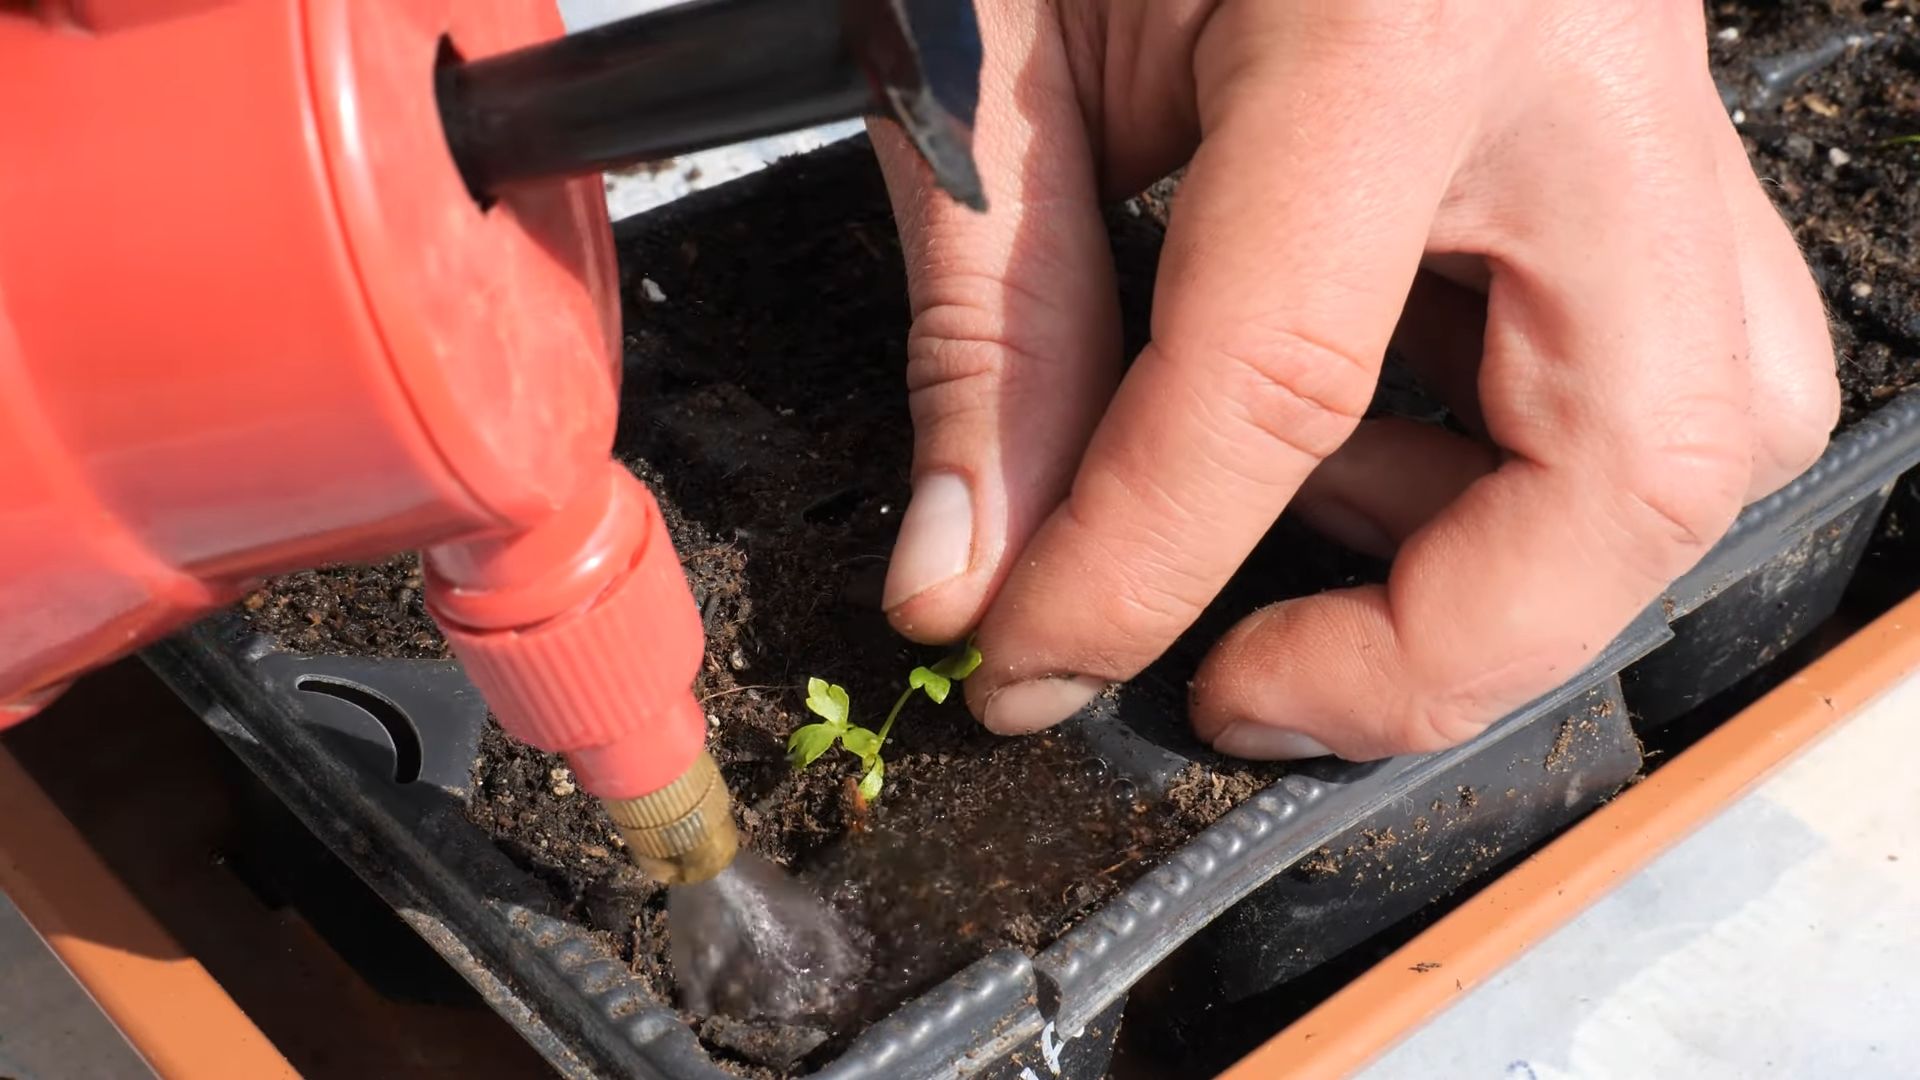
5. Water Thoroughly: Water the soil thoroughly until water drains out of the bottom of the pot. This will help settle the soil and ensure that the roots are properly hydrated.
6. Return to Sunny Location: Place the pot in the same sunny location where you had the celery base in water.
Caring for Your Celery Plant: Nurturing Growth
Now that your celery is planted in soil, it’s time to provide it with the care it needs to thrive.
1. Watering: Celery needs consistent moisture, so water it regularly. Check the soil moisture by sticking your finger about an inch into the soil. If it feels dry, it’s time to water. Water deeply, until water drains out of the bottom of the pot. Avoid overwatering, as this can lead to root rot.
2. Sunlight: Celery loves sunlight, so make sure it gets at least 6 hours of direct sunlight per day. If you don’t have a sunny window, you might consider using a grow light.
3. Fertilizing: To encourage healthy growth, fertilize your celery plant every 2-3 weeks with a balanced liquid fertilizer. Follow the instructions on the fertilizer label.
4. Misting (Optional): Celery appreciates humidity, so you can mist the leaves with water every few days, especially if you live in a dry climate.
5. Pest Control: Keep an eye out for pests, such as aphids or spider mites. If you notice any pests, you can try spraying the plant with insecticidal soap or neem oil.
6. Harvesting: It takes about 3-4 months for celery to mature. You can harvest individual stalks as needed, or you can harvest the entire plant at once. To harvest, simply cut the stalks at the base of the plant.
Troubleshooting: Addressing Common Issues
Even with the best care, you might encounter some challenges along the way. Here are some common issues and how to address them:
* Yellowing Leaves: This can be caused by overwatering, underwatering, or nutrient deficiencies. Check the soil moisture and adjust your watering accordingly. If the soil is consistently moist, you might be overwatering. If the soil is dry, you might be underwatering. You can also try fertilizing the plant to provide it with the nutrients it needs.
* Slow Growth: This can be caused by insufficient sunlight, poor soil, or lack of nutrients. Make sure your celery plant is getting enough sunlight and that the soil is well-draining and nutrient-rich. You can also try fertilizing the plant to boost its growth.
* Pests: Aphids, spider mites, and other pests can attack celery plants. Inspect your plant regularly for signs of pests. If you find any, you can try spraying the plant with insecticidal soap or neem oil.
* Bolting: Bolting is when the plant prematurely flowers and goes to seed. This can be caused by stress, such as extreme temperatures or lack of water. To prevent bolting, make sure your celery plant is getting consistent moisture and is protected from extreme temperatures.
Tips for Success: Maximizing Your Celery Harvest
Here are a few extra tips to help you get the most out of your celery-growing adventure:
* Choose the Right Variety: Some celery varieties are easier to grow than others. Look for varieties that are known for being disease-resistant and tolerant of different growing conditions.
* Start with a Healthy Base: The healthier the celery base you start with, the better your chances of success. Choose a stalk that is firm, crisp, and free from blemishes.
* Provide Consistent Moisture: Celery needs consistent moisture to thrive. Water regularly and avoid letting the soil dry out completely.
* Fertilize Regularly: Celery is a heavy feeder, so fertilize it regularly with a balanced liquid fertilizer.
* Protect from Pests: Keep an eye out for pests and take action promptly if you find any.
* Be Patient: Growing celery from kitchen scraps takes time and patience. Don’t get discouraged if you don’t see results immediately. Just keep providing your plant with the care it needs, and you’ll eventually be rewarded with a delicious harvest.
Growing celery from kitchen scraps is a fun and rewarding project that anyone can do. With a little bit of effort and patience, you can enjoy fresh, homegrown celery right from your own kitchen. Happy gardening!
Conclusion
So, there you have it! Growing celery at home, while it might seem daunting at first, is surprisingly achievable and incredibly rewarding. Forget those limp, flavorless stalks from the grocery store. Imagine the crisp, vibrant crunch of freshly harvested celery, bursting with flavor and packed with nutrients, all thanks to your own green thumb. This DIY trick isn’t just about saving money; it’s about connecting with your food, understanding its journey from seed to table, and enjoying the unparalleled taste of homegrown goodness.
Why is this a must-try? Because it empowers you to control the quality of your food. You know exactly what goes into your celery – no mystery pesticides or questionable farming practices. Plus, the flavor difference is undeniable. Homegrown celery boasts a brighter, more intense flavor that elevates everything from soups and salads to crudités and juices. It’s a game-changer.
But the benefits don’t stop there. Growing your own celery is a fantastic way to reduce your carbon footprint. Think about all the transportation and packaging involved in getting celery from a farm to your local supermarket. By growing it yourself, you’re cutting out a significant portion of that environmental impact.
Ready to experiment? Consider these variations:
* Try different celery varieties: From the classic Pascal celery to the more compact and self-blanching varieties, there’s a celery type to suit every garden and taste preference. Experiment and discover your favorite!
* Companion planting: Celery thrives alongside certain plants, like onions, garlic, and tomatoes. Research companion planting to maximize your garden’s productivity and create a healthier ecosystem.
* Hydroponic celery: For those with limited space or challenging soil conditions, hydroponic celery growing is a viable and exciting option. It’s a great way to enjoy fresh celery year-round, regardless of the weather.
* Celery from scraps: You can even regrow celery from the base of a store-bought bunch! Simply place the base in a shallow dish of water, and watch it sprout new growth. It’s a fun and easy way to get started with growing celery at home.
Don’t be afraid to get your hands dirty and embrace the learning process. Gardening is all about experimentation and discovery. Even if you encounter a few challenges along the way, the satisfaction of harvesting your own delicious celery will make it all worthwhile.
We wholeheartedly encourage you to try this DIY trick for growing celery at home. It’s a simple, sustainable, and incredibly rewarding way to enjoy fresh, flavorful celery. Once you’ve experienced the taste of homegrown celery, you’ll never go back to store-bought again.
And most importantly, we want to hear about your experience! Share your tips, tricks, and triumphs in the comments below. Let’s build a community of home gardeners and inspire others to grow their own food. What variety did you choose? What challenges did you face? What are your favorite ways to use your homegrown celery? Your insights could be invaluable to other aspiring celery growers. So, get growing, get sharing, and get ready to enjoy the delicious rewards of your labor!
FAQ
What are the biggest challenges when growing celery at home?
One of the most common challenges is providing celery with consistent moisture. Celery is a thirsty plant and needs regular watering, especially during hot weather. Inconsistent watering can lead to tough, bitter stalks. Another challenge is pest control. Celery can be susceptible to pests like aphids, celery leaf tiers, and carrot rust flies. Regular monitoring and appropriate pest control measures are essential. Finally, celery requires a long growing season, so starting seeds indoors early is often necessary, especially in colder climates.
How much sunlight does celery need?
Celery thrives in full sun, which means at least 6 hours of direct sunlight per day. However, in hotter climates, it can benefit from some afternoon shade to prevent the leaves from scorching. If you’re growing celery indoors, you’ll need to supplement with grow lights to provide adequate light.
What kind of soil is best for growing celery?
Celery prefers rich, well-drained soil that is high in organic matter. Amend your soil with compost or well-rotted manure before planting to improve its fertility and drainage. The ideal soil pH for celery is between 6.0 and 6.8.
How often should I water my celery plants?
Celery needs consistent moisture to thrive. Water deeply and regularly, especially during hot, dry weather. Aim to keep the soil consistently moist but not waterlogged. A good rule of thumb is to water when the top inch of soil feels dry to the touch. Mulching around the plants can help retain moisture and suppress weeds.
When is the best time to harvest celery?
Celery is typically ready to harvest when the stalks are at least 6-8 inches long and about 1 inch in diameter. The exact time will depend on the variety and growing conditions. You can harvest individual stalks as needed or harvest the entire plant at once. To harvest, simply cut the stalks at the base of the plant with a sharp knife.
Can I grow celery in containers?
Yes, you can grow celery in containers, but you’ll need to choose a large container that is at least 12 inches deep and wide. Use a high-quality potting mix and ensure that the container has good drainage. Container-grown celery will likely need more frequent watering and fertilizing than celery grown in the ground.
What are some common pests and diseases that affect celery?
Common pests that affect celery include aphids, celery leaf tiers, carrot rust flies, and slugs. Diseases that can affect celery include early blight, late blight, and pink rot. Regular monitoring and appropriate pest and disease control measures are essential for healthy celery plants. Organic pest control options include insecticidal soap, neem oil, and Bacillus thuringiensis (Bt).
How can I prevent my celery from becoming bitter?
Several factors can contribute to bitter celery, including inconsistent watering, nutrient deficiencies, and hot weather. Ensure that your celery plants receive consistent moisture and are fertilized regularly with a balanced fertilizer. Providing some afternoon shade during hot weather can also help prevent bitterness. Choosing a self-blanching variety can also reduce bitterness.
Can I regrow celery from scraps?
Yes, you can regrow celery from the base of a store-bought bunch. Simply cut off the stalks about 2 inches from the base and place the base in a shallow dish of water. Change the water every day or two. After a few days, you should see new roots and leaves sprouting. Once the roots are well-developed, you can transplant the celery base into a pot or directly into the garden. While it won’t produce a full-sized head of celery, it will provide you with fresh celery leaves for flavoring soups, salads, and other dishes.
What are the nutritional benefits of celery?
Celery is a low-calorie vegetable that is rich in vitamins, minerals, and antioxidants. It is a good source of vitamin K, vitamin A, vitamin C, potassium, and folate. Celery also contains compounds that have anti-inflammatory and antioxidant properties. Eating celery can help support healthy digestion, lower blood pressure, and reduce the risk of chronic diseases.

Leave a Comment