

Growing artichokes at home might seem like a challenge reserved for seasoned gardeners, but I’m here to tell you it’s totally achievable, even if you’re just starting out! Forget those expensive grocery store prices 鈥?imagine strolling into your own backyard and harvesting these delicious, architectural beauties.
Artichokes have a rich history, dating back to ancient Roman times where they were considered a delicacy. They’ve been cultivated and enjoyed for centuries, and now, you can bring that same culinary heritage to your own garden. But why bother with the effort, you might ask? Well, beyond the satisfaction of growing your own food, homegrown artichokes taste infinitely better than anything you can buy. They’re fresher, more flavorful, and you know exactly what went into nurturing them.
This DIY guide is packed with simple tricks and hacks to help you successfully growing artichokes at home, regardless of your experience level. We’ll cover everything from choosing the right variety and preparing your soil to protecting your plants from pests and harvesting your bounty. So, grab your gardening gloves, and let’s get started on this exciting journey to homegrown artichoke goodness!
Growing Artichokes: A Beginner’s Guide to Homegrown Goodness
Okay, artichoke lovers, listen up! I’m going to walk you through the surprisingly simple (yes, really!) process of growing your own artichokes. Forget those pricey grocery store globes; we’re bringing the Mediterranean vibes to your backyard. It might seem intimidating, but trust me, with a little patience and the right know-how, you’ll be harvesting your own delicious artichokes in no time.
What You’ll Need
Before we dive in, let’s gather our supplies. Here’s a checklist to make sure you’re ready to go:
* Artichoke Starts or Seeds: You can start from seed, but I highly recommend buying starts (young plants) from a reputable nursery. It’s much faster and easier, especially for beginners. Look for varieties like ‘Green Globe’ or ‘Violetta’.
* Well-Draining Soil: Artichokes are heavy feeders and need rich, well-draining soil. Amend your garden soil with compost and aged manure.
* Compost and Aged Manure: These are essential for providing the nutrients your artichokes need to thrive.
* Gardening Gloves: Protect your hands from thorns and dirt.
* Shovel or Garden Fork: For digging holes and amending the soil.
* Watering Can or Hose: For regular watering.
* Mulch: To help retain moisture and suppress weeds. Straw, wood chips, or shredded leaves work well.
* Fertilizer (Optional): A balanced fertilizer can give your artichokes an extra boost.
* Pruning Shears or Knife: For harvesting and pruning.
* Space: Artichokes need plenty of room to grow, so make sure you have enough space in your garden. They can get quite large, reaching 3-4 feet wide and tall.
Choosing the Right Location
Location, location, location! Artichokes are sun-worshippers, so you’ll need to pick a spot that gets at least 6-8 hours of direct sunlight per day. They also need well-draining soil, as they don’t like to sit in soggy conditions.
* Sunlight: Full sun is a must.
* Soil: Well-draining, fertile soil is crucial. Amend with compost and aged manure.
* Space: Give each plant plenty of room to grow (3-4 feet apart).
* Protection from Wind: Artichokes can be susceptible to wind damage, so choose a sheltered location if possible.
Planting Your Artichokes
Now for the fun part 鈥?getting those artichokes in the ground!
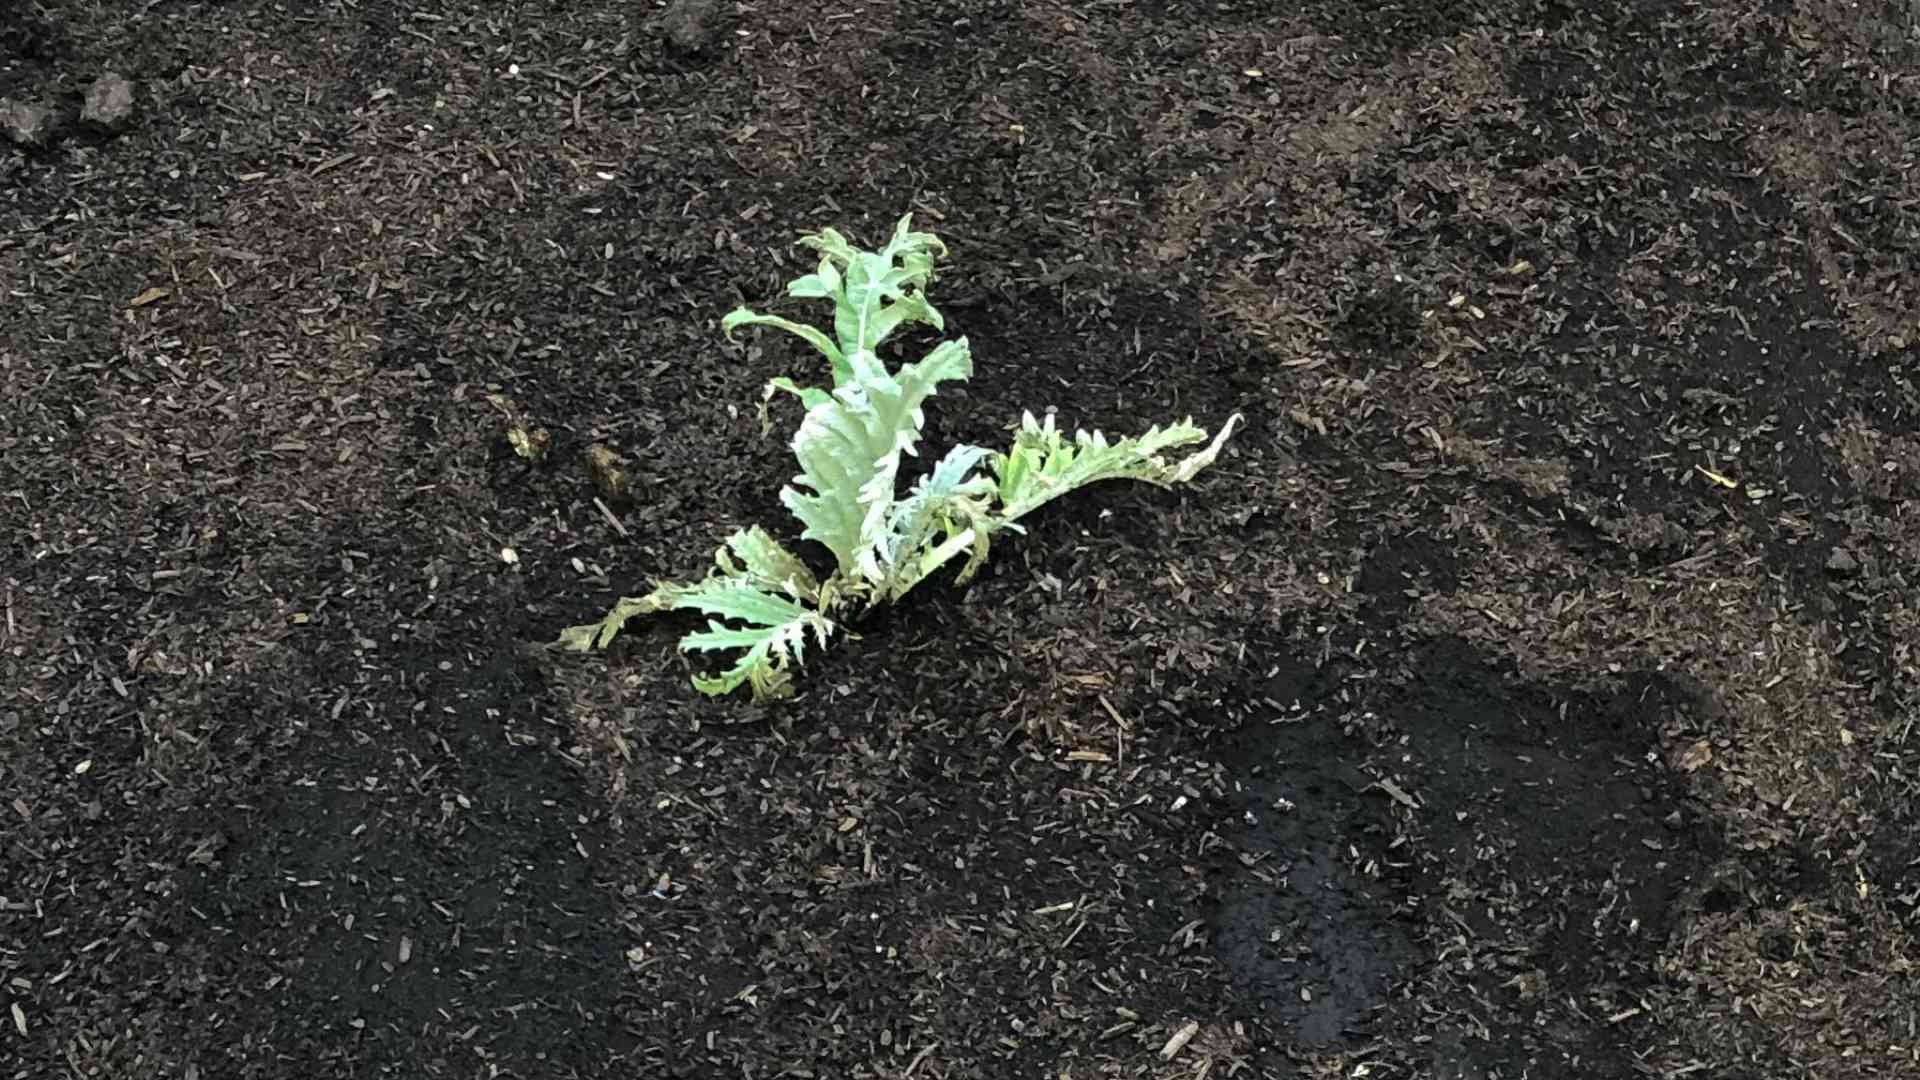
1. Prepare the Soil: Dig a hole that’s twice as wide and as deep as the root ball of your artichoke start. Mix in plenty of compost and aged manure to enrich the soil.
2. Planting the Start: Gently remove the artichoke start from its container and loosen the roots slightly. Place the start in the hole, making sure the top of the root ball is level with the surrounding soil.
3. Backfill the Hole: Fill the hole with soil, gently firming it around the plant.
4. Water Thoroughly: Water the newly planted artichoke deeply to help settle the soil and encourage root growth.
5. Mulch: Apply a layer of mulch around the base of the plant to help retain moisture and suppress weeds.
Caring for Your Artichokes
Once your artichokes are planted, it’s time to give them the TLC they need to thrive.
* Watering: Artichokes need consistent moisture, especially during dry periods. Water deeply whenever the top inch of soil feels dry to the touch. Avoid overwatering, as this can lead to root rot.
* Fertilizing: Artichokes are heavy feeders, so fertilize them regularly with a balanced fertilizer. Follow the instructions on the fertilizer package. I like to use a slow-release fertilizer in the spring and then supplement with liquid fertilizer throughout the growing season.
* Weeding: Keep the area around your artichokes free of weeds, as they can compete for nutrients and water.
* Pest Control: Keep an eye out for pests like aphids, snails, and slugs. Handpick them off the plants or use organic pest control methods.
* Pruning: After harvesting the main artichoke bud, cut back the stem to encourage side shoots to develop. In the fall, after the plant has finished producing, cut it back to the ground. In colder climates, you’ll need to protect the crown of the plant with a thick layer of mulch to prevent it from freezing.
Overwintering Artichokes (For Colder Climates)
If you live in a colder climate (zones 6 and below), you’ll need to take extra steps to protect your artichokes over the winter. Artichokes are perennials in warmer climates, but they can be damaged by freezing temperatures.
1. Cut Back the Plant: In the fall, after the plant has finished producing, cut it back to the ground.
2. Apply a Thick Layer of Mulch: Cover the crown of the plant with a thick layer of mulch (straw, leaves, or wood chips) to insulate it from the cold.
3. Consider a Protective Cover: For extra protection, you can cover the plant with a burlap sack or a cold frame.
4. Remove Protection in Spring: In the spring, after the last frost, remove the mulch and protective cover to allow the plant to start growing again.
Harvesting Your Artichokes
The moment we’ve all been waiting for 鈥?harvesting those delicious artichokes!
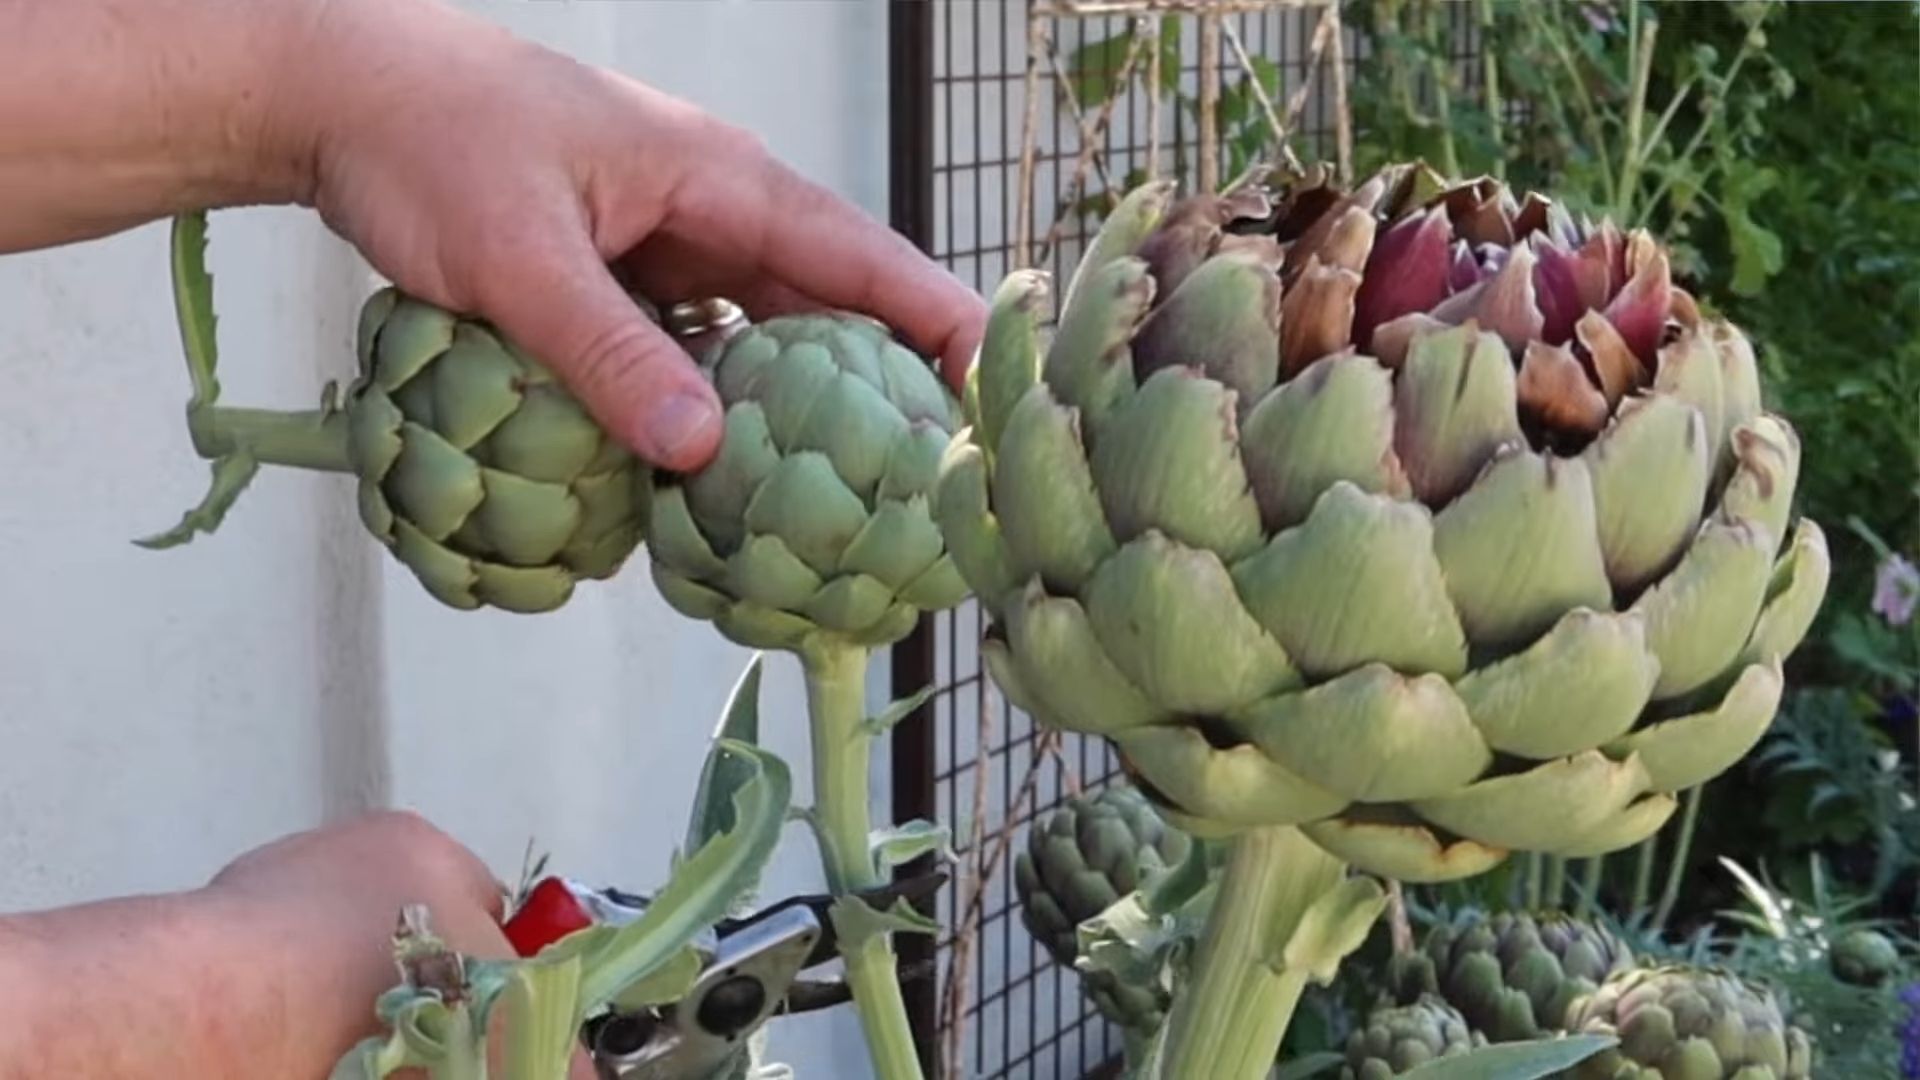
1. Timing is Key: Artichokes are ready to harvest when the buds are still tight and firm, but the bracts (the outer leaves) have started to open slightly.
2. Use Pruning Shears or a Knife: Cut the artichoke stem about 2-3 inches below the base of the bud.
3. Harvest the Main Bud First: The main bud will be the largest and most mature.
4. Harvest Side Shoots: After harvesting the main bud, the plant will produce smaller side shoots. These can also be harvested when they are ready.
5. Enjoy Your Harvest: Artichokes are best enjoyed fresh. Steam, grill, or bake them and serve with your favorite dipping sauce.
Troubleshooting Common Problems
Even with the best care, you might encounter some problems along the way. Here are a few common issues and how to deal with them:
* Aphids: These tiny pests can suck the sap from your artichoke plants. Spray them with insecticidal soap or neem oil.
* Snails and Slugs: These slimy creatures can munch on the leaves of your artichokes. Handpick them off the plants or use snail bait.
* Root Rot: This fungal disease can occur if the soil is too wet. Make sure your soil is well-draining and avoid overwatering.
* Lack of Buds: If your artichoke plant isn’t producing buds, it could be due to a lack of sunlight, nutrients, or water. Make sure your plant is getting enough of all three.
Propagating Artichokes
Want to expand your artichoke patch? You can propagate them by dividing the root clumps.
1. Dig Up the Plant: In the spring or fall, carefully dig up the entire artichoke plant.
2. Divide the Root Clump: Use a sharp knife or shovel to divide the root clump into several sections, each with its own roots and shoots.
3. Replant the Divisions: Replant the divisions in well-prepared soil, spacing them 3-4 feet apart.
4. Water Thoroughly: Water the newly planted divisions thoroughly to help them establish.
Artichoke Varieties to Consider
While ‘Green Globe’ is a classic and reliable choice, there are other artichoke varieties you might want to explore:
* ‘Violetta’: A beautiful purple artichoke with a slightly sweeter flavor.
* ‘Imperial Star’: An early-maturing variety that’s great for shorter growing seasons.
* ‘Big Heart’: A large, meaty artichoke with a mild flavor.
* ‘Romanesco’: An Italian heirloom variety with a unique, nutty flavor.
Artichoke Recipes to Try
Now that you’ve harvested your own artichokes, it’s time to get cooking! Here are a few of my favorite artichoke recipes:
* Steamed Artichokes with Garlic Aioli: A classic and simple way to enjoy artichokes.
* Grilled Artichokes with Lemon Butter: Grilling adds a smoky flavor that’s irresistible.
* Artichoke and Spinach Dip: A crowd-pleasing appetizer that’s perfect for parties.
* Artich
Conclusion
So, there you have it! Growing artichokes at home, while it might seem daunting at first, is a remarkably rewarding experience. Forget the expensive, often bruised artichokes at the grocery store. Imagine stepping into your own backyard and harvesting plump, vibrant globes bursting with fresh, earthy flavor. This DIY approach not only saves you money but also gives you complete control over the growing process, ensuring your artichokes are free from unwanted chemicals and pesticides.
But why is this DIY trick a must-try? Beyond the cost savings and organic benefits, growing your own artichokes connects you to the natural world in a tangible way. You’ll witness the entire life cycle of this fascinating plant, from the initial sprout to the magnificent, thistle-like flower. It’s a project that offers both beauty and deliciousness.
And the possibilities don’t stop there! Consider these variations to personalize your artichoke growing journey:
* Container Gardening: If you’re short on space, don’t despair! Artichokes thrive in large containers, making them perfect for patios and balconies. Just be sure to choose a pot that’s at least 24 inches in diameter and provides excellent drainage.
* Variety Selection: Experiment with different artichoke varieties to discover your favorite flavor profile. ‘Green Globe’ is a classic choice, but ‘Violetta’ offers a beautiful purple hue and a slightly sweeter taste. ‘Imperial Star’ is known for its early maturity, ideal for shorter growing seasons.
* Companion Planting: Enhance your artichoke patch by incorporating companion plants. Chamomile, marigolds, and yarrow attract beneficial insects and deter pests, creating a healthier and more productive growing environment.
* Extending the Season: In colder climates, protect your artichoke plants during the winter months by mulching heavily around the base and covering them with burlap or frost blankets. This will help them survive the winter and produce an earlier crop the following spring.
Growing artichokes at home is more than just a gardening project; it’s an investment in fresh, healthy food and a connection to the natural world. It’s a chance to learn, experiment, and enjoy the fruits (or rather, the buds!) of your labor.
We wholeheartedly encourage you to give this DIY trick a try. Don’t be intimidated by the perceived difficulty. With a little planning, patience, and the right information, you’ll be enjoying homegrown artichokes in no time.
And most importantly, we want to hear about your experience! Share your successes, your challenges, and your tips in the comments below. Let’s build a community of artichoke enthusiasts and learn from each other. What variety did you choose? What challenges did you face? What delicious recipes did you create with your homegrown artichokes? Your insights will help other aspiring gardeners embark on their own artichoke-growing adventures. So, get your hands dirty, embrace the process, and prepare to be amazed by the bounty of your own backyard. Happy growing!
Frequently Asked Questions (FAQ)
Q: What is the best time of year to plant artichokes?
A: The ideal time to plant artichokes depends on your climate. In warmer regions with mild winters (zones 7-10), you can plant artichokes in the fall for a spring harvest. In colder climates (zones 6 and below), it’s best to start artichokes indoors in late winter or early spring and transplant them outdoors after the last frost. Starting them indoors gives them a head start and allows them to establish a strong root system before facing the challenges of outdoor conditions.
Q: How much sunlight do artichokes need?
A: Artichokes are sun-loving plants and require at least 6-8 hours of direct sunlight per day to thrive. Choose a planting location that receives ample sunlight throughout the day. If you’re growing artichokes in containers, make sure to place them in a sunny spot on your patio or balcony. Insufficient sunlight can lead to weak growth and reduced bud production.
Q: What type of soil is best for growing artichokes?
A: Artichokes prefer well-drained, fertile soil that is rich in organic matter. The ideal soil pH is between 6.0 and 7.0. Before planting, amend your soil with compost, aged manure, or other organic materials to improve drainage and fertility. If your soil is heavy clay, consider adding sand or perlite to improve drainage. Good drainage is crucial to prevent root rot, which can be a common problem for artichokes.
Q: How often should I water my artichoke plants?
A: Artichokes need consistent moisture, especially during the growing season. Water deeply and regularly, ensuring that the soil remains consistently moist but not waterlogged. Avoid overhead watering, as this can increase the risk of fungal diseases. A good rule of thumb is to water when the top inch of soil feels dry to the touch. During hot, dry weather, you may need to water more frequently.
Q: How do I fertilize my artichoke plants?
A: Artichokes are heavy feeders and benefit from regular fertilization. Apply a balanced fertilizer (e.g., 10-10-10) every 4-6 weeks during the growing season. You can also side-dress your plants with compost or aged manure. Avoid over-fertilizing, as this can lead to excessive foliage growth at the expense of bud production.
Q: How do I harvest artichokes?
A: Artichokes are ready to harvest when the buds are plump and firm, and the outer bracts (leaves) are just beginning to open. Use a sharp knife to cut the stem about 2-3 inches below the base of the bud. Harvest the main bud first, followed by the smaller side buds. Regular harvesting encourages continued bud production.
Q: What are some common pests and diseases that affect artichokes?
A: Artichokes can be susceptible to several pests and diseases, including aphids, snails, slugs, artichoke plume moth, and powdery mildew. Regularly inspect your plants for signs of infestation or disease. Control aphids with insecticidal soap or neem oil. Use snail and slug bait to protect your plants from these pests. Prevent powdery mildew by ensuring good air circulation and avoiding overhead watering. If necessary, treat with a fungicide.
Q: Can I grow artichokes in containers?
A: Yes, artichokes can be successfully grown in containers, making them a great option for gardeners with limited space. Choose a large container that is at least 24 inches in diameter and provides excellent drainage. Use a high-quality potting mix and fertilize regularly. Container-grown artichokes may require more frequent watering than those grown in the ground.
Q: How do I overwinter artichoke plants in cold climates?
A: In cold climates, artichokes need protection from freezing temperatures. After the first frost, cut back the foliage to about 6 inches above the ground. Mulch heavily around the base of the plant with straw, leaves, or other organic materials. You can also cover the plants with burlap or frost blankets. In extremely cold climates, you may need to dig up the plants and store them in a cool, dark place until spring.
Q: Are artichokes perennial or annual plants?
A: Artichokes are technically perennial plants, meaning they can live for more than two years. However, in colder climates, they are often grown as annuals because they may not survive the winter. With proper care and protection, you can overwinter artichoke plants and enjoy them for several years.
Q: How do I prepare artichokes for cooking?
A: To prepare artichokes for cooking, start by rinsing them thoroughly under cold water. Snap off the tough outer leaves until you reach the pale green inner leaves. Cut off the top inch of the artichoke and trim the stem. Use kitchen shears to snip off the thorny tips of the remaining leaves. Rub the cut surfaces with lemon juice to prevent discoloration. You can then steam, boil, grill, or bake the artichokes.
Leave a Comment