

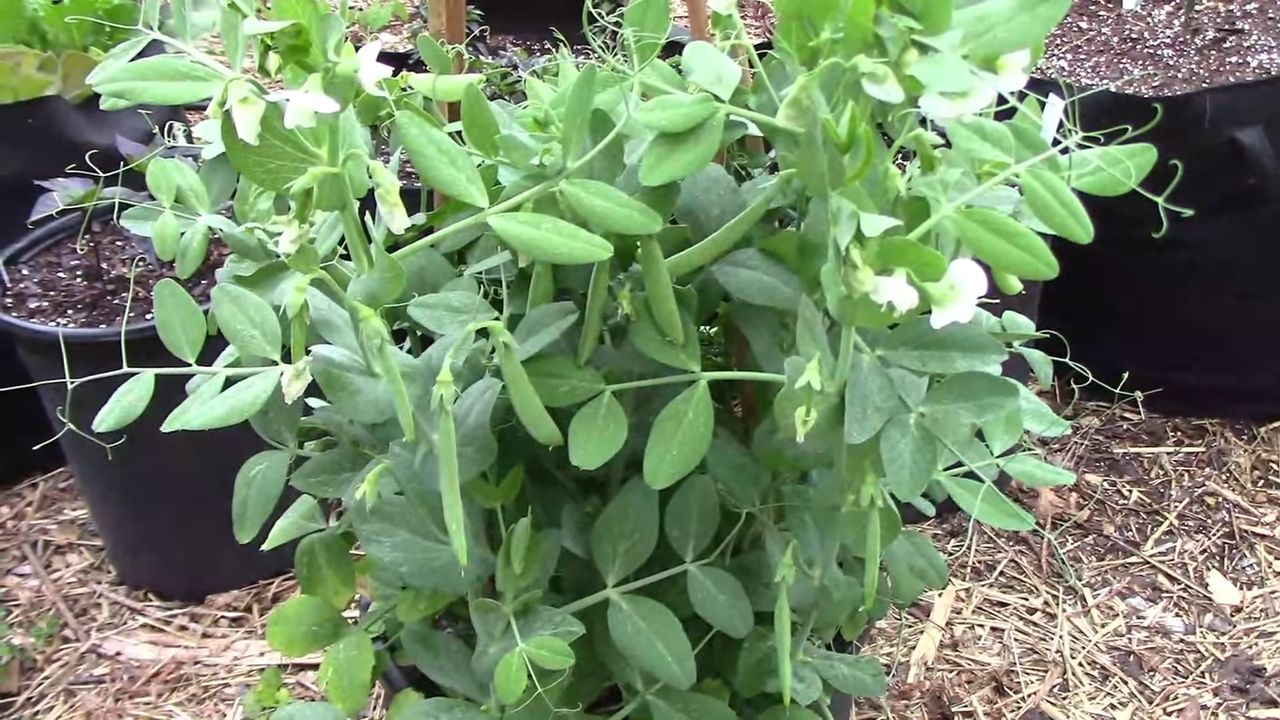
Growing peas indoors might sound like a whimsical dream, reserved for seasoned gardeners with sprawling greenhouses. But guess what? I’m here to tell you that fresh, sweet peas are totally achievable, even if your “garden” is currently limited to a sunny windowsill! Forget those sad, flavorless peas from the grocery store – imagine plucking plump, juicy pods right from your own indoor vine.
The history of pea cultivation stretches back millennia, with evidence suggesting they were enjoyed as early as the Neolithic period. From ancient civilizations to medieval gardens, peas have always held a special place in our diets. While traditionally grown outdoors, the desire for fresh produce year-round has sparked a surge in innovative indoor gardening techniques.
Why should you try this DIY trick? Well, for starters, growing peas indoors allows you to bypass unpredictable weather and pesky garden pests. Plus, it’s incredibly rewarding to nurture a plant from seed to harvest, especially when that harvest is a delicious and nutritious treat. Whether you’re a beginner gardener or a seasoned pro looking for a fun new project, this guide will equip you with everything you need to successfully grow peas indoors and enjoy a taste of spring, no matter the season. Let’s get started!
Growing Peas Indoors: Your Comprehensive DIY Guide
Hello, dear garden friends! Are you tired of the dreary winter and longing for some fresh greens? Then I have just the thing for you: growing peas indoors! Yes, it’s really possible and easier than you think. I’ll show you how you can supply yourself with crisp pea shoots or even whole pea plants, even in the cold months. Let’s get started!
What you need: The Ingredients for Your Indoor Pea Garden
Before we get started, we’ll obviously need the right materials. Here is a list so you have everything ready:
- Pea seeds: It’s best to choose varieties that are well-suited for growing in pots. Dwarf or bush peas are ideal as they don’t grow as tall. Make sure the seeds are untreated.
- Pots or containers: Depending on how many peas you want to grow, you’ll need appropriately sized pots. They should be at least 15 cm (6 inches) deep and have drainage holes.
- Seed starting mix or potting soil: Good soil is the be-all and end-all for healthy plants. Seed starting mix is particularly low in nutrients and is well-suited for germination. Potting soil is a bit richer and can be used later.
- Water: Clear water for watering, preferably stale tap water or rainwater.
- Spray bottle: For moistening the seeds and young plants.
- Stakes or trellis: If you are growing pea varieties that grow a bit taller, they will need a trellis.
- A bright windowsill or grow light: Peas need a lot of light to grow well.
The Preparation: How to Create the Perfect Foundation
Before we start planting, we need to make a few preparations. This is important so the peas feel comfortable and germinate well.
- Prepare the seeds: To speed up germination, you can soak the pea seeds in lukewarm water for 12-24 hours. This softens the seed coat and makes germination easier.
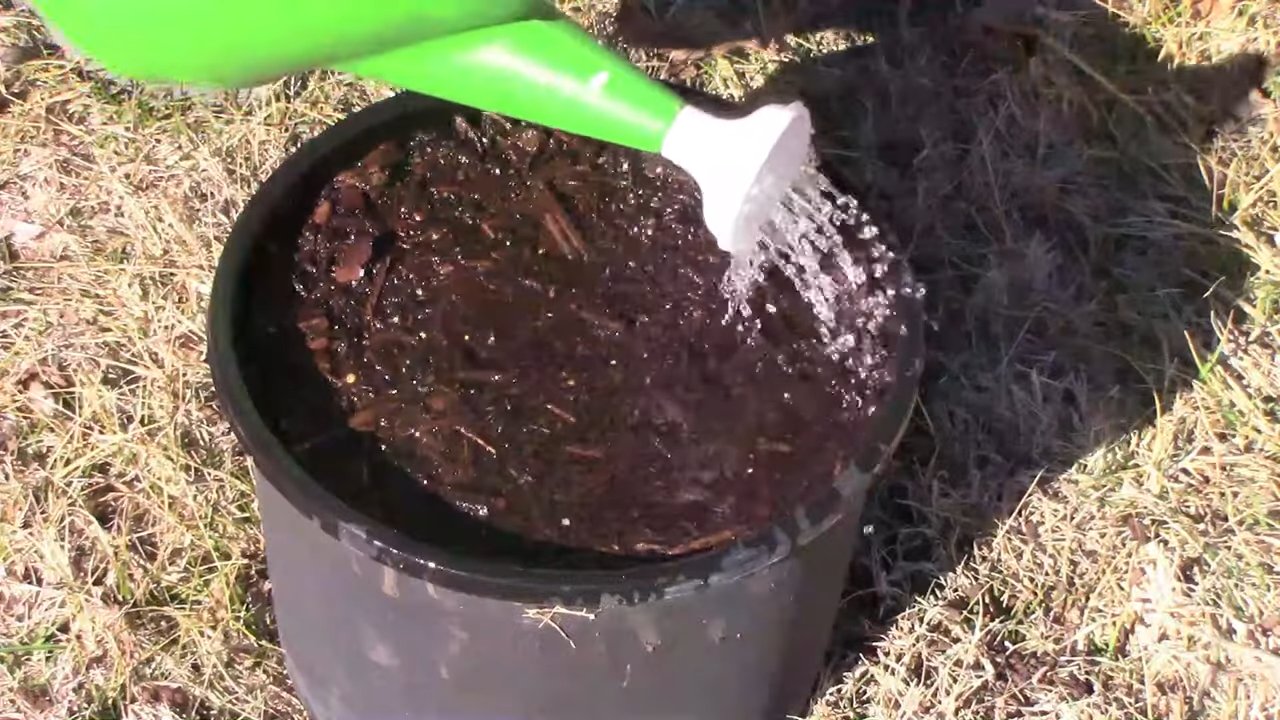
- Prepare the pots: Fill the pots with soil, but leave about 2-3 cm (about 1 inch) of space to the rim. Press the soil down lightly.
- Moisten the soil: Gently water the soil so that it is well-moistened but not sitting in water.
The Sowing: Now the Peas Go into the Soil
Now for the exciting part: we’re sowing the peas!
- Distribute the seeds: Distribute the soaked pea seeds evenly on the soil. Make sure they are not too close to each other, so the plants have enough space later on.
- Cover with soil: Cover the seeds with a thin layer of soil (approx. 1-2 cm).
- Moisten again: Gently moisten the soil with the spray bottle.
- The location: Place the pots in a bright and warm place. A windowsill with plenty of sunlight is ideal. If you don’t have a bright windowsill, you can also use a grow light.
The Care: Keeping Your Peas Happy and Healthy
After sowing, it’s important to take good care of the peas so they grow and thrive well.
- Watering: Keep the soil always moist, but not wet. Water regularly, but avoid waterlogging. It’s best to test with your finger if the soil is dry before you water.
- Light: Peas need a lot of light. If they don’t get enough light, they will become long and thin. Rotate the pots regularly so that all sides of the plants get even light.
- Fertilizing: After about 2-3 weeks, you can start fertilizing. Use an organic liquid fertilizer and follow the dosage instructions.
- Trellis: If your pea variety grows taller, it will need a trellis. You can use bamboo stakes, small grids, or strings.
- Pests: Watch out for pests like aphids or spider mites. If infested, you can treat the plants with a mild insecticide or a soap solution.
Harvest Time: Enjoying the Fruits of Your Labor
Depending on the variety and growing conditions, you can harvest the first peas after about 60-70 days.
- Harvesting pea shoots: If you only want to grow pea shoots, you can harvest them after just a few days, as soon as they reach a height of about 5-10 cm (2-4 inches). Simply cut them with scissors.
- Harvesting peas: If you want to harvest whole peas, wait until the pods are plump and open easily. Pick the pods carefully without damaging the plants.
Extra Tips for Successful Indoor Pea Growing
Here are a few additional tips that will help you successfully grow your peas indoors:
- Choose the right variety: Make sure to choose pea varieties that are well-suited for growing in pots. Dwarf or bush peas are ideal as they don’t grow as tall.
- Ventilate regularly: Ensure good ventilation to prevent mold growth.
- Don’t overwater: Waterlogging can lead to root rot.
- Observe the plants: Watch for signs of pests or diseases and act early.
- Be patient: It can take some time for the peas to germinate and grow. Don’t give up if it doesn’t work right away!
Common Problems and Solutions
Problems can also occur when growing peas indoors. Here are some common problems and how you can solve them:
- The seeds don’t germinate: The seeds may have been too old or the soil too dry. Try again with fresh seeds and make sure to keep the soil moist.
- The plants turn yellow: This can be due to a nutrient deficiency. Fertilize the plants with an organic liquid fertilizer.
- The plants become long and thin: This is usually due to a lack of light. Move the plants to a brighter location or use a grow light.
- Pests: If infested with aphids or spider mites, you can treat the plants with a mild insecticide or a soap solution.
Growing Peas as Sprouts: A Quick Alternative
If you’re in a hurry and want to enjoy fresh greens quickly, you can also grow peas as sprouts. It’s very simple and only takes a few days.
- Prepare the seeds: Soak the pea seeds in lukewarm water for 12-24 hours.
- Prepare a sprouting jar or tray: Place the soaked seeds in a sprouting jar or tray.
- Rinse regularly: Rinse the seeds 2-3 times a day with fresh water.
- The location: Place the sprouting jar or tray in a bright place, but not in direct sunlight.
- Harvest: After about 3-5 days, you can harvest the pea sprouts.
Uses for Your Indoor Peas
The homegrown peas are versatile. Here are a few ideas:
Peas: You can snack on the fresh peas raw, cook them, steam them, or use them in soups and stews.
Pea sprouts: They taste delicious in salads, soups, or as a topping for sandwiches.
Conclusion
So, there you have it! Growing peas indoors is not only achievable, but it’s also a remarkably rewarding experience. Forget relying solely on the fleeting outdoor growing season. With this simple DIY trick, you can enjoy the sweet, tender taste of homegrown peas year-round, right from the comfort of your own home.
Why is this a must-try? Because it puts you in control. You dictate the environment, ensuring optimal growing conditions free from unpredictable weather, pests, and other outdoor challenges. Imagine the satisfaction of snipping fresh pea shoots for your salad in the dead of winter, or adding plump, juicy peas to your spring stir-fry, all cultivated by your own hand. It’s a connection to nature, a sustainable practice, and a delicious way to enhance your meals.
But the benefits extend beyond just fresh produce. Growing peas indoors is a fantastic way to brighten up your living space. The vibrant green vines climbing up your trellis or container add a touch of natural beauty, creating a calming and inviting atmosphere. It’s also a great project for families, teaching children about the wonders of plant life and the importance of healthy eating.
Looking for variations? Consider experimenting with different pea varieties. Snow peas, snap peas, and shelling peas all thrive indoors, each offering a unique flavor and texture. You can also adjust your growing setup to suit your space. A sunny windowsill works well for smaller containers, while a grow light can provide the necessary illumination for larger setups or darker areas. Try using different types of trellises or supports to create visually appealing displays. Vertical gardening is your friend!
Don’t be afraid to get creative with your soil mix. While a standard potting mix works well, you can enhance drainage and nutrient content by adding perlite, vermiculite, or compost. Remember to monitor the moisture levels and adjust your watering schedule accordingly. Overwatering can lead to root rot, while underwatering can stunt growth.
The key to successful indoor pea growing is observation and adaptation. Pay attention to your plants’ needs and make adjustments as necessary. With a little patience and care, you’ll be rewarded with a bountiful harvest of delicious, homegrown peas.
We wholeheartedly encourage you to give this DIY trick a try. It’s easier than you might think, and the rewards are well worth the effort. Once you’ve experienced the joy of growing your own peas indoors, you’ll never look at store-bought peas the same way again.
And most importantly, we want to hear about your experience! Share your photos, tips, and challenges in the comments below. Let’s create a community of indoor pea growers and learn from each other. What varieties did you try? What growing methods worked best for you? What challenges did you encounter, and how did you overcome them? Your insights can help others succeed and inspire even more people to embrace the joys of indoor gardening. Let’s cultivate a greener, healthier, and more delicious world, one pea at a time! Embrace the power of growing peas indoors and transform your home into a thriving edible garden.
Frequently Asked Questions (FAQ)
What kind of peas grow best indoors?
While most pea varieties can be grown indoors, some tend to be more successful than others. Bush varieties, also known as dwarf peas, are generally preferred because they require less vertical space and are easier to manage in containers. Popular choices include ‘Little Marvel,’ ‘Tom Thumb,’ and ‘Sugar Ann’ snap peas. These varieties are compact and produce a good yield in a relatively small space. However, vining varieties like ‘Sugar Snap’ or ‘Oregon Sugar Pod’ can also be grown indoors, but they will require a taller trellis or support system. Consider the available space and your personal preferences when selecting a pea variety for indoor growing. Experimenting with different varieties is a great way to discover which ones thrive best in your specific indoor environment.
How much light do indoor peas need?
Peas require a significant amount of light to thrive and produce a good harvest. Ideally, they need at least 6-8 hours of direct sunlight per day. If you don’t have a south-facing window that provides sufficient sunlight, you’ll need to supplement with artificial lighting. Grow lights are an excellent option for indoor pea growing. Fluorescent grow lights or LED grow lights are both effective choices. Position the grow lights about 6-12 inches above the plants and keep them on for 12-16 hours per day. Monitor the plants closely and adjust the lighting as needed. If the leaves start to turn yellow or pale, it could be a sign that they’re not getting enough light. Remember, adequate light is crucial for photosynthesis, which is the process by which plants convert light energy into food.
What kind of soil is best for growing peas indoors?
Peas prefer well-draining soil that is rich in organic matter. A good quality potting mix is a suitable option for growing peas indoors. You can also amend the potting mix with compost, perlite, or vermiculite to improve drainage and aeration. Avoid using garden soil, as it can be too heavy and compact for container gardening. The ideal soil pH for peas is between 6.0 and 7.0. You can test the soil pH using a soil testing kit and adjust it as needed. Ensure that the containers you use have drainage holes to prevent waterlogging, which can lead to root rot. A well-draining soil mix is essential for healthy root development and optimal plant growth.
How often should I water my indoor pea plants?
Watering frequency depends on several factors, including the size of the container, the type of soil, and the ambient temperature. Generally, you should water your indoor pea plants when the top inch of soil feels dry to the touch. Avoid overwatering, as this can lead to root rot. Water deeply, ensuring that the water drains out of the drainage holes. During warmer months or in drier environments, you may need to water more frequently. Check the soil moisture regularly and adjust your watering schedule accordingly. A good rule of thumb is to water thoroughly but infrequently, allowing the soil to dry out slightly between waterings.
Do I need to fertilize my indoor pea plants?
Peas are relatively light feeders, but they still benefit from regular fertilization. Start by incorporating compost or other organic matter into the soil before planting. During the growing season, you can fertilize your pea plants every 2-3 weeks with a balanced liquid fertilizer. Look for a fertilizer that is specifically formulated for vegetables or flowering plants. Follow the instructions on the fertilizer label carefully and avoid over-fertilizing, as this can damage the plants. Alternatively, you can use a slow-release fertilizer at the time of planting. This will provide a steady supply of nutrients throughout the growing season.
How do I support my indoor pea plants?
Vining pea varieties require a trellis or other support system to climb on. You can use a variety of materials for support, including bamboo stakes, netting, or a wire trellis. Install the support system at the time of planting to avoid disturbing the roots later on. As the pea plants grow, gently guide the vines onto the support system. You can also use plant ties to secure the vines to the trellis. Bush varieties may not require as much support, but they can still benefit from a small stake or cage to prevent them from falling over.
When can I harvest my indoor peas?
The harvest time depends on the pea variety and the growing conditions. Generally, snap peas are ready to harvest when the pods are plump and the peas inside are still small and tender. Shelling peas are ready to harvest when the pods are full and the peas inside are large and well-developed. Snow peas are harvested when the pods are flat and the peas inside are barely visible. Harvest the peas regularly to encourage continued production. Use scissors or pruning shears to cut the pods from the vine.
What are some common problems with growing peas indoors?
Some common problems with growing peas indoors include aphids, spider mites, and powdery mildew. Aphids and spider mites can be controlled with insecticidal soap or neem oil. Powdery mildew is a fungal disease that can be prevented by providing good air circulation and avoiding overwatering. If you notice any signs of pests or diseases, take action immediately to prevent them from spreading. Regularly inspect your plants for any signs of problems and address them promptly.
Can I grow peas indoors year-round?
Yes, with proper care and attention, you can grow peas indoors year-round. The key is to provide adequate light, water, and nutrients. You may need to adjust your growing conditions depending on the season. During the winter months, you may need to supplement with artificial lighting to ensure that the plants receive enough light. You may also need to adjust your watering schedule depending on the humidity levels in your home. With a little planning and effort, you can enjoy fresh, homegrown peas all year long.
Leave a Comment