

Dollar Tree Rack Ideas: Unleash your inner organizer and transform your home without breaking the bank! Have you ever stared at a cluttered space, dreaming of a Pinterest-worthy makeover but cringed at the potential cost? I know I have! That’s where the magic of Dollar Tree comes in. This isn’t just about cheap finds; it’s about ingenious DIY solutions that can revolutionize your storage and organization game.
For generations, resourceful individuals have found creative ways to repurpose everyday items. Think of the Depression-era ingenuity of turning flour sacks into clothing – a testament to the power of resourcefulness. Today, we’re channeling that same spirit, but with a modern twist: using Dollar Tree finds to create stylish and functional racks.
Why do you need these Dollar Tree rack ideas? Because clutter breeds stress, and a well-organized home fosters peace of mind. Whether you’re battling overflowing closets, a chaotic pantry, or a messy craft room, these DIY hacks offer simple, affordable solutions. I’m going to show you how to create everything from stylish shoe racks to space-saving spice organizers, all using budget-friendly materials from Dollar Tree. Get ready to be amazed by what you can achieve with a little creativity and a few dollars!
Transform Your Space: Amazing DIY Projects with Dollar Tree Racks!
Hey there, fellow DIY enthusiasts! I’m so excited to share some incredibly versatile and budget-friendly projects you can create using those simple wire racks from the Dollar Tree. Seriously, these racks are like the chameleons of the crafting world – they can be transformed into so many different things! Get ready to unleash your creativity and revamp your home without breaking the bank.
Project 1: DIY Floating Shelves
Who doesn’t love the look of floating shelves? They’re modern, minimalist, and perfect for displaying your favorite trinkets, plants, or books. And guess what? You can make them yourself using Dollar Tree racks!
Materials You’ll Need:
* Dollar Tree wire racks (2-4 depending on the desired length and number of shelves)
* Wood planks (cut to the desired size of your shelves – I recommend measuring your racks first!)
* Spray paint (optional, for the racks)
* Wood stain or paint (for the shelves)
* Heavy-duty construction adhesive (like Liquid Nails)
* Screws (for extra security, optional)
* Wall anchors (appropriate for your wall type)
* Level
* Drill (optional, if using screws)
* Measuring tape
* Safety glasses
Step-by-Step Instructions:
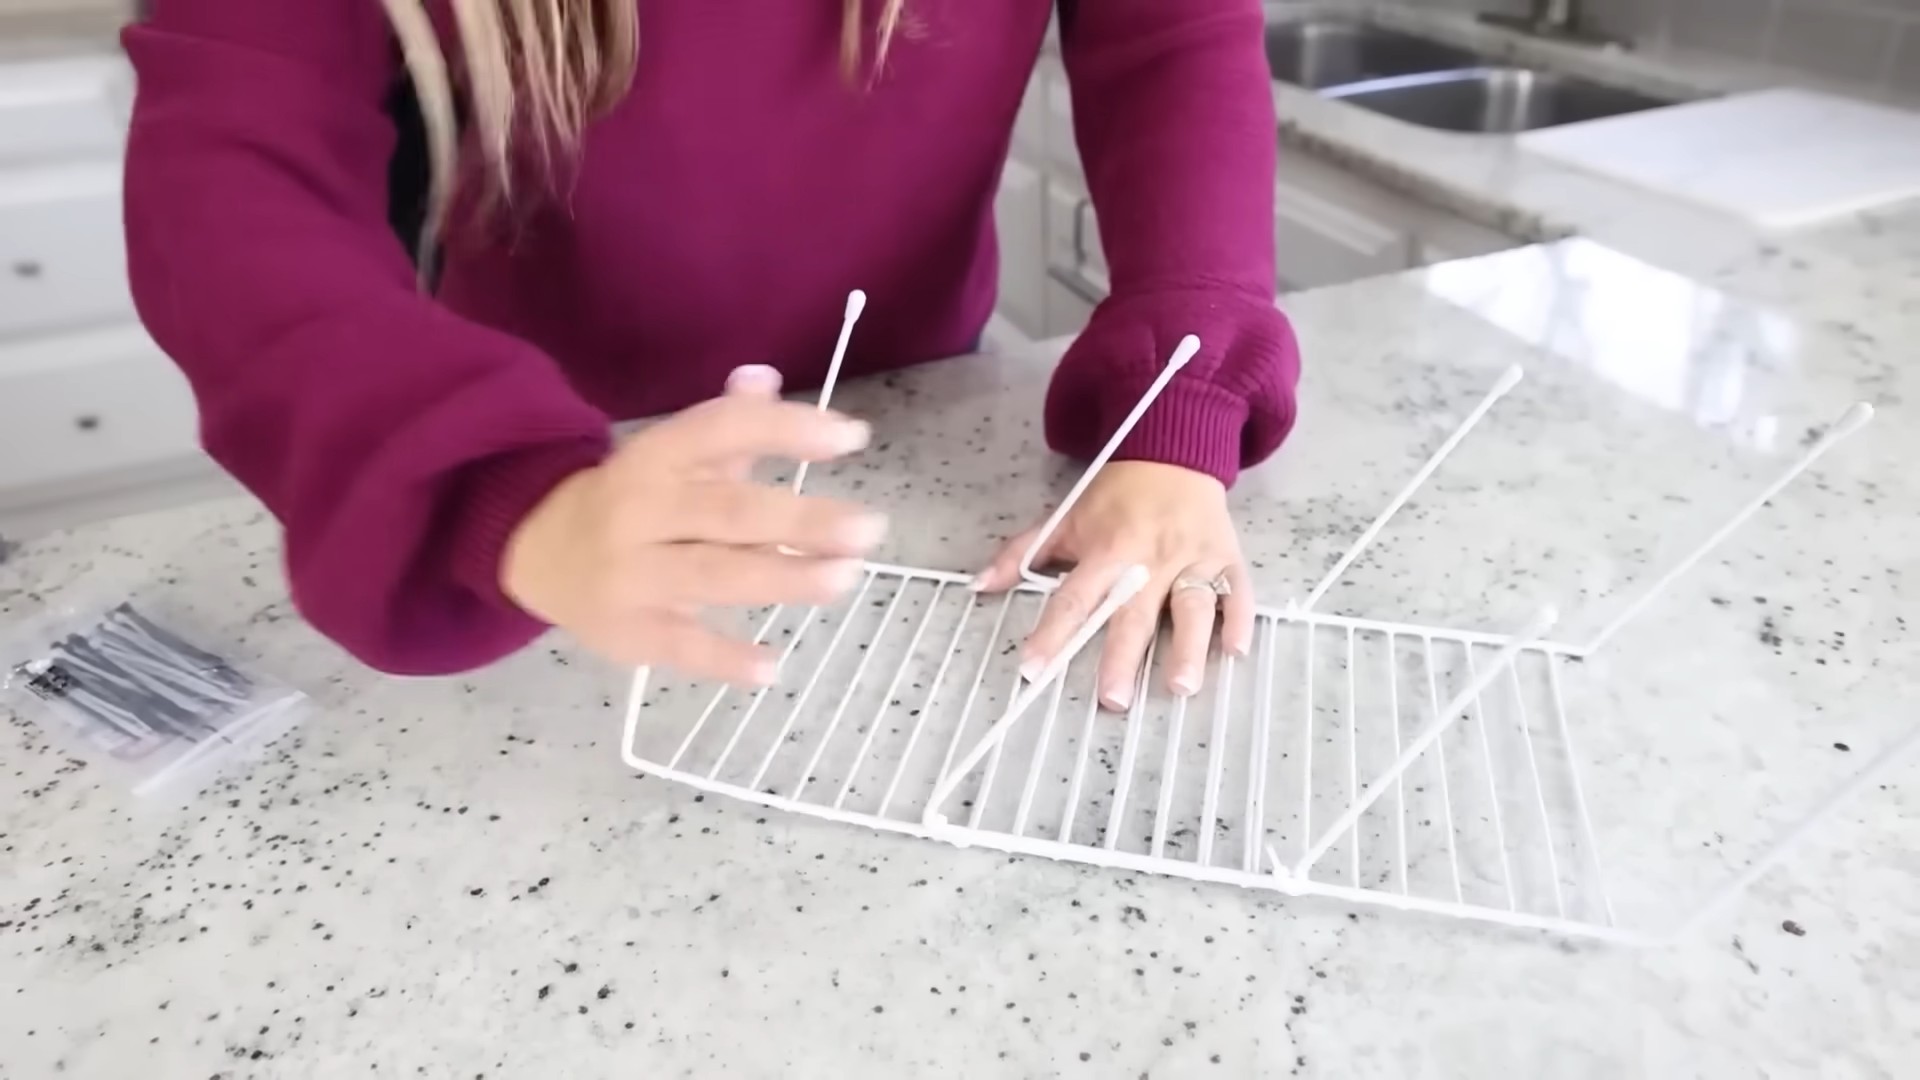
1. Prepare the Racks: If you want to change the color of your racks, now’s the time to spray paint them. I personally love a matte black or a metallic gold for a more modern look. Make sure you do this in a well-ventilated area and wear a mask! Let them dry completely before moving on.
2. Prepare the Wood Planks: Sand down your wood planks to ensure a smooth surface. Then, stain or paint them in your desired color. I love using a wood stain to bring out the natural grain of the wood, but a pop of color can also be super fun! Let them dry completely.
3. Attach the Racks to the Wood: This is where the construction adhesive comes in. Apply a generous amount of adhesive to the top of the wire rack where the wood plank will sit. Carefully position the wood plank on top of the rack, making sure it’s centered.
4. Secure the Wood (Optional): For extra security, you can use screws to attach the wood plank to the rack. Drill pilot holes first to prevent the wood from splitting. Then, drive the screws through the rack and into the wood.
5. Let it Cure: Allow the adhesive to cure completely according to the manufacturer’s instructions. This is crucial for ensuring a strong and stable shelf. I usually wait at least 24 hours.
6. Mount the Shelves: Now for the fun part – mounting your shelves! Use a level to mark the desired location on your wall. Install wall anchors according to the manufacturer’s instructions.
7. Attach the Shelves to the Wall: Carefully position the shelf against the wall, aligning it with the wall anchors. Use screws to attach the shelf to the wall through the rack. Make sure the screws are long enough to go through the rack and into the wall anchors.
8. Admire Your Work! Step back and admire your beautiful new floating shelves! Decorate them with your favorite items and enjoy the extra storage space.
Project 2: DIY Hanging Basket Organizer
This project is perfect for organizing your kitchen, bathroom, or even your craft room. It’s a simple and stylish way to keep things off the counter and within easy reach.
Materials You’ll Need:
* Dollar Tree wire racks (3-4 depending on the desired number of baskets)
* Zip ties
* S-hooks (optional, for hanging items from the bottom rack)
* Spray paint (optional, for the racks)
* Measuring tape
* Scissors
* Wall mounting hardware (hooks or screws and anchors)
Step-by-Step Instructions:
1. Prepare the Racks: Again, if you want to change the color of your racks, spray paint them now. Let them dry completely.
2. Connect the Racks: This is where the zip ties come in handy. Position the racks vertically, one on top of the other, to create a tower. Use zip ties to securely connect the racks together at each corner. Make sure the zip ties are tight and the racks are stable.
3. Trim the Zip Ties: Use scissors to trim the excess zip tie ends. This will give your organizer a cleaner look.
4. Add S-Hooks (Optional): If you want to hang items from the bottom rack, attach S-hooks to the wires. This is great for hanging utensils, towels, or small tools.
5. Mount the Organizer: Decide where you want to hang your organizer. Use wall mounting hardware to securely attach it to the wall. Make sure the hardware is appropriate for the weight of the organizer and the items you’ll be storing in it.
6. Organize Your Items: Now for the fun part – filling your organizer with your favorite items! Use baskets or containers to keep things tidy and organized.
Project 3: DIY Desk Organizer
Keep your desk clutter-free with this simple and effective desk organizer made from Dollar Tree racks.
Materials You’ll Need:
* Dollar Tree wire racks (2)
* Zip ties
* Cardboard (for the base)
* Fabric or wrapping paper (to cover the cardboard)
* Hot glue gun and glue sticks
* Scissors
* Ruler
* Pencil
Step-by-Step Instructions:
1. Prepare the Racks: You can spray paint the racks if you desire. Let them dry.
2. Create the Base: Measure the width and depth of the two racks placed side-by-side. Cut a piece of cardboard to this size. This will be the base of your organizer.
3. Cover the Base: Cover the cardboard base with fabric or wrapping paper. Use hot glue to secure the fabric or paper to the cardboard. Make sure the edges are neatly glued down.
4. Attach the Racks to the Base: Place the two racks side-by-side on top of the covered cardboard base. Use zip ties to connect the racks together at the top and bottom.
5. Secure the Racks to the Base: Use hot glue to secure the racks to the cardboard base. Apply glue to the bottom of the racks where they meet the cardboard.
6. Organize Your Desk: Now you have a handy desk organizer! Use it to store pens, pencils, notebooks, and other desk essentials.
Project 4: DIY Jewelry Organizer
Tired of tangled necklaces and missing earrings? This jewelry organizer is a lifesaver!
Materials You’ll Need:
* Dollar Tree wire rack (1)
* Spray paint (optional)
* S-hooks or earring hooks
* Wall mounting hardware (hooks or nails)
Step-by-Step Instructions:
1. Prepare the Rack: Spray paint the rack if desired. Let it dry.
2. Attach Hooks: Attach S-hooks to the rack for hanging necklaces and bracelets. For earrings, you can use earring hooks or simply hang them directly on the wires of the rack.
3. Mount the Organizer: Use wall mounting hardware to hang the organizer on your wall.
4. Organize Your Jewelry: Hang your necklaces, bracelets, and earrings on the organizer. Say goodbye to tangled jewelry!
Project 5: DIY Kitchen Utensil Holder
Keep your kitchen utensils organized and within easy reach with this simple DIY holder.
Materials You’ll Need:
* Dollar Tree wire rack (1)
* Jars or cans (various sizes)
* Hot glue gun and glue sticks
* Spray paint (optional)
Step-by-Step Instructions:
1. Prepare the Rack and Jars: Spray paint the rack and jars if desired. Let them dry.
2. Attach Jars to Rack: Use hot glue to attach the jars to the rack. Position the jars so that they are evenly spaced and securely attached.
3. Hang or Place the Organizer: You can hang the organizer on the wall or simply place it on your countertop.
4. Organize Your Utensils: Fill the jars with your kitchen utensils.
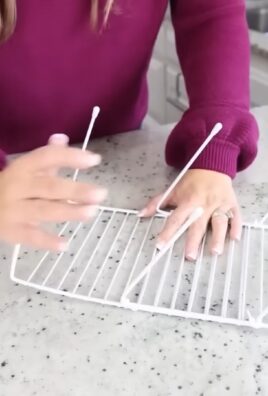
Project 6: DIY Plant Trellis
Give your climbing plants a stylish support system with this easy trellis.
Materials You’ll Need:
* Dollar Tree wire rack (1 or more, depending on the size of the trellis)
* Zip ties (if using multiple racks)
* Spray paint (optional)
Step-by-Step Instructions:
1. Prepare the Rack(s): Spray paint the rack(s) if desired. Let them dry.
2. Shape the Trellis: If
Conclusion
So, there you have it! Growing carrots at home, while it might seem daunting at first, is a surprisingly rewarding experience. From the vibrant green tops swaying in the breeze to the satisfying crunch of a freshly harvested, homegrown carrot, the entire process connects you to the earth in a way that store-bought produce simply can’t. We’ve covered everything from seed selection and soil preparation to thinning, watering, and pest control, equipping you with the knowledge you need to cultivate your own little carrot patch.
But why is this DIY trick a must-try? Beyond the undeniable freshness and superior flavor of homegrown carrots, there’s the sheer joy of nurturing something from seed to table. You control the entire process, ensuring your carrots are free from harmful pesticides and grown with love. Plus, it’s a fantastic way to get kids involved in gardening and teach them about where their food comes from.
And don’t think you’re limited to just orange carrots! Experiment with different varieties like Nantes, Chantenay, or even colorful options like purple or yellow carrots. Consider companion planting with herbs like rosemary or sage to deter pests and enhance the flavor of your carrots. You can also adjust your planting schedule to enjoy a continuous harvest throughout the growing season. Try succession planting, sowing new seeds every few weeks, to ensure a steady supply of fresh carrots.
Growing carrots at home is not just about the carrots themselves; it’s about the journey, the connection to nature, and the satisfaction of creating something delicious and healthy with your own two hands. It’s about embracing a more sustainable lifestyle and enjoying the simple pleasures of homegrown goodness.
We’ve provided you with the tools and knowledge; now it’s time to put them into practice. Don’t be afraid to get your hands dirty, experiment with different techniques, and learn from your mistakes. Every gardener, even the most experienced, started somewhere.
So, grab your seeds, prepare your soil, and embark on your own carrot-growing adventure. We’re confident that you’ll be amazed by the results. And most importantly, we want to hear about your experience! Share your tips, tricks, and triumphs in the comments below. Let us know what worked for you, what challenges you faced, and what delicious recipes you created with your homegrown carrots. Together, we can build a community of passionate gardeners and spread the joy of growing carrots at home. Happy gardening!
Frequently Asked Questions (FAQs)
What is the best time of year to plant carrot seeds?
The best time to plant carrot seeds depends on your climate. In general, carrots are a cool-season crop, meaning they thrive in temperatures between 60°F and 70°F (15°C and 21°C). For most regions, this means planting in early spring (a few weeks before the last expected frost) or late summer/early fall for a fall harvest. Check your local frost dates to determine the optimal planting time for your area. If you live in a warmer climate, you can often plant carrots throughout the winter.
What kind of soil is best for growing carrots?
Carrots need loose, well-drained soil to grow properly. Rocky or compacted soil can cause them to become stunted or misshapen. Amend your soil with plenty of compost or well-rotted manure to improve drainage and fertility. Avoid using fresh manure, as it can cause forking. A slightly acidic soil pH of 6.0 to 6.8 is ideal. If your soil is heavy clay, consider growing carrots in raised beds or containers filled with a suitable potting mix.
How deep should I plant carrot seeds?
Carrot seeds are very small and should be planted shallowly. Sow them about ¼ to ½ inch deep and gently cover them with soil. Keep the soil consistently moist until the seeds germinate, which usually takes 7-21 days depending on the temperature and moisture levels.
How often should I water my carrot plants?
Carrots need consistent moisture to develop properly. Water deeply and regularly, especially during dry periods. Aim for about 1 inch of water per week. Avoid overwatering, as this can lead to root rot. Check the soil moisture regularly and water when the top inch feels dry to the touch.
Why are my carrots forking or splitting?
Forking or splitting carrots can be caused by several factors, including rocky soil, compacted soil, inconsistent watering, or excessive nitrogen in the soil. Make sure your soil is loose and well-drained, and avoid over-fertilizing with nitrogen-rich fertilizers. Consistent watering is also crucial to prevent the roots from splitting.
How do I thin my carrot seedlings?
Thinning is essential for giving your carrots enough space to grow. Once the seedlings are a few inches tall, thin them to about 1-2 inches apart. When they are a bit larger, thin them again to 3-4 inches apart. Gently pull out the excess seedlings, being careful not to disturb the roots of the remaining plants. You can eat the thinned seedlings as microgreens!
What are some common pests and diseases that affect carrots?
Common pests that affect carrots include carrot rust flies, aphids, and nematodes. Carrot rust flies lay their eggs near the base of the plants, and the larvae tunnel into the roots, causing damage. Aphids can suck the sap from the leaves, weakening the plants. Nematodes are microscopic worms that can damage the roots. To prevent pest problems, practice crop rotation, use row covers, and encourage beneficial insects. Diseases that can affect carrots include leaf blight and root rot. Ensure good air circulation and avoid overwatering to prevent these diseases.
How do I know when my carrots are ready to harvest?
Carrots are typically ready to harvest 60-80 days after planting, depending on the variety. Check the seed packet for specific maturity dates. You can harvest carrots when they reach the desired size. Gently loosen the soil around the carrots and pull them out by the tops. If the soil is dry, water it well before harvesting to make it easier to pull the carrots.
Can I grow carrots in containers?
Yes, you can definitely grow carrots in containers! Choose a container that is at least 12 inches deep to accommodate the length of the carrot roots. Use a well-draining potting mix and follow the same planting and care instructions as you would for growing carrots in the ground. Container-grown carrots may need more frequent watering than those grown in the ground.
How do I store my harvested carrots?
To store your harvested carrots, remove the tops and gently brush off any excess soil. Store them in a cool, dark, and humid place, such as a refrigerator or root cellar. You can wrap them in a damp paper towel or store them in a plastic bag with air holes to help maintain humidity. Carrots can typically be stored for several weeks or even months under the right conditions.
Can I save carrot seeds for next year?
Saving carrot seeds is a bit more involved than saving seeds from some other vegetables. Carrots are biennials, meaning they take two years to complete their life cycle and produce seeds. You’ll need to overwinter your carrot plants and allow them to flower and produce seeds in the second year. However, it’s important to note that carrots can cross-pollinate with other carrot varieties or even wild carrots, so the seeds you save may not be true to type. If you’re serious about saving carrot seeds, it’s best to isolate your plants to prevent cross-pollination.
What are some creative ways to use homegrown carrots?
Beyond the usual salads and snacks, homegrown carrots can be used in a variety of creative ways. Roast them with herbs and spices for a delicious side dish. Add them to soups, stews, and stir-fries. Juice them for a healthy and refreshing drink. Use them to make carrot cake, muffins, or bread. You can even pickle them for a tangy and flavorful condiment. The possibilities are endless!
Leave a Comment