

Grow Malabar Spinach Home and unlock a world of fresh, vibrant greens right at your fingertips! Have you ever dreamed of stepping into your backyard and harvesting delicious, nutritious spinach for your dinner? Well, dream no more! This DIY guide is your key to transforming your garden (or even your balcony!) into a thriving Malabar spinach haven.
Malabar spinach, also known as Ceylon spinach or vine spinach, isn’t actually a true spinach, but its leafy greens offer a similar taste and texture, packed with vitamins and minerals. Originating from tropical Asia, this climbing vine has been a culinary staple for centuries, gracing dishes with its unique flavor and adding a touch of exotic flair. Imagine the satisfaction of growing something so historically significant and culturally rich!
But why should you bother with this DIY project? In today’s world, knowing where your food comes from is more important than ever. Growing your own Malabar spinach allows you to control the quality of your produce, ensuring it’s free from harmful pesticides and bursting with freshness. Plus, it’s incredibly rewarding to nurture a plant from seed to harvest. I’m excited to share these simple yet effective tricks and hacks that will empower you to grow Malabar Spinach home successfully, even if you’re a complete beginner. Get ready to roll up your sleeves and embark on this green adventure with me!
Growing Malabar Spinach at Home: A Comprehensive DIY Guide
Hey there, fellow gardening enthusiasts! I’m so excited to share my experience growing Malabar Spinach ( *Basella alba* ) at home. It’s a fantastic, heat-tolerant alternative to regular spinach, and it thrives in warm weather when other leafy greens are struggling. Plus, it’s super easy to grow, even if you’re a beginner like I once was! This guide will walk you through every step, from starting seeds to harvesting your delicious, homegrown Malabar Spinach.
Choosing Your Growing Method
Before we dive into the nitty-gritty, let’s talk about the two main ways you can grow Malabar Spinach: from seeds or from cuttings. Both are relatively straightforward, but each has its own advantages.
* **From Seeds:** This is the most common method and allows you to start from scratch. It’s also a great way to get a large number of plants. The downside is that seeds can be slow to germinate.
* **From Cuttings:** This method is faster than starting from seeds, as you’re essentially cloning an existing plant. It’s perfect if you already have access to a Malabar Spinach plant or if a friend is willing to share some cuttings.
I’ll cover both methods in detail below, so you can choose the one that best suits your needs and resources.
Growing Malabar Spinach from Seeds
This is my preferred method because I love the feeling of nurturing a plant from its very beginning. Here’s how I do it:
1. Preparing the Seeds
Malabar Spinach seeds have a tough outer coating, which can make germination slow and uneven. To speed things up, I like to scarify and soak them.
1. **Scarification:** Gently rub the seeds with sandpaper or nick them with a knife. Be careful not to damage the inner part of the seed! This helps water penetrate the seed coat more easily.
2. **Soaking:** Place the scarified seeds in a glass of warm water and let them soak for 24-48 hours. You’ll notice they start to swell up, which is a good sign!
2. Starting the Seeds Indoors (Optional but Recommended)
Starting seeds indoors gives them a head start, especially if you live in an area with a shorter growing season.
1. **Choose Your Containers:** I like to use seed starting trays or small pots (about 2-3 inches in diameter). Make sure they have drainage holes!
2. **Use a Seed Starting Mix:** This is a lightweight, sterile mix that’s specifically designed for starting seeds. Don’t use regular garden soil, as it can be too heavy and may contain pathogens.
3. **Sow the Seeds:** Fill the containers with seed starting mix, moisten it gently, and then sow the seeds about 1/2 inch deep. I usually plant 2-3 seeds per container to increase my chances of success.
4. **Provide Warmth and Light:** Malabar Spinach seeds need warmth to germinate. I place my seed starting trays on a heat mat or in a warm spot in my house. They also need plenty of light. If you don’t have a sunny window, you can use a grow light.
5. **Keep the Soil Moist:** Water the seeds regularly, but be careful not to overwater. The soil should be moist but not soggy.
6. **Wait Patiently:** Germination can take anywhere from 7-21 days, so be patient! Once the seedlings emerge, remove the weaker ones, leaving only the strongest seedling in each container.
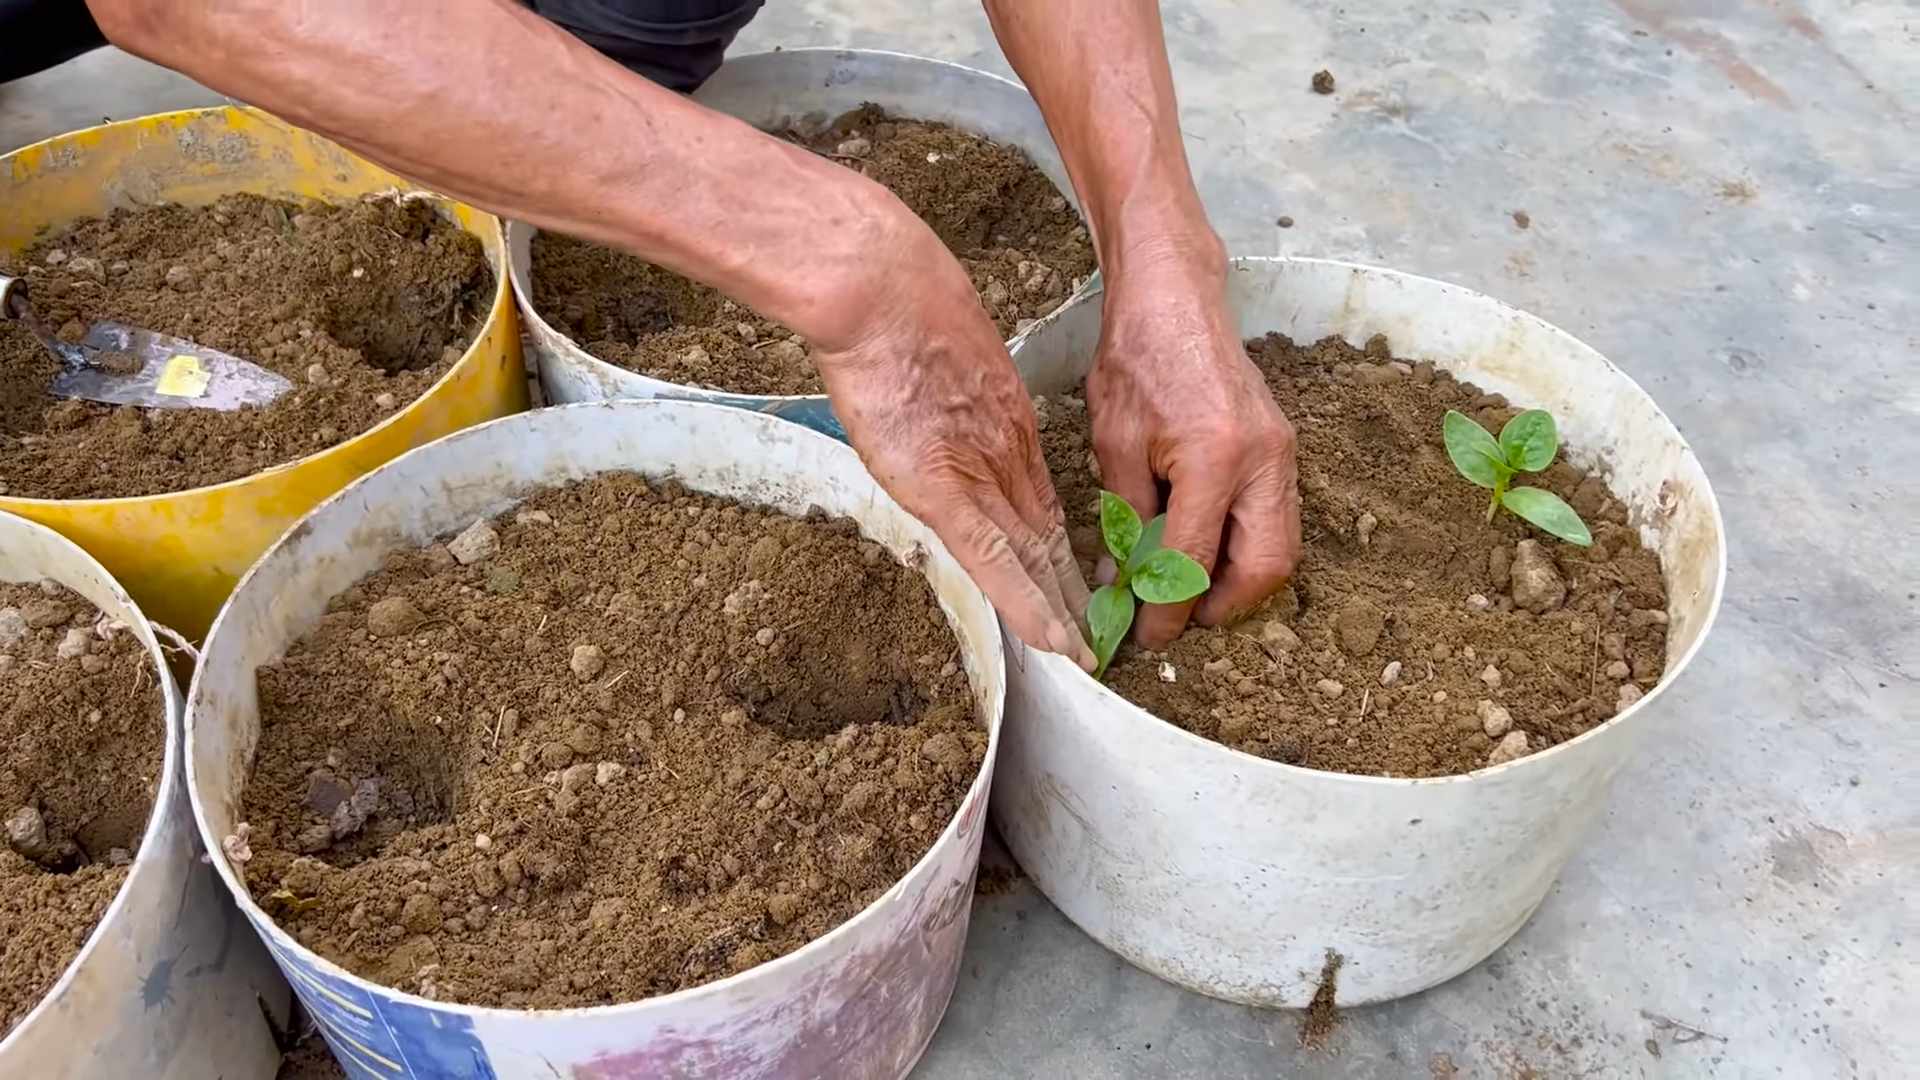
3. Transplanting Seedlings Outdoors
Once the seedlings have developed a few sets of true leaves (the leaves that look like miniature versions of the adult leaves) and the weather has warmed up, it’s time to transplant them outdoors.
1. **Harden Off the Seedlings:** This is a crucial step! Before transplanting, gradually acclimate the seedlings to outdoor conditions. Start by placing them outside for a few hours each day, increasing the amount of time each day over the course of a week. This will help them adjust to the sun, wind, and temperature changes.
2. **Choose a Sunny Location:** Malabar Spinach needs at least 6 hours of sunlight per day.
3. **Prepare the Soil:** Amend the soil with compost or other organic matter to improve drainage and fertility. Malabar Spinach prefers well-drained soil that’s rich in nutrients.
4. **Plant the Seedlings:** Dig holes that are slightly larger than the root balls of the seedlings. Gently remove the seedlings from their containers and place them in the holes. Backfill with soil and water thoroughly. Space the plants about 12-18 inches apart.
5. **Provide Support:** Malabar Spinach is a vining plant, so it needs support to climb. You can use a trellis, fence, or even a sturdy stake. I’ve found that a simple bamboo trellis works perfectly.
Growing Malabar Spinach from Cuttings
This method is super easy and a great way to propagate new plants from an existing one.
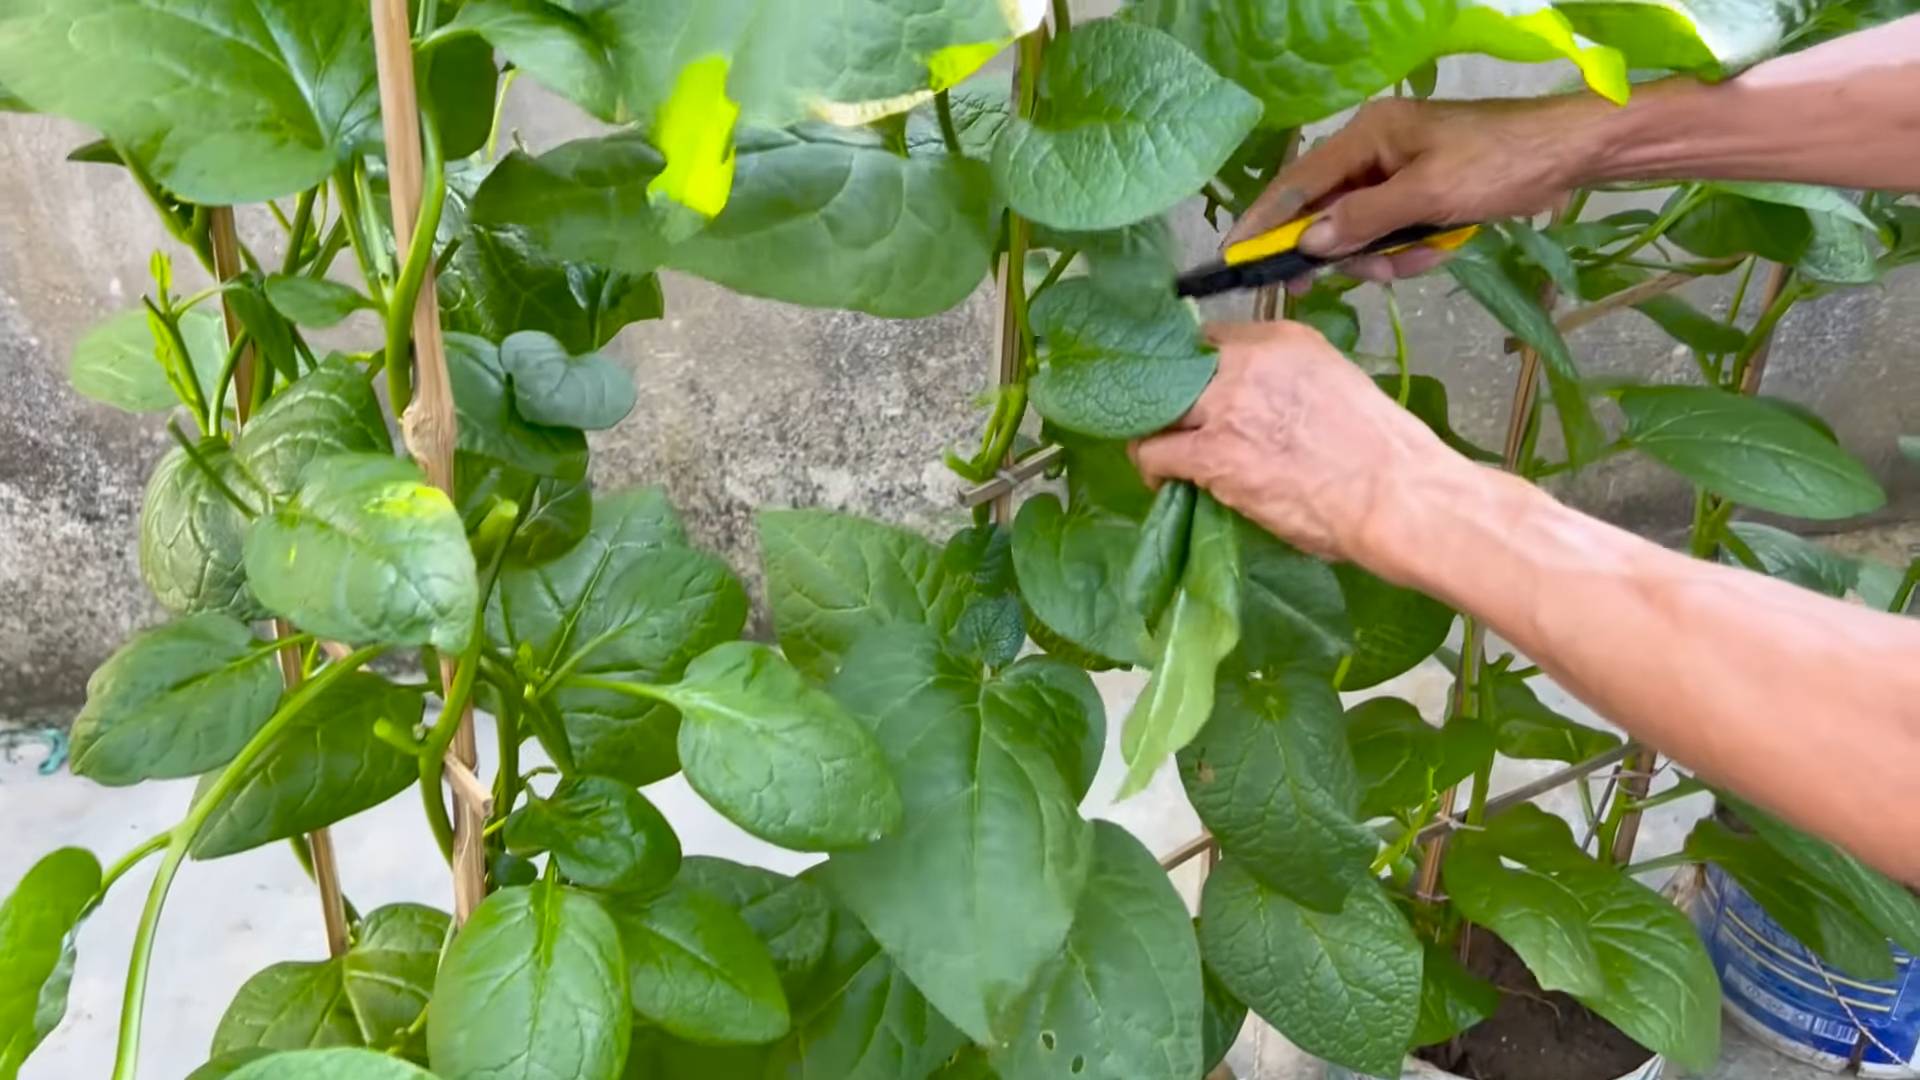
1. Taking the Cuttings
1. **Choose Healthy Stems:** Select healthy, vigorous stems that are about 4-6 inches long.
2. **Make the Cut:** Use clean, sharp scissors or pruning shears to make a clean cut just below a node (the point where a leaf or branch emerges from the stem).
3. **Remove Lower Leaves:** Remove the leaves from the bottom 2 inches of the cutting. This will prevent them from rotting when you put the cutting in water or soil.
2. Rooting the Cuttings
You can root Malabar Spinach cuttings in water or directly in soil. I’ve had success with both methods.
* **Rooting in Water:**
1. Place the cuttings in a glass or jar of water, making sure that the bottom 2 inches of the stem are submerged.
2. Place the jar in a bright, indirect light location.
3. Change the water every few days to prevent algae growth.
4. Roots should start to appear within a week or two.
5. Once the roots are about an inch long, you can transplant the cuttings into pots or directly into the garden.
* **Rooting in Soil:**
1. Dip the cut end of the cutting in rooting hormone (optional, but it can help speed up the rooting process).
2. Plant the cutting in a small pot filled with well-draining potting mix.
3. Water thoroughly and keep the soil moist but not soggy.
4. Place the pot in a bright, indirect light location.
5. Cover the pot with a plastic bag or humidity dome to create a humid environment.
6. Remove the bag or dome for a few hours each day to allow for air circulation.
7. Roots should start to develop within a few weeks.
8. Once the cutting has rooted, you can transplant it into the garden.
3. Transplanting Rooted Cuttings
Follow the same instructions as for transplanting seedlings (see above). Remember to harden off the cuttings before transplanting them outdoors.
Caring for Your Malabar Spinach Plants
Once your Malabar Spinach plants are established, they’re relatively low-maintenance. Here are a few tips to keep them happy and healthy:
* **Watering:** Water regularly, especially during hot, dry weather. Malabar Spinach prefers consistently moist soil.
* **Fertilizing:** Fertilize every few weeks with a balanced fertilizer or compost tea. This will help promote healthy growth and abundant leaf production.
* **Pruning:** Prune the vines regularly to encourage branching and prevent them from becoming too leggy. You can also pinch off the tips of the vines to encourage bushier growth.
* **Pest and Disease Control:** Malabar Spinach is generally pest and disease resistant. However, keep an eye out for common garden pests like aphids and spider mites. If you notice any pests, you can treat them with insecticidal soap or neem oil.
Harvesting Your Malabar Spinach
The best part! You can start harvesting Malabar Spinach leaves as soon as the plants are large enough.
1. **Harvest Regularly:** The more you harvest, the more the plants will produce.
2. **Pick Young Leaves:** Young leaves are more tender and flavorful.
3. **Cut or Pinch Off Leaves:** You can either cut the leaves with scissors or pinch them off with your fingers.
4. **Store Properly:** Store harvested leaves in the refrigerator in a plastic bag for up to a week.
Enjoying Your Homegrown Malabar Spinach
Malabar Spinach is incredibly versatile in the kitchen. You can use it in salads, stir-fries, soups, and stews. It has a slightly mucilaginous texture, similar to okra, which some people find appealing. I personally love it in stir-fries with garlic and ginger.
Here are a few ideas for using your homegrown Malabar Spinach:
* **Salads:** Add young, tender leaves to your favorite salads.
* **Stir-fries:** Sauté the leaves with garlic,
Conclusion
So, there you have it! Growing Malabar Spinach at home is not only achievable but also incredibly rewarding. Forget those expensive, often wilted greens at the supermarket. With a little patience and this straightforward DIY trick, you can have a constant supply of fresh, vibrant, and nutritious Malabar Spinach right at your fingertips.
Why is this a must-try? Because it empowers you to take control of your food source, reduces your carbon footprint, and introduces you to the joys of gardening. Imagine the satisfaction of harvesting your own leafy greens, knowing exactly where they came from and what went into growing them. Plus, Malabar Spinach is a nutritional powerhouse, packed with vitamins and minerals that will boost your health and well-being.
But the benefits don’t stop there. This DIY method is also incredibly versatile. You can adapt it to suit your specific needs and preferences. For example, if you live in a cooler climate, consider starting your seeds indoors and using grow lights to provide the necessary warmth and sunlight. If you have limited space, vertical gardening techniques, such as using trellises or hanging baskets, can be a game-changer. You can even experiment with different soil mixes and fertilizers to find what works best for your growing conditions.
Consider adding companion plants like basil or marigolds to deter pests naturally. Another variation is to explore different cultivars of Malabar Spinach. While the green variety is most common, you might also find red-stemmed varieties that add a beautiful splash of color to your garden and your plate.
Don’t be intimidated if you’ve never grown anything before. This DIY trick is designed to be beginner-friendly, with clear and concise instructions that anyone can follow. The key is to start small, be patient, and don’t be afraid to experiment. Even if you encounter a few challenges along the way, remember that gardening is a learning process, and every mistake is an opportunity to grow (pun intended!).
We wholeheartedly encourage you to give this DIY trick a try. You’ll be amazed at how easy and rewarding it is to grow your own Malabar Spinach at home. And once you’ve harvested your first batch of delicious greens, we’d love to hear about your experience. Share your photos, tips, and stories in the comments below. Let’s create a community of home gardeners who are passionate about growing their own food and sharing their knowledge with others.
So, what are you waiting for? Grab your seeds, prepare your soil, and get ready to embark on a journey of homegrown goodness. Happy gardening!
Frequently Asked Questions (FAQ)
What exactly is Malabar Spinach and why should I grow it?
Malabar Spinach (Basella alba) isn’t actually a true spinach, but a leafy green vine native to tropical Asia. It’s known for its mild, slightly peppery flavor and its ability to thrive in warm weather, making it an excellent alternative to spinach in hotter climates. Growing it yourself ensures you have access to fresh, organic greens free from pesticides and herbicides. Plus, it’s a beautiful and productive addition to any garden, providing both food and ornamental value. It’s also incredibly nutritious, packed with vitamins A and C, iron, and calcium.
How long does it take to grow Malabar Spinach from seed?
Generally, it takes about 2-3 weeks for Malabar Spinach seeds to germinate. However, germination can be slow and uneven. Soaking the seeds in warm water for 24 hours before planting can help speed up the process. Once the seedlings emerge, it takes approximately 60-70 days to reach maturity and be ready for harvest. Remember that these are estimates, and the actual time may vary depending on your climate and growing conditions.
What kind of soil is best for growing Malabar Spinach?
Malabar Spinach prefers well-draining soil that is rich in organic matter. A slightly acidic to neutral pH (6.5-7.0) is ideal. Amend your soil with compost, aged manure, or other organic materials to improve its fertility and drainage. If you’re growing in containers, use a high-quality potting mix specifically formulated for vegetables.
How much sunlight does Malabar Spinach need?
Malabar Spinach thrives in full sun, meaning at least 6-8 hours of direct sunlight per day. However, it can tolerate partial shade, especially in hotter climates. If you live in a region with intense afternoon sun, providing some shade during the hottest part of the day can prevent the leaves from scorching.
How often should I water Malabar Spinach?
Malabar Spinach needs consistent moisture to thrive. Water deeply whenever the top inch of soil feels dry to the touch. Avoid overwatering, as this can lead to root rot. During hot, dry weather, you may need to water more frequently. Mulching around the plants can help retain moisture in the soil.
Does Malabar Spinach need fertilizer?
Yes, Malabar Spinach benefits from regular fertilization. Apply a balanced organic fertilizer every 2-3 weeks during the growing season. You can also use compost tea or liquid seaweed extract to provide additional nutrients. Avoid over-fertilizing, as this can lead to excessive foliage growth at the expense of flavor.
How do I harvest Malabar Spinach?
You can start harvesting Malabar Spinach leaves as soon as the plant is large enough, typically when it’s about 6-8 inches tall. Simply snip off the leaves or stems as needed, leaving at least a few leaves on the plant to continue growing. Regular harvesting encourages the plant to produce more leaves.
What are some common pests and diseases that affect Malabar Spinach?
Malabar Spinach is generally resistant to pests and diseases, but it can occasionally be affected by aphids, spider mites, or leaf miners. These pests can usually be controlled with insecticidal soap or neem oil. Root rot can be a problem in poorly drained soil. To prevent this, ensure that your soil is well-draining and avoid overwatering.
Can I grow Malabar Spinach in containers?
Absolutely! Malabar Spinach is well-suited to container gardening. Choose a large container (at least 12 inches in diameter) with drainage holes. Use a high-quality potting mix and provide a trellis or other support for the vine to climb. Water and fertilize regularly, and place the container in a sunny location.
Is Malabar Spinach a perennial or an annual?
Malabar Spinach is a perennial in tropical and subtropical climates, meaning it can live for several years. However, in colder climates, it is typically grown as an annual, as it cannot tolerate frost. You can try to overwinter it indoors by bringing the plant inside before the first frost and providing it with adequate light and water.
How do I save seeds from Malabar Spinach?
To save seeds, allow some of the flowers to develop into small, dark berries. Once the berries are fully ripe and have turned black, harvest them and allow them to dry completely. Then, crush the berries to release the seeds. Store the seeds in a cool, dry place until you’re ready to plant them.
What are some ways to use Malabar Spinach in cooking?
Malabar Spinach can be used in a variety of dishes, just like regular spinach. It can be eaten raw in salads, sautéed, steamed, or added to soups, stews, and stir-fries. It’s also a great addition to smoothies and juices. Its slightly mucilaginous texture makes it a good thickener for soups and sauces.
Can I grow Malabar Spinach indoors?
Yes, you can grow Malabar Spinach indoors, but it requires a sunny location and adequate support for the vine to climb. Place the plant near a south-facing window or use grow lights to provide sufficient light. Water and fertilize regularly, and provide a trellis or other support for the vine to climb.
Is Malabar Spinach safe to eat?
Yes, Malabar Spinach is generally safe to eat. However, some people may experience mild digestive upset if they consume large quantities of it raw. Cooking the leaves can help to reduce this effect. As with any new food, it’s always a good idea to start with a small amount to see how your body reacts.
Where can I buy Malabar Spinach seeds?
Malabar Spinach seeds are available at many garden centers, nurseries, and online retailers. You can also find them at seed exchanges and from other gardeners. When purchasing seeds, choose a reputable source to ensure that you’re getting high-quality seeds that are likely to germinate.

Leave a Comment