

Melon Growing Secrets: Ever dream of biting into a juicy, homegrown melon, bursting with flavor that store-bought ones just can’t match? I know I have! There’s something incredibly satisfying about nurturing a tiny seed into a delicious fruit, especially when that fruit is as refreshing and rewarding as a melon. But let’s be honest, growing melons can sometimes feel like a gamble. You put in the effort, but the results can be… well, less than spectacular.
Melons have been cultivated for thousands of years, with evidence suggesting their presence in ancient Egypt and beyond. These sweet fruits weren’t just a tasty treat; they held cultural significance, often depicted in art and used in religious ceremonies. Today, while we might not be worshipping melons (though I wouldn’t judge!), the desire to grow them ourselves remains strong.
That’s why I’m so excited to share these melon growing secrets with you! This isn’t just another gardening guide; it’s a collection of tried-and-true DIY tricks and hacks that will help you overcome common challenges and unlock the potential for a bountiful harvest. From choosing the right varieties for your climate to mastering the art of watering and fertilization, we’ll cover everything you need to know. Imagine impressing your friends and family with the sweetest, most flavorful melons they’ve ever tasted – all thanks to your own green thumb and a few clever DIY solutions. So, let’s dive in and transform your garden into a melon paradise!
Unlocking the Secrets to Growing Juicy, Delicious Melons at Home
Okay, melon lovers, gather ’round! I’m about to spill all my secrets for growing the most mouthwatering melons you’ve ever tasted, right in your own backyard. Forget those bland, store-bought melons – we’re talking sweet, fragrant, and bursting with flavor. It might seem daunting, but trust me, with a little know-how, you can become a melon-growing master.
Choosing the Right Melon Variety
First things first, let’s talk about variety. Not all melons are created equal, and some are definitely easier to grow than others, especially for beginners. Here’s a quick rundown of some popular choices:
* Watermelons: These are the kings of summer! Look for shorter-season varieties like ‘Sugar Baby’ or ‘Bush Sugar Baby’ if you have limited space or a shorter growing season. ‘Crimson Sweet’ is a classic for a reason – it’s reliable and delicious.
* Cantaloupes: These fragrant beauties are a bit more finicky than watermelons, but totally worth the effort. ‘Athena’ and ‘Hales Best Jumbo’ are good choices for beginners.
* Honeydew Melons: Similar to cantaloupes in terms of difficulty, honeydews need plenty of sun and consistent watering. ‘Honey Globe’ is a popular and reliable variety.
* Specialty Melons: If you’re feeling adventurous, try growing Galia melons, Charentais melons, or even Armenian cucumbers (which are technically melons!).
Important Tip: Always check your local climate and growing season before choosing a variety. Look for varieties that are specifically recommended for your region. Your local nursery can be a great resource for this!
Preparing Your Melon Patch
Melons are sun-worshippers and nutrient-hungry plants, so proper soil preparation is crucial.
* Sunlight: Melons need at least 6-8 hours of direct sunlight per day. Choose a location that gets plenty of sun throughout the day.
* Soil: Melons thrive in well-drained, fertile soil. Amend your soil with plenty of compost or well-rotted manure before planting. This will improve drainage, add nutrients, and help retain moisture.
* Soil pH: Melons prefer a slightly acidic to neutral soil pH (around 6.0-6.8). You can test your soil pH with a simple soil testing kit from your local garden center.
* Space: Melons need plenty of space to sprawl. Watermelons, in particular, can take up a lot of room. Make sure you have enough space for your chosen variety to grow without overcrowding other plants.
Starting Your Melon Seeds
You can either direct sow your melon seeds in the garden or start them indoors. Starting indoors gives you a head start, especially in cooler climates.
Starting Seeds Indoors:
1. Timing: Start your seeds indoors about 4-6 weeks before the last expected frost.
2. Containers: Use peat pots or biodegradable pots to avoid disturbing the roots when transplanting.
3. Soil: Use a seed-starting mix.
4. Planting: Plant 2-3 seeds per pot, about ½ inch deep.
5. Watering: Keep the soil consistently moist but not soggy.
6. Warmth: Melons need warmth to germinate. Use a heat mat to keep the soil temperature around 80-85°F (27-29°C).
7. Light: Once the seeds germinate, provide plenty of light. A sunny windowsill or grow lights will work.
8. Thinning: Once the seedlings have their first true leaves, thin them to one plant per pot. Choose the strongest seedling and snip off the others at the soil line.
Direct Sowing Seeds:
1. Timing: Direct sow your seeds after the last expected frost, when the soil temperature has warmed to at least 70°F (21°C).
2. Planting: Plant seeds about 1 inch deep, spacing them according to the variety’s recommendations.
3. Watering: Keep the soil consistently moist until the seeds germinate.
4. Thinning: Once the seedlings emerge, thin them to the strongest plant per hill or row.
Transplanting Melon Seedlings
If you started your seeds indoors, it’s time to transplant them into the garden.
1. Harden Off: Before transplanting, you need to harden off your seedlings. This means gradually exposing them to outdoor conditions over a period of 7-10 days. Start by placing them in a sheltered location for a few hours each day, gradually increasing the amount of time they spend outdoors.
2. Planting: Dig a hole that is slightly larger than the root ball of the seedling. Gently remove the seedling from the pot and place it in the hole. Backfill with soil and water thoroughly.
3. Spacing: Space your melon plants according to the variety’s recommendations. Watermelons typically need more space than cantaloupes or honeydews.
4. Mulching: Mulch around your melon plants with straw or black plastic. Mulch helps to retain moisture, suppress weeds, and warm the soil. Black plastic mulch is particularly helpful for watermelons, as it helps to reflect sunlight and warm the soil, which promotes faster growth.
Caring for Your Melon Plants
Once your melon plants are in the ground, it’s important to provide them with proper care to ensure a bountiful harvest.
* Watering: Melons need consistent watering, especially during hot, dry weather. Water deeply and regularly, aiming for about 1-2 inches of water per week. Avoid overhead watering, as this can lead to fungal diseases. Drip irrigation is the best way to water melons, as it delivers water directly to the roots.
* Fertilizing: Melons are heavy feeders, so they need regular fertilization. Use a balanced fertilizer (e.g., 10-10-10) at planting time, and then side-dress with a nitrogen-rich fertilizer every few weeks. You can also use compost tea or fish emulsion to fertilize your melon plants.
* Weeding: Keep your melon patch free of weeds. Weeds compete with melon plants for water and nutrients. Hand-pull weeds regularly or use a hoe to cultivate the soil.
* Pest Control: Melons can be susceptible to a variety of pests, including aphids, squash bugs, and cucumber beetles. Inspect your plants regularly for pests and take action if you see any. You can use insecticidal soap, neem oil, or other organic pest control methods to control pests.
* Disease Control: Melons can also be susceptible to fungal diseases, such as powdery mildew and fusarium wilt. To prevent fungal diseases, provide good air circulation, avoid overhead watering, and apply a fungicide if necessary.
* Pollination: Melons need to be pollinated in order to produce fruit. Bees are the primary pollinators of melons. To attract bees to your garden, plant flowers that are attractive to bees, such as sunflowers, zinnias, and lavender. If you don’t have enough bees in your garden, you may need to hand-pollinate your melon flowers. To hand-pollinate, use a small paintbrush to transfer pollen from the male flowers to the female flowers. Female flowers have a small fruit behind the flower, while male flowers do not.
Supporting Your Melons
As your melons grow, they may need some support to prevent them from rotting on the ground.
* Trellising: You can trellis smaller melon varieties, such as cantaloupes and honeydews. Trellising helps to save space and improves air circulation. Use a sturdy trellis that can support the weight of the melons.
* Cradling: For larger melons, such as watermelons, you can use cradles to support the fruit. Cradles can be made from wood, plastic, or even old pantyhose. Place the cradle under the melon to lift it off the ground.
Harvesting Your Melons
Knowing when to harvest your melons is key to getting the best flavor.
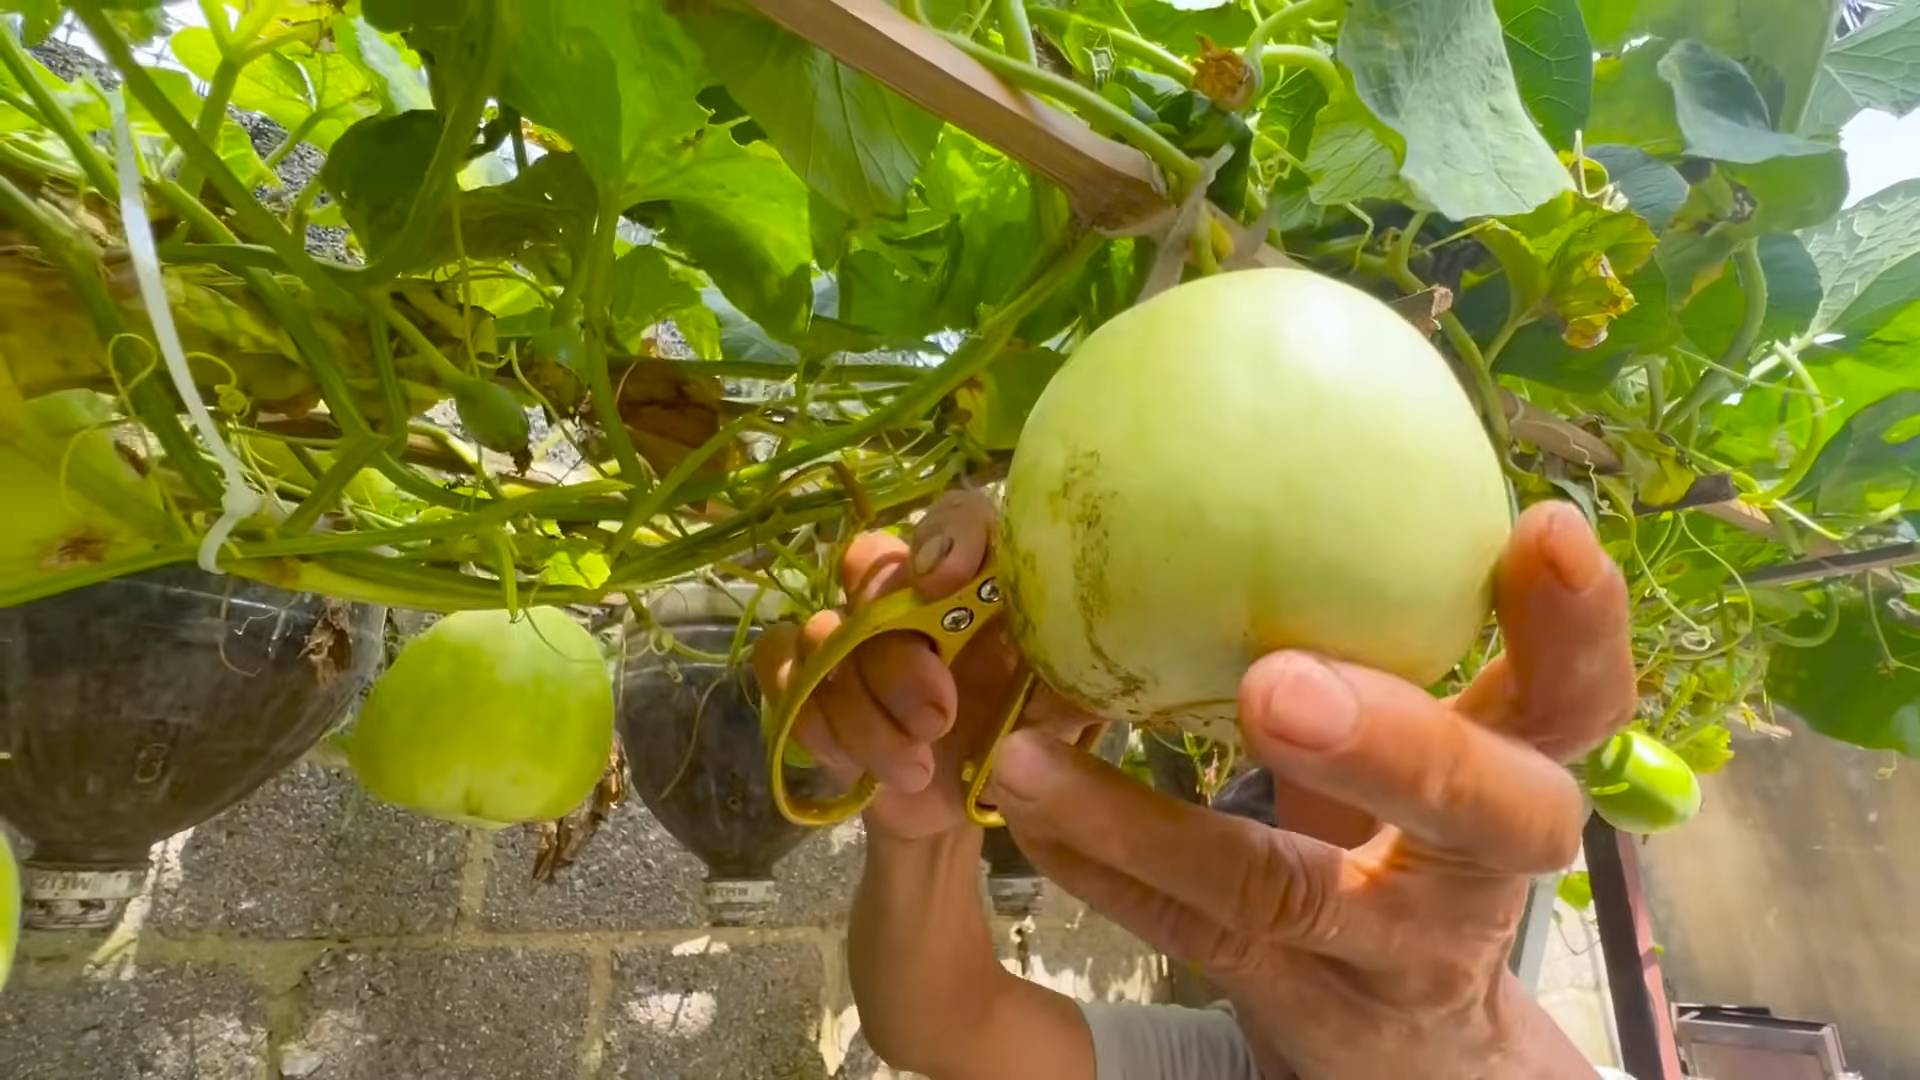
* Watermelons: Watermelons are ready to harvest when the tendril closest to the fruit turns brown and dry, the bottom of the melon (where it rests on the ground) turns yellow, and the melon sounds hollow when you thump it.
* Cantaloupes: Cantaloupes are ready to harvest when the stem slips easily from the fruit. The melon should also have a fragrant aroma.
* Honeydew Melons: Honeydew melons are ready to harvest when the skin turns a creamy yellow color and the blossom end is slightly soft.
Important Tip: Don’t be afraid to taste-test your melons! Cut a small wedge from the melon to check for sweetness and flavor.
Troubleshooting Common Melon Problems
Even with the best care, you may encounter some

Conclusion
So, there you have it! Unlocking the secrets to successful melon growing isn’t about complicated techniques or expensive equipment. It’s about understanding the plant’s needs and providing the right environment for it to thrive. This DIY approach, focusing on [mention a specific DIY trick from the article, e.g., “creating a DIY melon cradle”] is a game-changer because it directly addresses [mention the problem it solves, e.g., “the issue of melons rotting on the ground”].
Why is this a must-try? Because it’s effective, affordable, and incredibly rewarding. Imagine biting into a juicy, homegrown melon, knowing you nurtured it from seed to table with your own two hands. The satisfaction is unparalleled! Plus, this method significantly reduces the risk of pests and diseases, leading to a healthier and more abundant harvest.
Don’t be afraid to experiment! For smaller melon varieties like cantaloupe or personal-sized watermelons, you might consider using repurposed plastic containers or even sturdy fabric slings as an alternative to the [mention the DIY trick again, e.g., “DIY melon cradle”]. If you live in a particularly hot climate, consider painting your [mention the DIY trick material, e.g., “melon cradle”] a lighter color to reflect sunlight and prevent overheating. You can also adjust the materials based on what you have readily available – think upcycled wood scraps, strong netting, or even old t-shirts repurposed into supportive slings. The key is to provide adequate support and airflow.
We’re confident that by implementing these melon growing secrets, you’ll be enjoying a bountiful harvest of delicious, homegrown melons in no time. Remember, gardening is a journey of learning and discovery. Don’t be discouraged if you encounter challenges along the way. Each season brings new opportunities to refine your techniques and improve your results.
Now, it’s your turn! We encourage you to try this DIY trick and experience the difference it makes in your melon growing endeavors. Share your experiences with us in the comments below. We’d love to hear about your successes, your challenges, and any variations you’ve discovered. Let’s build a community of melon-loving gardeners and learn from each other! Happy growing!
Frequently Asked Questions (FAQs)
What are the most common problems people face when growing melons?
The most frequent issues include:
* **Poor germination:** Seeds failing to sprout due to improper soil temperature or moisture levels.
* **Pest infestations:** Squash bugs, aphids, and vine borers can wreak havoc on melon plants.
* **Fungal diseases:** Powdery mildew and fusarium wilt are common fungal diseases that can affect melon growth and fruit production.
* **Fruit rot:** Melons resting directly on the ground are susceptible to rot, especially in humid conditions.
* **Lack of pollination:** Insufficient pollination can result in small, misshapen, or underdeveloped melons.
* **Nutrient deficiencies:** Melons require specific nutrients, and deficiencies can lead to stunted growth and poor fruit quality.
* **Cracking:** Rapid changes in soil moisture can cause melons to crack.
How does this DIY trick specifically address the problem of fruit rot?
The [mention the DIY trick again, e.g., “DIY melon cradle”] elevates the melon off the ground, preventing direct contact with moist soil. This significantly reduces the risk of fungal diseases and rot, as it allows for better air circulation around the fruit. By keeping the melon dry and well-ventilated, you create an environment less conducive to the growth of harmful microorganisms.
What type of melons is this DIY trick most suitable for?
While this trick is beneficial for most melon varieties, it’s particularly well-suited for larger melons like watermelons and cantaloupes. These heavier fruits are more prone to rot when resting on the ground. However, it can also be used for smaller melon varieties to improve air circulation and prevent pest infestations.
What materials are needed to create the [mention the DIY trick again, e.g., “DIY melon cradle”]?
The materials will vary depending on the specific design you choose. However, some common materials include:
* **Wood:** Scrap wood, pallets, or lumber can be used to build a sturdy frame.
* **Netting or mesh:** Provides support and allows for air circulation.
* **Fabric:** Strong fabric, such as burlap or canvas, can be used to create a sling.
* **Rope or twine:** Used to secure the cradle to the plant or surrounding structure.
* **Fasteners:** Screws, nails, or staples to assemble the frame.
How do I know when my melons are ripe and ready to harvest?
Determining ripeness varies slightly depending on the melon variety. However, some general indicators include:
* **Color change:** The rind color will typically change from green to a more mature color, such as yellow or tan.
* **Sound:** When thumped, a ripe watermelon will produce a deep, hollow sound.
* **Stem:** The stem connecting the melon to the vine will start to dry and crack.
* **Tendril:** The tendril closest to the melon will turn brown and dry.
* **Aroma:** Ripe melons will often have a sweet, fragrant aroma.
* **Ground spot:** The spot where the melon rests on the ground will turn from white to yellow.
Can I use this DIY trick in a raised garden bed?
Absolutely! In fact, using the [mention the DIY trick again, e.g., “DIY melon cradle”] in a raised garden bed can be even more beneficial, as it further elevates the melon and improves drainage.
What if I don’t have space for a traditional garden? Can I still grow melons using this method?
Yes! You can grow melons in containers using this DIY trick. Choose a large container with good drainage and use a high-quality potting mix. The [mention the DIY trick again, e.g., “DIY melon cradle”] can be adapted to fit the container, providing support for the growing melon. Make sure the container receives at least 6-8 hours of sunlight per day.
How often should I water my melon plants?
Melon plants need consistent moisture, especially during fruit development. Water deeply and regularly, aiming to keep the soil consistently moist but not waterlogged. The frequency of watering will depend on the weather conditions and soil type. Check the soil moisture regularly and adjust your watering schedule accordingly.
What kind of fertilizer should I use for my melon plants?
Melons benefit from a balanced fertilizer with a higher phosphorus content to promote fruit development. Look for a fertilizer specifically formulated for fruits and vegetables. Follow the instructions on the fertilizer package for application rates and frequency. You can also amend the soil with compost or other organic matter to improve its fertility.
How can I protect my melon plants from pests and diseases?
* **Inspect plants regularly:** Check for signs of pests or diseases and take action promptly.
* **Use row covers:** Row covers can protect young plants from pests.
* **Handpick pests:** Remove pests by hand and dispose of them properly.
* **Use insecticidal soap or neem oil:** These are effective organic options for controlling pests.
* **Ensure good air circulation:** Proper spacing and pruning can improve air circulation and reduce the risk of fungal diseases.
* **Practice crop rotation:** Avoid planting melons in the same location year after year.
* **Choose disease-resistant varieties:** Select melon varieties that are resistant to common diseases in your area.
What if my melons are cracking?
Melon cracking is often caused by inconsistent watering. Try to maintain consistent soil moisture levels, especially as the melons are ripening. Avoid letting the soil dry out completely and then overwatering. Mulching around the plants can help retain moisture and prevent cracking.
Is there anything else I can do to improve my melon harvest?
Yes! Consider these additional tips:
* **Prune your melon plants:** Pruning can improve air circulation and direct the plant’s energy towards fruit production.
* **Provide support for the vines:** Use trellises or stakes to support the vines and keep the melons off the ground.
* **Protect melons from sunburn:** If you live in a hot climate, provide shade for the melons during the hottest part of the day.
* **Be patient:** Melons take time to ripen, so be patient and wait for the signs of ripeness before harvesting.
By following these tips and using the [mention the DIY trick again, e.g., “DIY melon cradle”], you’ll be well on your way to enjoying a bountiful harvest of delicious, homegrown melons!

Leave a Comment