

Grow Sage Indoors? Absolutely! Imagine stepping into your kitchen and snipping fresh, fragrant sage leaves to add a burst of flavor to your favorite dishes, all year round. No more relying on wilted supermarket herbs or braving the unpredictable weather. This isn’t just a dream; it’s a deliciously achievable reality with a few simple DIY tricks.
Sage, with its earthy aroma and slightly peppery taste, has been cherished for centuries. From ancient Romans using it for medicinal purposes to Native American traditions incorporating it in smudging ceremonies, sage boasts a rich history and cultural significance. It’s a herb that connects us to the past while enriching our present.
But why should you bother learning how to grow sage indoors? Well, for starters, it’s incredibly rewarding! There’s something deeply satisfying about nurturing a plant from a tiny seedling to a thriving herb. Plus, think of the money you’ll save by not constantly buying fresh sage. More importantly, having fresh herbs readily available encourages healthier cooking and adds a gourmet touch to even the simplest meals. I’m going to show you some easy DIY hacks that will have you harvesting your own sage in no time, even if you don’t have a green thumb!
Growing Sage Indoors: A Comprehensive DIY Guide
Hey there, fellow plant enthusiasts! I’m so excited to share my tried-and-true method for growing sage indoors. Fresh sage is a game-changer in the kitchen, and having it readily available is a total win. Plus, the aroma is just divine! Let’s dive in and get your indoor sage garden started.
Choosing the Right Sage Variety
Before we get our hands dirty, let’s talk sage varieties. While all sage is wonderful, some are better suited for indoor growing than others.
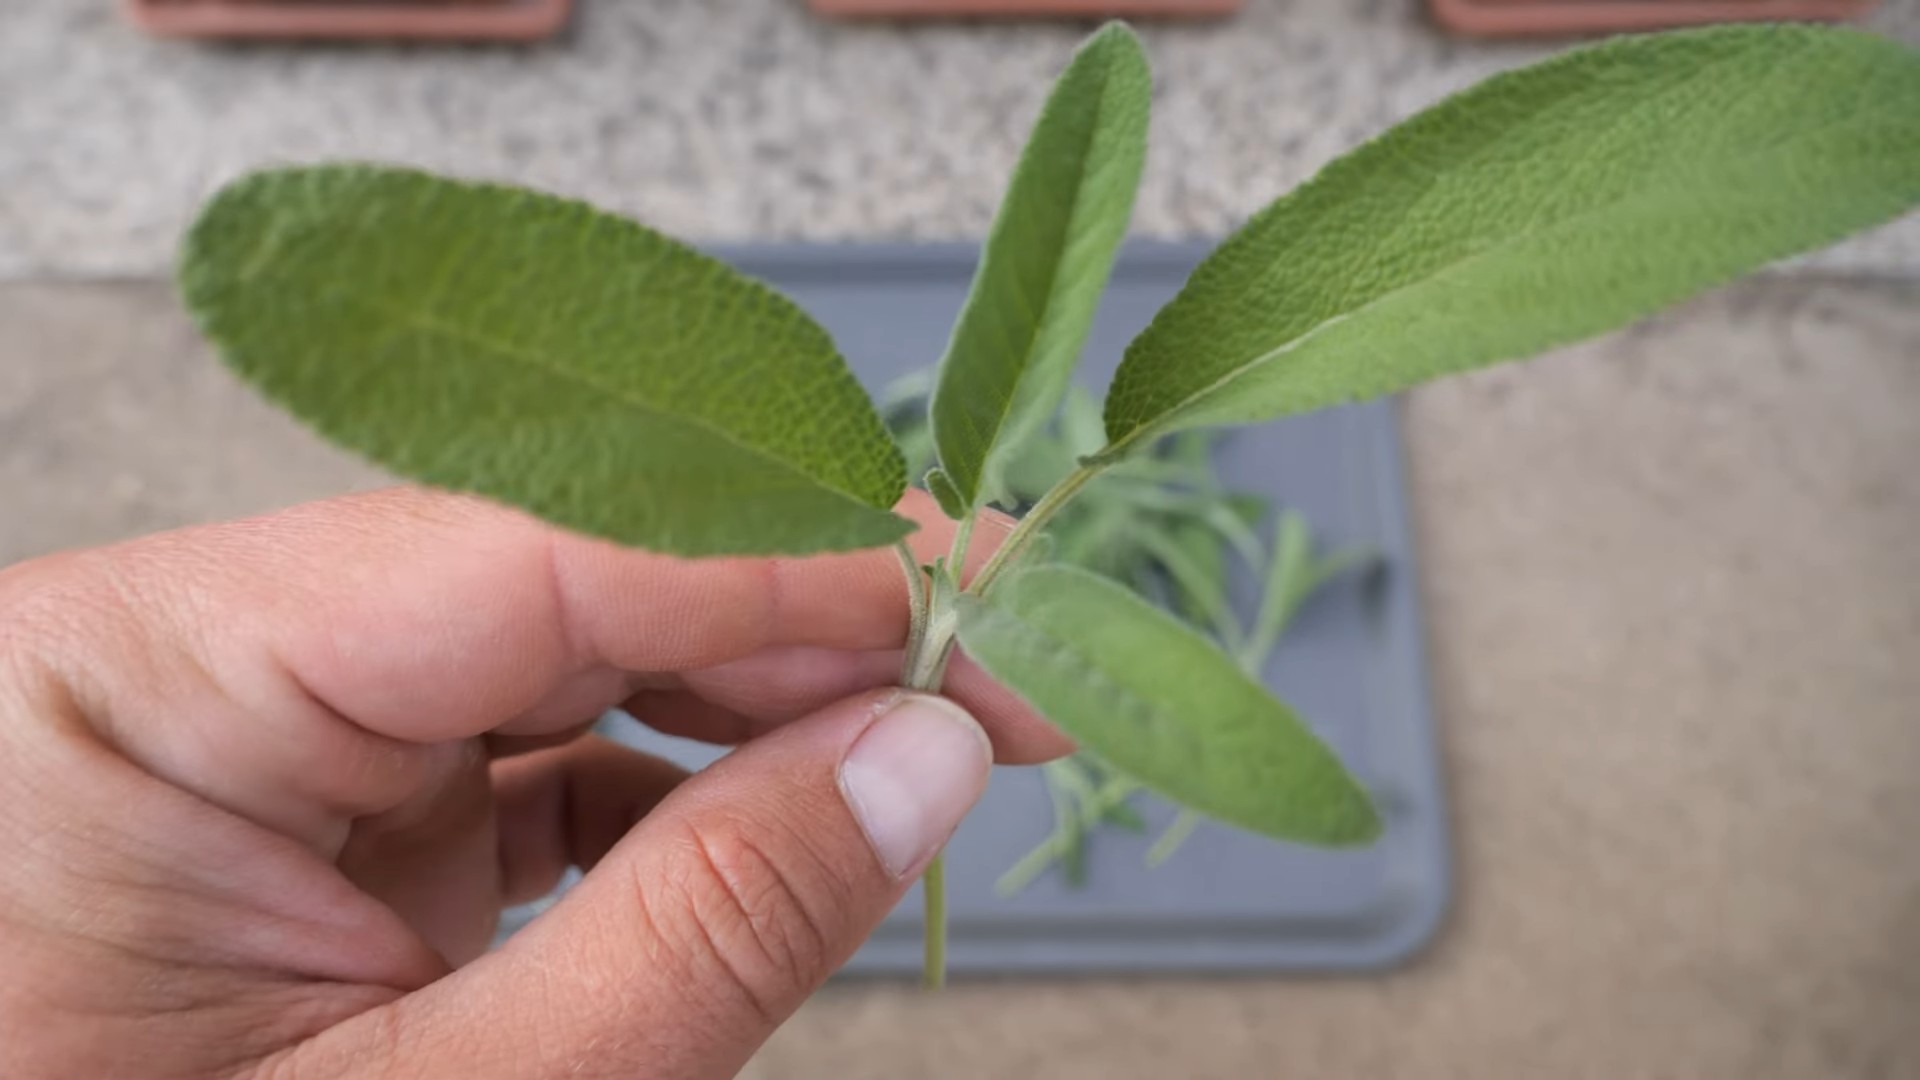
* Common Sage (Salvia officinalis): This is the classic culinary sage, and it thrives indoors. It’s relatively compact and easy to manage.
* Dwarf Sage: As the name suggests, this variety stays small, making it perfect for smaller spaces.
* Purple Sage: Not only does it taste great, but it also adds a pop of color with its beautiful purple leaves.
I personally prefer common sage because of its robust flavor and ease of care, but feel free to experiment and find your favorite!
Gathering Your Supplies
Okay, time to gather our supplies. Here’s what you’ll need:
* Sage Seeds or a Sage Plant: You can start from seeds or purchase a small sage plant from your local nursery. Starting from seeds takes longer, but it’s incredibly rewarding.
* Pot: Choose a pot that’s at least 6 inches in diameter with drainage holes. Good drainage is crucial for preventing root rot.
* Potting Mix: Use a well-draining potting mix specifically formulated for herbs. Avoid using garden soil, as it can become compacted and doesn’t drain well.
* Grow Lights (Optional but Recommended): Sage needs plenty of light, so if you don’t have a sunny windowsill, grow lights are a must.
* Watering Can or Spray Bottle: For gentle watering.
* Small Shovel or Trowel: For planting.
* Fertilizer (Optional): A balanced liquid fertilizer can help boost growth.
Planting Your Sage
Now for the fun part – planting! Whether you’re starting from seeds or a plant, the process is pretty straightforward.
Starting from Seeds:
1. Prepare the Pot: Fill your pot with potting mix, leaving about an inch of space at the top. Gently pat down the soil.
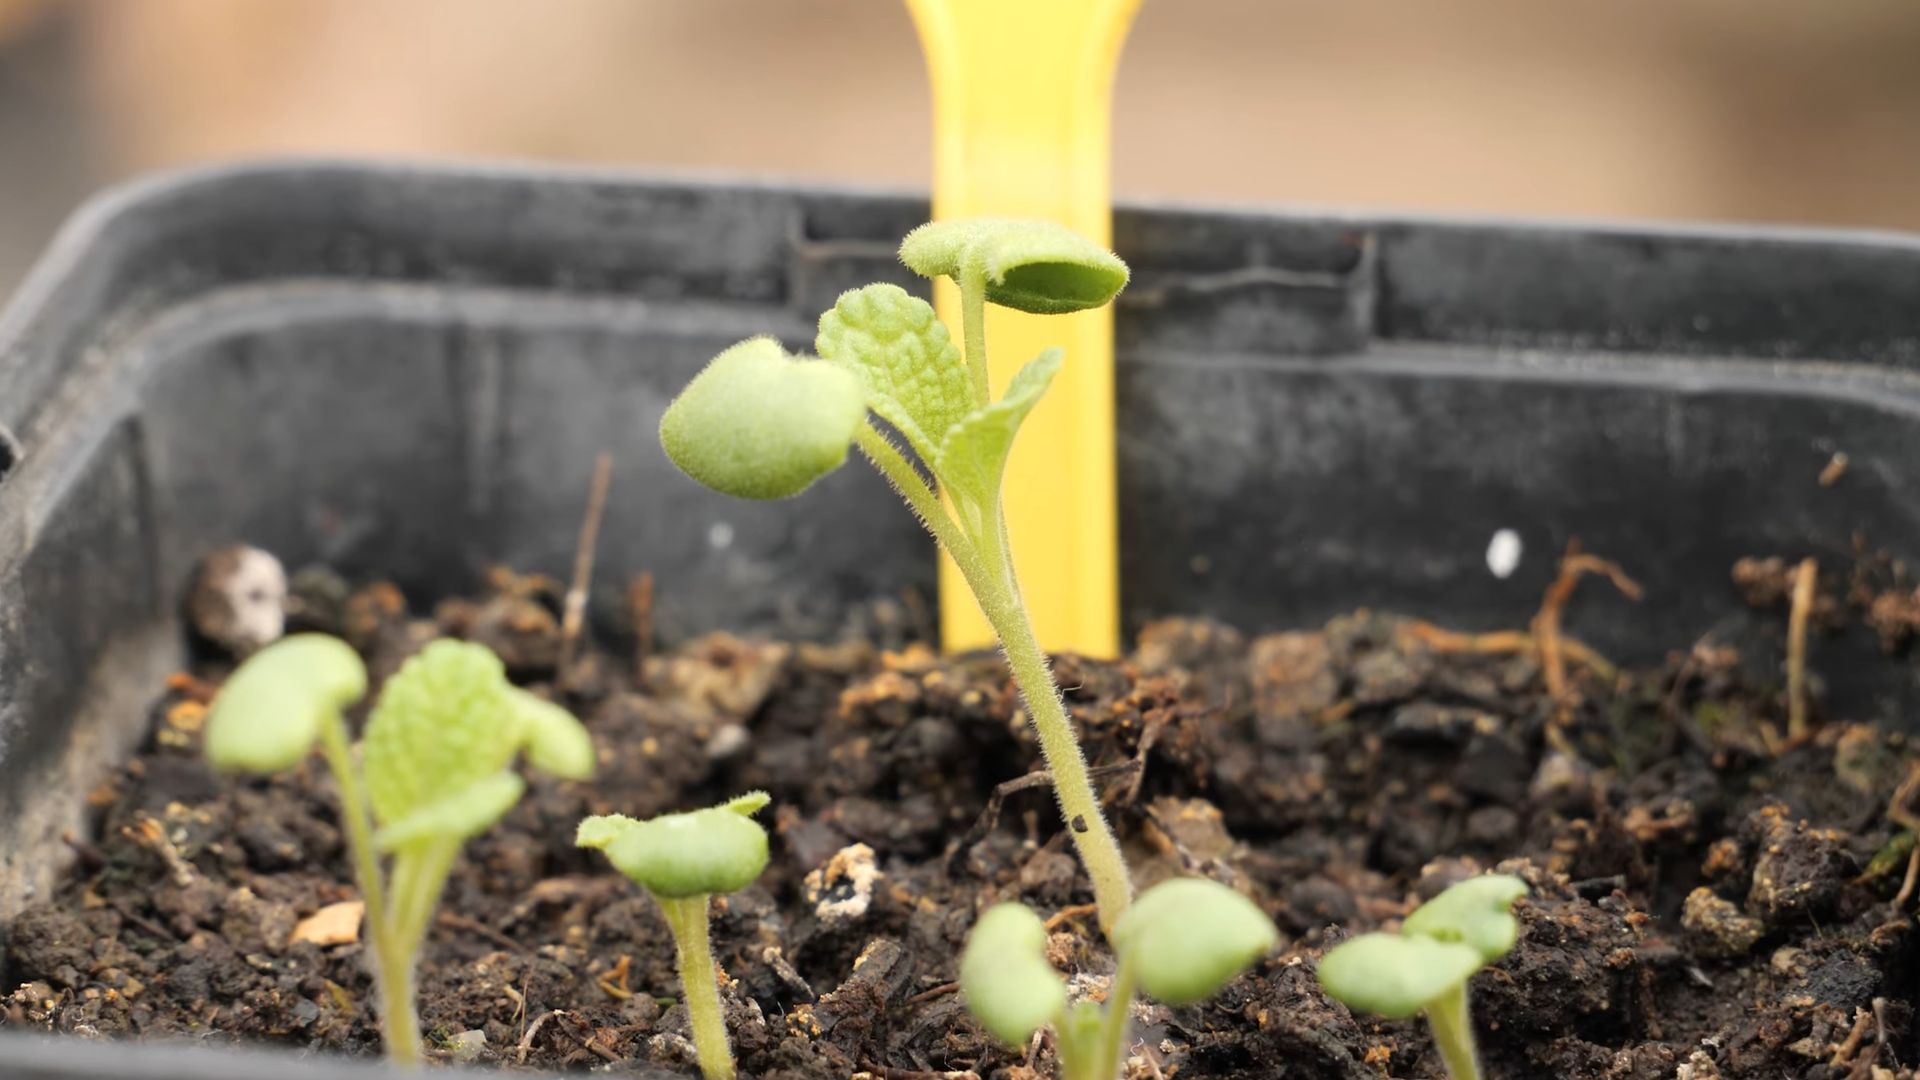
2. Sow the Seeds: Sprinkle the sage seeds evenly over the surface of the soil. They are tiny, so don’t overdo it.
3. Cover the Seeds: Lightly cover the seeds with a thin layer of potting mix.
4. Water Gently: Use a spray bottle to mist the soil. You want to keep it moist but not soggy.
5. Provide Light: Place the pot in a warm, sunny location or under grow lights.
6. Be Patient: Sage seeds can take anywhere from 10 to 21 days to germinate. Keep the soil consistently moist during this time.
Planting a Sage Plant:
1. Prepare the Pot: Fill your pot with potting mix, leaving about an inch of space at the top.
2. Remove the Plant: Gently remove the sage plant from its nursery container. Loosen the roots slightly if they are tightly packed.
3. Plant the Sage: Place the sage plant in the center of the pot.
4. Fill with Soil: Fill in the remaining space with potting mix, gently patting it down around the plant.
5. Water Thoroughly: Water the plant until water drains out of the bottom of the pot.
Caring for Your Indoor Sage
Once your sage is planted, it’s time to provide the right care to help it thrive.
Light:
Sage needs at least 6-8 hours of sunlight per day. If you don’t have a sunny windowsill, use grow lights. Place the lights a few inches above the plant. I’ve found that LED grow lights work best and are energy-efficient.
Watering:
Water your sage when the top inch of soil feels dry to the touch. Avoid overwatering, as this can lead to root rot. When you water, water thoroughly until water drains out of the bottom of the pot. Then, let the soil dry out a bit before watering again.
Temperature:
Sage prefers temperatures between 60-70°F (15-21°C). Avoid placing it near drafts or extreme temperature fluctuations.
Humidity:
Sage doesn’t need high humidity, so normal indoor humidity levels are fine.
Fertilizing:
You can fertilize your sage every 2-4 weeks during the growing season (spring and summer) with a balanced liquid fertilizer. Follow the instructions on the fertilizer label. I usually dilute the fertilizer to half strength to avoid burning the roots.
Pruning:
Pruning is essential for keeping your sage plant healthy and productive. Regularly pinch off the tips of the stems to encourage bushier growth. You can also remove any dead or yellowing leaves.
Harvesting Your Sage
Harvesting sage is easy and rewarding!
1. Wait Until Mature: Allow your sage plant to grow to at least 6 inches tall before harvesting.
2. Harvest in the Morning: The best time to harvest sage is in the morning, after the dew has dried but before the sun gets too hot.
3. Cut the Stems: Use sharp scissors or pruning shears to cut the stems. Cut just above a leaf node (the point where leaves grow from the stem).
4. Don’t Over-Harvest: Avoid removing more than one-third of the plant at a time. This will allow it to recover and continue growing.
Troubleshooting Common Problems
Even with the best care, you might encounter some problems. Here are a few common issues and how to address them:
* Yellowing Leaves: This could be a sign of overwatering, underwatering, or nutrient deficiency. Check the soil moisture and adjust your watering accordingly. If the soil is consistently moist, reduce watering. If it’s dry, water more frequently. You can also try fertilizing with a balanced liquid fertilizer.
* Leggy Growth: This usually indicates insufficient light. Move your sage plant to a sunnier location or provide supplemental light with grow lights.
* Pests: Sage can be susceptible to pests like aphids and spider mites. Inspect your plant regularly for signs of infestation. If you find pests, you can try spraying them with insecticidal soap or neem oil.
* Root Rot: This is caused by overwatering and poor drainage. Make sure your pot has drainage holes and that you’re not overwatering. If you suspect root rot, you may need to repot your sage plant in fresh potting mix.
Propagating Sage
Want more sage plants? Propagating sage is easy!
1. Take Cuttings: In the spring or summer, take 4-6 inch cuttings from healthy stems.
2. Remove Lower Leaves: Remove the leaves from the bottom inch of the cutting.
3. Rooting Hormone (Optional): Dip the cut end of the cutting in rooting hormone to encourage root growth.
4. Plant the Cutting: Plant the cutting in a small pot filled with moist potting mix.
5. Provide Humidity: Cover the pot with a plastic bag or place it in a humidity dome to create a humid environment.
6. Keep Moist: Keep the soil consistently moist but not soggy.
7. Wait for Roots: In a few weeks, the cutting should develop roots. You can check for roots by gently tugging on the cutting. If it resists, it has rooted.
8. Transplant: Once the cutting has rooted, you can transplant it into a larger pot.
Enjoying Your Homegrown Sage
Now that you’ve successfully grown your own sage indoors, it’s time to enjoy the fruits (or rather, leaves!) of your labor. Fresh sage is a versatile herb that can be used in a variety of dishes.
* Cooking: Add fresh sage to soups, stews, sauces, and stuffings. It pairs particularly well with poultry, pork, and vegetables.
* Tea: Steep fresh sage leaves in hot water to make a soothing and flavorful tea.
* Garnish: Use fresh sage leaves as a garnish for salads, soups, and other dishes.
* Drying: You can dry sage leaves for later use. Simply hang the stems upside down in a cool, dry place until the leaves are brittle. Then, crumble the leaves and store them in an airtight container.
Growing sage indoors is a rewarding experience that allows you to enjoy fresh, flavorful herbs year-round. With a little care and attention, you can have a thriving indoor sage garden that will enhance your culinary creations and fill your home with its delightful aroma. Happy gardening!
Conclusion
So, there you have it! Growing sage indoors is not only achievable, but it’s also a rewarding experience that brings a touch of the garden into your home, regardless of the season. We’ve walked through the essential steps, from selecting the right variety and providing optimal lighting to ensuring proper watering and addressing potential challenges. But why should you embark on this indoor gardening adventure?
The answer is simple: fresh, flavorful sage at your fingertips, whenever you need it. Imagine adding a sprig of freshly harvested sage to your morning omelet, infusing your roasted chicken with its earthy aroma, or crafting a soothing sage tea on a chilly evening. No more last-minute trips to the grocery store or settling for dried herbs that lack the vibrant taste of the real deal.
Beyond the culinary benefits, growing sage indoors offers a therapeutic connection to nature. Tending to your sage plant can be a calming and meditative activity, providing a welcome respite from the stresses of daily life. Plus, the beautiful silvery-green foliage adds a touch of natural elegance to your indoor space.
Don’t be afraid to experiment with different varieties of sage. While common sage is a classic choice, consider exploring other options like purple sage, golden sage, or tricolor sage for a unique visual appeal and subtle variations in flavor. You can also try propagating sage from cuttings to expand your indoor herb garden and share the joy of growing sage with friends and family.
Ready to transform your kitchen into a fragrant herb haven? We wholeheartedly encourage you to give this DIY trick a try. It’s easier than you might think, and the rewards are well worth the effort. Remember to pay close attention to the lighting and watering needs of your sage plant, and don’t hesitate to adjust your approach as needed.
Once you’ve successfully grown your own sage indoors, we’d love to hear about your experience! Share your tips, tricks, and photos in the comments below. Let’s create a community of indoor herb enthusiasts and inspire others to discover the joys of growing their own fresh ingredients. Happy gardening!
Frequently Asked Questions (FAQs)
What are the best sage varieties to grow indoors?
While common sage (Salvia officinalis) is a reliable choice for indoor growing, several other varieties thrive indoors as well. Consider these options:
* **Dwarf Sage:** This compact variety is perfect for smaller spaces and containers. It offers the same classic sage flavor but in a more manageable size.
* **Purple Sage:** Known for its striking purple foliage, purple sage adds a touch of visual interest to your indoor herb garden. Its flavor is similar to common sage but with a slightly milder taste.
* **Golden Sage:** This variety features variegated leaves with golden edges, making it a beautiful and flavorful addition to your collection. Its flavor is slightly sweeter than common sage.
* **Tricolor Sage:** As the name suggests, tricolor sage boasts leaves with a mix of green, white, and purple hues. It’s a visually stunning plant with a mild, slightly fruity flavor.
* **Berggarten Sage:** This German variety is known for its broad leaves and robust flavor. It’s a great choice for culinary use and is relatively easy to grow indoors.
When selecting a sage variety, consider your personal preferences for flavor, appearance, and space constraints.
How much sunlight does indoor sage need?
Sage thrives in bright, sunny conditions. Ideally, your indoor sage plant should receive at least 6-8 hours of direct sunlight per day. Place your plant near a south-facing window, if possible, as these windows typically provide the most sunlight. If you don’t have access to a south-facing window, an east- or west-facing window can also work, but you may need to supplement with artificial lighting.
If your sage plant isn’t getting enough sunlight, you may notice that its leaves are pale or leggy (stretched out). In this case, consider using a grow light to provide additional illumination. Fluorescent or LED grow lights are excellent options for indoor herb gardening. Position the grow light a few inches above the plant and keep it on for 12-14 hours per day.
How often should I water my indoor sage plant?
Proper watering is crucial for the health of your indoor sage plant. Sage prefers well-draining soil and doesn’t like to be constantly wet. Water your sage plant when the top inch of soil feels dry to the touch. Avoid overwatering, as this can lead to root rot.
When you water, water thoroughly until excess water drains out of the bottom of the pot. Be sure to discard any excess water that accumulates in the saucer to prevent the roots from sitting in water. During the winter months, when growth slows down, you may need to water less frequently.
What kind of soil is best for growing sage indoors?
Sage prefers well-draining soil that is slightly acidic to neutral (pH 6.0-7.0). A good potting mix for indoor sage should contain a blend of peat moss, perlite, and vermiculite. This combination provides good drainage, aeration, and moisture retention.
Avoid using garden soil for your indoor sage plant, as it can be too heavy and may not drain well. You can also amend your potting mix with compost to provide additional nutrients.
How do I fertilize my indoor sage plant?
Sage is not a heavy feeder, so you don’t need to fertilize it frequently. However, occasional fertilization can help promote healthy growth. Use a balanced liquid fertilizer diluted to half strength every 4-6 weeks during the growing season (spring and summer).
Avoid over-fertilizing, as this can lead to leggy growth and a decrease in flavor. During the winter months, when growth slows down, you can reduce or eliminate fertilization.
How do I prune my indoor sage plant?
Pruning is essential for maintaining the shape and health of your indoor sage plant. Regular pruning encourages bushier growth and prevents the plant from becoming leggy.
Pinch back the tips of the stems regularly to promote branching. You can also remove any dead or yellowing leaves. In the spring, you can prune your sage plant more heavily to remove any overgrown or woody stems.
When pruning, use clean, sharp scissors or pruning shears to avoid damaging the plant.
How do I harvest sage from my indoor plant?
You can start harvesting sage leaves from your indoor plant once it has reached a height of about 6 inches. To harvest, simply snip off the leaves or stems with clean scissors or pruning shears.
Harvest sage in the morning, after the dew has dried, for the best flavor. You can use fresh sage leaves immediately or dry them for later use. To dry sage, hang the stems upside down in a cool, dry place or use a dehydrator.
What are some common problems with growing sage indoors?
While growing sage indoors is relatively easy, you may encounter a few common problems:
* **Pests:** Aphids, spider mites, and whiteflies can sometimes infest indoor sage plants. Inspect your plant regularly for signs of pests and treat them promptly with insecticidal soap or neem oil.
* **Root Rot:** Overwatering can lead to root rot, which is a fungal disease that can kill your sage plant. Ensure that your plant is in well-draining soil and avoid overwatering.
* **Powdery Mildew:** This fungal disease can cause a white, powdery coating on the leaves of your sage plant. Improve air circulation around the plant and treat with a fungicide if necessary.
* **Leggy Growth:** Insufficient sunlight can cause your sage plant to become leggy. Provide your plant with more sunlight or supplement with artificial lighting.
By addressing these potential problems promptly, you can keep your indoor sage plant healthy and thriving.
Can I propagate sage from cuttings indoors?
Yes, propagating sage from cuttings is a great way to expand your indoor herb garden. Here’s how to do it:
1. Take a 4-6 inch cutting from a healthy sage plant, just below a leaf node.
2. Remove the lower leaves from the cutting.
3. Dip the cut end of the stem in rooting hormone (optional).
4. Plant the cutting in a small pot filled with well-draining potting mix.
5. Water the cutting thoroughly and cover the pot with a plastic bag or humidity dome to create a humid environment.
6. Place the cutting in a warm, bright location, but out of direct sunlight.
7. Keep the soil moist but not soggy.
8. After a few weeks, the cutting should develop roots. You can then transplant it into a larger pot.
Is growing sage indoors worth it?
Absolutely! Growing sage indoors offers numerous benefits, including:
* **Fresh, flavorful herbs:** Enjoy the taste of fresh sage year-round, regardless of the weather.
* **Convenience:** Have sage readily available whenever you need it for cooking or other uses.
* **Cost savings:** Save money by growing your own sage instead of buying it from the store.
* **Therapeutic benefits:** Tending to your sage plant can be a relaxing and rewarding activity.
* **Aesthetic appeal:** Add a touch of natural beauty to your indoor space.
With a little care and attention, you can successfully grow sage indoors and enjoy all of these benefits. So, what are you waiting for? Start growing your own sage


Leave a Comment