

Grow Garlic from Cloves: Unlock the secrets to a bountiful harvest right in your backyard! Have you ever dreamed of snipping fresh garlic straight from your garden, infusing your meals with unparalleled flavor? Well, dream no more! This DIY guide will empower you to cultivate your own thriving garlic patch, even if you’re a complete beginner.
Garlic, a culinary staple with roots stretching back thousands of years, has been revered for its medicinal properties and distinct taste across cultures. From ancient Egypt, where it fueled the pyramid builders, to the Mediterranean, where it’s a cornerstone of countless dishes, garlic’s legacy is undeniable. But you don’t need to be a seasoned farmer to enjoy the fruits (or rather, bulbs!) of your labor.
In today’s world, where fresh, locally sourced ingredients are increasingly valued, learning to grow garlic from cloves is more relevant than ever. Not only will you save money on store-bought garlic, but you’ll also have the satisfaction of knowing exactly where your food comes from and how it was grown. Plus, homegrown garlic boasts a flavor that far surpasses anything you’ll find on supermarket shelves. So, let’s dive in and discover the simple steps to transforming a single clove into a flourishing garlic plant!
Grow Your Own Garlic: A Beginner’s Guide to Planting and Harvesting
Hey there, fellow garden enthusiasts! I’m so excited to share my experience with growing garlic. It’s surprisingly easy, incredibly rewarding, and nothing beats the taste of homegrown garlic. Plus, you’ll never have to buy those sad, imported bulbs again! This guide will walk you through every step, from choosing your garlic to enjoying your bountiful harvest.
Choosing Your Garlic
Before we get our hands dirty, let’s talk garlic varieties. Not all garlic is created equal, and the type you choose will impact its flavor, storage life, and even how well it grows in your climate.
* Hardneck vs. Softneck: This is the big one. Hardneck garlic is generally more flavorful and cold-hardy, making it ideal for colder climates. It produces a flower stalk called a scape, which you can harvest and eat (more on that later!). Softneck garlic is better suited for warmer climates and has a longer storage life. It’s also the type you typically see braided.
* Local is Best: I always recommend sourcing your garlic from a local farmer’s market or nursery. They’ll have varieties that are well-suited to your specific region. Plus, you’ll be supporting local agriculture!
* Avoid Grocery Store Garlic: While tempting, grocery store garlic is often treated to prevent sprouting, which means it might not grow well. It also might be from a region with a very different climate, making it less likely to thrive in your garden.
* Look for Healthy Bulbs: Choose firm, plump bulbs with no signs of mold, rot, or damage. The cloves should be well-formed and easy to separate.
Preparing for Planting
Okay, you’ve got your garlic! Now, let’s get ready to plant.
* Timing is Key: Garlic is typically planted in the fall, about 4-6 weeks before the ground freezes. This allows the cloves to establish roots before winter sets in. In warmer climates, you can plant in late winter or early spring.
* Sunlight: Garlic needs at least 6 hours of sunlight per day. Choose a sunny spot in your garden.
* Soil: Garlic prefers well-drained, fertile soil. Amend your soil with compost or well-rotted manure to improve drainage and add nutrients.
* Soil pH: Aim for a soil pH between 6.0 and 7.0. You can test your soil pH with a simple soil testing kit.
* Preparing the Soil: Loosen the soil to a depth of at least 12 inches. This will allow the garlic roots to penetrate easily. Remove any rocks, weeds, or debris.
Planting Your Garlic
Alright, time to get those cloves in the ground!
1. Separate the Cloves: Gently separate the cloves from the bulb, being careful not to damage them. Plant only the largest, healthiest cloves. You can use the smaller cloves, but they may not produce as large of bulbs.
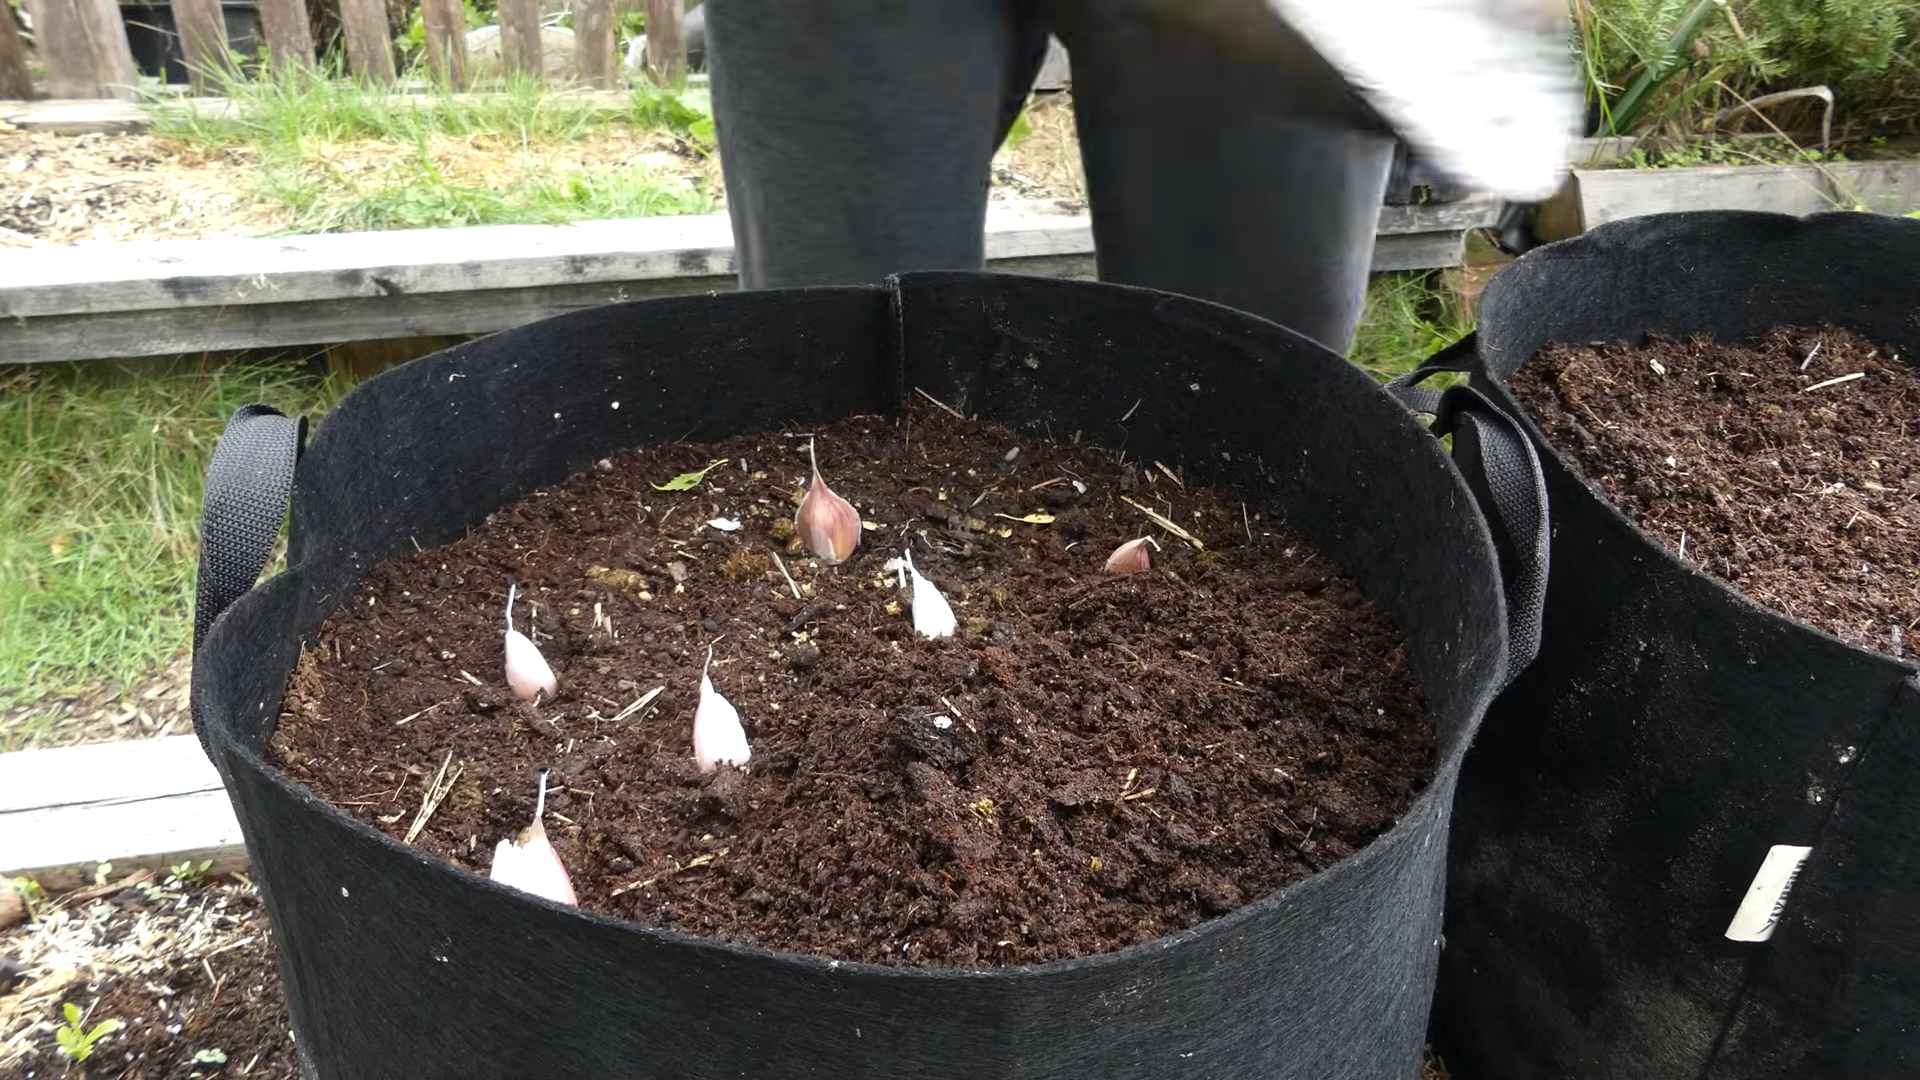
2. Planting Depth: Plant the cloves about 2 inches deep, pointed end up. The pointed end is where the sprout will emerge.
3. Spacing: Space the cloves about 6 inches apart in rows that are 12 inches apart. This gives the garlic plenty of room to grow.
4. Cover with Soil: Cover the cloves with soil and gently firm the soil around them.
5. Water Thoroughly: Water the planting area thoroughly to help settle the soil and encourage root growth.
6. Mulch: Apply a layer of mulch, such as straw or shredded leaves, to help retain moisture, suppress weeds, and protect the garlic from extreme temperatures. A 4-6 inch layer is ideal.
Caring for Your Garlic
Now that your garlic is planted, it’s time to provide it with the care it needs to thrive.
* Watering: Garlic needs consistent moisture, especially during the spring growing season. Water deeply whenever the top inch of soil feels dry. Avoid overwatering, as this can lead to rot.
* Weeding: Keep the planting area free of weeds, as they can compete with the garlic for nutrients and water. Hand-pull weeds carefully to avoid disturbing the garlic roots.
* Fertilizing: Garlic is a heavy feeder, so it benefits from regular fertilization. In the spring, when the garlic starts to actively grow, fertilize with a balanced fertilizer or a nitrogen-rich fertilizer. Follow the instructions on the fertilizer label. I like to use fish emulsion or compost tea.
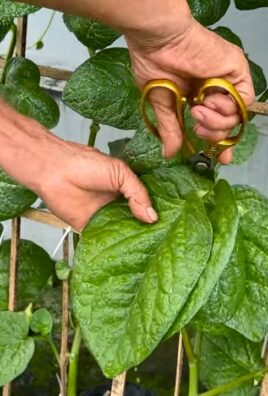
* Removing Scapes (Hardneck Garlic): If you’re growing hardneck garlic, you’ll notice a flower stalk (scape) emerging in the spring. It’s important to remove these scapes to encourage bulb growth. Simply snap them off where they meet the plant. Don’t throw them away! Scapes are delicious and can be used in pesto, stir-fries, or grilled.
* Pest and Disease Control: Garlic is generally pest-resistant, but it can be susceptible to certain pests and diseases, such as onion maggots and white rot. Inspect your plants regularly for signs of problems. If you notice any issues, take action promptly. Organic pest control methods, such as insecticidal soap or neem oil, can be effective.
Harvesting Your Garlic
The moment we’ve all been waiting for! Harvesting your homegrown garlic is incredibly satisfying.
* Timing: Garlic is typically ready to harvest in mid-summer, about 8-9 months after planting. The leaves will start to turn yellow and brown, and the stems will begin to fall over. This is a sign that the bulbs are mature.
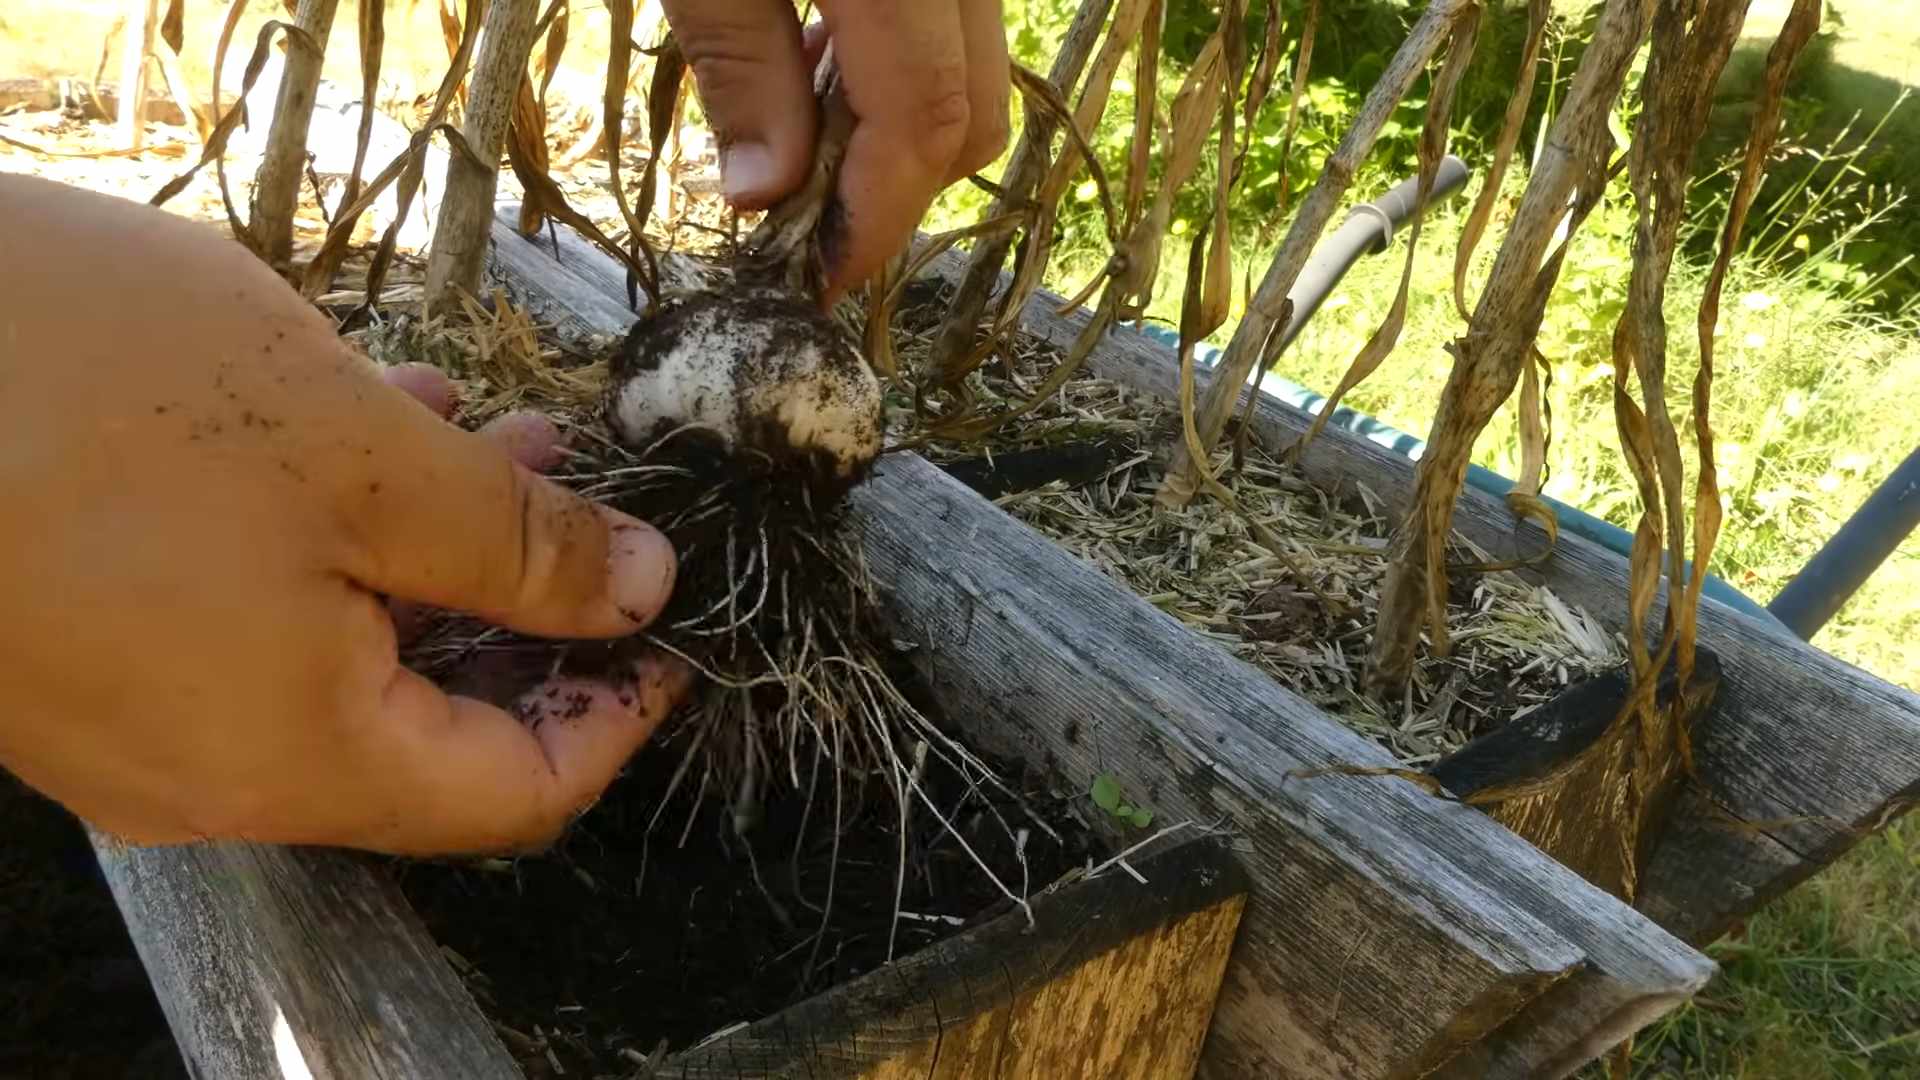
* Checking for Readiness: To check if your garlic is ready to harvest, carefully dig up a bulb. The bulb should be well-formed and the cloves should be plump and easy to separate.
* Harvesting: Use a garden fork or shovel to carefully lift the garlic bulbs from the soil. Be gentle to avoid bruising the bulbs.
* Cleaning: Gently brush off any excess soil from the bulbs. Avoid washing them, as this can promote rot.
* Curing: Curing is essential for extending the storage life of your garlic. Tie the garlic plants together in bundles of 4-6 bulbs and hang them in a cool, dry, well-ventilated place for 2-4 weeks. You can also spread the bulbs out on a screen or rack.
* Trimming: Once the garlic is cured, trim the roots and stems. Leave about 1-2 inches of stem attached to the bulb.
* Storage: Store your cured garlic in a cool, dry, dark place. A temperature between 60-70°F (15-21°C) is ideal. Properly cured garlic can last for several months.
Enjoying Your Harvest
Congratulations! You’ve successfully grown your own garlic. Now it’s time to enjoy the fruits (or rather, bulbs) of your labor.
* Cooking: Use your homegrown garlic in all your favorite recipes. It’s delicious roasted, sautéed, or added to sauces, soups, and stews.
* Preserving: You can preserve your garlic by pickling it, making garlic confit, or freezing it.
* Saving for Next Year: Save some of your best bulbs to plant next year. This will ensure that you have a continuous supply of homegrown garlic.
Troubleshooting
Even with the best care, you might encounter some challenges along the way. Here are a few common problems and how to address them:
* Small Bulbs: Small bulbs can be caused by several factors, including poor soil, insufficient sunlight, or inadequate watering. Make sure your garlic is planted in well-drained, fertile soil, receives at least 6 hours of sunlight per day, and is watered regularly.
* Rotting Bulbs: Rotting bulbs are usually caused by overwatering or poor drainage. Make sure your soil is well-drained and avoid overwatering.
* Pests and Diseases: Inspect your plants regularly for signs of pests and diseases. Take action promptly to address any issues.
Additional Tips and Tricks
* Companion Planting: Garlic is a great companion plant for many vegetables, including tomatoes, peppers, and eggplant. It can help repel pests and improve the flavor of these vegetables.
* Succession Planting: Plant garlic in succession to extend your harvest season. Plant a few cloves every few weeks to ensure a continuous supply of fresh garlic.
* Experiment with Varieties: Try growing different varieties of garlic to find your favorites. Each variety has its own unique flavor and characteristics.
* Garlic Greens: Don’t throw away the green shoots that emerge from the garlic cloves. These greens are edible and can be used in salads, stir-fries, or as a garnish. They have a mild garlic flavor.
* Garlic Powder: You can make your own garlic powder by dehydrating garlic cloves and then grinding them into a powder.
Growing garlic is a rewarding experience that
Conclusion
So, there you have it! Growing garlic from cloves isn’t just a gardening project; it’s an investment in flavor, sustainability, and a deeper connection to the food you eat. Forget those bland, imported bulbs from the supermarket. Imagine the satisfaction of harvesting your own plump, pungent garlic, bursting with a taste that store-bought varieties simply can’t match. This DIY trick is a game-changer for any home cook or gardening enthusiast.
Why is this a must-try? Because it’s incredibly rewarding, surprisingly easy, and yields a product far superior to what you can typically find in stores. You control the growing conditions, ensuring your garlic is free from unwanted chemicals and packed with the robust flavor you crave. Plus, it’s a fantastic way to reduce your carbon footprint and support local, sustainable practices, even if your “local” is just your backyard!
But the beauty of growing garlic from cloves lies in its adaptability. Feel free to experiment! Try different varieties of garlic to discover your favorite flavor profile. Some varieties are known for their intense heat, while others offer a milder, sweeter taste. Consider planting in raised beds for improved drainage, or even in containers if you’re short on space. You can also try companion planting with herbs like rosemary or thyme, which are said to deter pests and enhance the garlic’s flavor.
Don’t be afraid to get your hands dirty and embrace the process. From the initial planting to the triumphant harvest, growing garlic from cloves is an experience that will connect you to the earth and reward you with a bounty of deliciousness.
We wholeheartedly encourage you to give this DIY trick a try. It’s a simple yet profound way to elevate your cooking and connect with nature. And most importantly, we want to hear about your experience! Share your photos, tips, and triumphs in the comments below. Let’s build a community of garlic growers and spread the word about the joys of homegrown flavor. What variety did you choose? What challenges did you face? What amazing dishes did you create with your homegrown garlic? We can’t wait to hear your stories! Let’s all become garlic aficionados together!
Frequently Asked Questions (FAQs)
Q: What kind of garlic should I plant?
A: There are two main types of garlic: hardneck and softneck. Hardneck varieties are generally more flavorful and cold-hardy, making them ideal for colder climates. They also produce scapes, which are edible flower stalks that can be used in stir-fries or pesto. Softneck varieties are better suited for warmer climates and have a longer storage life. They are also the type typically braided. Within these two categories, there are countless varieties, each with its own unique flavor profile. Elephant garlic, while often called garlic, is actually more closely related to leeks and has a milder flavor. Experiment to find your favorite!
Q: When is the best time to plant garlic?
A: The best time to plant garlic is typically in the fall, about 4-6 weeks before the ground freezes. This allows the cloves to establish roots before winter sets in. In warmer climates, you can plant in late fall or early winter. The key is to give the cloves enough time to develop roots but not enough time to sprout above ground before the cold weather arrives.
Q: How do I prepare the soil for planting garlic?
A: Garlic prefers well-drained soil that is rich in organic matter. Before planting, amend the soil with compost or well-rotted manure. This will provide the garlic with the nutrients it needs to thrive. Ensure the soil is loose and free of rocks or debris. A slightly acidic to neutral pH is ideal.
Q: How deep and how far apart should I plant the garlic cloves?
A: Plant the garlic cloves about 2 inches deep, with the pointed end facing up. Space the cloves about 6-8 inches apart in rows that are 12-18 inches apart. This will give the garlic enough room to grow and prevent overcrowding.
Q: How much water does garlic need?
A: Garlic needs consistent moisture, especially during the spring when it is actively growing. Water deeply whenever the soil feels dry to the touch. Avoid overwatering, as this can lead to rot. During the winter, garlic needs very little water.
Q: How do I know when the garlic is ready to harvest?
A: Garlic is typically ready to harvest in mid-summer, when the lower leaves start to turn yellow and brown. Don’t wait until all the leaves have died back, as this can indicate that the bulbs are overripe. To harvest, carefully loosen the soil around the bulb and gently pull it out of the ground.
Q: How do I cure garlic after harvesting?
A: Curing garlic is essential for extending its storage life. After harvesting, brush off any excess dirt and allow the bulbs to dry in a well-ventilated area for 2-3 weeks. You can hang the bulbs in bunches or spread them out on a screen. Once the necks are dry and the outer skins are papery, you can trim the roots and stalks and store the garlic in a cool, dry place.
Q: Can I grow garlic in containers?
A: Yes, you can grow garlic in containers! Choose a large container that is at least 12 inches deep and wide. Use a well-draining potting mix and follow the same planting instructions as you would for growing garlic in the ground. Container-grown garlic may need more frequent watering and fertilization.
Q: What are some common pests and diseases that affect garlic?
A: Some common pests that affect garlic include onion maggots, nematodes, and thrips. Diseases include white rot, downy mildew, and rust. To prevent these problems, practice good crop rotation, use disease-free planting material, and avoid overwatering. You can also use organic pest control methods, such as neem oil or insecticidal soap.
Q: Can I eat the garlic scapes?
A: Yes! Garlic scapes are the curly flower stalks that grow from hardneck garlic varieties. They have a mild garlic flavor and can be used in a variety of dishes, such as stir-fries, pesto, and soups. Harvest the scapes when they are still tender and before they start to curl too tightly. Cutting off the scapes also encourages the plant to put more energy into bulb development.
Leave a Comment