

Homemade Peroxide Cleaners: Unleash the Sparkling Power Within Your Reach!
Have you ever looked at those store-bought cleaners, brimming with mysterious chemicals, and wondered if there was a better, simpler way? I know I have! For generations, resourceful folks have been harnessing the power of everyday ingredients to keep their homes sparkling clean. Think of your grandmother’s secret cleaning recipes, passed down through the family – often involving simple, effective solutions. Today, we’re diving into one of the most versatile and eco-friendly options out there: homemade peroxide cleaners.
Why should you ditch the harsh chemicals and embrace the DIY approach? Well, for starters, it’s incredibly cost-effective! Plus, you know exactly what’s going into your cleaners, making them safer for your family, pets, and the environment. But the real magic lies in the effectiveness. Hydrogen peroxide is a fantastic disinfectant, deodorizer, and stain remover. It’s a powerhouse ingredient that can tackle everything from grimy countertops to stubborn bathroom stains.
In this article, I’m going to share my favorite homemade peroxide cleaners recipes and tricks that will transform your cleaning routine. Get ready to unlock a world of sparkling clean, all while saving money and protecting our planet. Let’s get started!
Homemade Peroxide Cleaners: Your Guide to Sparkling Clean Without the Harsh Chemicals
Hey there, fellow DIY enthusiasts! I’m so excited to share my favorite homemade peroxide cleaner recipes with you. I’ve been using these for years, and they’re not only incredibly effective but also much gentler on the environment (and my wallet!) than many store-bought options. Peroxide, or hydrogen peroxide (H2O2), is a fantastic disinfectant, deodorizer, and stain remover. Just remember to always test in an inconspicuous area first, especially on colored fabrics or delicate surfaces. Let’s get started!
Understanding Hydrogen Peroxide
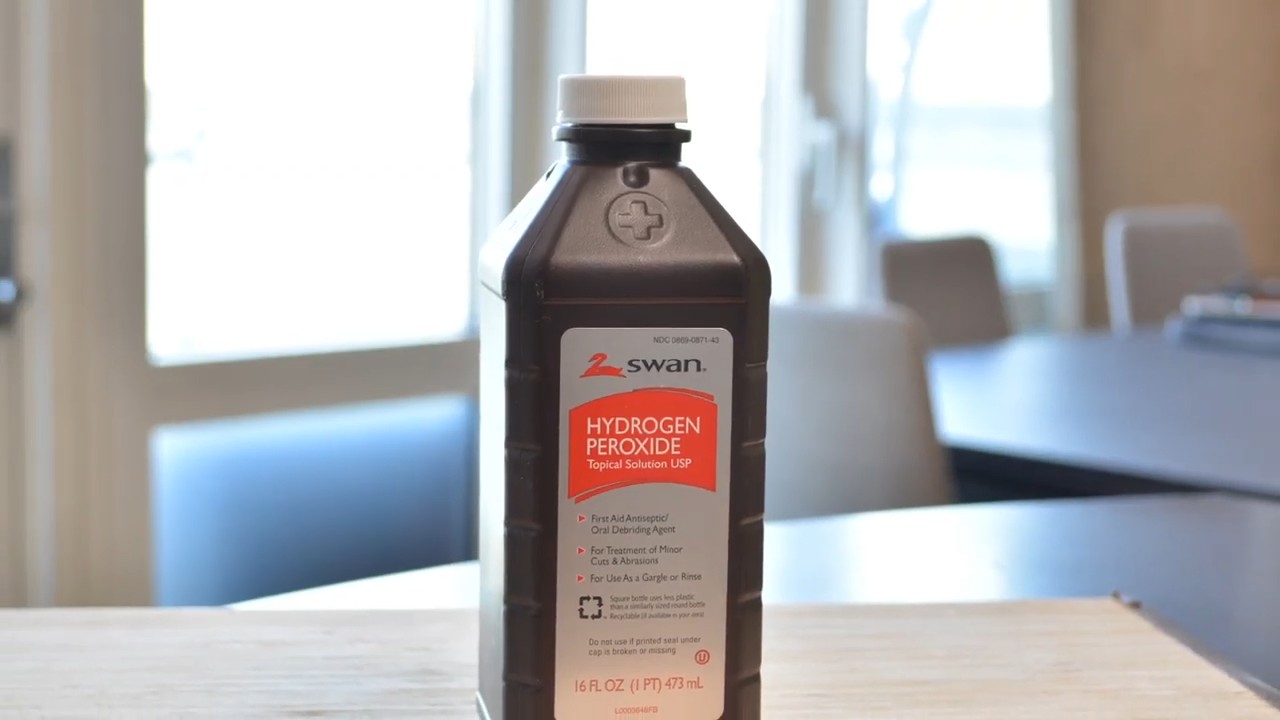
Before we dive into the recipes, let’s quickly cover the basics. You’ll typically find hydrogen peroxide in a 3% solution at your local drugstore. This is the concentration we’ll be using for most of these cleaners. Higher concentrations are available, but they require extra caution and are generally not necessary for household cleaning. Always store hydrogen peroxide in a dark, cool place, as light degrades it. And, of course, keep it out of reach of children and pets.
General Safety Tips
* Always wear gloves: While 3% hydrogen peroxide is relatively mild, it can still irritate your skin with prolonged exposure.
* Avoid mixing with vinegar or bleach: Mixing hydrogen peroxide with vinegar can create peracetic acid, which can be irritating and potentially harmful. Mixing it with bleach creates chlorine gas, which is extremely dangerous.
* Test in an inconspicuous area: Before applying any of these cleaners to a large surface, test it on a small, hidden area to ensure it doesn’t cause discoloration or damage.
* Use proper ventilation: While these cleaners are generally safe, it’s always a good idea to open a window or turn on a fan when cleaning, especially in enclosed spaces.
* Store properly: Keep hydrogen peroxide in its original dark bottle, away from light and heat.
Recipe 1: All-Purpose Peroxide Cleaner
This is my go-to cleaner for just about everything! It’s great for countertops, sinks, toilets, and even floors (just make sure to test it first on your flooring).
What you’ll need:
* Spray bottle
* 3% hydrogen peroxide
* Water
* Optional: A few drops of your favorite essential oil (lemon, tea tree, and lavender are great choices)
Step-by-step instructions:
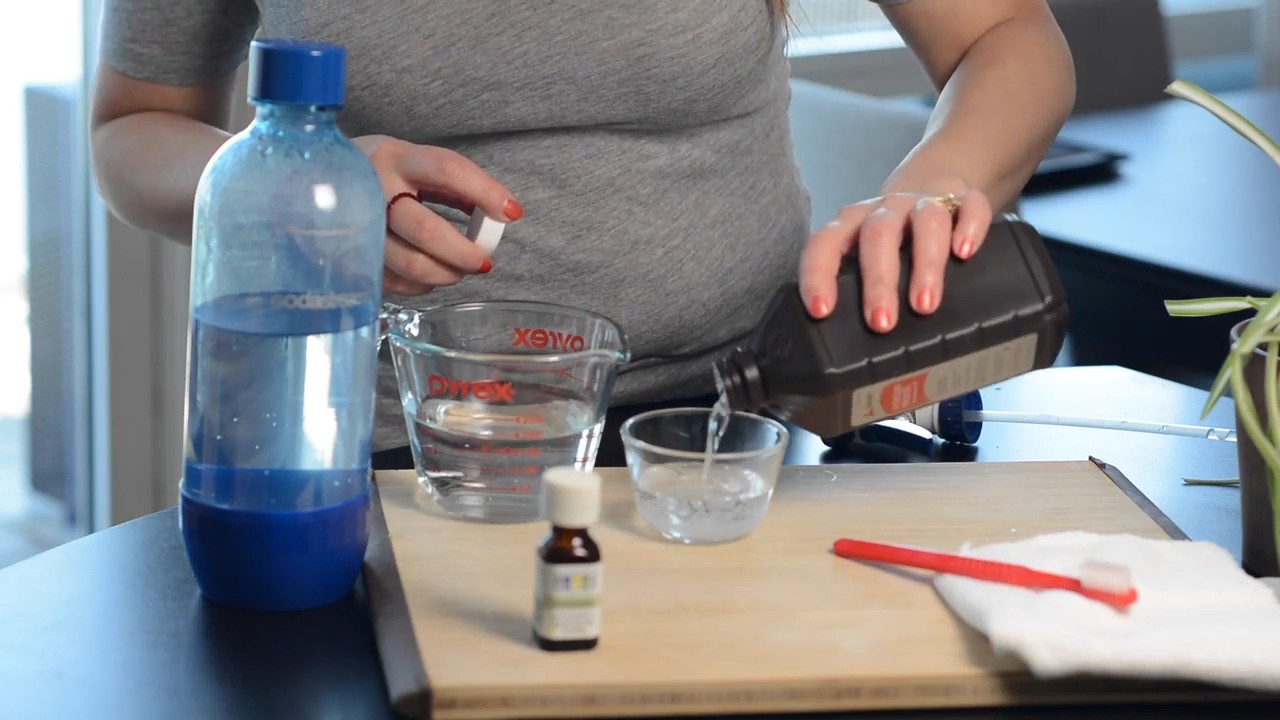
1. Prepare the bottle: Make sure your spray bottle is clean and empty.
2. Mix the solution: Pour equal parts hydrogen peroxide and water into the spray bottle. I usually do a 50/50 mix.
3. Add essential oils (optional): If you’re using essential oils, add a few drops (5-10) to the mixture. This will give your cleaner a pleasant scent and can also add extra antibacterial properties.
4. Shake well: Close the spray bottle tightly and shake well to combine all the ingredients.
5. Spray and wipe: Spray the cleaner onto the surface you want to clean and let it sit for a few minutes. Then, wipe it clean with a damp cloth or sponge.
Recipe 2: Peroxide Toilet Bowl Cleaner
This is a simple yet effective way to disinfect and deodorize your toilet bowl.
What you’ll need:
* 3% hydrogen peroxide
Step-by-step instructions:
1. Pour peroxide into the bowl: Pour about 1/2 cup of hydrogen peroxide directly into the toilet bowl.
2. Let it sit: Let the peroxide sit for at least 30 minutes, or even overnight for a deeper clean.
3. Scrub and flush: After the soaking time, scrub the bowl with a toilet brush and flush.
Recipe 3: Peroxide Laundry Booster
Hydrogen peroxide is a fantastic laundry booster that can help brighten whites and remove stains.
What you’ll need:
* 3% hydrogen peroxide
Step-by-step instructions:
1. Add to the washing machine: Add 1 cup of hydrogen peroxide to your washing machine along with your regular laundry detergent. Pour it directly into the drum or the bleach dispenser.
2. Wash as usual: Wash your clothes as usual.
3. Important note: This is best for white or light-colored clothes. Test on an inconspicuous area of colored fabrics before using.
Recipe 4: Peroxide Stain Remover
This is my secret weapon for tackling tough stains like blood, grass, and wine.
What you’ll need:
* 3% hydrogen peroxide
* Spray bottle or small bowl
* Clean cloth or sponge
Step-by-step instructions:
1. Test the fabric: As always, test the hydrogen peroxide on an inconspicuous area of the fabric to make sure it doesn’t cause discoloration.
2. Apply to the stain: Spray or pour a small amount of hydrogen peroxide directly onto the stain.
3. Let it sit: Let the peroxide sit for 5-10 minutes.
4. Blot the stain: Gently blot the stain with a clean cloth or sponge, working from the outside in.
5. Rinse and wash: Rinse the treated area with cold water and then wash the item as usual.
Recipe 5: Peroxide Mold and Mildew Remover
Hydrogen peroxide is a great alternative to bleach for removing mold and mildew.
What you’ll need:
* 3% hydrogen peroxide
* Spray bottle
* Scrub brush or sponge
* Clean cloth
Step-by-step instructions:
1. Spray the affected area: Spray the mold or mildew-affected area with hydrogen peroxide, making sure to saturate the surface.
2. Let it sit: Let the peroxide sit for 10-15 minutes.
3. Scrub the area: Scrub the area with a scrub brush or sponge to remove the mold and mildew.
4. Wipe clean: Wipe the area clean with a damp cloth.
5. Repeat if necessary: If the mold or mildew is stubborn, repeat the process.
Recipe 6: Peroxide Toothbrush Sanitizer
Keep your toothbrush clean and germ-free with this simple sanitizer.
What you’ll need:
* 3% hydrogen peroxide
* Small cup or glass
Step-by-step instructions:
1. Pour peroxide into the cup: Pour enough hydrogen peroxide into the cup to cover the bristles of your toothbrush.
2. Soak the toothbrush: Place your toothbrush in the cup, bristles down, and let it soak for 5-10 minutes.
3. Rinse thoroughly: Rinse your toothbrush thoroughly with water before using.
Recipe 7: Peroxide Cutting Board Sanitizer
Cutting boards can harbor bacteria, so it’s important to sanitize them regularly.
What you’ll need:
* 3% hydrogen peroxide
* Spray bottle
* Clean cloth
Step-by-step instructions:
1. Spray the cutting board: Spray the entire surface of the cutting board with hydrogen peroxide.
2. Let it sit: Let the peroxide sit for 5-10 minutes.
3. Wipe clean: Wipe the cutting board clean with a damp cloth.
Recipe 8: Peroxide Fruit and Vegetable Wash
Remove pesticides and dirt from your fruits and vegetables with this simple wash.
What you’ll need:
* 3% hydrogen peroxide
* Water
* Large bowl
Step-by-step instructions:
1. Fill the bowl with water: Fill a large bowl with cold water.
2. Add peroxide: Add 1/4 cup of hydrogen peroxide to the water.
3. Soak the produce: Place your fruits and vegetables in the bowl and let them soak for 15-20 minutes.
4. Rinse thoroughly: Rinse the produce thoroughly with water before eating.
Recipe 9: Peroxide Grout Cleaner
Grout can be a pain to clean, but hydrogen peroxide can help loosen dirt and grime.
What you’ll need:
* 3% hydrogen peroxide
* Spray bottle
* Old toothbrush or grout brush
Step-by-step instructions:
1. Spray the grout: Spray the grout lines with hydrogen peroxide.
2. Let it sit: Let the peroxide sit for 10-15 minutes.
3. Scrub the grout: Scrub the grout lines with an old toothbrush or grout brush.
4. Wipe clean: Wipe the grout clean with a damp cloth.
Recipe 10: Peroxide Mirror and Window Cleaner
Get streak-free mirrors and windows with this simple cleaner.
What you’ll need:
* 3% hydrogen peroxide
Conclusion
So, there you have it! Ditching the harsh chemicals and embracing the power of homemade peroxide cleaners is not just a trend; it’s a smarter, safer, and often more effective way to tackle household grime. We’ve explored several fantastic recipes, each tailored to specific cleaning needs, and hopefully, you’re feeling inspired to give them a try.
Why is this a must-try? Because you’re taking control of what you bring into your home. You know exactly what’s in your cleaning solutions, avoiding potentially harmful ingredients that can irritate skin, trigger allergies, or even pose long-term health risks. Plus, you’re saving money! Hydrogen peroxide is incredibly affordable, and when combined with common household staples like vinegar, baking soda, and essential oils, you can create powerful cleaning agents for a fraction of the cost of store-bought alternatives.
But the benefits don’t stop there. Homemade peroxide cleaners are often more environmentally friendly. You’re reducing your reliance on plastic packaging and minimizing the release of harsh chemicals into the environment. It’s a win-win for your home and the planet.
Ready to experiment? Consider these variations to personalize your cleaning experience:
* **For a citrus boost:** Add a few drops of lemon, orange, or grapefruit essential oil to your all-purpose peroxide cleaner for a refreshing scent and added cleaning power. Citrus oils are known for their degreasing properties.
* **For extra scrubbing power:** When cleaning stubborn stains on surfaces like grout or tile, create a paste of baking soda and hydrogen peroxide. Apply the paste, let it sit for a few minutes, then scrub with a brush.
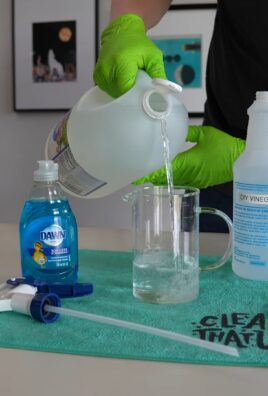
* **For a natural disinfectant:** Combine equal parts hydrogen peroxide and white vinegar in separate spray bottles. Spray one after the other, allowing each to sit for a few minutes before wiping clean. *Never mix them together in the same container.*
* **For laundry stain removal:** Pre-treat stains on white or light-colored clothing with a solution of hydrogen peroxide and water before washing. Test on an inconspicuous area first to ensure colorfastness.
* **For a gentle floor cleaner:** Dilute hydrogen peroxide with water and a small amount of dish soap to create a safe and effective floor cleaner for tile, linoleum, and other non-porous surfaces.
We truly believe that once you experience the effectiveness and peace of mind that comes with using homemade peroxide cleaners, you’ll never go back to harsh commercial products. It’s a simple change that can make a big difference in your health, your wallet, and the environment.
So, what are you waiting for? Gather your ingredients, choose a recipe, and get cleaning! We’re confident you’ll be amazed by the results.
Don’t forget to share your experience! We’d love to hear about your favorite homemade peroxide cleaner recipes, any variations you’ve tried, and the cleaning challenges you’ve conquered. Share your tips and tricks in the comments below, and let’s build a community of eco-conscious cleaners! Let us know what worked for you and what didn’t. Your feedback will help others discover the amazing benefits of homemade cleaning solutions.
Frequently Asked Questions (FAQs)
Is hydrogen peroxide safe to use for cleaning?
Yes, hydrogen peroxide is generally safe to use for cleaning when handled properly. It’s a non-toxic alternative to many harsh chemicals found in commercial cleaners. However, it’s important to use it with caution. Always wear gloves to protect your skin, and avoid getting it in your eyes. If contact occurs, rinse immediately with plenty of water. Never mix hydrogen peroxide with bleach, as this can create toxic fumes. Store hydrogen peroxide in a dark, cool place, away from children and pets.
What is the best concentration of hydrogen peroxide to use for cleaning?
The standard concentration of hydrogen peroxide sold in drugstores is 3% which is ideal for most household cleaning tasks. Higher concentrations, such as 6% or 35%, are available but should be handled with extreme care and diluted appropriately. For general cleaning, stick with the 3% solution.
Can I use hydrogen peroxide on all surfaces?
While hydrogen peroxide is generally safe for most surfaces, it’s always a good idea to test it in an inconspicuous area first, especially on delicate or porous materials. Avoid using it on natural stone surfaces like marble or granite, as it can potentially etch or discolor them. It’s also best to avoid using it on colored fabrics without testing, as it can have a bleaching effect.
How long does hydrogen peroxide last?
Hydrogen peroxide has a relatively long shelf life, but it can degrade over time, especially when exposed to light and heat. Store it in a dark, cool place, and it should remain effective for several months. To test its potency, pour a small amount into a sink and see if it fizzes. If it doesn’t fizz, it may have lost some of its effectiveness.
Can I mix hydrogen peroxide with vinegar?
Yes, you can use hydrogen peroxide and vinegar for cleaning, but *never mix them together in the same container.* Mixing them can create peracetic acid, which can be irritating to the eyes, skin, and respiratory system. Instead, use them sequentially. Spray one solution, let it sit for a few minutes, then wipe clean before spraying the other solution. This method allows you to harness the individual cleaning power of each ingredient without creating harmful fumes.
What are some common uses for homemade peroxide cleaners?
Homemade peroxide cleaners can be used for a wide range of cleaning tasks, including:
* Disinfecting countertops and cutting boards
* Cleaning bathrooms, including toilets, sinks, and showers
* Removing stains from clothing and carpets
* Cleaning floors
* Freshening up sponges and dishcloths
* Cleaning and disinfecting toothbrushes
* Whitening grout
* Cleaning mirrors and windows
Are homemade peroxide cleaners safe for pets and children?
While homemade peroxide cleaners are generally safer than commercial cleaners, it’s still important to take precautions when using them around pets and children. Keep them out of reach when cleaning, and ensure that surfaces are thoroughly dry before allowing pets or children to come into contact with them. If you’re concerned about potential exposure, consider using a diluted solution or opting for other natural cleaning alternatives.
Can I add essential oils to my homemade peroxide cleaners?
Yes, adding essential oils to your homemade peroxide cleaners can enhance their cleaning power and provide a pleasant scent. Some popular essential oils for cleaning include lemon, tea tree, lavender, eucalyptus, and peppermint. Add a few drops of your favorite essential oil to your cleaning solution, but be sure to research the safety of each oil before using it around pets and children.
How do I dispose of homemade peroxide cleaners?
Homemade peroxide cleaners can be safely disposed of down the drain. Simply flush the remaining solution with plenty of water. Avoid pouring large quantities of undiluted hydrogen peroxide down the drain, as it can potentially harm septic systems.
What if my homemade peroxide cleaner doesn’t seem to be working?
If your homemade peroxide cleaner isn’t working as effectively as you’d like, consider these tips:
* Make sure you’re using the correct concentration of hydrogen peroxide.
* Allow the solution to sit on the surface for a few minutes before wiping it clean.
* Use a scrub brush or sponge to agitate stubborn stains.
* Try a different recipe or variation.
* Ensure that the surface is properly prepared before cleaning (e.g., removing loose debris).
* Consider using a stronger cleaning agent for particularly challenging stains.
Remember, homemade peroxide cleaners are a great way to clean your home naturally and effectively. By following these tips and FAQs, you can enjoy a cleaner, healthier home without the harsh chemicals.

Leave a Comment