

Growing Kale at Home can seem daunting, but trust me, it’s easier than you think! Have you ever dreamed of stepping into your backyard and harvesting fresh, vibrant kale for a healthy smoothie or a delicious salad? I know I have, and let me tell you, the feeling of accomplishment is incredible. This isn’t just about gardening; it’s about connecting with nature and nourishing your body with homegrown goodness.
Kale, a nutritional powerhouse, has a rich history dating back to ancient Greece and Rome, where it was a staple food. Over centuries, it has spread across the globe, becoming a symbol of health and vitality. But in today’s fast-paced world, accessing fresh, organic produce can be a challenge. That’s where the magic of home gardening comes in!
Many people are intimidated by the idea of gardening, thinking it requires vast spaces or expert knowledge. But the truth is, growing kale at home can be done in small spaces, even on a balcony or patio. And with a few simple DIY tricks and hacks, you can enjoy a bountiful harvest without breaking the bank. This article will guide you through the entire process, from selecting the right kale variety to protecting your plants from pests. So, grab your gardening gloves, and let’s get started on this exciting journey together!
Growing Kale at Home: A Beginner’s Guide
Hey there, fellow gardening enthusiasts! I’m so excited to share my experience with growing kale at home. It’s surprisingly easy, incredibly rewarding, and gives you access to fresh, nutritious greens right in your backyard (or even on your balcony!). Kale is a superfood powerhouse, packed with vitamins and minerals, and it’s incredibly versatile in the kitchen. So, let’s dive into how you can cultivate your own kale patch!
Choosing Your Kale Variety
Before we get our hands dirty, let’s talk kale varieties. There are so many to choose from, each with its own unique flavor and texture. Here are a few of my favorites:
* **Curly Kale:** This is the classic kale you probably see most often in the grocery store. It has tightly curled leaves and a slightly bitter flavor that mellows out when cooked.
* **Lacinato Kale (Dinosaur Kale):** Also known as Tuscan kale or cavolo nero, this variety has long, dark green, almost black leaves with a slightly bumpy texture. It has a milder, sweeter flavor than curly kale.
* **Red Russian Kale:** This variety has flat, fringed leaves with reddish-purple stems. It’s known for its tender leaves and slightly sweet, nutty flavor.
* **Redbor Kale:** This is a beautiful ornamental kale with deeply ruffled, purple leaves. It’s just as edible as other varieties and adds a pop of color to your garden.
I recommend trying a few different varieties to see which ones you like best!
Starting from Seed vs. Buying Seedlings
You have two main options for starting your kale: from seed or from seedlings (also called transplants). Both have their pros and cons:
* **Starting from Seed:** This is the more economical option, and it gives you more control over the entire growing process. However, it requires a bit more time and effort. You’ll need to start your seeds indoors a few weeks before the last frost or direct sow them in your garden after the danger of frost has passed.
* **Buying Seedlings:** This is the easier and faster option. You can find kale seedlings at most garden centers in the spring. However, it’s generally more expensive than starting from seed, and you may have fewer variety choices.
I personally prefer starting from seed because I enjoy the process and I like having more control over the varieties I grow. But if you’re short on time or just want a head start, buying seedlings is a perfectly fine option.
Preparing Your Garden Bed
Kale thrives in well-drained soil that is rich in organic matter. Here’s how I prepare my garden bed for kale:
1. **Choose a Sunny Location:** Kale needs at least 6 hours of sunlight per day.
2. **Clear the Area:** Remove any weeds, rocks, or debris from the area where you plan to plant your kale.
3. **Amend the Soil:** Kale prefers a slightly acidic to neutral soil pH (around 6.0 to 7.0). You can test your soil pH with a soil testing kit. If your soil is too acidic, you can add lime to raise the pH. If it’s too alkaline, you can add sulfur to lower the pH.
4. **Add Compost:** Mix in plenty of compost or other organic matter to improve the soil’s drainage, fertility, and water-holding capacity. I usually add a few inches of compost to my garden bed and work it into the top 6-8 inches of soil.
5. **Till or Dig:** Till the soil to a depth of about 8-12 inches to loosen it up and make it easier for the kale roots to grow. If you prefer not to till, you can use a garden fork or shovel to dig and loosen the soil.
Planting Your Kale
Now comes the fun part: planting your kale!
Planting Seeds
1. **Sow Seeds:** Sow kale seeds about 1/2 inch deep and 1-2 inches apart in rows.
2. **Water Gently:** Water the seeds gently to avoid washing them away.
3. **Keep Soil Moist:** Keep the soil consistently moist until the seeds germinate, which usually takes about 5-10 days.
4. **Thin Seedlings:** Once the seedlings have developed a few true leaves, thin them to about 12-18 inches apart. This will give them enough room to grow and mature.
Planting Seedlings
1. **Dig Holes:** Dig holes that are slightly larger than the root balls of your kale seedlings. Space the holes 12-18 inches apart.
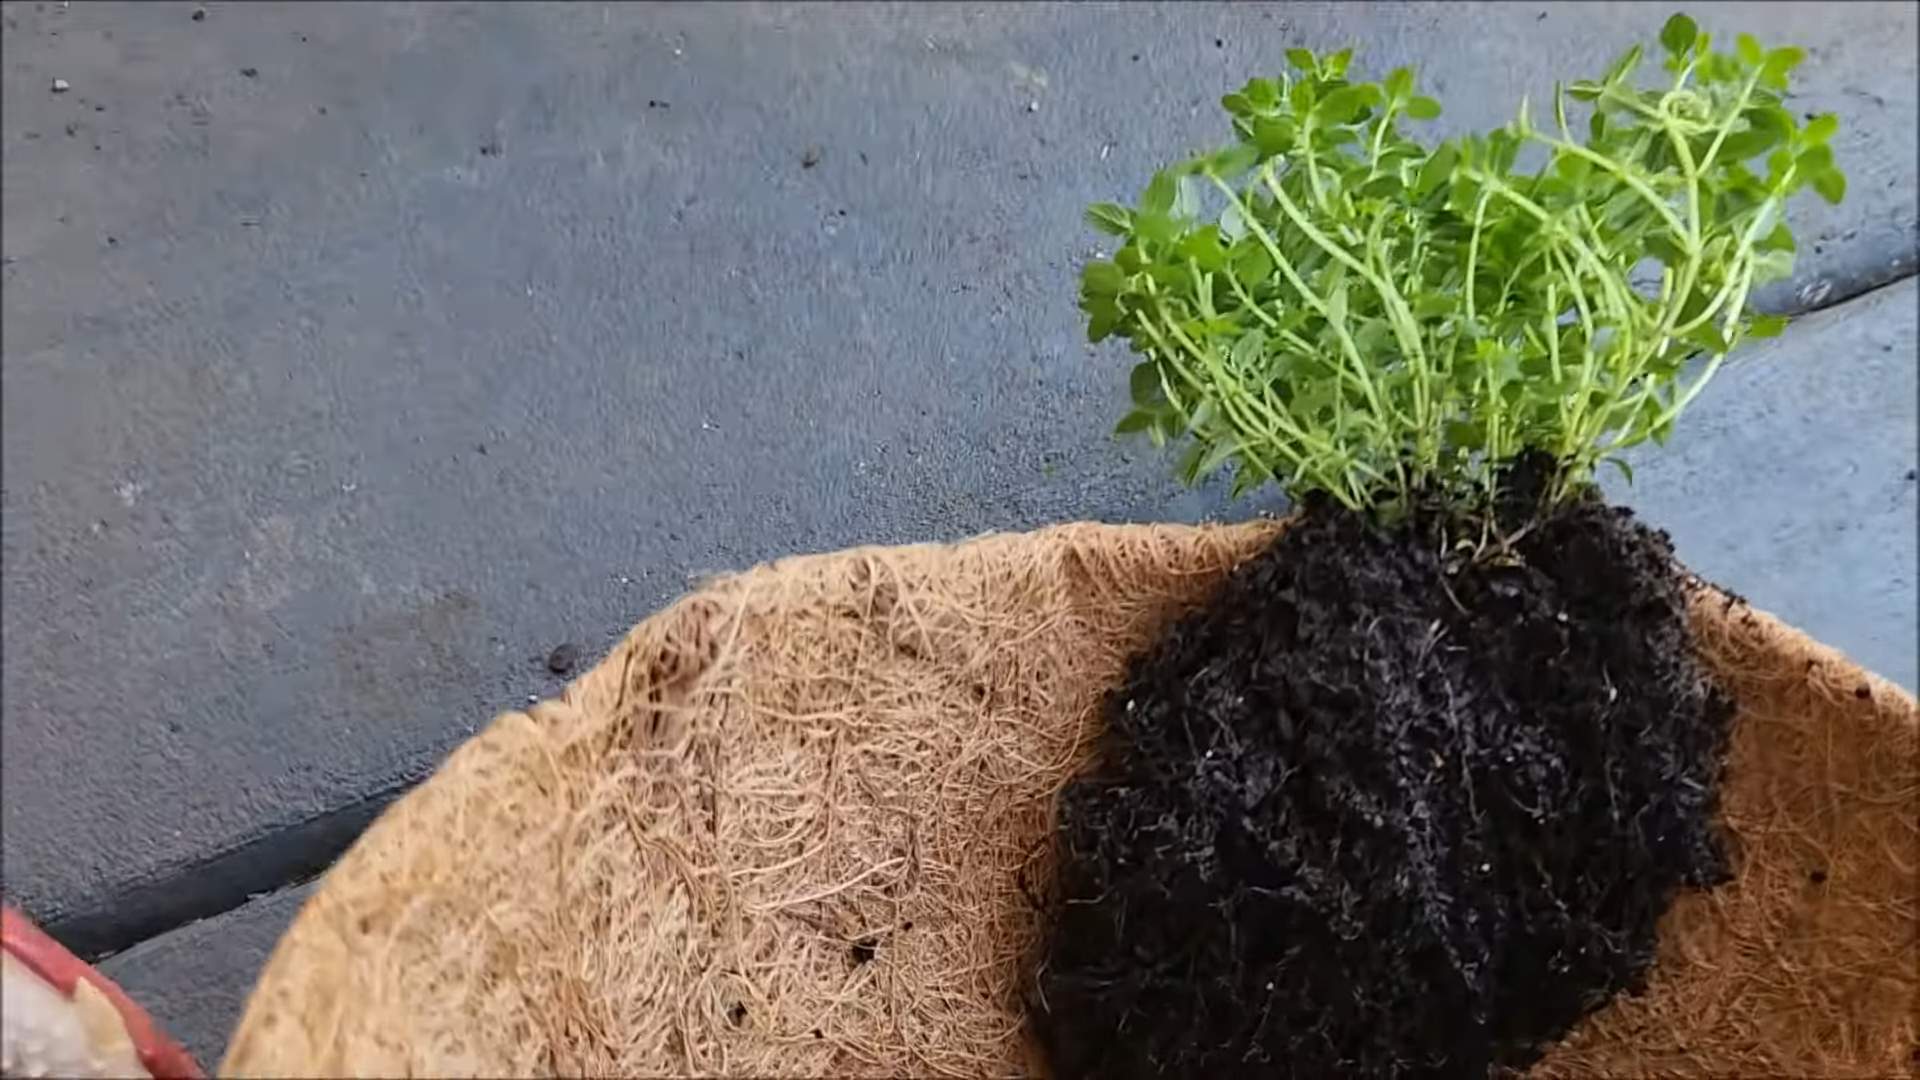
2. **Remove Seedlings from Pots:** Gently remove the seedlings from their pots, being careful not to damage the roots.
3. **Place Seedlings in Holes:** Place the seedlings in the holes, making sure the top of the root ball is level with the soil surface.
4. **Fill Holes with Soil:** Fill the holes with soil and gently firm the soil around the seedlings.
5. **Water Thoroughly:** Water the seedlings thoroughly to help them settle in.
Caring for Your Kale
Kale is relatively easy to care for, but here are a few tips to keep your plants healthy and productive:
* **Watering:** Water your kale regularly, especially during dry periods. Kale needs about 1 inch of water per week.
* **Fertilizing:** Fertilize your kale every few weeks with a balanced fertilizer or compost tea.
* **Weeding:** Keep your garden bed free of weeds, which can compete with your kale for nutrients and water.
* **Mulching:** Apply a layer of mulch around your kale plants to help retain moisture, suppress weeds, and regulate soil temperature. I like to use straw or wood chips as mulch.
* **Pest Control:** Kale can be susceptible to a few pests, such as aphids, cabbage worms, and flea beetles. I usually inspect my plants regularly and handpick any pests I find. You can also use insecticidal soap or neem oil to control pests.
* **Bolting:** Kale can bolt (go to seed) in hot weather. To prevent bolting, try to plant your kale in early spring or late summer. You can also provide shade for your plants during the hottest part of the day.
Harvesting Your Kale
You can start harvesting kale leaves as soon as they are large enough to eat, usually about 6-8 inches long.
1. **Harvest Outer Leaves:** Harvest the outer leaves first, leaving the inner leaves to continue growing.
2. **Cut or Snap Leaves:** You can either cut the leaves off with a knife or snap them off with your fingers.
3. **Harvest Regularly:** Harvest your kale regularly to encourage continued production.
4. **Wash and Store:** Wash the kale leaves thoroughly and store them in the refrigerator in a plastic bag or container. They will keep for about a week.
Dealing with Common Kale Problems
Even with the best care, you might encounter a few problems while growing kale. Here’s how I deal with some common issues:
* **Aphids:** These tiny pests can suck the sap from kale leaves, causing them to become distorted and yellow. I usually spray aphids with insecticidal soap or neem oil.
* **Cabbage Worms:** These green caterpillars can devour kale leaves. I handpick them off my plants or use Bacillus thuringiensis (Bt), a natural insecticide.
* **Flea Beetles:** These tiny beetles can chew small holes in kale leaves. I use row covers to protect my plants from flea beetles.
* **Clubroot:** This fungal disease can cause kale roots to become swollen and distorted. I prevent clubroot by rotating my crops and avoiding planting kale in the same spot year after year.
Enjoying Your Homegrown Kale
Now that you’ve harvested your kale, it’s time to enjoy it! Kale is incredibly versatile and can be used in a variety of dishes. Here are a few of my favorite ways to eat kale:
* **Salads:** Add chopped kale to your salads for a boost of nutrients. Massage the kale with olive oil and lemon juice to soften it up.
* **Smoothies:** Blend kale into your smoothies for a healthy and delicious drink.
* **Soups and Stews:** Add chopped kale to your soups and stews for added flavor and nutrition.
* **Sautéed Kale:** Sauté kale with garlic, olive oil, and a pinch of salt for a simple and delicious side dish.
* **Kale Chips:** Bake kale leaves in the oven with olive oil and salt for a healthy and crispy snack.
Growing kale at home is a rewarding experience that provides you with fresh, nutritious greens all season long. With a little bit of effort, you can enjoy the taste and health benefits of homegrown kale. Happy gardening!
Conclusion
So, there you have it! Growing kale at home is not only achievable, but it’s also incredibly rewarding. From the vibrant, nutrient-packed leaves gracing your garden to the delicious and healthy meals you can create, the benefits are undeniable. We’ve walked you through the essential steps, from selecting the right kale variety to nurturing your plants for a bountiful harvest.
Why is this DIY trick a must-try? Because it puts you in control of your food source. You know exactly what goes into your kale – no pesticides, no hidden chemicals, just pure, homegrown goodness. Plus, it’s a fantastic way to connect with nature, de-stress, and learn a new skill. Imagine stepping outside your door to snip fresh kale for your morning smoothie or a hearty winter stew. The flavor is simply unmatched by store-bought varieties, often boasting a sweeter, less bitter taste when freshly picked.
But the fun doesn’t stop there! Feel free to experiment with different kale varieties. Try the curly kale for its classic texture, the lacinato (dinosaur) kale for its unique appearance and slightly sweeter flavor, or the Russian kale for its tender leaves and mild taste. You can also explore different growing methods. While we focused on traditional gardening, kale thrives in raised beds and even containers, making it accessible to those with limited space. Consider companion planting to deter pests naturally. Marigolds, for example, are known to repel many common garden pests.
Don’t be afraid to get creative with your harvest, either. Beyond salads and smoothies, kale can be baked into crispy chips, added to soups and stews, sautéed with garlic and olive oil, or even used as a pizza topping. The possibilities are endless!
We wholeheartedly encourage you to embark on this exciting journey of growing kale at home. It’s a simple, sustainable, and incredibly satisfying way to enhance your health and connect with nature. And most importantly, it’s a delicious way to enjoy the fruits (or rather, the leaves!) of your labor.
Now, grab your seeds, prepare your soil, and get ready to experience the joy of homegrown kale. We’re confident that you’ll be amazed by the results.
We’d love to hear about your experiences! Share your photos, tips, and challenges in the comments below. Let’s create a community of kale-loving gardeners and inspire others to embrace the joys of homegrown goodness. Happy gardening!
Frequently Asked Questions (FAQ)
What is the best time of year to start growing kale?
Kale is a cool-season crop, meaning it thrives in cooler temperatures. The best time to plant kale is typically in the spring or fall. For a spring harvest, start seeds indoors 6-8 weeks before the last expected frost or direct sow them outdoors 2-4 weeks before the last frost. For a fall harvest, plant seeds in late summer or early fall, about 6-8 weeks before the first expected frost. This allows the plants to mature before the coldest weather arrives. In warmer climates, you can often grow kale throughout the winter.
How much sunlight does kale need?
Kale needs at least 6 hours of sunlight per day to thrive. While it can tolerate some shade, especially in hotter climates, insufficient sunlight can lead to leggy growth and reduced yields. Choose a location in your garden that receives full sun for the majority of the day. If you’re growing kale indoors, use grow lights to supplement natural sunlight.
What kind of soil is best for growing kale?
Kale prefers well-drained soil that is rich in organic matter. The ideal soil pH is between 6.0 and 7.5. Before planting, amend your soil with compost, aged manure, or other organic materials to improve its fertility and drainage. If your soil is heavy clay, consider adding sand or perlite to improve drainage. A soil test can help you determine the pH and nutrient levels of your soil and guide you in making necessary amendments.
How often should I water my kale plants?
Kale needs consistent moisture to thrive, especially during hot and dry weather. Water your plants deeply whenever the top inch of soil feels dry to the touch. Avoid overwatering, as this can lead to root rot. Mulching around your plants can help retain moisture and suppress weeds. During periods of heavy rain, you may need to reduce watering frequency.
What are some common pests and diseases that affect kale?
Kale is susceptible to several pests and diseases, including aphids, cabbage worms, flea beetles, and downy mildew. Regularly inspect your plants for signs of infestation or disease. To control pests, you can use insecticidal soap, neem oil, or handpick them off the plants. To prevent diseases, ens
So, there you have it! Growing kale at home is not only achievable, but it’s also incredibly rewarding. From the vibrant, nutrient-packed leaves gracing your garden to the delicious and healthy meals you can create, the benefits are undeniable. We’ve walked you through the essential steps, from selecting the right kale variety to nurturing your plants for a bountiful harvest.
Why is this DIY trick a must-try? Because it puts you in control of your food source. You know exactly what goes into your kale – no pesticides, no hidden chemicals, just pure, homegrown goodness. Plus, it’s a fantastic way to connect with nature, de-stress, and learn a new skill. Imagine stepping outside your door to snip fresh kale for your morning smoothie or a hearty winter stew. The flavor is simply unmatched by store-bought varieties, often boasting a sweeter, less bitter taste when freshly picked.
But the fun doesn’t stop there! Feel free to experiment with different kale varieties. Try the curly kale for its classic texture, the lacinato (dinosaur) kale for its unique appearance and slightly sweeter flavor, or the Russian kale for its tender leaves and mild taste. You can also explore different growing methods. While we focused on traditional gardening, kale thrives in raised beds and even containers, making it accessible to those with limited space. Consider companion planting to deter pests naturally. Marigolds, for example, are known to repel many common garden pests.
Don’t be afraid to get creative with your harvest, either. Beyond salads and smoothies, kale can be baked into crispy chips, added to soups and stews, sautéed with garlic and olive oil, or even used as a pizza topping. The possibilities are endless!
We wholeheartedly encourage you to embark on this exciting journey of growing kale at home. It’s a simple, sustainable, and incredibly satisfying way to enhance your health and connect with nature. And most importantly, it’s a delicious way to enjoy the fruits (or rather, the leaves!) of your labor.
Now, grab your seeds, prepare your soil, and get ready to experience the joy of homegrown kale. We’re confident that you’ll be amazed by the results.
We’d love to hear about your experiences! Share your photos, tips, and challenges in the comments below. Let’s create a community of kale-loving gardeners and inspire others to embrace the joys of homegrown goodness. Happy gardening!
Frequently Asked Questions (FAQ)
What is the best time of year to start growing kale?
Kale is a cool-season crop, meaning it thrives in cooler temperatures. The best time to plant kale is typically in the spring or fall. For a spring harvest, start seeds indoors 6-8 weeks before the last expected frost or direct sow them outdoors 2-4 weeks before the last frost. For a fall harvest, plant seeds in late summer or early fall, about 6-8 weeks before the first expected frost. This allows the plants to mature before the coldest weather arrives. In warmer climates, you can often grow kale throughout the winter.
How much sunlight does kale need?
Kale needs at least 6 hours of sunlight per day to thrive. While it can tolerate some shade, especially in hotter climates, insufficient sunlight can lead to leggy growth and reduced yields. Choose a location in your garden that receives full sun for the majority of the day. If you’re growing kale indoors, use grow lights to supplement natural sunlight.
What kind of soil is best for growing kale?
Kale prefers well-drained soil that is rich in organic matter. The ideal soil pH is between 6.0 and 7.5. Before planting, amend your soil with compost, aged manure, or other organic materials to improve its fertility and drainage. If your soil is heavy clay, consider adding sand or perlite to improve drainage. A soil test can help you determine the pH and nutrient levels of your soil and guide you in making necessary amendments.
How often should I water my kale plants?
Kale needs consistent moisture to thrive, especially during hot and dry weather. Water your plants deeply whenever the top inch of soil feels dry to the touch. Avoid overwatering, as this can lead to root rot. Mulching around your plants can help retain moisture and suppress weeds. During periods of heavy rain, you may need to reduce watering frequency.
What are some common pests and diseases that affect kale?
Kale is susceptible to several pests and diseases, including aphids, cabbage worms, flea beetles, and downy mildew. Regularly inspect your plants for signs of infestation or disease. To control pests, you can use insecticidal soap, neem oil, or handpick them off the plants. To prevent diseases, ensure good air circulation, avoid overwatering, and remove any infected leaves promptly. Crop rotation can also help prevent soilborne diseases.
How do I harvest kale?
You can begin harvesting kale leaves when they are about 4-6 inches long. Start by harvesting the outer leaves, leaving the inner leaves to continue growing. This allows the plant to produce new leaves throughout the growing season. You can harvest kale leaves continuously until the plant bolts (goes to seed) in hot weather. To harvest, simply snip the leaves off at the base of the stem with a sharp knife or scissors.
Can I grow kale in containers?
Yes, kale grows well in containers, making it a great option for those with limited space. Choose a container that is at least 12 inches deep and wide to accommodate the plant’s root system. Use a well-draining potting mix and ensure the container has drainage holes. Water regularly and fertilize every few weeks with a balanced fertilizer. Place the container in a location that receives at least 6 hours of sunlight per day.
How do I store kale after harvesting?
To store kale after harvesting, wash the leaves thoroughly and dry them completely. You can use a salad spinner or pat them dry with paper towels. Store the kale in a plastic bag or container in the refrigerator. It will typically last for about 5-7 days. For longer storage, you can blanch the kale leaves for 2-3 minutes, then freeze them in freezer bags or containers.
What are some creative ways to use kale in cooking?
Kale is a versatile ingredient that can be used in a variety of dishes. You can add it to salads, smoothies, soups, stews, and stir-fries. It can also be baked into crispy chips, sautéed with garlic and olive oil, or used as a pizza topping. Experiment with different recipes and find your favorite ways to enjoy this nutritious vegetable. Remember that massaging kale with olive oil and lemon juice can help tenderize it for salads.
How can I encourage more people to try growing kale at home?
Share your experiences and successes with others! Post photos of your kale plants and dishes on social media, write blog posts about your gardening journey, or offer to share your harvest with friends and neighbors. Educate people about the health benefits of kale and the ease of growing it at home. By sharing your passion and knowledge, you can inspire others to embrace the joys of homegrown kale.
Leave a Comment