

Container chili pepper growing has never been more accessible, or more rewarding! Imagine plucking fiery, vibrant chili peppers straight from your patio, ready to spice up your next meal. Forget those bland, store-bought peppers – with a little know-how, you can cultivate a thriving chili pepper garden right in your own backyard, balcony, or even windowsill.
The history of chili peppers stretches back thousands of years, with evidence suggesting their cultivation in South America as early as 6,000 BC. From ancient civilizations to modern-day cuisine, these fiery fruits have added zest and flavor to cultures around the globe. Now, you can participate in this rich history by growing your own!
But why should you bother with container chili pepper growing? Well, for starters, it’s incredibly convenient. No sprawling garden required! Plus, container gardening allows you to control the soil, sunlight, and watering, creating the perfect environment for your chili peppers to flourish. In this article, I’m going to share some of my favorite DIY tricks and hacks to help you achieve a bountiful harvest, even if you’re a complete beginner. We’ll cover everything from choosing the right container and soil to pest control and maximizing your pepper production. Get ready to unleash your inner gardener and add some serious heat to your life!
Growing Chili Peppers in Containers: A Spicy DIY Guide
Hey there, fellow chili enthusiasts! Are you ready to bring the heat to your patio, balcony, or even your kitchen windowsill? Growing chili peppers in containers is a fantastic way to enjoy fresh, spicy goodness right at your fingertips. It’s easier than you might think, and I’m here to guide you through every step of the process. Let’s get started!
Choosing the Right Chili Pepper Variety
First things first, let’s talk peppers! The world of chili peppers is vast and exciting, ranging from mild and sweet to face-meltingly hot. When growing in containers, some varieties thrive better than others. Here are a few of my favorites:
* Jalapeños: A classic choice, jalapeños are relatively easy to grow and produce a good yield. They’re perfect for adding a moderate kick to your dishes.
* Serranos: If you’re looking for a bit more heat, serranos are a great option. They’re also quite productive in containers.
* Cayenne Peppers: These slender red peppers are known for their fiery flavor. They’re ideal for making chili powder or hot sauce.
* Thai Peppers: Small but mighty, Thai peppers pack a serious punch. They’re perfect for adding a spicy kick to Asian-inspired dishes.
* Habaneros: For the adventurous spice lover, habaneros offer intense heat and a fruity flavor. Be warned, they’re not for the faint of heart!
* Bell Peppers: Okay, okay, bell peppers aren’t technically chili peppers, but they’re still a great option for container gardening! They’re sweet, versatile, and easy to grow.
When choosing your pepper variety, consider your personal preference for heat level, the size of your container, and the amount of sunlight you have available.
Gathering Your Supplies
Now that you’ve chosen your pepper variety, it’s time to gather your supplies. Here’s what you’ll need:
* Containers: Choose containers that are at least 12 inches in diameter and depth. Larger containers are generally better, as they provide more room for the roots to grow. Make sure your containers have drainage holes to prevent waterlogging.
* Potting Mix: Use a high-quality potting mix that is well-draining and contains plenty of organic matter. Avoid using garden soil, as it can become compacted in containers and hinder drainage.
* Chili Pepper Seeds or Seedlings: You can start your chili peppers from seed or purchase seedlings from a local nursery. Starting from seed is more economical, but it requires more time and effort.
* Fertilizer: Use a balanced fertilizer that is specifically formulated for vegetables. Look for a fertilizer with an N-P-K ratio of around 5-10-5 or 10-10-10.
* Watering Can or Hose: You’ll need a way to water your plants regularly.
* Gardening Gloves: Protect your hands from dirt and potential irritants.
* Optional:
* Plant Markers: To label your different pepper varieties.
* Trellis or Stakes: To support taller pepper plants.
* Pruning Shears: To prune your plants and remove any dead or diseased foliage.
Planting Your Chili Peppers
Alright, let’s get our hands dirty! Here’s how to plant your chili peppers in containers:
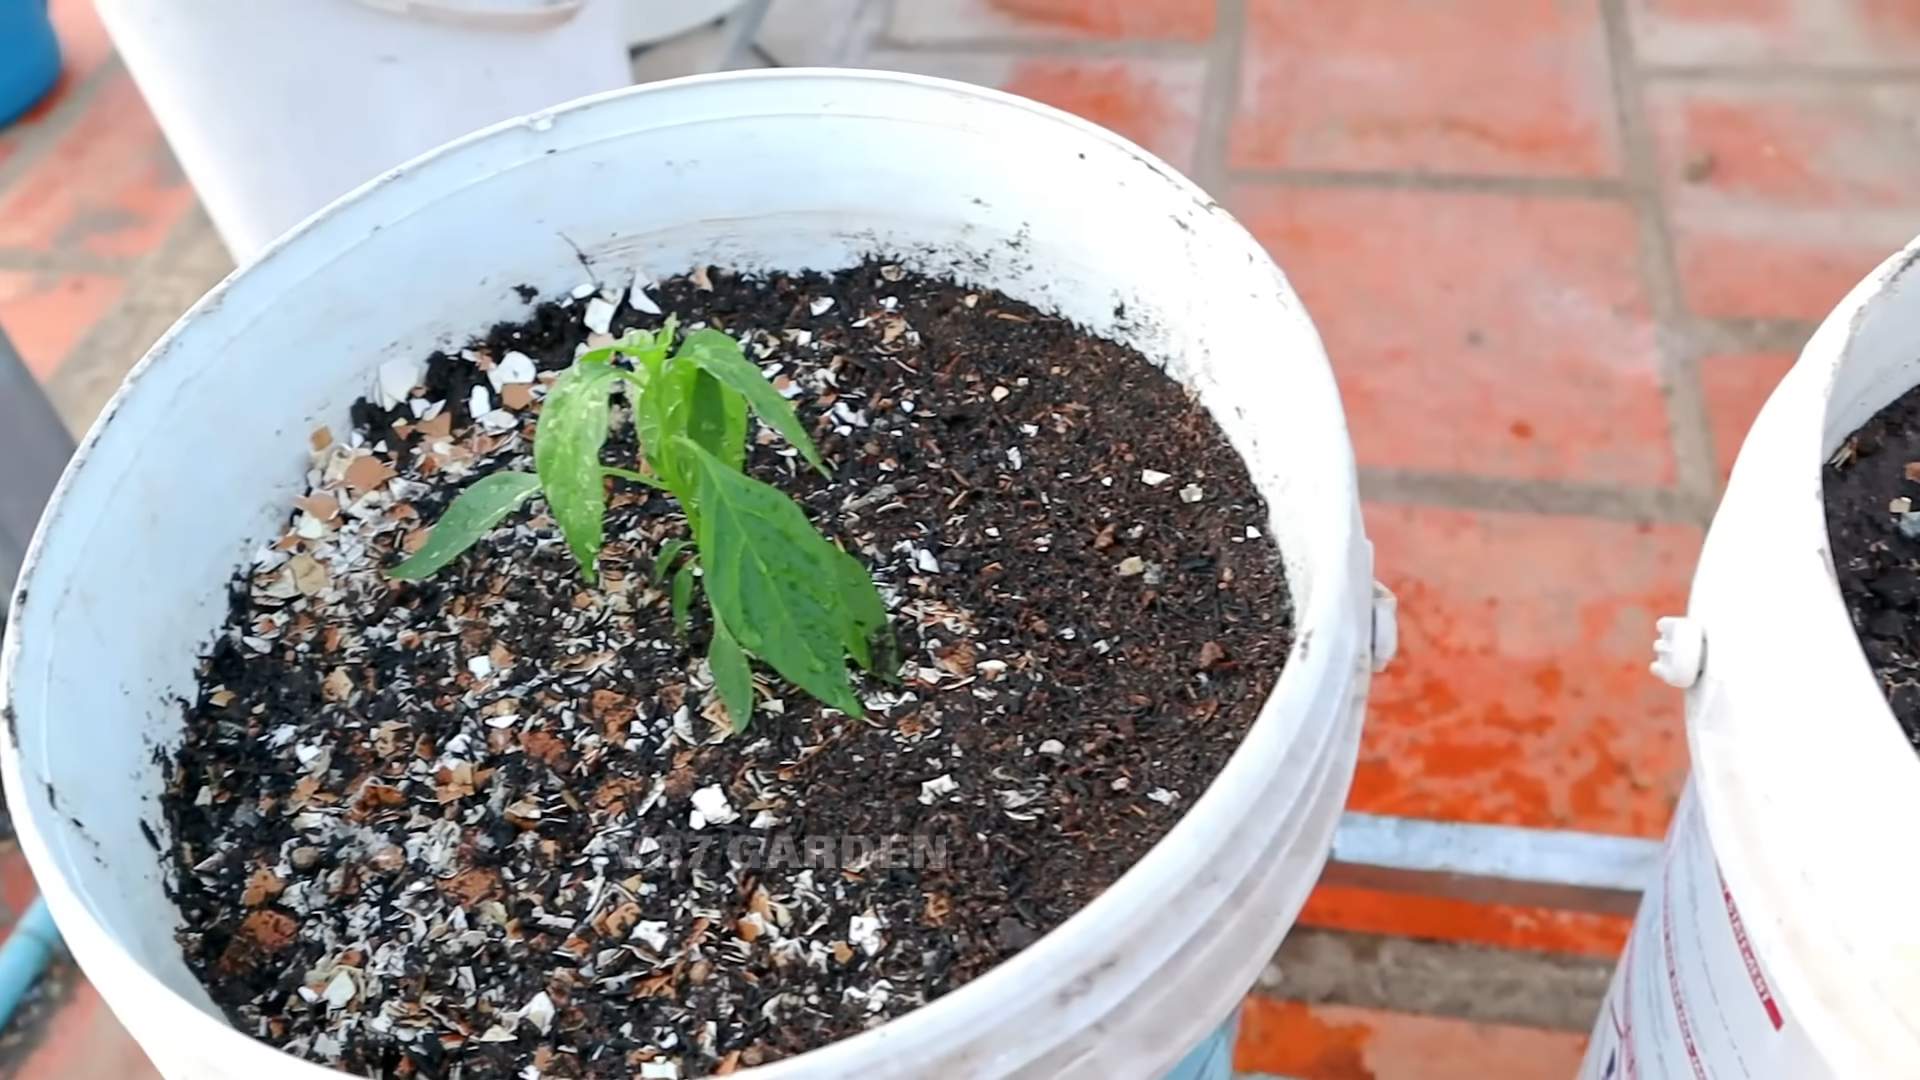
1. Prepare Your Containers: Fill your containers with potting mix, leaving about an inch of space at the top.
2. Starting from Seed: If you’re starting from seed, sow the seeds about ¼ inch deep in the potting mix. Water gently and keep the soil moist until the seeds germinate. This usually takes about 7-14 days. Once the seedlings have developed a few sets of true leaves, you can transplant them into larger containers.
3. Transplanting Seedlings: If you’re using seedlings, gently remove them from their nursery pots. Loosen the roots slightly and place the seedlings in the center of your containers.
4. Fill and Water: Fill in around the seedlings with potting mix, making sure the top of the root ball is level with the soil surface. Water thoroughly until the water drains out of the drainage holes.
5. Label Your Plants: Use plant markers to label your different pepper varieties.
Caring for Your Chili Peppers
Now that your chili peppers are planted, it’s time to provide them with the care they need to thrive.
1. Sunlight: Chili peppers need at least 6-8 hours of sunlight per day. Place your containers in a sunny location where they will receive plenty of direct sunlight. If you don’t have enough sunlight, you can supplement with grow lights.
2. Watering: Water your chili peppers regularly, especially during hot, dry weather. The soil should be kept consistently moist, but not soggy. Water deeply, allowing the water to drain out of the drainage holes. Avoid watering the foliage, as this can lead to fungal diseases. I usually check the soil moisture by sticking my finger about an inch deep. If it feels dry, it’s time to water.
3. Fertilizing: Fertilize your chili peppers every 2-3 weeks with a balanced fertilizer. Follow the instructions on the fertilizer package. You can also use a liquid fertilizer diluted in water.
4. Pruning: Pruning can help to improve air circulation and encourage bushier growth. Remove any dead or diseased foliage. You can also pinch off the growing tips of the plants to encourage branching.
5. Pest and Disease Control: Keep an eye out for pests and diseases. Common pests that affect chili peppers include aphids, spider mites, and whiteflies. You can control these pests with insecticidal soap or neem oil. Common diseases include fungal diseases like powdery mildew and blossom end rot. You can prevent these diseases by providing good air circulation and avoiding overwatering. If you notice any signs of disease, remove the affected foliage and treat the plant with a fungicide.
6. Supporting Your Plants: As your chili pepper plants grow, they may need support to prevent them from falling over. You can use trellises or stakes to support the plants. Tie the stems to the supports with soft twine or plant ties.
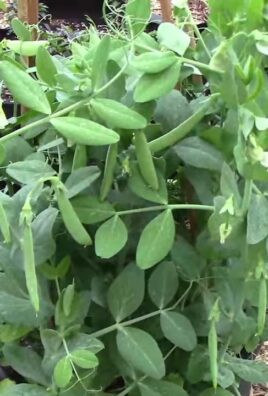
Harvesting Your Chili Peppers
The moment we’ve all been waiting for! Harvesting your chili peppers is the most rewarding part of the process.
1. When to Harvest: The time to harvest your chili peppers will depend on the variety and your personal preference. Generally, chili peppers are ready to harvest when they have reached their mature size and color. The color will vary depending on the variety, but it’s usually red, yellow, orange, or green.
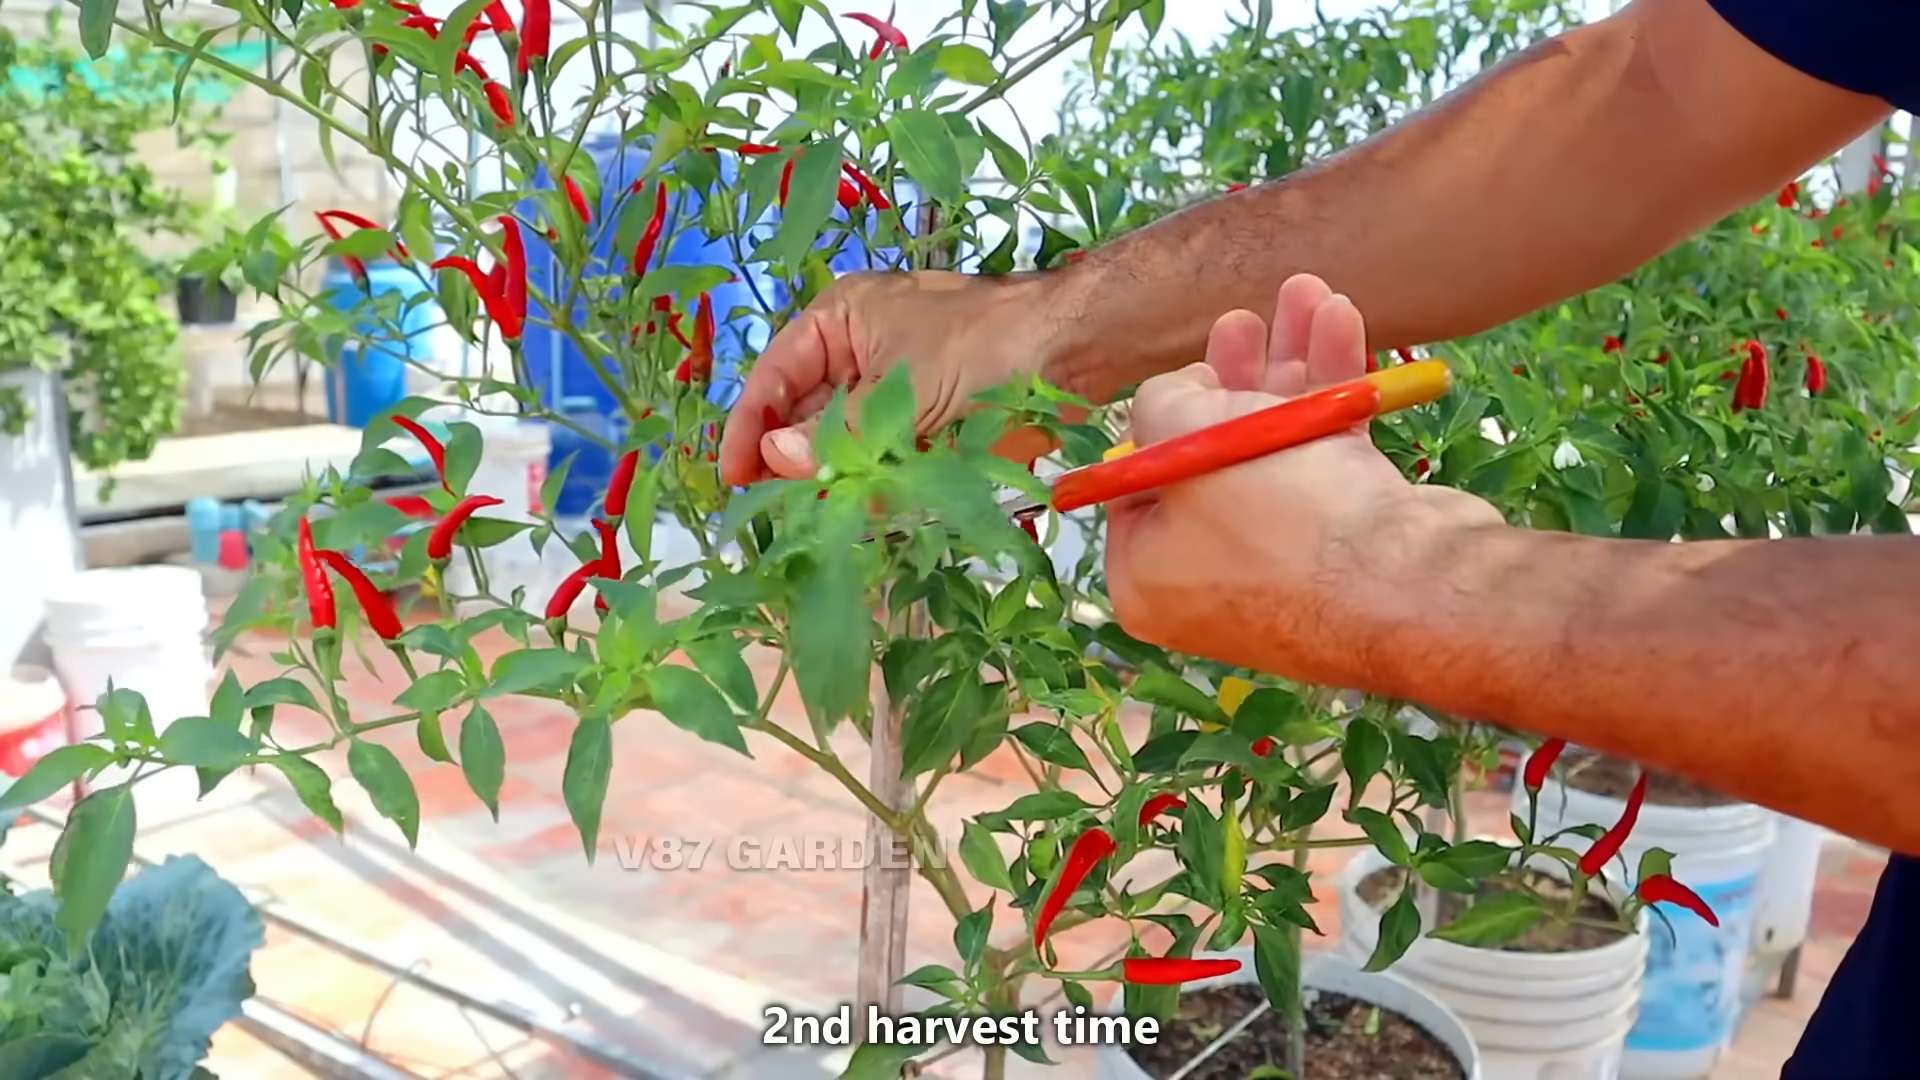
2. How to Harvest: Use pruning shears or scissors to cut the peppers from the plant. Be careful not to damage the plant. Leave a small stem attached to the pepper.
3. Enjoy Your Harvest: Now it’s time to enjoy your fresh chili peppers! You can use them in your favorite recipes, make hot sauce, or dry them for later use.
Troubleshooting Common Problems
Even with the best care, you may encounter some problems when growing chili peppers in containers. Here are a few common issues and how to address them:
* Blossom End Rot: This is a common problem that causes the bottom of the peppers to rot. It’s usually caused by a calcium deficiency. To prevent blossom end rot, make sure your soil is well-draining and that you’re watering your plants regularly. You can also add calcium to the soil by using bone meal or calcium nitrate.
* Leaf Drop: Leaf drop can be caused by a variety of factors, including overwatering, underwatering, nutrient deficiencies, and temperature stress. Make sure you’re watering your plants properly and fertilizing them regularly. Protect your plants from extreme temperatures.
* Lack of Fruit: If your chili pepper plants are not producing fruit, it could be due to a lack of pollination. Chili peppers are self-pollinating, but they may need some he
Hey there, fellow chili enthusiasts! Are you ready to bring the heat to your patio, balcony, or even your kitchen windowsill? Growing chili peppers in containers is a fantastic way to enjoy fresh, spicy goodness right at your fingertips. It’s easier than you might think, and I’m here to guide you through every step of the process. Let’s get started!
Choosing the Right Chili Pepper Variety
First things first, let’s talk peppers! The world of chili peppers is vast and exciting, ranging from mild and sweet to face-meltingly hot. When growing in containers, some varieties thrive better than others. Here are a few of my favorites:
* Jalapeños: A classic choice, jalapeños are relatively easy to grow and produce a good yield. They’re perfect for adding a moderate kick to your dishes.
* Serranos: If you’re looking for a bit more heat, serranos are a great option. They’re also quite productive in containers.
* Cayenne Peppers: These slender red peppers are known for their fiery flavor. They’re ideal for making chili powder or hot sauce.
* Thai Peppers: Small but mighty, Thai peppers pack a serious punch. They’re perfect for adding a spicy kick to Asian-inspired dishes.
* Habaneros: For the adventurous spice lover, habaneros offer intense heat and a fruity flavor. Be warned, they’re not for the faint of heart!
* Bell Peppers: Okay, okay, bell peppers aren’t technically chili peppers, but they’re still a great option for container gardening! They’re sweet, versatile, and easy to grow.
When choosing your pepper variety, consider your personal preference for heat level, the size of your container, and the amount of sunlight you have available.
Gathering Your Supplies
Now that you’ve chosen your pepper variety, it’s time to gather your supplies. Here’s what you’ll need:
* Containers: Choose containers that are at least 12 inches in diameter and depth. Larger containers are generally better, as they provide more room for the roots to grow. Make sure your containers have drainage holes to prevent waterlogging.
* Potting Mix: Use a high-quality potting mix that is well-draining and contains plenty of organic matter. Avoid using garden soil, as it can become compacted in containers and hinder drainage.
* Chili Pepper Seeds or Seedlings: You can start your chili peppers from seed or purchase seedlings from a local nursery. Starting from seed is more economical, but it requires more time and effort.
* Fertilizer: Use a balanced fertilizer that is specifically formulated for vegetables. Look for a fertilizer with an N-P-K ratio of around 5-10-5 or 10-10-10.
* Watering Can or Hose: You’ll need a way to water your plants regularly.
* Gardening Gloves: Protect your hands from dirt and potential irritants.
* Optional:
* Plant Markers: To label your different pepper varieties.
* Trellis or Stakes: To support taller pepper plants.
* Pruning Shears: To prune your plants and remove any dead or diseased foliage.
Planting Your Chili Peppers
Alright, let’s get our hands dirty! Here’s how to plant your chili peppers in containers:
1. Prepare Your Containers: Fill your containers with potting mix, leaving about an inch of space at the top.
2. Starting from Seed: If you’re starting from seed, sow the seeds about ¼ inch deep in the potting mix. Water gently and keep the soil moist until the seeds germinate. This usually takes about 7-14 days. Once the seedlings have developed a few sets of true leaves, you can transplant them into larger containers.
3. Transplanting Seedlings: If you’re using seedlings, gently remove them from their nursery pots. Loosen the roots slightly and place the seedlings in the center of your containers.
4. Fill and Water: Fill in around the seedlings with potting mix, making sure the top of the root ball is level with the soil surface. Water thoroughly until the water drains out of the drainage holes.
5. Label Your Plants: Use plant markers to label your different pepper varieties.
Caring for Your Chili Peppers
Now that your chili peppers are planted, it’s time to provide them with the care they need to thrive.
1. Sunlight: Chili peppers need at least 6-8 hours of sunlight per day. Place your containers in a sunny location where they will receive plenty of direct sunlight. If you don’t have enough sunlight, you can supplement with grow lights.
2. Watering: Water your chili peppers regularly, especially during hot, dry weather. The soil should be kept consistently moist, but not soggy. Water deeply, allowing the water to drain out of the drainage holes. Avoid watering the foliage, as this can lead to fungal diseases. I usually check the soil moisture by sticking my finger about an inch deep. If it feels dry, it’s time to water.
3. Fertilizing: Fertilize your chili peppers every 2-3 weeks with a balanced fertilizer. Follow the instructions on the fertilizer package. You can also use a liquid fertilizer diluted in water.
4. Pruning: Pruning can help to improve air circulation and encourage bushier growth. Remove any dead or diseased foliage. You can also pinch off the growing tips of the plants to encourage branching.
5. Pest and Disease Control: Keep an eye out for pests and diseases. Common pests that affect chili peppers include aphids, spider mites, and whiteflies. You can control these pests with insecticidal soap or neem oil. Common diseases include fungal diseases like powdery mildew and blossom end rot. You can prevent these diseases by providing good air circulation and avoiding overwatering. If you notice any signs of disease, remove the affected foliage and treat the plant with a fungicide.
6. Supporting Your Plants: As your chili pepper plants grow, they may need support to prevent them from falling over. You can use trellises or stakes to support the plants. Tie the stems to the supports with soft twine or plant ties.
Harvesting Your Chili Peppers
The moment we’ve all been waiting for! Harvesting your chili peppers is the most rewarding part of the process.
1. When to Harvest: The time to harvest your chili peppers will depend on the variety and your personal preference. Generally, chili peppers are ready to harvest when they have reached their mature size and color. The color will vary depending on the variety, but it’s usually red, yellow, orange, or green.
2. How to Harvest: Use pruning shears or scissors to cut the peppers from the plant. Be careful not to damage the plant. Leave a small stem attached to the pepper.
3. Enjoy Your Harvest: Now it’s time to enjoy your fresh chili peppers! You can use them in your favorite recipes, make hot sauce, or dry them for later use.
Troubleshooting Common Problems
Even with the best care, you may encounter some problems when growing chili peppers in containers. Here are a few common issues and how to address them:
* Blossom End Rot: This is a common problem that causes the bottom of the peppers to rot. It’s usually caused by a calcium deficiency. To prevent blossom end rot, make sure your soil is well-draining and that you’re watering your plants regularly. You can also add calcium to the soil by using bone meal or calcium nitrate.
* Leaf Drop: Leaf drop can be caused by a variety of factors, including overwatering, underwatering, nutrient deficiencies, and temperature stress. Make sure you’re watering your plants properly and fertilizing them regularly. Protect your plants from extreme temperatures.
* Lack of Fruit: If your chili pepper plants are not producing fruit, it could be due to a lack of pollination. Chili peppers are self-pollinating, but they may need some help from you. You can hand-pollinate your plants by gently shaking the flowers or using a small paintbrush to transfer pollen from one flower to another.
* Pests and Diseases: As mentioned earlier, pests and diseases can be a problem for chili pepper plants. Keep an eye out for any signs of infestation or disease and take action promptly.
Extra Tips for Success
Here are a few extra tips to help you grow the best chili peppers possible:
* Choose the Right Container Size: As I mentioned earlier, larger containers are generally better for chili peppers. A container that is at least 12 inches in diameter and depth will provide enough room for the roots to grow.
* Use High-Quality Potting Mix: Don’t skimp on the potting mix! Use a high-quality potting mix that is well-draining and contains plenty of organic matter.
* Provide Adequate Sunlight: Chili peppers need at least 6-
Conclusion
So, there you have it! Growing chili peppers in containers isn’t just a gardening trend; it’s a gateway to fresh, flavorful heat right at your fingertips. This DIY approach offers a level of control and convenience that traditional gardening often lacks. Imagine stepping outside your door and harvesting vibrant, spicy peppers whenever you need them. No more bland meals or expensive grocery store runs for subpar chilies. This is about taking control of your culinary destiny, one container at a time.
The beauty of container chili pepper growing lies in its adaptability. You can tailor the entire process to your specific needs and preferences. Want a scorching habanero? Plant it! Prefer a milder jalapeño? Go for it! The choice is entirely yours. And don’t be afraid to experiment with different container sizes, soil mixes, and even companion plants. Basil, for example, is said to deter pests and improve the flavor of your peppers. Marigolds are another excellent choice for pest control, adding a splash of color to your container garden.
Beyond the sheer convenience and customization, growing your own chili peppers is incredibly rewarding. There’s something deeply satisfying about nurturing a plant from seed to harvest, knowing that you played a direct role in bringing that fiery flavor to your table. It’s a connection to nature, a mindful activity, and a delicious way to spice up your life.
This container chili pepper growing method is a must-try for anyone who loves fresh, flavorful food and enjoys a bit of hands-on gardening. It’s accessible to beginners, adaptable to various climates and spaces, and ultimately, a whole lot of fun.
We encourage you to give this DIY trick a try. Start small, perhaps with just one or two containers, and see how it goes. Don’t be afraid to make mistakes – that’s how we learn! And most importantly, share your experience with us. Tell us about your successes, your challenges, and any tips or tricks you discover along the way. Let’s build a community of container chili pepper enthusiasts and spread the joy of homegrown heat! Share your photos and stories on our social media channels using #ContainerChiliPeppers. We can’t wait to see what you grow!
Frequently Asked Questions (FAQ)
What is the best size container for growing chili peppers?
The ideal container size depends on the variety of chili pepper you’re growing. Smaller varieties like Thai chilies or ornamental peppers can thrive in containers as small as 5 gallons. However, larger varieties like bell peppers or jalapeños will need at least a 10-gallon container to allow their roots to develop properly. A good rule of thumb is to choose a container that is at least 12 inches in diameter and 12 inches deep. Remember, bigger is generally better, as it provides more room for root growth and helps retain moisture.
What type of soil should I use for container chili pepper growing?
Chili peppers need well-draining soil that is rich in organic matter. A good potting mix specifically formulated for vegetables is an excellent choice. Avoid using garden soil, as it can become compacted in containers and hinder drainage. You can also create your own potting mix by combining equal parts of peat moss, perlite, and compost. Adding a slow-release fertilizer to the soil at planting time will provide your peppers with a steady supply of nutrients throughout the growing season.
How often should I water my container chili peppers?
Watering frequency depends on several factors, including the size of the container, the weather, and the type of soil you’re using. Generally, you should water your chili peppers when the top inch of soil feels dry to the touch. Avoid overwatering, as this can lead to root rot. During hot, dry weather, you may need to water your plants daily. In cooler weather, you can water them less frequently. A good way to check if your plants need water is to lift the container. If it feels light, it’s time to water.
How much sunlight do chili peppers need?
Chili peppers need at least 6-8 hours of direct sunlight per day to thrive. Choose a location for your containers that receives plenty of sunlight throughout the day. If you live in a particularly hot climate, you may need to provide some afternoon shade to prevent the peppers from scorching. If you don’t have a sunny spot outdoors, you can grow chili peppers indoors under grow lights.
What are some common pests and diseases that affect chili peppers?
Common pests that can affect chili peppers include aphids, spider mites, and whiteflies. These pests can be controlled with insecticidal soap or neem oil. Diseases that can affect chili peppers include fungal diseases like powdery mildew and blossom end rot. Powdery mildew can be treated with a fungicide, while blossom end rot is caused by a calcium deficiency and can be prevented by adding calcium to the soil. Regularly inspect your plants for signs of pests or diseases and take action promptly to prevent them from spreading.
How do I fertilize my container chili peppers?
Chili peppers are heavy feeders and need regular fertilization to produce a good crop. Use a fertilizer that is high in phosphorus and potassium, as these nutrients are essential for fruit development. You can use a liquid fertilizer every two weeks or a slow-release fertilizer at planting time. Avoid over-fertilizing, as this can lead to excessive foliage growth and fewer peppers.
When should I harvest my chili peppers?
The time to harvest your chili peppers depends on the variety and your personal preference. Most chili peppers will change color as they ripen, from green to red, yellow, or orange. You can harvest them at any stage of ripeness, but they will be hotter and more flavorful when they are fully ripe. To harvest, simply cut the pepper from the plant with a sharp knife or scissors.
Can I overwinter my container chili peppers?
Yes, you can overwinter your container chili peppers in a frost-free location. Before the first frost, prune the plants back to about 6 inches tall and move them indoors to a sunny window or under grow lights. Water them sparingly during the winter months and fertilize them occasionally. In the spring, after the last frost, you can move them back outdoors.
What are some good companion plants for chili peppers?
Good companion plants for chili peppers include basil, marigolds, onions, and garlic. Basil is said to deter pests and improve the flavor of the peppers. Marigolds are also effective at repelling pests. Onions and garlic can help to prevent fungal diseases. Avoid planting chili peppers near beans or cabbage, as these plants can inhibit their growth.
How can I increase the heat of my chili peppers?
Several factors can influence the heat of your chili peppers, including genetics, growing conditions, and stress. To increase the heat, make sure your plants receive plenty of sunlight and water them regularly. You can also try stressing the plants by withholding water for a few days before harvesting. Some gardeners believe that adding Epsom salts to the soil can also increase the heat of chili peppers.
Leave a Comment