

Bitter Gourd Growing Tips: Unlock the secrets to a bountiful harvest right in your backyard! Have you ever dreamt of plucking fresh, vibrant bitter gourds straight from your own garden? It’s easier than you think, and this guide is your key to success. For centuries, bitter gourd, also known as karela, has been a staple in Asian cuisine and traditional medicine, revered for its unique flavor and incredible health benefits. From ancient Ayurvedic practices to modern-day kitchens, this remarkable vegetable has stood the test of time.
But let’s be honest, growing bitter gourd can sometimes feel like a challenge. Maybe your vines are struggling, or perhaps you’re not getting the yield you hoped for. That’s where these DIY tricks and hacks come in! I’m here to share my tried-and-true methods for cultivating thriving bitter gourd plants, even if you’re a beginner gardener. Imagine the satisfaction of serving up a delicious, homegrown bitter gourd dish, knowing you nurtured it from seed to table.
This article is packed with practical advice, from selecting the right variety and preparing the soil to mastering the art of trellising and pest control. With these bitter gourd growing tips, you’ll be well on your way to enjoying a flourishing garden and a steady supply of this nutritious and flavorful vegetable. So, grab your gardening gloves, and let’s get started!
Growing Bitter Gourd Like a Pro: My DIY Guide to a Bountiful Harvest
Hey there, fellow gardening enthusiasts! I’m so excited to share my tried-and-true methods for growing bitter gourd, also known as bitter melon or karela. It’s a unique vegetable with a distinct flavor profile, and while it might not be everyone’s cup of tea (or gourd!), its health benefits are undeniable. Plus, the satisfaction of harvesting your own homegrown bitter gourd is simply unmatched. So, let’s dive in and get our hands dirty!
Choosing the Right Variety and Starting Seeds
Before we even think about planting, we need to select the right bitter gourd variety for our climate and preferences. There are several types available, differing in size, shape, and bitterness levels. Some popular choices include:
* Long Green Varieties: These are typically less bitter and easier to grow.
* Short, Thick Varieties: These tend to be more bitter and require a bit more attention.
* Hybrid Varieties: Often bred for disease resistance and higher yields.
I personally prefer the long green varieties because they’re more forgiving for beginner gardeners. Once you’ve chosen your variety, it’s time to start the seeds.
Here’s how I start my bitter gourd seeds:
1. Scarification: Bitter gourd seeds have a tough outer shell, so scarification helps them germinate faster. Gently rub the seeds with sandpaper or nick them with a knife. Be careful not to damage the inner seed!
2. Soaking: Soak the scarified seeds in warm water for 24 hours. This further softens the seed coat and encourages germination.
3. Planting in Seed Trays: Fill seed trays with a well-draining potting mix. I like to use a mix of peat moss, perlite, and vermiculite. Plant the seeds about 1/2 inch deep, with the pointed end facing down.
4. Watering and Warmth: Water the seed trays gently and keep them in a warm location (around 80-85°F or 27-29°C). A heat mat can be helpful if you live in a cooler climate.
5. Germination: Germination usually takes about 7-14 days. Keep the soil consistently moist but not waterlogged.
Preparing the Garden Bed and Transplanting Seedlings
While the seeds are germinating, it’s time to prepare the garden bed. Bitter gourd needs plenty of sunlight and well-drained soil.
Here’s my method for preparing the garden bed:
1. Sunlight: Choose a location that receives at least 6-8 hours of direct sunlight per day.
2. Soil Preparation: Bitter gourd thrives in fertile, well-drained soil. Amend the soil with plenty of organic matter, such as compost or well-rotted manure. This will improve drainage, aeration, and nutrient content.
3. Soil pH: Aim for a soil pH between 6.0 and 7.0. You can test your soil pH with a soil testing kit and amend it accordingly.
4. Trellising: Bitter gourd is a vine, so it needs a trellis to climb on. You can use a sturdy fence, a bamboo trellis, or even a DIY structure made from PVC pipes. I prefer using a strong metal trellis as it can withstand the weight of the mature vines and fruits.
5. Spacing: Space the plants about 2-3 feet apart along the trellis. This allows for good air circulation and prevents overcrowding.
Once the seedlings have developed a few true leaves (usually after 3-4 weeks), they’re ready to be transplanted into the garden bed.
Here’s how I transplant my bitter gourd seedlings:
1. Hardening Off: Before transplanting, harden off the seedlings by gradually exposing them to outdoor conditions for a week. Start by placing them in a sheltered location for a few hours each day, gradually increasing the amount of time they spend outdoors.
2. Transplanting: Dig holes that are slightly larger than the root balls of the seedlings. Gently remove the seedlings from the seed trays and place them in the holes.
3. Backfilling: Backfill the holes with soil and gently firm the soil around the base of the plants.
4. Watering: Water the transplanted seedlings thoroughly.
5. Mulching: Apply a layer of mulch around the base of the plants to help retain moisture, suppress weeds, and regulate soil temperature. I like to use straw or wood chips.
Caring for Your Bitter Gourd Plants
Now that the plants are in the ground, it’s time to provide them with the care they need to thrive.
Here’s my routine for caring for my bitter gourd plants:
1. Watering: Water the plants regularly, especially during dry spells. Bitter gourd needs consistent moisture to produce healthy fruits. Aim to keep the soil consistently moist but not waterlogged. I usually water deeply 2-3 times a week, depending on the weather.
2. Fertilizing: Fertilize the plants every 2-3 weeks with a balanced fertilizer. I prefer using an organic fertilizer, such as compost tea or fish emulsion. Follow the instructions on the fertilizer package.
3. Pruning: Prune the plants regularly to encourage branching and fruit production. Remove any yellowing or dead leaves. You can also pinch off the tips of the vines to encourage lateral growth.
4. Pest and Disease Control: Keep an eye out for pests and diseases. Common pests that affect bitter gourd include aphids, spider mites, and squash bugs. Common diseases include powdery mildew and downy mildew. Treat any infestations or infections promptly with appropriate organic pesticides or fungicides. Neem oil is a great organic option for controlling many pests.
5. Training the Vines: As the vines grow, train them to climb the trellis. Gently guide the vines and tie them to the trellis with twine or plant ties.
Pollination and Fruit Development
Bitter gourd plants produce separate male and female flowers. The female flowers have a small fruit behind them, while the male flowers do not. Pollination is necessary for fruit development.
Here’s what I do to ensure proper pollination:
1. Natural Pollination: Bees and other insects are natural pollinators. Encourage pollinators to visit your garden by planting flowering plants nearby.
2. Hand Pollination: If you’re not seeing enough natural pollination, you can hand-pollinate the flowers. Use a small paintbrush to transfer pollen from the male flowers to the female flowers. Do this in the morning, when the flowers are open.
3. Fruit Development: After pollination, the female flowers will start to develop into fruits. It takes about 10-15 days for the fruits to mature.
Harvesting and Storing Bitter Gourd
The moment we’ve all been waiting for – harvesting!
Here’s how I harvest my bitter gourd:
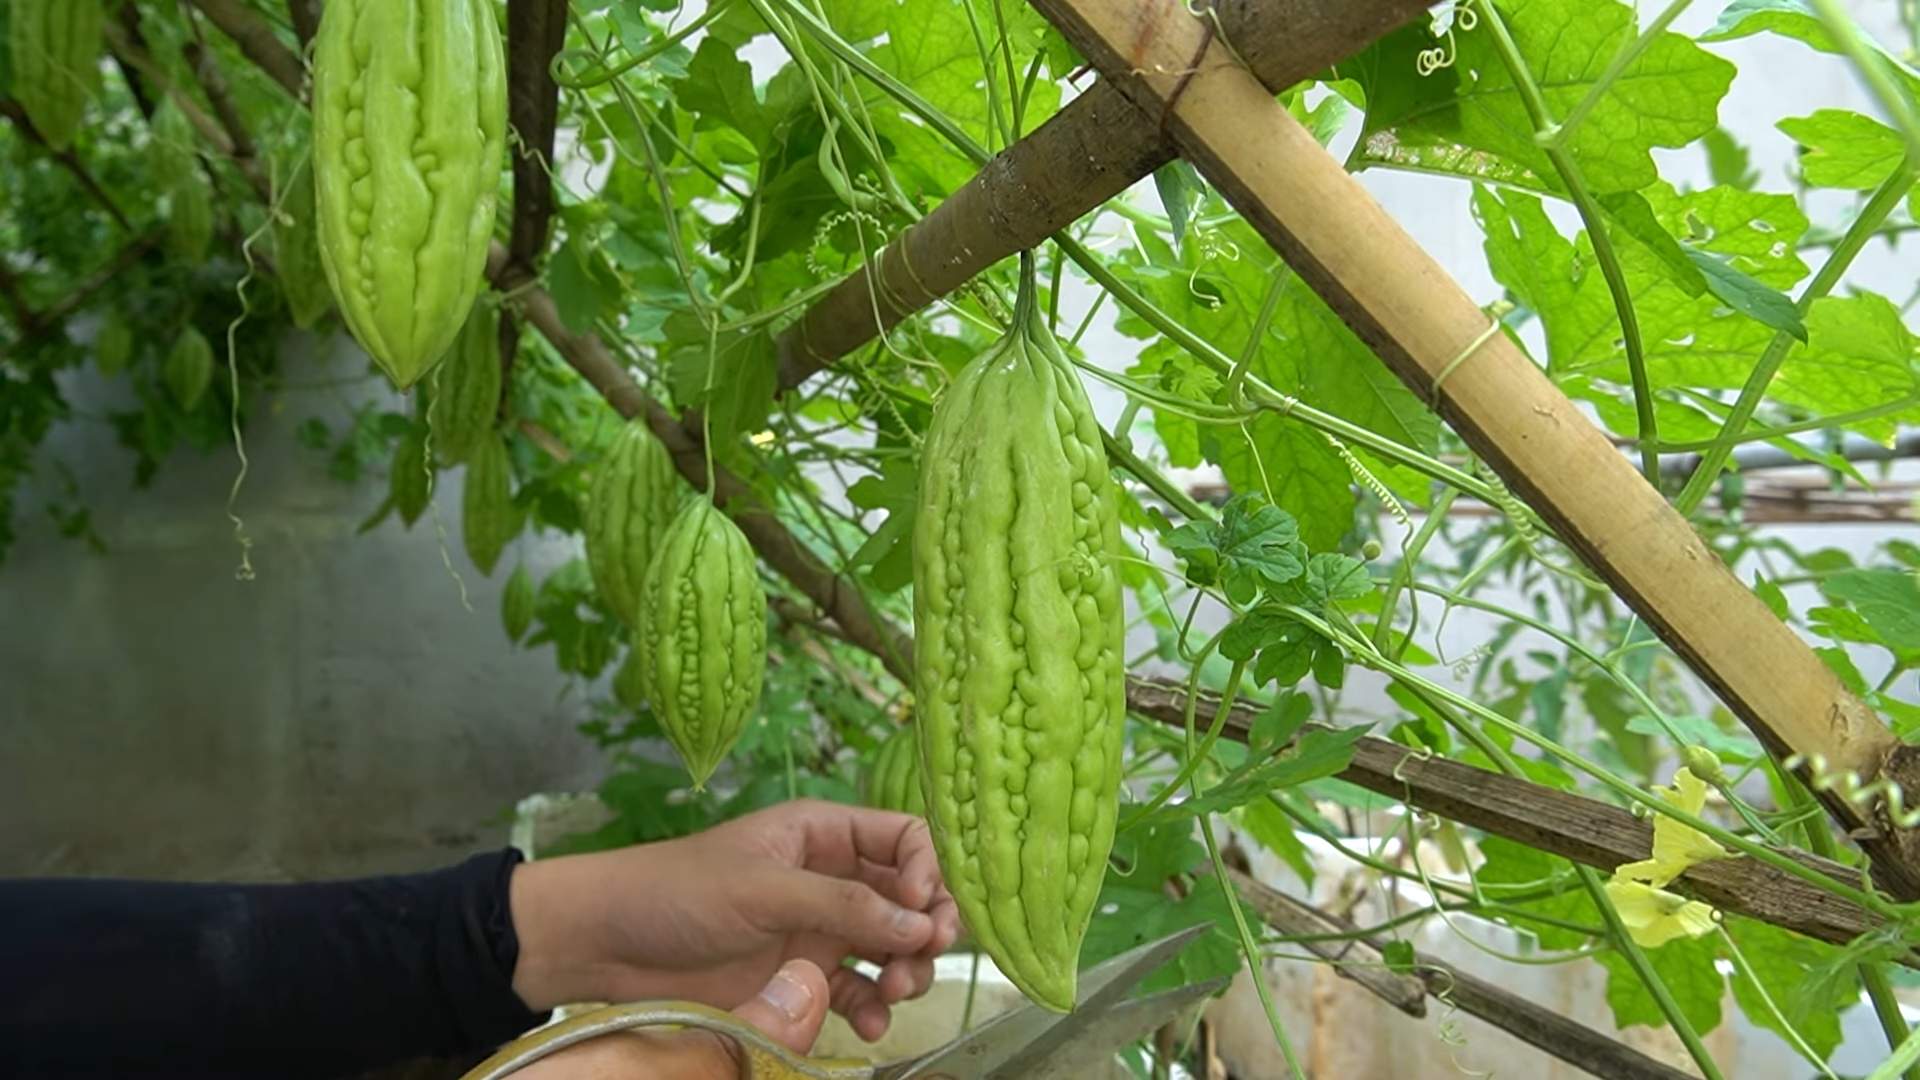
1. Harvest Time: Harvest the fruits when they are still green and slightly immature. The fruits will become more bitter as they ripen.
2. Harvesting Technique: Use a sharp knife or pruning shears to cut the fruits from the vine. Leave a small stem attached to the fruit.
3. Harvesting Frequency: Harvest the fruits regularly to encourage continued production.
Storing Bitter Gourd:
1. Short-Term Storage: Store the harvested fruits in the refrigerator for up to a week. Wrap them in a paper towel to absorb excess moisture.
2. Long-Term Storage: For longer-term storage, you can freeze the bitter gourd. Blanch the sliced bitter gourd in boiling water for 2-3 minutes, then transfer it to an ice bath to stop the cooking process. Drain the bitter gourd and freeze it in freezer bags or containers.
Troubleshooting Common Problems
Even with the best care, you might encounter some problems while growing bitter gourd. Here are some common issues and how I address them:
* Yellowing Leaves: This could be due to overwatering, underwatering, nutrient deficiencies, or pests. Check the soil moisture, fertilize the plants, and inspect them for pests.
* Lack of Fruit Production: This could be due to poor pollination, insufficient sunlight, or nutrient deficiencies. Hand-pollinate the flowers, ensure the plants are getting enough sunlight, and fertilize them regularly.
* Pest Infestations: Treat pest infestations promptly with appropriate organic pesticides.
* Disease Infections: Treat disease infections promptly with appropriate organic fungicides.
Enjoying Your Homegrown Bitter Gourd
Now that you’ve harvested your own bitter gourd, it’s time to enjoy the fruits of your labor! Bitter gourd can be used in a variety of dishes, from stir-fries to curries to soups. It’s also a popular ingredient in traditional medicine.
Here are some of my favorite ways to enjoy bitter gourd:
* Bitter Gourd Stir-Fry: Slice the bitter gourd thinly and stir-fry it with onions, garlic, and other

Conclusion
So, there you have it! Growing your own bitter gourd doesn’t have to be a daunting task. With these simple yet effective DIY tricks, you can transform your garden into a thriving haven for this nutritious and flavorful vegetable. We’ve covered everything from seed preparation and soil enrichment to pest control and harvesting, all designed to maximize your yield and minimize common frustrations.
Why is this a must-try? Because fresh, homegrown bitter gourd offers a taste and nutritional profile that store-bought varieties simply can’t match. You control the growing environment, ensuring your gourds are free from harmful pesticides and bursting with natural goodness. Plus, there’s an undeniable satisfaction in nurturing a plant from seed to harvest, knowing you’ve created something delicious and healthy with your own two hands.
But the journey doesn’t end here! Feel free to experiment with different variations to suit your specific climate and preferences. For instance, if you live in a particularly hot region, consider providing extra shade during the peak afternoon hours. If space is limited, vertical gardening techniques, such as training your bitter gourd vines up a trellis or fence, can be incredibly effective. You can also try different companion planting strategies. Marigolds, for example, are known to deter certain pests, while basil can improve the overall health of your bitter gourd plants. Another variation is to experiment with different varieties of bitter gourd. Some are more bitter than others, and some are better suited to specific climates. Don’t be afraid to try a few different types to find your favorite.
Remember, successful gardening is all about learning and adapting. Pay close attention to your plants, observe their growth patterns, and adjust your approach as needed. The tips we’ve shared are a solid foundation, but your own observations and experiences will be invaluable in fine-tuning your bitter gourd growing tips for your unique garden.
We’re confident that with a little effort and these DIY tricks, you’ll be enjoying a bountiful harvest of fresh, delicious bitter gourd in no time. So, grab your seeds, prepare your soil, and get ready to embark on this rewarding gardening adventure.
And most importantly, we want to hear about your experiences! Share your successes, your challenges, and any additional tips you’ve discovered along the way. Let’s create a community of bitter gourd enthusiasts, sharing our knowledge and helping each other grow the best possible crop. Post pictures of your thriving vines, your impressive harvests, and your delicious bitter gourd creations. Let us know which of these bitter gourd growing tips worked best for you, or if you have any other tips to share. Happy gardening!
Frequently Asked Questions (FAQ)
Q: How long does it take for bitter gourd to grow from seed to harvest?
A: Generally, bitter gourd takes about 60 to 90 days from seed to harvest. However, this timeframe can vary depending on several factors, including the variety of bitter gourd, the climate, and the growing conditions. Warmer temperatures and consistent moisture will typically lead to faster growth. Starting seeds indoors a few weeks before the last expected frost can also give you a head start. Keep a close eye on your plants and be patient – the reward of fresh, homegrown bitter gourd is well worth the wait!
Q: What is the best soil for growing bitter gourd?
A: Bitter gourd thrives in well-drained, fertile soil that is rich in organic matter. A slightly acidic to neutral pH (between 6.0 and 7.0) is ideal. Before planting, amend your soil with compost, well-rotted manure, or other organic materials to improve drainage, fertility, and water retention. If your soil is heavy clay, consider adding sand or perlite to improve drainage. A soil test can help you determine the specific nutrient needs of your soil and guide you in making appropriate amendments.
Q: How often should I water my bitter gourd plants?
A: Bitter gourd plants need consistent moisture, especially during hot weather and fruit development. Water deeply and regularly, aiming to keep the soil consistently moist but not waterlogged. A good rule of thumb is to water when the top inch of soil feels dry to the touch. Mulching around the base of the plants can help retain moisture and suppress weeds. Avoid overhead watering, as this can increase the risk of fungal diseases. Drip irrigation or soaker hoses are excellent options for delivering water directly to the roots.
Q: What are some common pests and diseases that affect bitter gourd, and how can I control them?
A: Common pests that can affect bitter gourd include aphids, squash bugs, cucumber beetles, and fruit flies. Diseases include powdery mildew, downy mildew, and anthracnose. To control pests, consider using organic methods such as introducing beneficial insects (like ladybugs), hand-picking pests, or using insecticidal soap or neem oil. For diseases, ensure good air circulation around the plants, avoid overhead watering, and apply a fungicide if necessary. Regularly inspect your plants for signs of pests or diseases and take action promptly to prevent them from spreading. Crop rotation can also help prevent soilborne diseases.
Q: How do I know when my bitter gourd is ready to harvest?
A: Bitter gourd is typically ready to harvest when the fruit is still green and firm, but before it turns yellow or orange. The size of the fruit will vary depending on the variety, but generally, you can harvest when the gourd reaches about two-thirds of its mature size. The skin should be smooth and unblemished. Use a sharp knife or pruning shears to cut the gourd from the vine, leaving a short stem attached. Harvesting regularly will encourage the plant to produce more fruit.
Q: How can I reduce the bitterness of bitter gourd?
A: Bitter gourd is known for its distinctive bitterness, but there are several ways to reduce it. One common method is to soak the sliced or chopped bitter gourd in salted water for at least 30 minutes before cooking. This helps to draw out some of the bitter compounds. Another technique is to blanch the bitter gourd in boiling water for a few minutes before using it in your recipe. You can also remove the seeds and pith, as these are the most bitter parts of the gourd. Cooking bitter gourd with acidic ingredients, such as vinegar or lemon juice, can also help to balance the bitterness.
Q: Can I grow bitter gourd in containers?
A: Yes, you can successfully grow bitter gourd in containers, provided you choose a large enough container (at least 15-20 gallons) and provide adequate support for the vines. Use a well-draining potting mix and ensure the container has drainage holes. Water regularly and fertilize every few weeks with a balanced fertilizer. Place the container in a sunny location that receives at least 6-8 hours of sunlight per day. A trellis or other support structure is essential for the vines to climb.
Q: What are some good companion plants for bitter gourd?
A: Companion planting can be beneficial for bitter gourd by attracting beneficial insects, repelling pests, or improving soil health. Good companion plants for bitter gourd include marigolds (which deter nematodes and other pests), basil (which repels flies and mosquitoes), beans (which fix nitrogen in the soil), and rosemary (which repels cabbage moths and bean beetles). Avoid planting bitter gourd near plants that are susceptible to the same pests or diseases, such as cucumbers and melons.
Q: How do I save seeds from my bitter gourd for next year?
A: To save seeds from your bitter gourd, allow a few gourds to fully mature on the vine until they turn yellow or orange. Once the gourd is ripe, harvest it and extract the seeds. Wash the seeds thoroughly to remove any pulp or residue. Spread the seeds out on a paper towel to dry completely in a cool, dry place. Once the seeds are dry, store them in an airtight container in a cool, dark location. Properly stored bitter gourd seeds can remain viable for several years.


Leave a Comment