

Growing Malabar Spinach Fast can feel like a race against the clock, especially when you’re craving those delicious, nutrient-packed leaves! Have you ever dreamt of harvesting a vibrant, leafy green just weeks after planting? Well, you’re not alone! For generations, gardeners have sought the secrets to maximizing their yields and shortening the growing time of their favorite vegetables.
Malabar Spinach, though not a true spinach, boasts a rich history in Asian and African cuisines, where it’s prized for its heat tolerance and unique flavor. It’s a climbing vine, adding a beautiful vertical element to your garden, and it’s incredibly versatile in the kitchen. But let’s face it, sometimes patience isn’t our strongest virtue, and waiting for a slow-growing plant can be frustrating. That’s where these DIY tricks come in!
I’m here to share some of my favorite, tried-and-true methods for growing Malabar Spinach fast. These aren’t just random tips; they’re practical hacks that address the plant’s specific needs, from optimizing soil conditions to providing the perfect support system. Whether you’re a seasoned gardener or just starting out, these simple techniques will help you accelerate growth and enjoy a bountiful harvest sooner than you ever thought possible. Get ready to unlock the secrets to a thriving Malabar Spinach patch!
Growing Malabar Spinach Like a Pro: A DIY Guide to Speedy Success
Hey there, fellow gardening enthusiasts! I’m so excited to share my secrets for growing Malabar spinach – that delicious, heat-loving leafy green – at lightning speed. Forget waiting months for a decent harvest; with these tips and tricks, you’ll be enjoying fresh, homegrown Malabar spinach in no time. Let’s dive in!
Understanding Malabar Spinach: Your Foundation for Success
Before we get our hands dirty, let’s quickly cover the basics. Malabar spinach (Basella alba or Basella rubra) isn’t actually spinach, but it tastes similar and thrives in hot weather where true spinach wilts. It’s a vining plant, so it needs support to climb. It’s also incredibly prolific, meaning you’ll get a ton of leaves from just a few plants. Knowing these things will help you understand why we’re doing what we’re doing.
Phase 1: Seed Starting (The Fast Track)
Starting from seed is the most common way to grow Malabar spinach, but we’re going to supercharge the process.
Why speed up seed starting? Malabar spinach seeds have a tough outer coating, which can make germination slow and uneven. We’re going to break that dormancy and give them a head start.
Materials you’ll need:
* Malabar spinach seeds
* Small container (seed starting tray, yogurt cups, etc.)
* Seed starting mix (or a mix of peat moss, perlite, and vermiculite)
* Sandpaper (fine-grit) or a nail file
* Warm water
* Paper towels
* Spray bottle
* Heat mat (optional, but highly recommended)
* Grow light (optional, but helpful)
Step-by-step instructions:
1. Scarify the seeds: This is the secret weapon! Gently rub each seed with sandpaper or a nail file to lightly scratch the outer coating. Don’t go too deep – just enough to weaken the shell. This allows water to penetrate more easily. I usually do this by holding the seed between my thumb and forefinger and gently rubbing it against the sandpaper a few times.
2. Soak the seeds: Place the scarified seeds in a small bowl of warm water and let them soak for 24-48 hours. This further softens the seed coat and encourages germination. Change the water every 12 hours to keep it fresh. You’ll likely see some seeds start to swell – that’s a good sign!
3. Prepare your seed starting container: Fill your container with seed starting mix, leaving about half an inch of space at the top. Moisten the mix thoroughly with a spray bottle. You want it damp, not soggy.
4. Sow the seeds: Plant the soaked seeds about ½ inch deep in the prepared mix. I usually plant 2-3 seeds per cell or container to increase my chances of success.
5. Cover and warm: Gently cover the seeds with a thin layer of seed starting mix. Mist the surface with water to keep it moist. Place the container on a heat mat, if you have one. The ideal germination temperature for Malabar spinach is between 70-80°F (21-27°C). If you don’t have a heat mat, find a warm spot in your house.
6. Provide light: If you’re using a grow light, position it a few inches above the container. If not, place the container in a bright, sunny window.
7. Maintain moisture: Keep the seed starting mix consistently moist, but not waterlogged. Use a spray bottle to mist the surface as needed.
8. Watch for germination: You should see seedlings emerge within 7-14 days. Once they sprout, remove the heat mat (if you were using one) and continue to provide plenty of light.
9. Thin if necessary: If more than one seedling emerges in a single cell or container, thin them out by snipping off the weaker seedlings at the soil line. Leave the strongest seedling to grow.
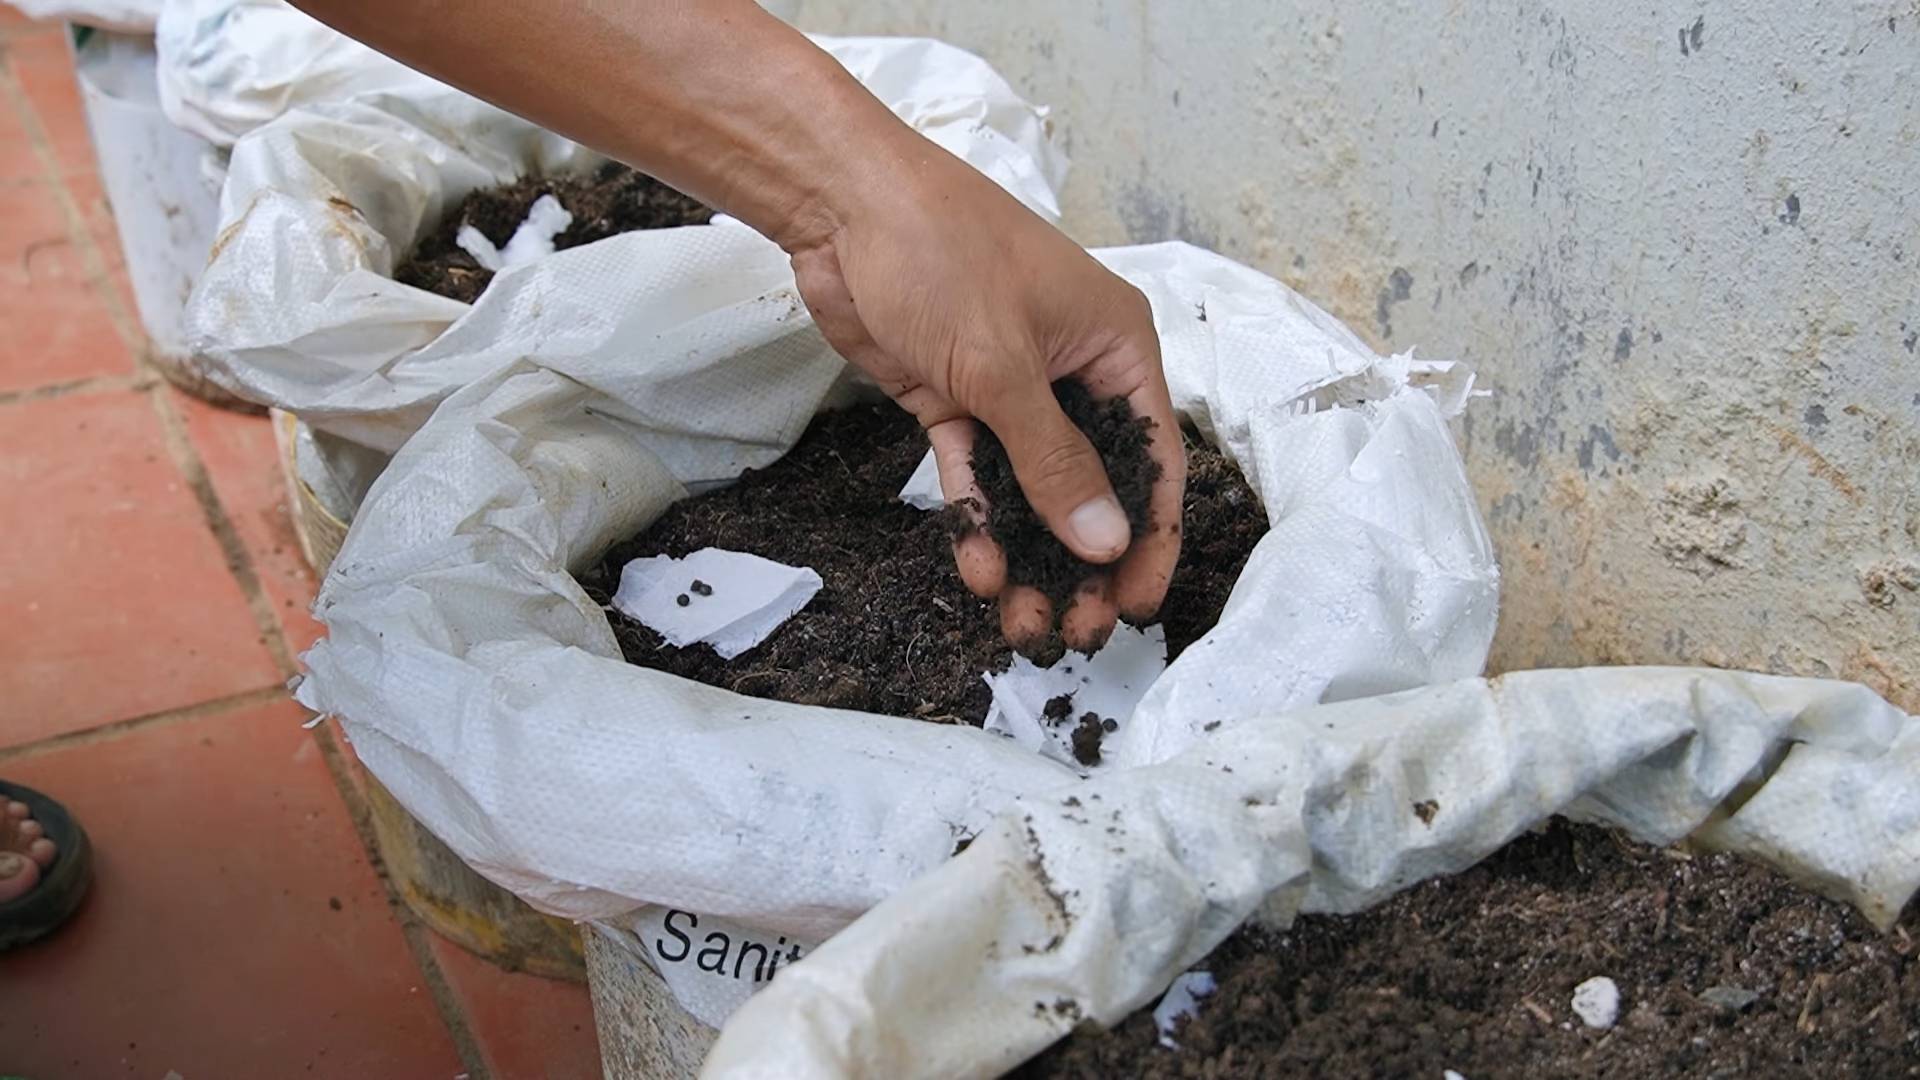
Phase 2: Preparing the Garden Bed (Nutrient Powerhouse)
Malabar spinach is a heavy feeder, meaning it needs plenty of nutrients to thrive. We’re going to create a super-rich garden bed to give it the boost it needs.
Why a nutrient-rich bed? This ensures rapid growth and abundant leaf production. Think of it as giving your plants a delicious, nutritious meal every day.
Materials you’ll need:
* Well-draining soil (if your soil is heavy clay, amend it with compost and sand)
* Compost (lots of it!)
* Aged manure (optional, but beneficial)
* Organic fertilizer (slow-release)
* Trellis or other support structure
Step-by-step instructions:
1. Choose a sunny location: Malabar spinach needs at least 6 hours of direct sunlight per day.
2. Prepare the soil: Dig a hole or trench where you plan to plant your Malabar spinach. The size will depend on how many plants you’re growing. I usually dig a trench about 1 foot wide and 1 foot deep.
3. Amend the soil: Mix in a generous amount of compost and aged manure (if using) with the existing soil. The goal is to create a loose, fertile, and well-draining growing medium. I usually aim for a 50/50 mix of soil and compost.
4. Add fertilizer: Incorporate a slow-release organic fertilizer into the soil according to the package directions. This will provide a steady supply of nutrients to your plants.
5. Install a trellis: Malabar spinach is a vining plant, so it needs a trellis or other support structure to climb. You can use a bamboo trellis, a wire fence, or even a sturdy tomato cage. Install the trellis before you plant your seedlings to avoid disturbing their roots later. I’ve found that a simple A-frame trellis works wonders.
Phase 3: Transplanting and Ongoing Care (The Growth Spurt)
Now that we have our seedlings and a nutrient-rich garden bed, it’s time to transplant and provide the ongoing care that will fuel rapid growth.
Why careful transplanting and consistent care? Minimizing transplant shock and providing the right conditions will ensure your plants get off to a strong start and continue to thrive.
Materials you’ll need:
* Your Malabar spinach seedlings
* Watering can or hose
* Mulch (straw, wood chips, etc.)
* Organic fertilizer (liquid)
* Pruning shears
Step-by-step instructions:
1. Harden off the seedlings: Before transplanting, gradually acclimate your seedlings to outdoor conditions. Start by placing them outside in a sheltered location for a few hours each day, gradually increasing the amount of time they spend outdoors over the course of a week. This will help them adjust to the sun, wind, and temperature changes.
2. Transplant the seedlings: Once the seedlings are hardened off, carefully transplant them into the prepared garden bed. Space them about 12-18 inches apart. Dig a hole slightly larger than the root ball of each seedling and gently place the seedling in the hole. Backfill with soil and gently firm around the base of the plant.
3. Water thoroughly: Water the transplanted seedlings thoroughly to help them settle in.
4. Mulch around the plants: Apply a layer of mulch around the base of the plants to help retain moisture, suppress weeds, and regulate soil temperature.
5. Water regularly: Malabar spinach needs consistent moisture, especially during hot weather. Water deeply whenever the top inch of soil feels dry.
6. Fertilize regularly: Feed your Malabar spinach plants with a liquid organic fertilizer every 2-3 weeks. This will provide them with the extra nutrients they need to grow quickly. I like to use a seaweed emulsion or fish emulsion fertilizer.
7. Prune regularly: Prune your Malabar spinach plants regularly to encourage bushier growth and prevent them from becoming too leggy. Pinch off the tips of the vines to promote branching. You can also harvest leaves as needed.
8. Train the vines: As the vines grow, train them to climb the trellis. Gently guide the vines up the trellis and tie them in place with twine or plant clips if needed.
9. Watch for pests and diseases: Malabar spinach is generally pest and disease resistant, but it can occasionally be affected by aphids or spider mites. If you notice any pests, treat them with an organic insecticide such as neem oil or insecticidal soap.
Bonus Tips for Supercharged Growth
* Provide afternoon shade in extremely hot climates: While Malabar spinach loves heat, it can benefit from some afternoon shade in areas with scorching summers.
* Harvest regularly: The more you harvest, the more the plant will produce. Don’t be afraid to cut back the vines – they’ll grow back
Conclusion
So, there you have it! Growing Malabar spinach fast isn’t just a pipe dream; it’s an achievable reality with a little know-how and the right techniques. We’ve explored the secrets to optimizing your growing conditions, from selecting the perfect sunny spot and enriching your soil to mastering the art of watering and providing sturdy support for these vigorous vines. The benefits extend far beyond simply having a readily available supply of this nutritious leafy green. You’ll be reducing your reliance on store-bought produce, minimizing your carbon footprint, and enjoying the unparalleled satisfaction of harvesting food you’ve nurtured yourself.
But the journey doesn’t end here. Feel free to experiment with different trellising methods. Perhaps you’ll discover that a repurposed pallet makes an excellent climbing frame, or maybe you’ll find that interplanting with companion herbs like basil or marigolds helps to deter pests naturally. Consider trying different varieties of Malabar spinach, too. While the green-stemmed variety is most common, the red-stemmed version offers a beautiful visual contrast and a slightly different flavor profile.
This DIY trick for accelerating Malabar spinach growth is a game-changer for any gardener, regardless of experience level. It’s about more than just speed; it’s about maximizing your yield, minimizing waste, and connecting with the natural world in a meaningful way. Imagine the delicious meals you can create with your homegrown Malabar spinach – stir-fries, soups, salads, and more! The possibilities are truly endless.
Don’t be intimidated by the prospect of trying something new. The steps we’ve outlined are straightforward and easy to follow, and the rewards are well worth the effort. We encourage you to embrace the challenge, get your hands dirty, and witness the magic of accelerated Malabar spinach growth firsthand.
And most importantly, we want to hear about your experiences! Share your successes, your challenges, and your unique adaptations in the comments below. Let’s build a community of Malabar spinach enthusiasts, sharing tips and tricks to help each other grow the best possible crop. Your insights could be invaluable to someone just starting out, and together, we can unlock the full potential of this amazing plant. So go ahead, give it a try, and let us know how it goes! Happy gardening!
Frequently Asked Questions (FAQ)
What exactly *is* Malabar spinach, and why should I grow it?
Malabar spinach (Basella alba or Basella rubra) isn’t actually a true spinach, but a leafy green vine that thrives in warm weather. It’s incredibly nutritious, packed with vitamins A and C, iron, and calcium. Unlike true spinach, it doesn’t bolt (go to seed) in hot weather, making it a fantastic alternative for summer gardens. Plus, it’s a beautiful ornamental plant with its glossy leaves and climbing habit. Growing your own ensures you have a fresh, pesticide-free supply and reduces your reliance on store-bought produce. It’s also a fun and rewarding gardening project!
How long does it *really* take to grow Malabar spinach fast using these methods?
While the exact timeframe can vary depending on your specific climate and growing conditions, you can generally expect to see harvestable leaves within 6-8 weeks of planting if you follow the techniques outlined in this article. This is significantly faster than the typical 8-12 weeks it can take without these methods. Factors like consistent watering, adequate sunlight, and nutrient-rich soil are crucial for achieving optimal growth rates. Remember to be patient and observe your plants regularly to adjust your care as needed.
What kind of soil is best for growing Malabar spinach fast?
Malabar spinach thrives in well-draining soil that is rich in organic matter. A slightly acidic to neutral pH (around 6.5 to 7.0) is ideal. Before planting, amend your soil with compost, well-rotted manure, or other organic materials to improve its fertility and drainage. You can also add a slow-release fertilizer to provide a steady supply of nutrients. If you’re growing in containers, use a high-quality potting mix specifically formulated for vegetables. Regular soil testing can help you determine if your soil is lacking any essential nutrients.
How much sun does Malabar spinach need to grow quickly?
Malabar spinach needs at least 6-8 hours of direct sunlight per day to grow quickly and produce abundant leaves. Choose a location in your garden that receives full sun for most of the day. If you live in a particularly hot climate, some afternoon shade can be beneficial to prevent the leaves from scorching. If you’re growing indoors, use grow lights to supplement natural sunlight and ensure your plants receive adequate illumination.
How often should I water my Malabar spinach plants?
Consistent watering is essential for fast Malabar spinach growth. Keep the soil consistently moist, but not waterlogged. Water deeply whenever the top inch of soil feels dry to the touch. During hot, dry weather, you may need to water more frequently. Mulching around the base of the plants can help to retain moisture and reduce the need for frequent watering. Avoid overhead watering, as this can increase the risk of fungal diseases.
What kind of support or trellis should I use for Malabar spinach?
Malabar spinach is a vining plant and requires support to climb. A trellis, fence, or even a sturdy stake will work well. Choose a support system that is at least 6-8 feet tall to accommodate the plant’s vigorous growth. You can also train the vines to climb up existing structures, such as arbors or pergolas. Make sure the support is strong enough to handle the weight of the mature plant, especially after heavy rain.
Are there any common pests or diseases that affect Malabar spinach?
Malabar spinach is generally resistant to pests and diseases, but it can occasionally be affected by aphids, spider mites, or fungal diseases like leaf spot. Inspect your plants regularly for signs of infestation or disease. If you notice any problems, treat them promptly with organic pest control methods or fungicides. Proper watering and good air circulation can help to prevent fungal diseases.
Can I grow Malabar spinach in containers?
Yes, Malabar spinach can be successfully grown in containers. Choose a large container that is at least 12 inches in diameter and has good drainage holes. Use a high-quality potting mix and provide adequate support for the vines to climb. Container-grown plants may require more frequent watering and fertilization than those grown in the ground.
How do I harvest Malabar spinach?
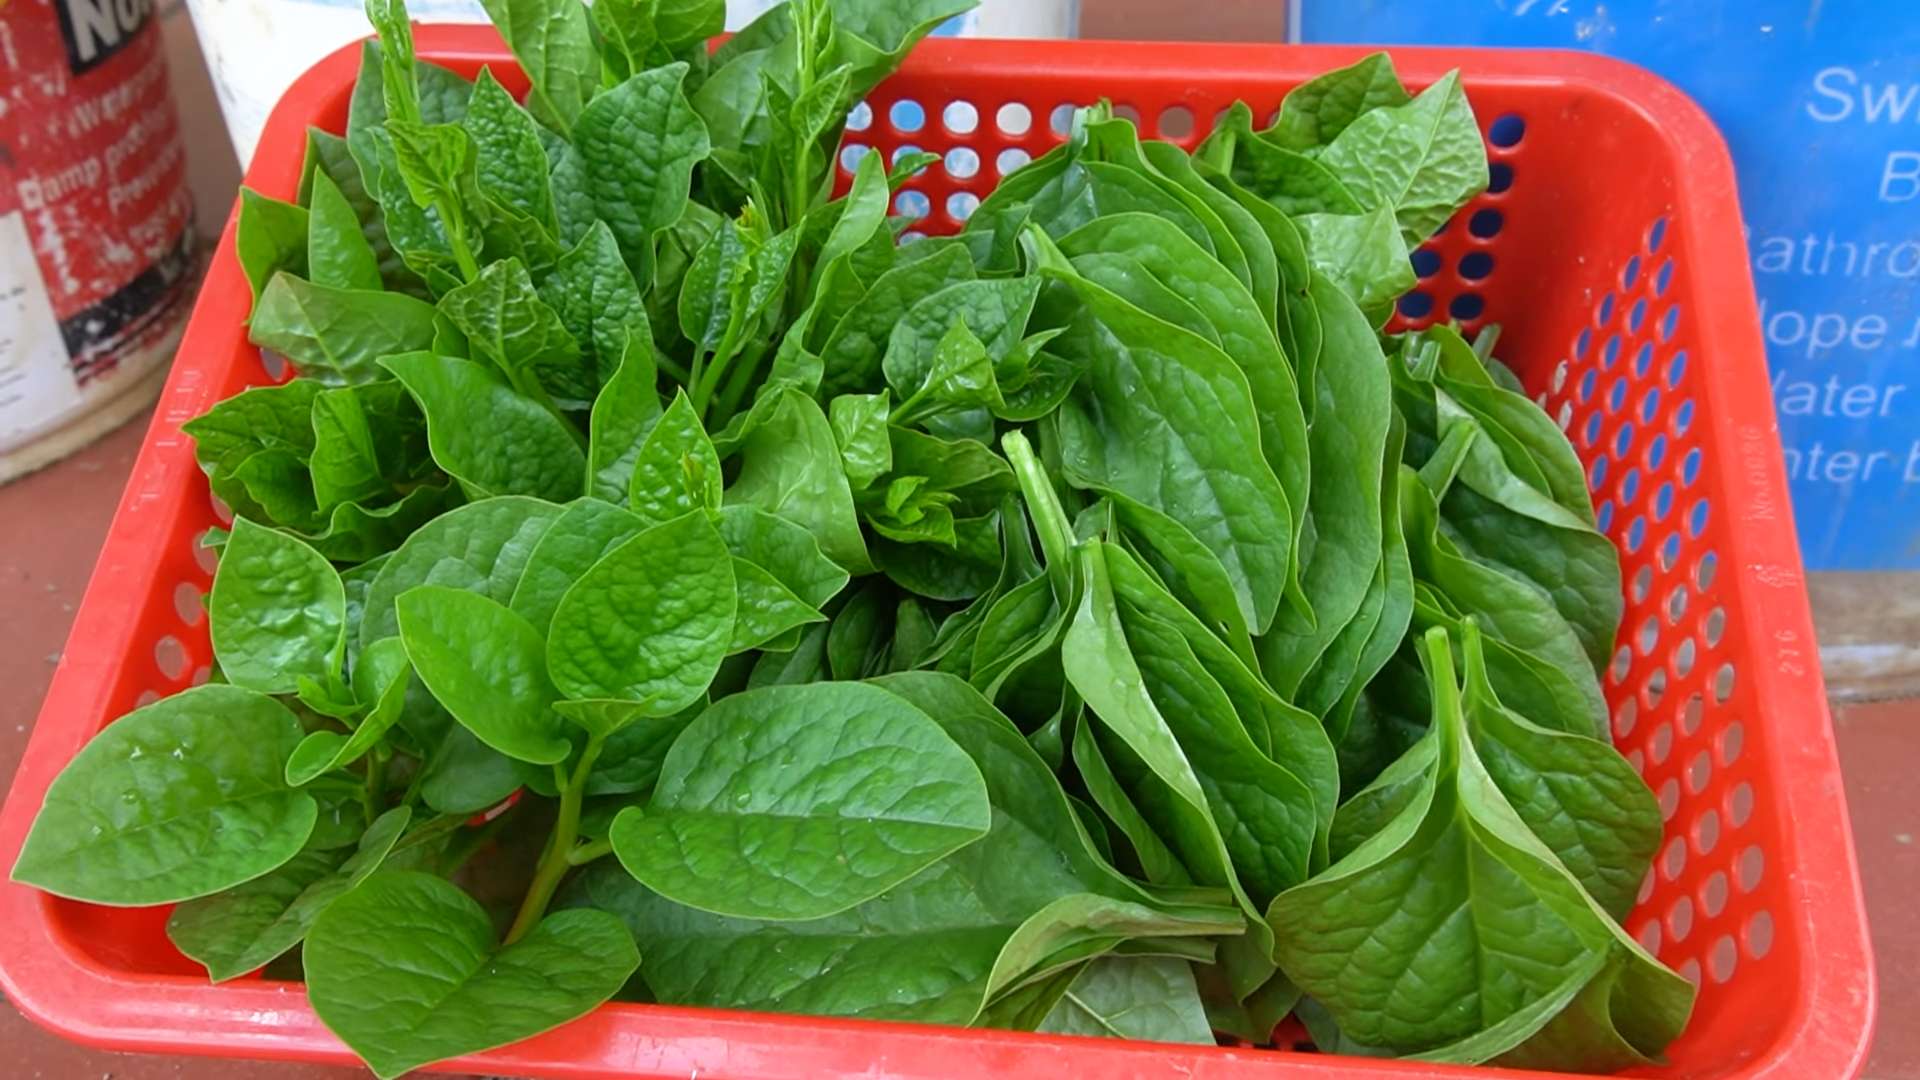
You can begin harvesting Malabar spinach leaves as soon as they are large enough to eat, typically when they are about 4-6 inches long. Simply snip off the leaves with scissors or pruning shears. Regular harvesting will encourage the plant to produce more leaves. You can also harvest the tender stems and shoots.
Can I save seeds from my Malabar spinach plants?
Yes, you can save seeds from your Malabar spinach plants. Allow some of the flowers to develop into berries and ripen on the vine. Once the berries turn dark purple or black, harvest them and remove the seeds. Dry the seeds thoroughly before storing them in an airtight container in a cool, dark place.
Is Malabar spinach safe to eat raw?
While Malabar spinach is generally safe to eat raw, some people may find the texture slightly slimy. Cooking the leaves briefly can help to reduce the sliminess. You can also add a squeeze of lemon juice or vinegar to the raw leaves to help break down the mucilage.
What are some ways to use Malabar spinach in cooking?
Malabar spinach can be used in a variety of dishes, similar to regular spinach. It’s great in stir-fries, soups, stews, salads, and omelets. It can also be used as a thickening agent in soups and sauces. The leaves have a mild, slightly peppery flavor that pairs well with a variety of ingredients.
Can I grow Malabar spinach indoors?
Yes, you can grow Malabar spinach indoors, but it requires a lot of light. Place the plant near a sunny window that receives at least 6 hours of direct sunlight per day, or supplement with grow lights. Provide adequate support for the vines to climb and water regularly.
What if my Malabar spinach isn’t growing fast enough?
If your Malabar spinach isn’t growing as quickly as you’d like, review the tips outlined in this article. Make sure your plants are receiving enough sunlight, water, and nutrients. Check the soil pH and amend it if necessary. Consider adding a fertilizer specifically formulated for leafy greens. Also, ensure that your plants have adequate support to climb. If you’re still having trouble, consult with a local gardening expert for personalized advice.


Leave a Comment