

Thriving collard greens tips are what every home gardener dreams of! Imagine stepping outside your back door and harvesting vibrant, leafy greens bursting with flavor. No more bland, store-bought collards – just fresh, delicious goodness grown with your own two hands. But let’s be honest, getting those collards to truly thrive can sometimes feel like a battle against pests, unpredictable weather, and nutrient deficiencies.
Collard greens have a rich history, deeply rooted in Southern cuisine and culture. They’ve been a staple for generations, providing essential nutrients and a comforting taste of home. Beyond their culinary significance, collards are also incredibly versatile and relatively easy to grow, making them a perfect choice for beginner and experienced gardeners alike.
That’s where these DIY tricks and hacks come in! I’m going to share my tried-and-true secrets for cultivating the most amazing collard greens you’ve ever seen. From soil preparation to pest control, I’ll guide you through every step of the process. You’ll learn how to create the perfect environment for your collards to flourish, ensuring a bountiful harvest that will impress your family and friends. So, if you’re ready to unlock the secrets to thriving collard greens tips and enjoy the satisfaction of growing your own food, let’s get started!
Unlock the Secret to Thriving Collard Greens: A DIY Guide
Hey there, fellow gardeners! I’m so excited to share my tried-and-true methods for growing the most amazing, lush collard greens you’ve ever seen. Forget those sad, wimpy greens at the grocery store – we’re talking vibrant, flavorful leaves that will make your Southern soul sing! This isn’t just about planting; it’s about creating the perfect environment for your collards to flourish. Let’s dive in!
Choosing the Right Variety
Before we even think about soil, let’s talk varieties. Not all collard greens are created equal! Picking the right one for your climate and taste is crucial.
* Georgia Southern: This is a classic for a reason! It’s heat-tolerant and produces large, slightly crumpled leaves. A great all-around choice.
* Vates: If you’re in a cooler climate, Vates is your friend. It’s cold-hardy and matures relatively quickly.
* Champion: For a smoother leaf and mild flavor, Champion is a winner. It’s also known for its disease resistance.
* Top Bunch: This variety is known for its upright growth habit, making it easier to harvest.
I personally love Georgia Southern for its robust flavor, but experiment and find what works best for you!
Preparing the Soil: The Foundation for Success
Collard greens are hungry plants, so soil preparation is key. Think of it as building a strong foundation for a house – you wouldn’t skimp on that, would you?
* Sunlight: Collards need at least 6 hours of sunlight per day. Choose a spot in your garden that gets plenty of sunshine.
* Soil Type: They prefer well-drained soil that’s rich in organic matter.
* pH Level: Aim for a soil pH between 6.0 and 6.8. You can test your soil with a kit from your local garden center.
* Amendments: This is where the magic happens!
* Compost: Add plenty of compost to your soil. It improves drainage, adds nutrients, and helps retain moisture. I usually add a few inches of compost to my planting area.
* Aged Manure: Aged manure is another fantastic amendment. It’s packed with nutrients that collards love. Be sure it’s aged, though, or it can burn your plants.
* Fertilizer: A balanced fertilizer (like 10-10-10) can give your collards a boost. Follow the instructions on the fertilizer package.
Planting Your Collard Greens: Getting Started
You can start collard greens from seed or purchase transplants from a nursery. I’ve done both, and both methods work well.
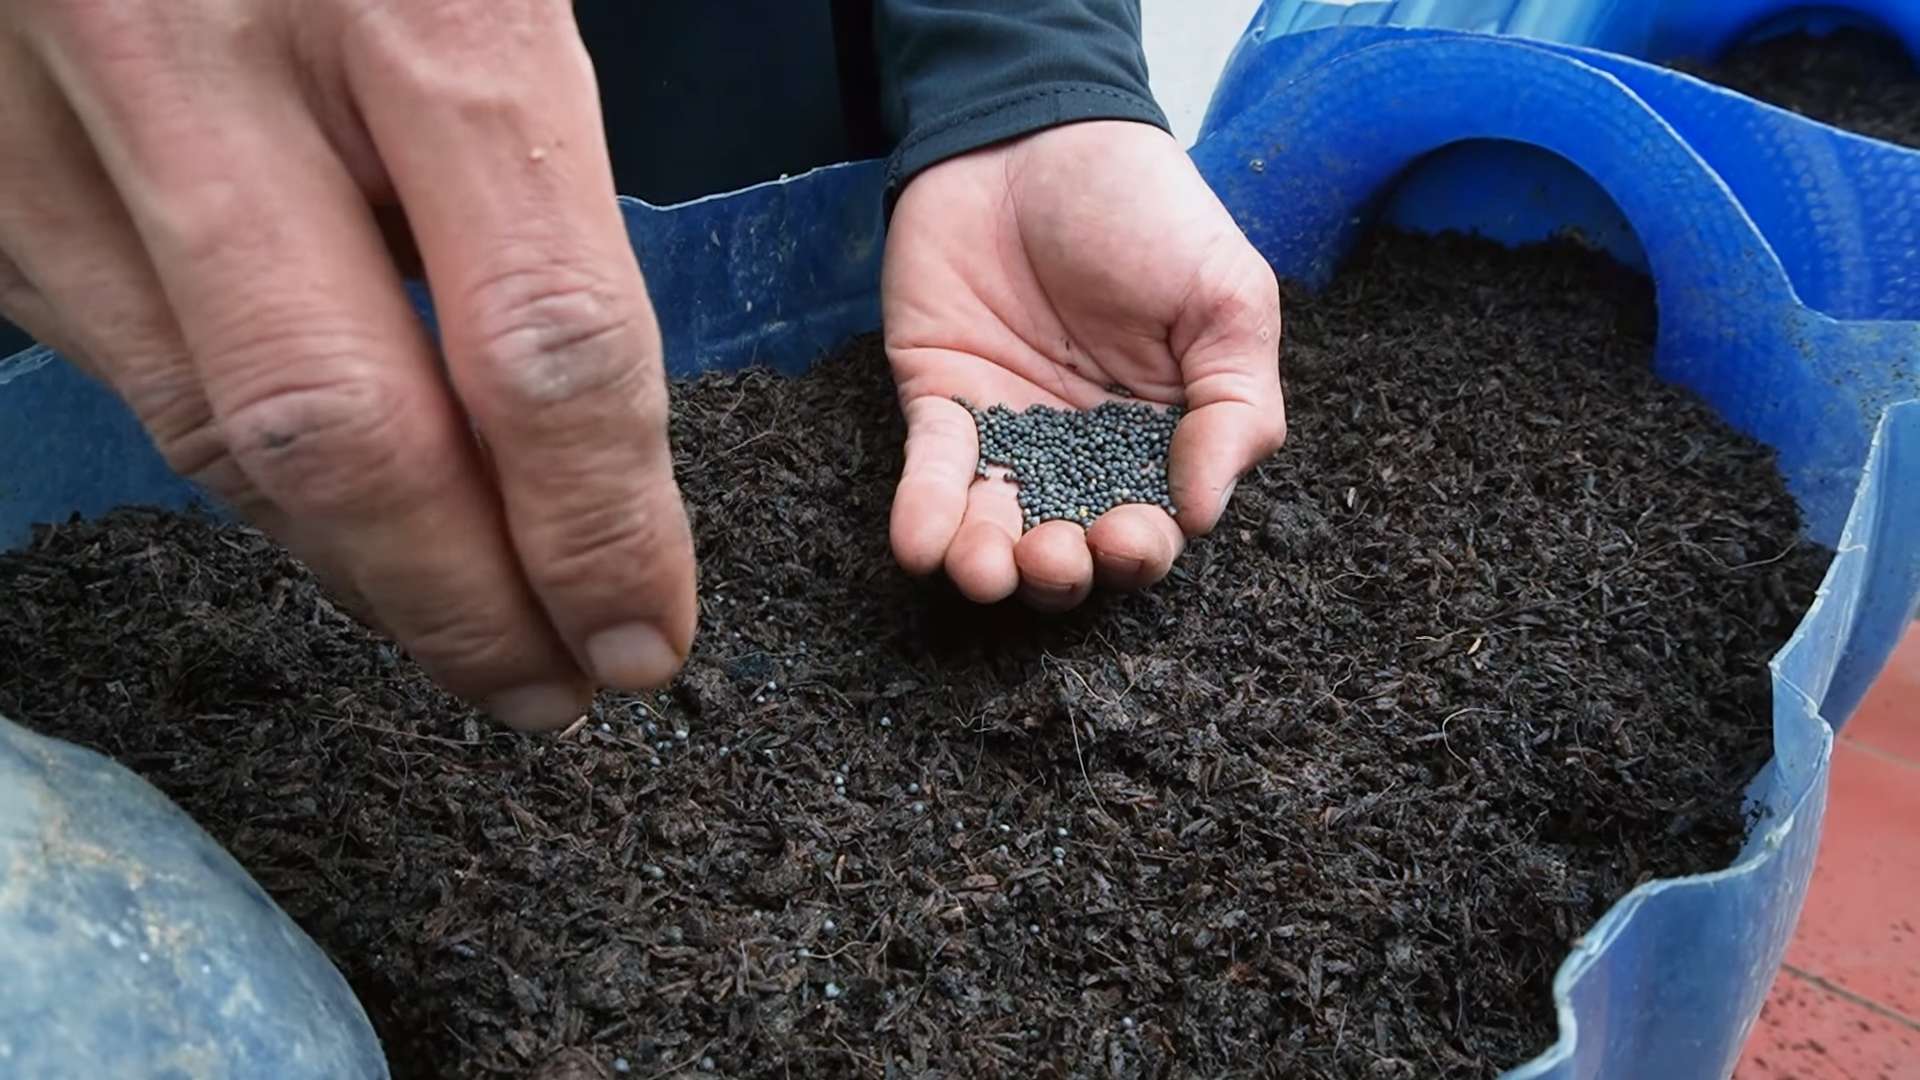
Starting from Seed:
1. Timing: You can start seeds indoors 6-8 weeks before the last frost or direct sow them in the garden after the last frost. For a fall harvest, sow seeds in mid-summer.
2. Sowing Indoors: Sow seeds about 1/4 inch deep in seed-starting trays or pots. Keep the soil moist and warm.
3. Transplanting: Once the seedlings have a few sets of true leaves, you can transplant them into the garden. Space them about 12-18 inches apart.
4. Direct Sowing: Sow seeds directly into the garden about 1/2 inch deep. Thin the seedlings to 12-18 inches apart once they emerge.
Using Transplants:
1. Choosing Transplants: Select healthy-looking transplants with sturdy stems and green leaves. Avoid plants that are root-bound or have yellowing leaves.
2. Planting: Dig a hole that’s slightly larger than the root ball of the transplant. Gently remove the transplant from its container and loosen the roots.
3. Spacing: Space the transplants about 12-18 inches apart.
4. Watering: Water the transplants thoroughly after planting.
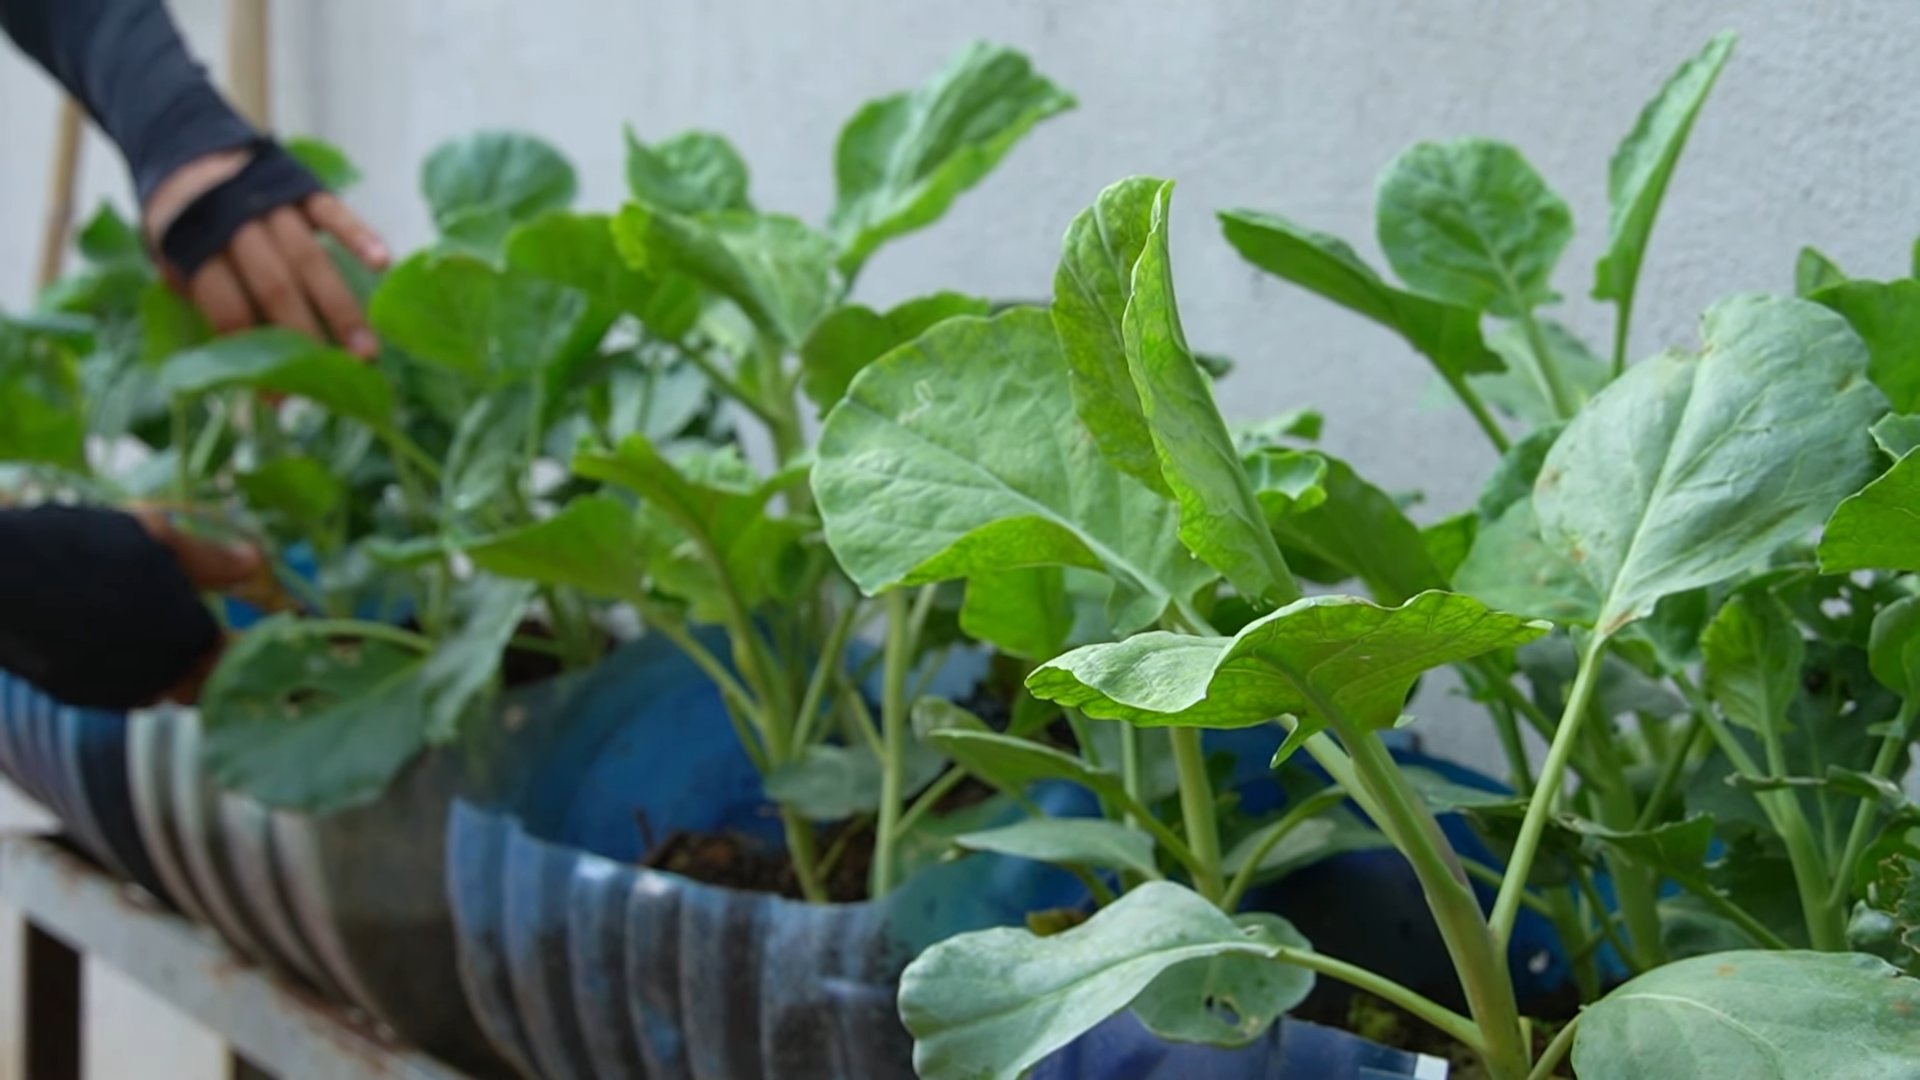
Caring for Your Collard Greens: Keeping Them Happy
Once your collard greens are planted, it’s time to give them the TLC they need to thrive.
* Watering: Collard greens need consistent moisture, especially during hot weather. Water deeply whenever the top inch of soil feels dry. I like to water in the morning so the leaves have time to dry before nightfall, which helps prevent fungal diseases.
* Fertilizing: Side-dress your collard greens with a nitrogen-rich fertilizer every few weeks. This will encourage lush growth. I use fish emulsion or compost tea.
* Weeding: Keep the area around your collard greens free of weeds. Weeds compete with your plants for nutrients and water.
* Mulching: Apply a layer of mulch around your collard greens to help retain moisture, suppress weeds, and regulate soil temperature. Straw, wood chips, or shredded leaves work well.
* Pest Control: Keep an eye out for pests like cabbage worms, aphids, and flea beetles.
* Cabbage Worms: These little green caterpillars can devour your collard greens in no time. Handpick them off the plants or use Bacillus thuringiensis (Bt), a natural insecticide.
* Aphids: These tiny insects suck the sap from your plants. Spray them with a strong stream of water or use insecticidal soap.
* Flea Beetles: These small, jumping beetles can create tiny holes in the leaves. Cover your plants with row covers to prevent them from reaching your collard greens.
Harvesting Your Collard Greens: The Sweet Reward
After all your hard work, it’s time to reap the rewards!
* When to Harvest: You can start harvesting collard greens when the leaves are about 10-12 inches long.
* How to Harvest: Harvest the outer leaves first, leaving the inner leaves to continue growing. This allows you to harvest from the same plant multiple times.
* Harvesting Technique: Use a sharp knife or scissors to cut the leaves near the base of the plant.
* Storage: Store collard greens in the refrigerator for up to a week. Wrap them in a damp paper towel and place them in a plastic bag.
Dealing with Common Problems
Even with the best care, you might encounter some problems along the way. Here’s how to troubleshoot some common issues:
* Yellowing Leaves: This could be a sign of nutrient deficiency, overwatering, or disease. Check your soil pH, fertilize your plants, and make sure the soil is well-drained.
* Holes in Leaves: This is usually caused by pests like cabbage worms or flea beetles. Inspect your plants regularly and take action to control pests.
* Stunted Growth: This could be due to poor soil, lack of sunlight, or disease. Amend your soil, make sure your plants are getting enough sunlight, and check for signs of disease.
* Bolting: Bolting is when the plant prematurely flowers and goes to seed. This can happen in hot weather. To prevent bolting, choose heat-tolerant varieties and provide shade during the hottest part of the day.
Extending Your Harvest: Succession Planting
Want to enjoy fresh collard greens all season long? Try succession planting!
* What is Succession Planting? Succession planting is the practice of planting crops at intervals to ensure a continuous harvest.
* How to Do It: Sow seeds or plant transplants every 2-3 weeks. This will give you a steady supply of collard greens throughout the growing season.
Overwintering Collard Greens
If you live in a mild climate, you can overwinter your collard greens for a spring harvest.
* Protection: Protect your plants from frost and cold winds by covering them with row covers or a thick layer of mulch.
* Watering: Water your plants sparingly during the winter months.
* Fertilizing: Fertilize your plants in early spring to encourage new growth.
My Secret Weapon: Epsom Salts
Okay, I’m going to let you in on a little secret that has worked wonders for my collard greens: Epsom salts!
* Why Epsom Salts? Epsom salts are magnesium sulfate, and magnesium is essential for plant growth. It helps plants absorb nutrients and promotes chlorophyll production, which is what makes leaves green and healthy.
* How to Use It: Dissolve 1 tablespoon of Epsom salts in 1 gallon of water. Spray the solution on your collard greens every few weeks. You can also add Epsom salts to the soil around your plants.
Final Thoughts
Growing collard greens is a rewarding experience. With a little bit of planning and care, you can enjoy a bountiful harvest of delicious, nutritious greens. Don’t be afraid to experiment and find what works best for you. Happy gardening!
Conclusion
So, there you have it! Mastering the art of growing thriving collard greens isn’t some mystical, unattainable feat. It’s about understanding their needs, providing the right environment, and employing a few simple, yet effective, DIY tricks to give them that extra boost. We’ve explored everything from soil preparation and sunlight requirements to pest control and harvesting techniques. But the real magic lies in the proactive steps you take to ensure your collard greens are not just surviving, but truly thriving.
This isn’t just about having a few leafy greens in your garden; it’s about cultivating a sustainable source of nutritious food, connecting with nature, and experiencing the satisfaction of nurturing something from seed to table. And the best part? You don’t need expensive equipment or specialized knowledge to achieve success. These DIY tips are designed to be accessible to everyone, regardless of their gardening experience.
One of the most compelling reasons to embrace these DIY methods is the control you gain over the quality of your produce. You know exactly what goes into your collard greens – no harmful chemicals, no hidden additives, just pure, wholesome goodness. This is especially important in today’s world, where concerns about food safety and environmental sustainability are paramount.
But don’t just take our word for it. The proof, as they say, is in the pudding (or in this case, the collard greens!). We strongly encourage you to try these techniques in your own garden. Experiment with different variations, such as adding coffee grounds to your soil for an extra nitrogen boost or using companion planting to deter pests naturally. Consider interplanting your collard greens with herbs like rosemary or thyme, which not only repel insects but also add a delightful aroma to your garden. You could even try succession planting, sowing new seeds every few weeks to ensure a continuous harvest throughout the growing season.
Remember, gardening is a journey of learning and discovery. There will be successes and setbacks along the way, but each experience will teach you something valuable. Don’t be afraid to make mistakes, to try new things, and to adapt your approach based on what works best for you and your specific growing conditions.
And most importantly, don’t forget to share your experiences with us! We’d love to hear about your successes, your challenges, and any unique DIY tricks you’ve discovered along the way. Share your photos, your tips, and your stories in the comments section below. Let’s create a community of thriving collard greens enthusiasts, where we can learn from each other and inspire others to embrace the joys of gardening.
So, get out there, get your hands dirty, and start growing your own delicious, nutritious, and thriving collard greens today! You’ll be amazed at what you can achieve with a little bit of knowledge, a little bit of effort, and a whole lot of love.
Frequently Asked Questions (FAQs)
What are the most common problems people face when trying to grow collard greens, and how can these DIY tips help address them?
Many gardeners struggle with issues like pest infestations (cabbage worms, aphids), nutrient deficiencies (yellowing leaves), and slow growth. These DIY tips directly address these problems. For example, the DIY pest control methods, such as using neem oil or creating a garlic spray, offer a natural and effective way to combat common pests without resorting to harsh chemicals. Similarly, amending the soil with compost or aged manure provides essential nutrients that promote healthy growth and prevent deficiencies. The tips on proper watering and sunlight exposure also contribute to overall plant health and resilience, making them less susceptible to problems.
How often should I water my collard greens, and how can I tell if I’m overwatering or underwatering them?
Watering frequency depends on factors like climate, soil type, and the age of your plants. Generally, collard greens need about 1 inch of water per week. The best way to determine if they need water is to check the soil moisture. Stick your finger about an inch into the soil near the base of the plant. If the soil feels dry, it’s time to water.
Overwatering can lead to root rot and other fungal diseases. Signs of overwatering include yellowing leaves, wilting (even when the soil is wet), and a foul smell coming from the soil. Underwatering, on the other hand, can cause the leaves to wilt and turn brown around the edges. To avoid these problems, water deeply but infrequently, allowing the soil to dry out slightly between waterings. Consider using a soaker hose or drip irrigation to deliver water directly to the roots, minimizing water loss through evaporation and reducing the risk of fungal diseases.
What are some good companion plants for collard greens, and how can they benefit my garden?
Companion planting is a fantastic way to enhance the health and productivity of your collard greens. Some excellent companion plants include:
* **Aromatic herbs:** Rosemary, thyme, and sage repel many common pests, such as cabbage moths and aphids.
* **Marigolds:** These flowers are known for their ability to deter nematodes and other soil-borne pests.
* **Dill:** Attracts beneficial insects like ladybugs and lacewings, which prey on aphids and other harmful pests.
* **Garlic and onions:** These alliums have strong odors that deter many insects.
* **Legumes (beans and peas):** These plants fix nitrogen in the soil, which can benefit collard greens.
By strategically planting these companions alongside your collard greens, you can create a more balanced and resilient ecosystem in your garden, reducing the need for chemical pesticides and fertilizers.
How do I know when my collard greens are ready to harvest, and what’s the best way to harvest them?
Collard greens are typically ready to harvest when the leaves are about 10-12 inches long. The leaves should be a deep green color and feel firm to the touch. To harvest, simply cut the outer leaves near the base of the plant, leaving the inner leaves to continue growing. This allows you to harvest continuously throughout the growing season. Avoid harvesting more than one-third of the plant at a time, as this can stress the plant and reduce its overall yield. It’s best to harvest in the morning, when the leaves are crisp and hydrated.
Can I grow collard greens in containers, and if so, what are some tips for success?
Yes, you can definitely grow collard greens in containers! Choose a large container (at least 12 inches in diameter) with good drainage. Use a high-quality potting mix that is rich in organic matter. Place the container in a sunny location that receives at least 6 hours of sunlight per day. Water regularly, especially during hot weather, and fertilize every few weeks with a balanced fertilizer. Consider using a self-watering container to help maintain consistent moisture levels. Container-grown collard greens may require more frequent watering and fertilization than those grown in the ground, but with proper care, you can enjoy a bountiful harvest even in a small space.
What are some creative ways to use my harvested collard greens in the kitchen?
Beyond the traditional Southern-style braised collard greens, there are many other delicious ways to enjoy your harvest. Try adding them to soups, stews, and stir-fries. You can also sauté them with garlic and olive oil for a simple and healthy side dish. Collard greens can also be used in salads, smoothies, and even as a wrap for fillings like rice and beans. For a unique twist, try making collard green chips by baking them in the oven with a little olive oil and salt. The possibilities are endless!
Are there any specific soil amendments that are particularly beneficial for growing thriving collard greens?
Yes, amending your soil is crucial for growing thriving collard greens. Compost is an excellent all-around amendment that improves soil structure, drainage, and fertility. Aged manure is another great option, providing essential nutrients like nitrogen, phosphorus, and potassium. Bone meal can be added to provide phosphorus, which promotes strong root growth. If your soil is acidic, you can add lime to raise the pH to the ideal range of 6.0 to 7.5. Before planting, it’s always a good idea to test your soil to determine its nutrient levels and pH, so you can amend it accordingly.
How can I protect my collard greens from frost and cold weather?
Collard greens are relatively cold-hardy, but they can still be damaged by frost and freezing temperatures. To protect them, you can cover them with row covers, blankets, or tarps when frost is predicted. You can also mulch around the base of the plants with straw or leaves to insulate the soil and protect the roots. If you’re growing collard greens in containers, you can move them to a sheltered location, such as a garage or shed, during periods of extreme cold.
What are some common mistakes to avoid when growing collard greens?
Some common mistakes include:
* **Planting too closely together:** Collard greens need plenty of space to grow, so be sure to space them at least 18-24 inches apart.
* **Neglecting to fertilize:** Collard greens are heavy feeders, so they need regular fertilization to thrive.
* **Ignoring pest problems:** Regularly inspect your plants for pests and take action promptly to prevent infestations.
* **Overwatering or underwatering:** Maintain consistent soil moisture, but avoid overwatering or allowing the soil to dry out completely.

Leave a Comment