

Kohlrabi yield small garden got you dreaming of plump, juicy bulbs but your tiny plot is giving you the side-eye? I get it! There’s nothing more frustrating than putting in the effort and ending up with kohlrabi the size of golf balls. But don’t despair, fellow gardener! This isn’t just another article; it’s your secret weapon to unlocking a bountiful kohlrabi harvest, even in the most compact of spaces.
Kohlrabi, a member of the cabbage family, has been cultivated in Europe since the 15th century, prized for its unique flavor and versatility. Historically, it was a staple crop, providing essential nutrients during colder months. Today, it’s a delightful addition to any garden, offering a crisp, slightly sweet taste that’s delicious raw or cooked.
But here’s the thing: maximizing your kohlrabi yield small garden requires a little know-how. Many gardeners struggle with overcrowding, poor soil, and inadequate sunlight, all of which can significantly impact the size and quality of their kohlrabi. That’s why I’ve compiled a collection of tried-and-true DIY tricks and hacks that will transform your small garden into a kohlrabi paradise. From clever companion planting strategies to soil amendments that boost growth, I’ll show you how to overcome common challenges and achieve a harvest you can be proud of. So, grab your gardening gloves, and let’s get started on maximizing that kohlrabi potential!
Boosting Your Kohlrabi Harvest: A DIY Guide to Bigger and Better Bulbs
So, you’re growing kohlrabi, huh? Awesome choice! It’s a quirky, delicious vegetable that’s surprisingly easy to grow. But sometimes, those bulbs just don’t get as big as you’d hoped. Don’t worry, I’ve been there! I’ve spent years experimenting with different techniques to maximize my kohlrabi harvest, and I’m here to share my secrets with you. This isn’t just about getting bigger bulbs; it’s about understanding what kohlrabi needs to thrive and creating the perfect environment for it. Let’s dive in!
Understanding Why Your Kohlrabi Might Be Small
Before we jump into the DIY fixes, let’s quickly cover why your kohlrabi might be underperforming. Knowing the root cause (pun intended!) will help you tailor your approach.
* Crowding: Kohlrabi needs space to grow. If they’re too close together, they’ll compete for resources and stay small.
* Poor Soil: Kohlrabi are heavy feeders and need nutrient-rich soil. If your soil is lacking, they won’t have the fuel they need to bulk up.
* Inconsistent Watering: Irregular watering can stress the plants and stunt their growth. Kohlrabi prefers consistently moist soil.
* Lack of Sunlight: Kohlrabi needs at least 6 hours of sunlight per day. Insufficient sunlight will limit their growth.
* Pest and Disease Issues: Pests like aphids and cabbage worms can weaken the plants, while diseases can hinder their development.
* Harvesting Too Late: This might sound counterintuitive, but letting kohlrabi grow too large can actually make them tough and woody. It’s better to harvest them when they’re still relatively small and tender.
DIY Hack #1: The Spacing Solution
This is probably the most common culprit for small kohlrabi. Giving your plants enough room to breathe is crucial.
What you’ll need:
* A measuring tape or ruler
* A trowel (if you need to transplant)
Step-by-step instructions:
1. Assess the Situation: Take a good look at your kohlrabi plants. Are they crammed together? Can you easily see the individual bulbs, or are they hidden by overlapping leaves?
2. Measure the Spacing: Ideally, kohlrabi should be spaced about 6-8 inches apart. Use your measuring tape to check the distance between each plant.
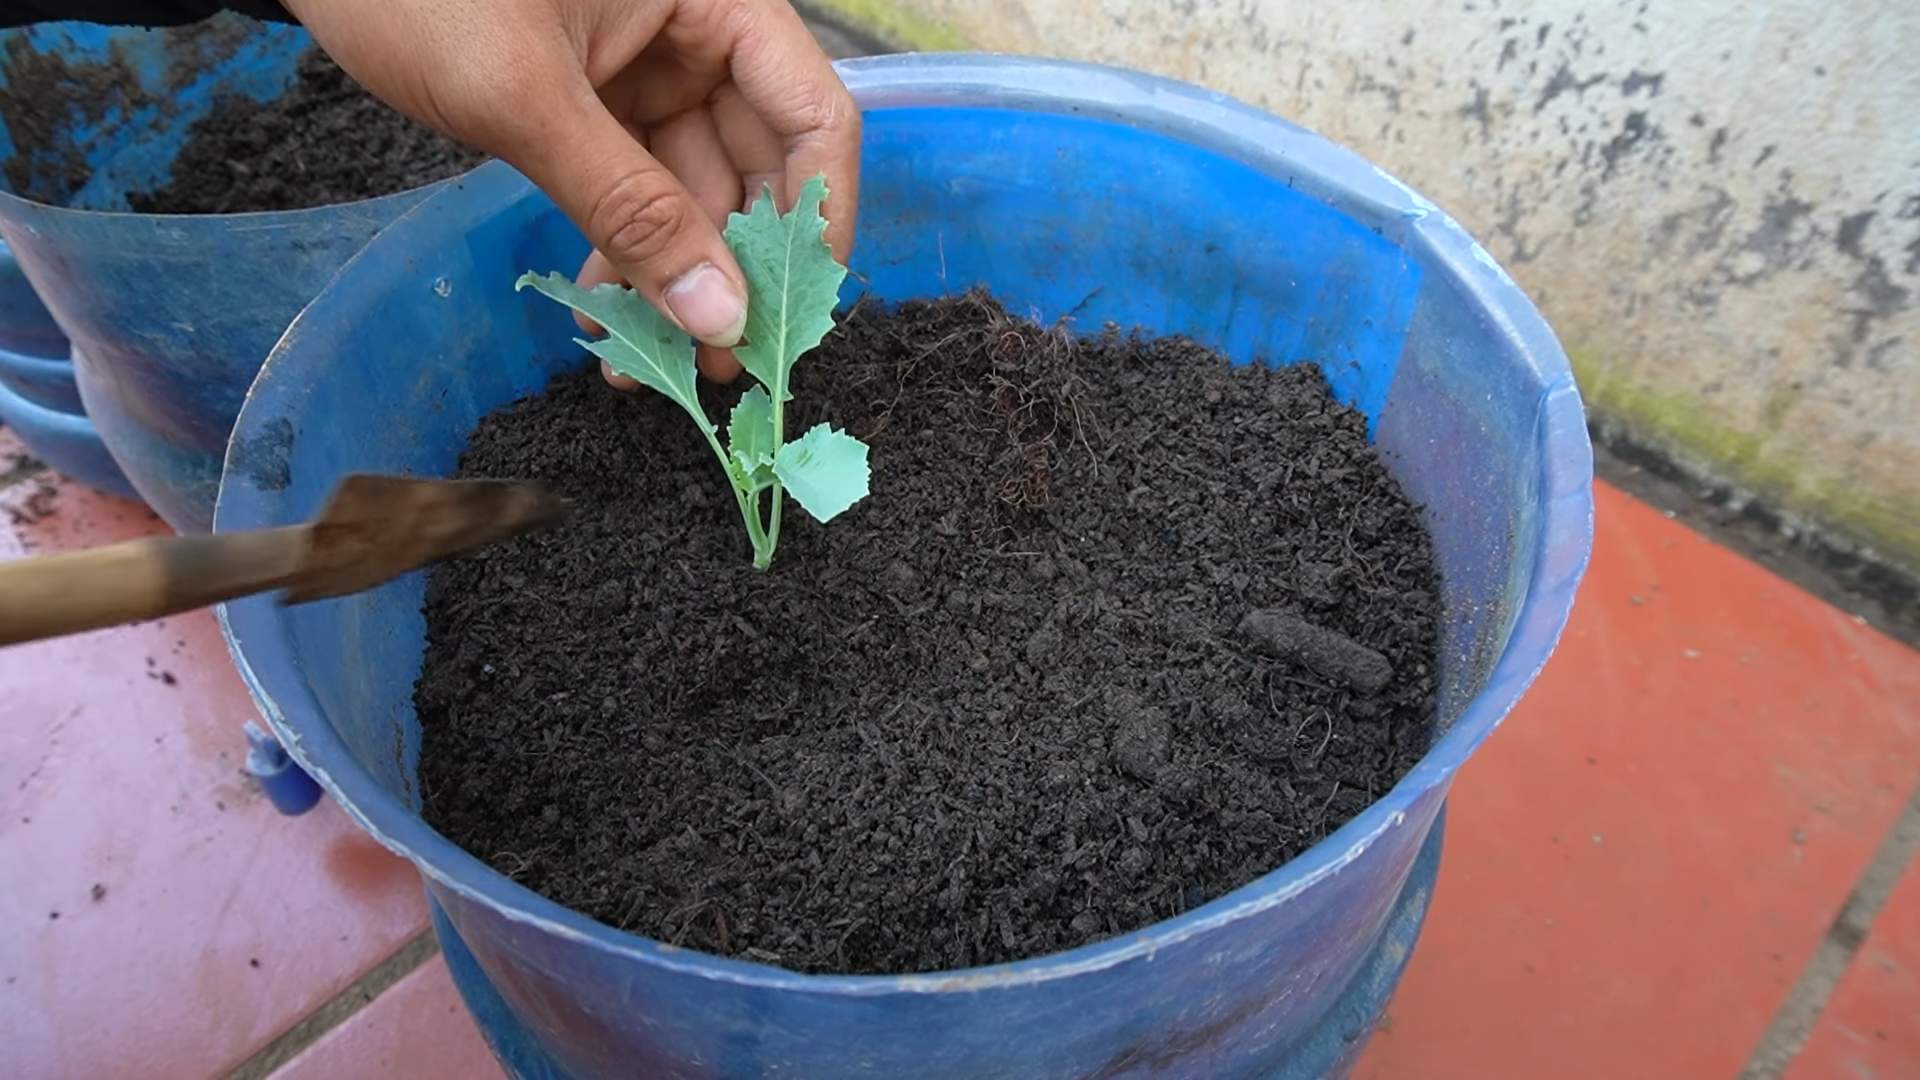
3. Transplant if Necessary: If your plants are too close, you’ll need to transplant some of them. Choose the healthiest-looking plants to keep and carefully dig up the others. Try to disturb the roots as little as possible.
4. Prepare the New Location: Dig a hole in the new location that’s large enough to accommodate the kohlrabi’s root ball.
5. Transplant Carefully: Gently place the kohlrabi in the hole and backfill with soil. Water thoroughly.
6. Monitor and Adjust: Keep an eye on your transplanted kohlrabi for the next few days. They might experience some transplant shock, but they should bounce back quickly.
DIY Hack #2: The Soil Enrichment Strategy
Kohlrabi are hungry plants! Giving them a nutrient boost can make a huge difference.
What you’ll need:
* Compost (well-rotted)
* A balanced organic fertilizer (e.g., 5-5-5)
* A garden fork or trowel
Step-by-step instructions:
1. Prepare the Soil: Gently loosen the soil around your kohlrabi plants with a garden fork or trowel. Be careful not to damage the roots.
2. Add Compost: Spread a 2-3 inch layer of compost around each plant. Compost is a fantastic source of organic matter and nutrients.
3. Apply Fertilizer: Sprinkle a balanced organic fertilizer around the base of each plant, following the instructions on the package.
4. Incorporate the Amendments: Gently work the compost and fertilizer into the top layer of soil.
5. Water Thoroughly: Water the plants well after applying the amendments. This will help the nutrients soak into the soil and reach the roots.
6. Repeat as Needed: You can repeat this process every 2-3 weeks, especially if your soil is poor.
DIY Hack #3: The Watering Wisdom
Consistent moisture is key to plump kohlrabi bulbs.
What you’ll need:
* A watering can or hose
* Mulch (straw, wood chips, or shredded leaves)
Step-by-step instructions:
1. Check the Soil Moisture: Before watering, stick your finger into the soil near the base of the kohlrabi plants. If the top inch of soil feels dry, it’s time to water.
2. Water Deeply: When you water, water deeply and slowly, allowing the water to soak into the soil. Avoid shallow watering, which can encourage shallow root growth.
3. Water Consistently: Aim to keep the soil consistently moist, but not waterlogged. Water more frequently during hot, dry weather.
4. Apply Mulch: Spread a 2-3 inch layer of mulch around the kohlrabi plants. Mulch helps to retain moisture in the soil, suppress weeds, and regulate soil temperature.
5. Monitor the Plants: Keep an eye on your kohlrabi plants for signs of overwatering or underwatering. Yellowing leaves can indicate overwatering, while wilting leaves can indicate underwatering.
DIY Hack #4: The Sunlight Strategy
Making sure your kohlrabi gets enough sun is crucial.
What you’ll need:
* Your eyes! (To observe the sunlight patterns in your garden)
* Pruning shears (if you need to trim nearby plants)
Step-by-step instructions:
1. Observe the Sunlight: Spend some time observing the sunlight patterns in your garden throughout the day. How many hours of direct sunlight do your kohlrabi plants receive?
2. Identify Obstructions: Are there any trees, shrubs, or buildings that are blocking the sunlight?
3. Prune if Necessary: If nearby plants are shading your kohlrabi, consider pruning them to allow more sunlight to reach the plants.
4. Relocate if Possible: If your kohlrabi plants are in a permanently shady location, consider transplanting them to a sunnier spot.
5. Consider Companion Planting: Avoid planting tall, leafy plants near your kohlrabi, as they can block the sunlight.
DIY Hack #5: The Pest and Disease Patrol
Protecting your kohlrabi from pests and diseases is essential for a healthy harvest.
What you’ll need:
* Insecticidal soap or neem oil
* Row covers (optional)
* Your eyes! (For regular inspection)
Step-by-step instructions:
1. Regular Inspection: Regularly inspect your kohlrabi plants for signs of pests or diseases. Look for aphids, cabbage worms, flea beetles, and other common garden pests. Also, watch out for signs of fungal diseases, such as leaf spots or powdery mildew.
2. Handpicking: If you find any pests, handpick them off the plants and dispose of them.
3. Insecticidal Soap or Neem Oil: For larger infestations, spray the plants with insecticidal soap or neem oil, following the instructions on the package. Be sure to spray both the tops and bottoms of the leaves.
4. Row Covers: To prevent pests from reaching your kohlrabi plants, you can cover them with row covers. Row covers are lightweight fabric covers that allow sunlight and water to pass through, but keep pests out.
5. Good Air Circulation: Ensure good air circulation around your kohlrabi plants to prevent fungal diseases. Avoid overcrowding the plants and prune any dead or diseased leaves.
DIY Hack #6: The Harvesting Harmony
Knowing when to harvest your kohlrabi is just as important as growing them properly.
What you’ll need:
* A sharp knife or garden shears
Step-by-step instructions:
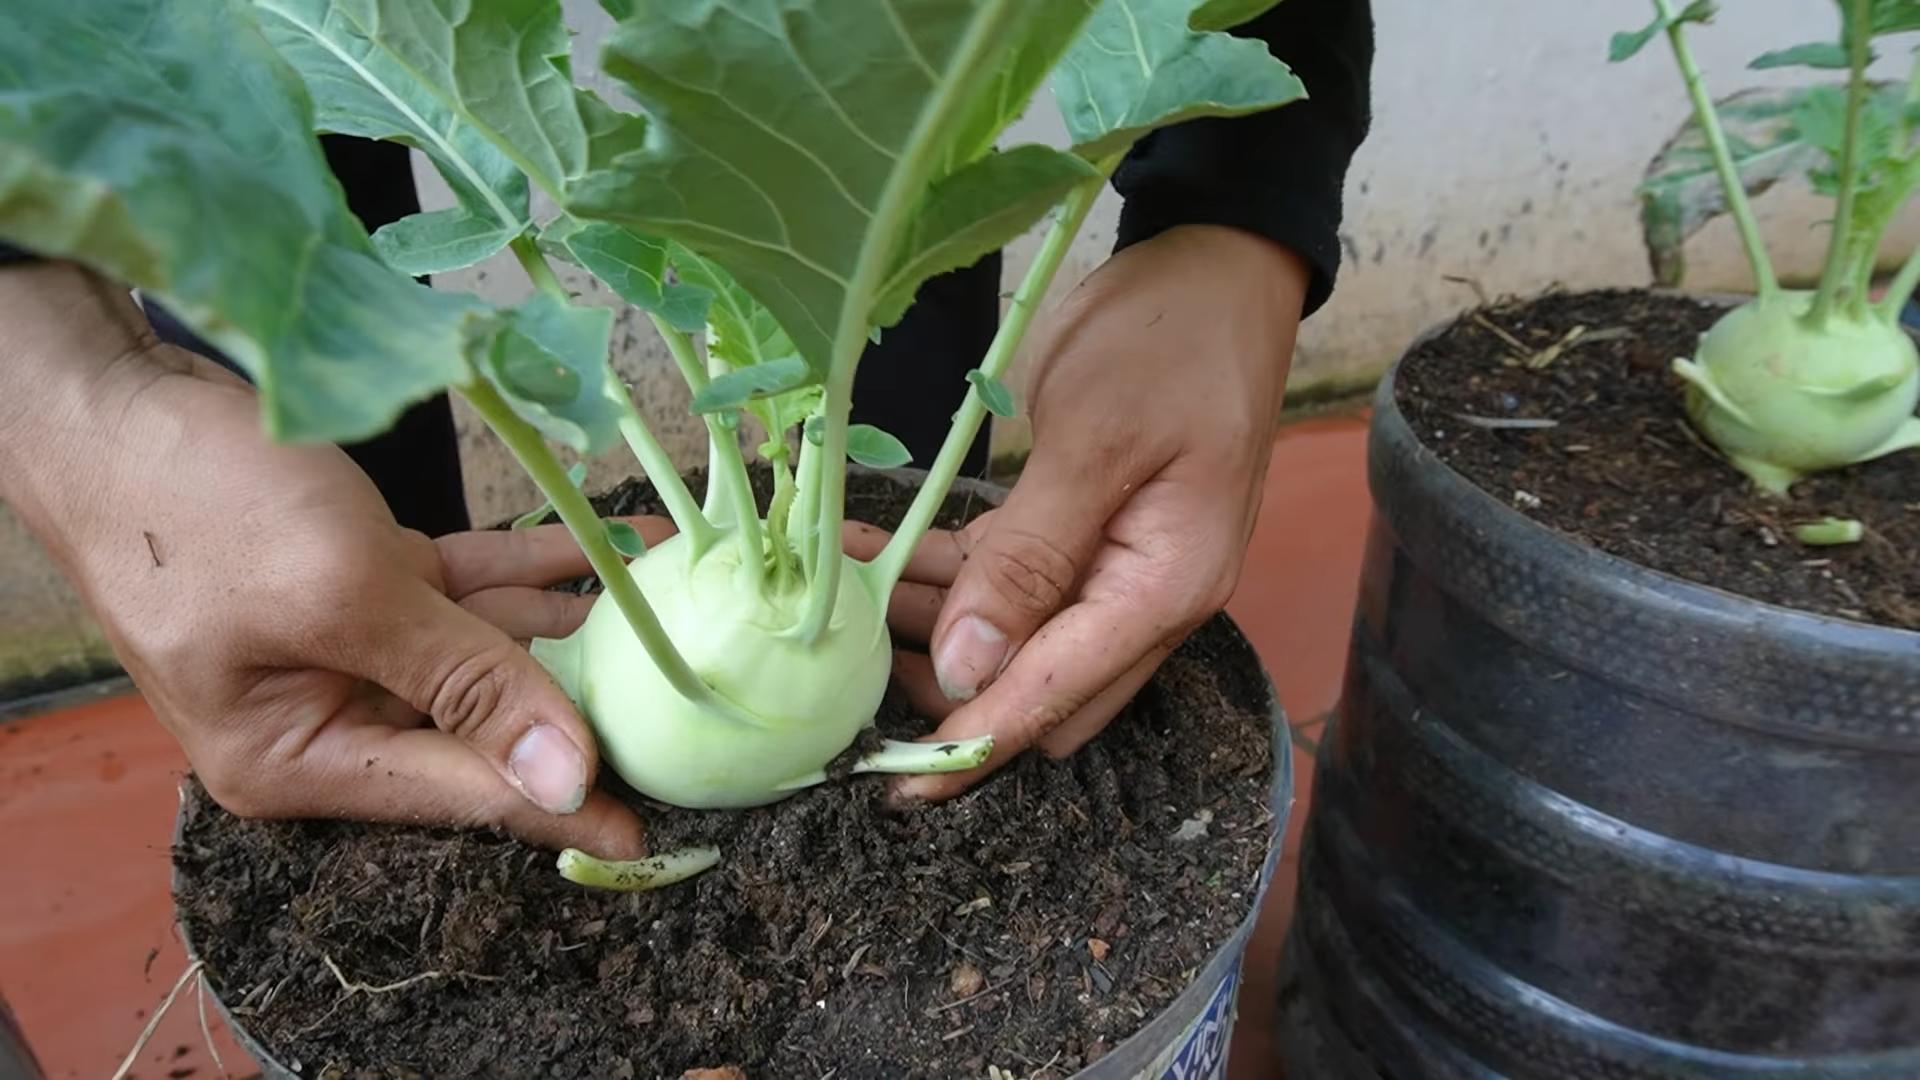
1. Check the Size: Kohlrabi is best harvested when the bulbs are about 2-3 inches in diameter. This is when they’re the most tender and flavorful.
2. Feel the Texture: Gently squeeze the bulb. It should feel firm and smooth. If it feels soft or spongy, it’s probably overripe.
3. Harvest Carefully: Use a sharp knife or garden shears to cut the kohlrabi bulb from the plant, leaving about an inch of stem attached.
4. Remove the Leaves: Remove the
Conclusion
So, there you have it! Transforming your kohlrabi harvest, even from a small garden, into delicious and versatile kohlrabi fries is not only achievable but incredibly rewarding. We’ve walked you through the simple steps, highlighting the ease and cost-effectiveness of this DIY trick. Forget store-bought, often bland, alternatives. With this method, you’re in complete control of the ingredients, ensuring a healthier and tastier snack or side dish for you and your family.
Why is this a must-try? Because it’s a fantastic way to utilize your entire kohlrabi crop, minimizing waste and maximizing flavor. It’s also a fun and engaging activity, especially if you involve children in the process. They’ll be more likely to try new vegetables when they’ve helped create something delicious with them. Plus, the satisfaction of enjoying homegrown, homemade kohlrabi fries is simply unmatched.
But don’t stop there! Feel free to experiment with different seasonings. A sprinkle of smoked paprika adds a delightful depth, while a dash of cayenne pepper brings a welcome kick. For a sweeter twist, consider a light dusting of cinnamon and a drizzle of honey after baking. You can also vary the dipping sauces. Classic ketchup is always a winner, but try pairing your kohlrabi fries with a homemade aioli, a tangy yogurt dip, or even a spicy sriracha mayo.
Consider the size and shape of your fries as well. Thicker fries will be softer on the inside, while thinner fries will be crispier. You can also cut them into wedges for a different presentation. If you’re feeling adventurous, try using an air fryer for an even faster and crispier result. Just be sure to adjust the cooking time accordingly.
Ultimately, the best kohlrabi fries are the ones you enjoy the most. So, embrace the process, get creative with your seasonings and dips, and don’t be afraid to experiment until you find your perfect combination.
We wholeheartedly encourage you to try this DIY kohlrabi fries trick. It’s a simple, satisfying, and delicious way to enjoy the fruits (or rather, vegetables) of your labor. And most importantly, we want to hear about your experience! Share your photos, tips, and variations in the comments below. Let us know what seasonings you tried, what dips you loved, and any other insights you gained along the way. Your feedback will not only help other readers but also inspire us to continue creating delicious and innovative recipes. So, get cooking, get creative, and get ready to enjoy some amazing homemade kohlrabi fries! We can’t wait to see what you come up with.
Frequently Asked Questions
What if my kohlrabi is very large and woody?
Large kohlrabi can sometimes develop a woody texture, especially if they’ve been left in the ground for too long. The best way to combat this is to peel the kohlrabi thoroughly, removing any tough outer layers. You might also consider removing the core, as it tends to be the most fibrous part. If the kohlrabi is still quite woody after peeling, you can try blanching the fries in boiling water for a few minutes before baking or frying. This will help to soften them up. However, if the kohlrabi is excessively woody, it might be best to use it in a soup or stew instead, where the texture will be less noticeable.
Can I use an air fryer instead of baking?
Absolutely! An air fryer is a fantastic alternative to baking, and it often results in even crispier kohlrabi fries. To use an air fryer, preheat it to around 400°F (200°C). Toss the kohlrabi fries with oil and seasonings as directed in the recipe. Then, arrange them in a single layer in the air fryer basket, making sure not to overcrowd them. You may need to cook them in batches. Cook for about 12-15 minutes, flipping them halfway through, until they are golden brown and crispy. Keep a close eye on them, as air fryers can vary in cooking time.
How do I store leftover kohlrabi fries?
Leftover kohlrabi fries are best stored in an airtight container in the refrigerator. They will keep for up to 3 days. However, keep in mind that they will lose some of their crispness as they sit. To reheat them, you can bake them in a preheated oven at 350°F (175°C) for about 5-10 minutes, or until heated through. You can also reheat them in an air fryer for a few minutes to restore some of their crispness. Microwaving is not recommended, as it will make them soggy.
What are some other ways to use kohlrabi from my small garden?
Besides fries, kohlrabi is incredibly versatile. You can shred it and add it to salads for a crunchy texture. It can also be roasted alongside other vegetables, such as carrots, potatoes, and Brussels sprouts. Kohlrabi can be used in soups and stews, adding a mild, slightly sweet flavor. The leaves are also edible and can be sautéed like spinach or added to salads. You can even pickle kohlrabi for a tangy and refreshing snack. Don’t be afraid to experiment and find your favorite ways to enjoy this unique vegetable.
Can I freeze kohlrabi fries?
While you can technically freeze kohlrabi fries, the texture may change upon thawing. They might become a bit softer and less crispy. If you do choose to freeze them, it’s best to flash freeze them first. To do this, spread the cooked and cooled fries in a single layer on a baking sheet and freeze for about 1-2 hours, or until solid. Then, transfer them to a freezer-safe bag or container. This will prevent them from sticking together. When you’re ready to eat them, bake or air fry them directly from frozen, adding a few extra minutes to the cooking time.
What kind of oil is best for making kohlrabi fries?
The best oil for making kohlrabi fries is one with a high smoke point, such as avocado oil, canola oil, or grapeseed oil. These oils can withstand high temperatures without breaking down and producing harmful compounds. Olive oil can also be used, but be sure to use a light or refined olive oil, as extra virgin olive oil has a lower smoke point. Avoid using oils with strong flavors, as they can overpower the taste of the kohlrabi.
How can I make my kohlrabi fries extra crispy?
To achieve extra crispy kohlrabi fries, there are a few tricks you can try. First, make sure to dry the kohlrabi fries thoroughly after peeling and cutting them. Excess moisture can prevent them from crisping up properly. You can pat them dry with paper towels or even let them sit in a colander for a while to drain. Second, don’t overcrowd the baking sheet or air fryer basket. This will allow the heat to circulate properly and crisp up the fries evenly. Finally, consider adding a light coating of cornstarch or potato starch to the fries before baking or frying. This will help to absorb any remaining moisture and create a crispier exterior.

Leave a Comment