

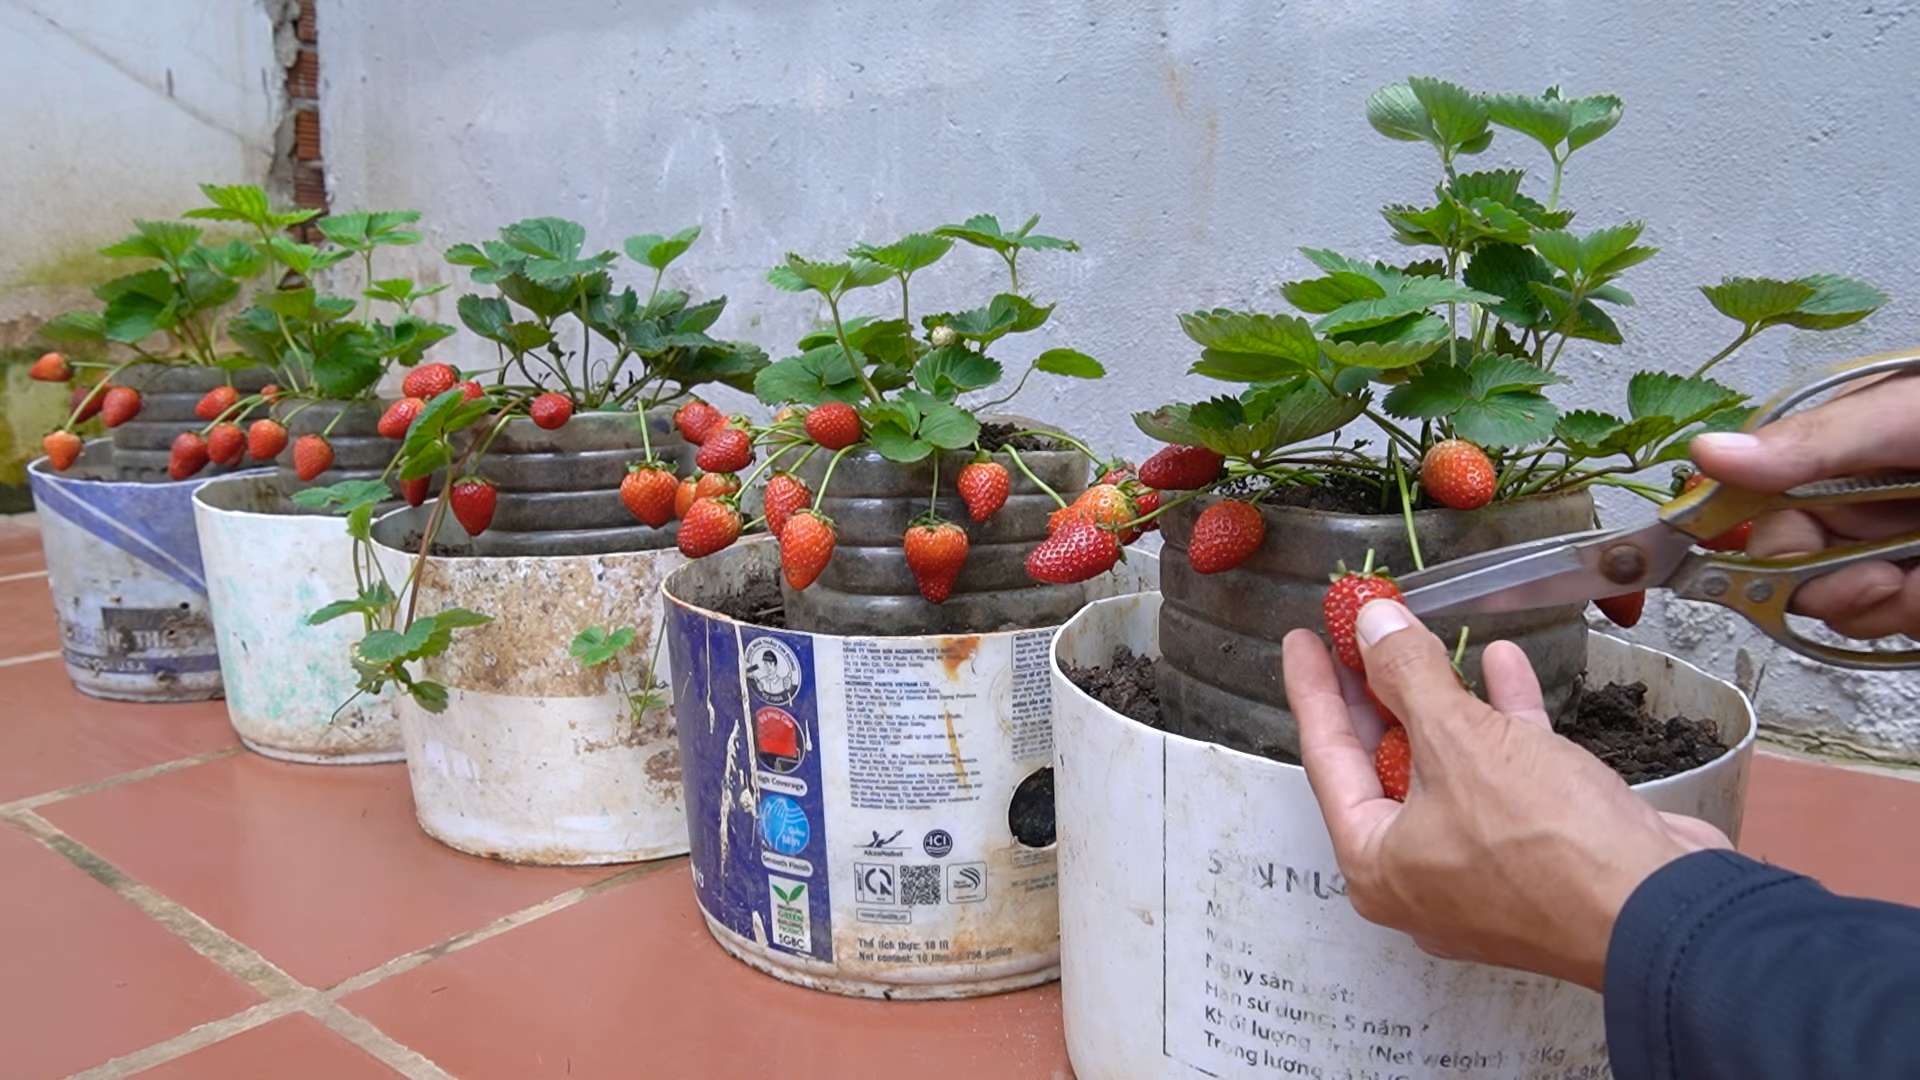
Continuous Strawberry Harvest: Imagine plucking juicy, sun-ripened strawberries from your own garden, not just for a week or two, but throughout the entire growing season! Sounds like a dream, right? Well, it doesn’t have to be! For centuries, gardeners have sought ways to extend the bounty of their harvests, and the allure of fresh strawberries has always been particularly strong. From ancient Roman feasts to modern-day desserts, strawberries have held a special place in our hearts (and stomachs!).
But let’s face it, the typical strawberry season can feel frustratingly short. You blink, and suddenly the berries are gone, leaving you craving that sweet, tangy flavor. That’s where these DIY tricks and hacks come in! I’m going to share some simple, yet incredibly effective, methods to achieve a continuous strawberry harvest in your own backyard. Whether you’re a seasoned gardener or just starting out, these tips will help you maximize your yield and enjoy fresh strawberries for months on end.
Why is this so important? Because who wants to rely on store-bought berries when you can have your own organic, delicious supply right outside your door? Plus, extending your harvest means less food waste and more opportunities to experiment with delicious strawberry recipes. So, get ready to roll up your sleeves and discover the secrets to a never-ending supply of these delightful red gems!
DIY: The Never-Ending Strawberry Patch – A Guide to Staggered Planting
Hey there, fellow gardening enthusiasts! Are you tired of the fleeting strawberry season? Do you dream of plucking juicy, red berries from your garden all summer long? Well, you’ve come to the right place! I’m going to share my secret to a continuous strawberry harvest, ensuring you have a steady supply of these delicious fruits for months on end. It’s all about staggered planting, and trust me, it’s easier than you think!
Understanding Staggered Planting
Before we dive into the nitty-gritty, let’s quickly understand the concept. Staggered planting simply means planting different varieties of strawberries that mature at different times, or planting the same variety at intervals. This way, instead of all your plants producing fruit at once, you’ll have a continuous flow of ripe berries throughout the growing season.
Choosing Your Strawberry Varieties
This is a crucial step! Different strawberry varieties have different fruiting habits. We’ll focus on three main types:
* June-Bearing: These are your classic strawberries, producing one large crop in late spring or early summer (usually in June, hence the name). They’re known for their large, flavorful berries.
* Everbearing: Don’t let the name fool you! Everbearing strawberries don’t produce fruit continuously. Instead, they typically have two main harvests: one in the spring and another in the late summer or early fall.
* Day-Neutral: These are the workhorses of the strawberry world! Day-neutral varieties produce fruit throughout the growing season, as long as the temperature is between 35°F and 85°F. They’re less sensitive to day length than other types.
For a truly continuous harvest, I recommend planting a combination of all three types. This way, you’ll have berries from spring to fall!
Materials You’ll Need
Before we get our hands dirty, let’s gather our supplies. Here’s what you’ll need:
* Strawberry plants (June-bearing, everbearing, and day-neutral varieties)
* Gardening gloves
* Trowel or spade
* Watering can or hose
* Compost or well-rotted manure
* Strawberry fertilizer (optional, but recommended)
* Mulch (straw, wood chips, or pine needles)
* Measuring tape or ruler
* Plant labels and a permanent marker (to keep track of your varieties and planting dates)
Preparing Your Planting Area
Strawberries thrive in well-drained soil that’s rich in organic matter. Here’s how to prepare your planting area:
1. Choose a sunny location: Strawberries need at least 6-8 hours of sunlight per day.
2. Test your soil: A soil test will tell you the pH level and nutrient content of your soil. Strawberries prefer a slightly acidic soil with a pH between 5.5 and 6.5. You can purchase a soil testing kit at most garden centers.
3. Amend your soil: If your soil is heavy clay or sandy, amend it with compost or well-rotted manure to improve drainage and fertility. Work the organic matter into the top 12 inches of soil.
4. Remove weeds: Clear the area of any weeds, grass, or other debris. Weeds compete with strawberries for nutrients and water.
5. Create raised beds (optional): Raised beds improve drainage and warm up faster in the spring. If you have heavy clay soil, raised beds are highly recommended.
Planting Your Strawberries: The Staggered Approach
Now for the fun part! Here’s how to plant your strawberries in a staggered fashion:
1. Plant your June-bearing strawberries first: These should be planted in early spring, as soon as the ground can be worked. Space them about 18 inches apart in rows that are 3-4 feet apart.
2. Plant your everbearing strawberries next: Plant these in mid-spring, about 2-3 weeks after your June-bearing varieties. Space them about 12 inches apart in rows that are 2-3 feet apart.
3. Plant your day-neutral strawberries last: Plant these in late spring, about 2-3 weeks after your everbearing varieties. Space them about 8-10 inches apart in rows that are 1-2 feet apart.
Detailed Planting Instructions for Each Plant:
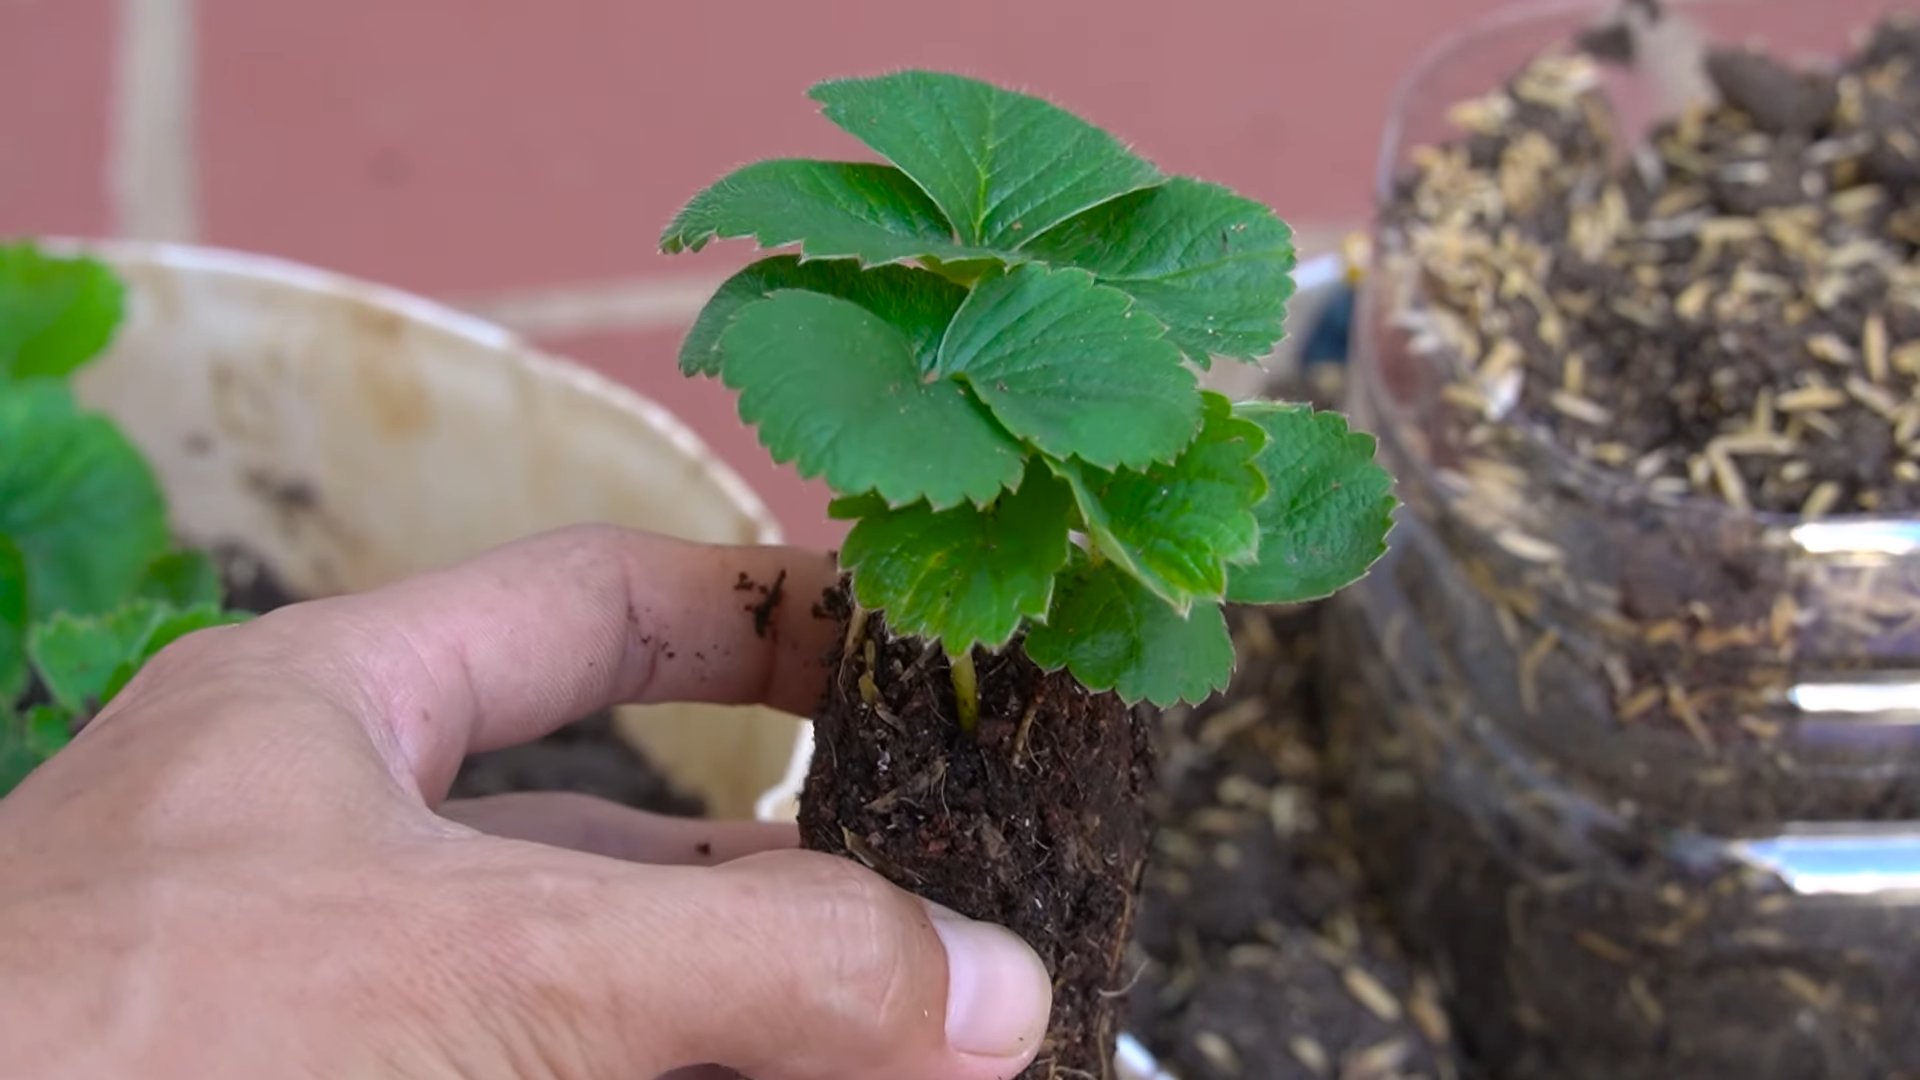
1. Dig the hole: Dig a hole that’s large enough to accommodate the root ball of the strawberry plant.
2. Loosen the roots: Gently loosen the roots of the strawberry plant before planting. This will encourage them to spread out and establish themselves in the soil.
3. Position the plant: Place the strawberry plant in the hole, making sure that the crown (the point where the roots meet the stem) is level with the soil surface. This is crucial! Planting the crown too deep can cause the plant to rot, while planting it too shallow can cause the roots to dry out.
4. Backfill the hole: Fill the hole with soil, gently firming it around the plant.
5. Water thoroughly: Water the newly planted strawberry plants thoroughly.
Mulching Your Strawberry Plants
Mulching is essential for keeping your strawberry plants healthy and productive. Here’s why:
* It helps retain moisture in the soil.
* It suppresses weed growth.
* It keeps the berries clean.
* It protects the plants from extreme temperatures.
I prefer to use straw as mulch for my strawberry plants, but you can also use wood chips or pine needles. Apply a 2-3 inch layer of mulch around the plants, being careful not to cover the crown.
Fertilizing Your Strawberry Plants
Strawberries are heavy feeders, so it’s important to fertilize them regularly. Use a fertilizer that’s specifically formulated for strawberries, following the instructions on the package. I usually fertilize my strawberry plants in the spring, before they start to produce fruit, and again in the fall, after they’ve finished fruiting.
Watering Your Strawberry Plants
Strawberries need consistent moisture, especially during fruiting. Water your strawberry plants regularly, especially during dry spells. Aim to keep the soil consistently moist, but not soggy. Avoid overhead watering, as this can promote fungal diseases. Drip irrigation is the best way to water strawberry plants.
Pruning Your Strawberry Plants
Pruning is important for keeping your strawberry plants healthy and productive. Here’s how to prune each type:
* June-bearing strawberries: After they’ve finished fruiting, mow or cut back the foliage to about 1 inch above the crown. This will encourage new growth and help prevent disease.
* Everbearing strawberries: Remove the runners (the long, trailing stems that produce new plants) throughout the growing season. This will encourage the plants to focus their energy on producing fruit.
* Day-neutral strawberries: Remove the runners throughout the growing season. You can also pinch off the first flush of flowers in the spring to encourage the plants to produce more fruit later in the season.
Protecting Your Strawberries from Pests and Diseases
Strawberries are susceptible to a variety of pests and diseases. Here are some common problems and how to deal with them:
* Slugs and snails: These pests can damage the leaves and berries of strawberry plants. Use slug and snail bait or traps to control them.
* Birds: Birds love to eat strawberries! Cover your plants with netting to protect them from birds.
* Gray mold: This fungal disease can cause the berries to rot. Remove any infected berries and foliage promptly. Improve air circulation around the plants by thinning out the foliage.
* Leaf spot: This fungal disease causes brown spots on the leaves. Remove any infected leaves and foliage promptly. Improve air circulation around the plants by thinning out the foliage.
Harvesting Your Strawberries
The moment we’ve all been waiting for! Here’s how to harvest your strawberries:
1. Pick the berries when they’re fully ripe: Strawberries are at their peak flavor when they’re fully red and slightly soft to the touch.
2. Gently twist the berry off the plant: Be careful not to damage the plant.
3. Harvest in the morning: Strawberries are best harvested in the morning, after the dew has dried.
4. Store the berries in the refrigerator: Strawberries are best stored in the refrigerator. They’ll keep for several days.
Troubleshooting Common Problems
Even with the best care, you might encounter some problems along the way. Here are a few common issues and how to address them:
* Poor fruit production: This could be due to a variety of factors, including lack of sunlight, poor soil, or inadequate fertilization. Make sure your plants are getting enough sunlight, amend your soil with compost, and fertilize them regularly.
* Small berries: This could be due
Conclusion
So, there you have it! This simple DIY trick for achieving a continuous strawberry harvest is more than just a gardening hack; it’s a pathway to enjoying fresh, delicious strawberries throughout the growing season. Forget those fleeting weeks of abundance followed by months of waiting. By implementing this method, you’re essentially extending your strawberry season and maximizing your yield.
Why is this a must-try? Because it’s efficient, cost-effective, and incredibly rewarding. Imagine stepping into your garden and consistently finding ripe, juicy strawberries ready to be picked. Think of the possibilities: fresh strawberry shortcake on a whim, homemade strawberry jam to share with friends, or simply a handful of sweet berries enjoyed straight from the vine. This DIY approach empowers you to take control of your strawberry production and enjoy the fruits (literally!) of your labor for a longer period.
But don’t think this is a one-size-fits-all solution. Feel free to experiment and adapt the method to suit your specific needs and environment. For example, if you live in a particularly hot climate, consider providing extra shade during the hottest part of the day to prevent your plants from overheating. You could also try different varieties of strawberries to see which ones perform best with this method in your area. Some gardeners have found success using raised beds or containers to further optimize drainage and soil conditions. Another variation is to use different types of fertilizer, experimenting with organic options like compost tea or worm castings to boost plant health and fruit production.
The key is to observe your plants closely and adjust your approach as needed. Pay attention to their growth, the color of their leaves, and the size and quality of their fruit. This will help you fine-tune your technique and achieve the best possible results.
We are confident that this continuous strawberry harvest method will revolutionize your strawberry growing experience. It’s a game-changer for both novice and experienced gardeners alike.
Now, it’s your turn! We encourage you to give this DIY trick a try and see for yourself the difference it can make. Don’t be afraid to experiment, adapt, and personalize the method to suit your own garden. And most importantly, share your experience with us! We’d love to hear about your successes, your challenges, and any variations you’ve discovered along the way. Post your photos, tips, and stories in the comments section below. Let’s create a community of strawberry enthusiasts who are all enjoying a continuous harvest of delicious, homegrown berries! Happy gardening!
Frequently Asked Questions (FAQ)
What exactly does “continuous harvest” mean?
Continuous harvest refers to the ability to harvest strawberries over an extended period, rather than just during a short, concentrated season. This DIY method aims to achieve this by strategically managing your strawberry plants to encourage ongoing fruit production. It’s not about having strawberries every single day of the year (unless you live in a very specific climate and use advanced techniques), but rather about significantly lengthening the time you can enjoy fresh strawberries from your garden.
What types of strawberries work best with this method?
While this method can be applied to various strawberry types, everbearing and day-neutral varieties tend to be the most suitable. Everbearing strawberries produce two or three crops of strawberries throughout the growing season, while day-neutral varieties produce fruit continuously as long as the temperature is between 35-85°F. June-bearing strawberries, which produce one large crop in early summer, can still benefit from some aspects of this method, such as proper fertilization and pruning, but they won’t provide the same continuous harvest as everbearing or day-neutral types. Research which varieties thrive in your local climate for optimal results.
How often should I fertilize my strawberry plants?
Fertilizing frequency depends on the type of fertilizer you’re using and the specific needs of your plants. Generally, everbearing and day-neutral strawberries benefit from regular feeding throughout the growing season. A balanced fertilizer (e.g., 10-10-10) can be applied every 4-6 weeks. Organic options like compost tea or worm castings can be used more frequently, perhaps every 2-3 weeks. Always follow the instructions on the fertilizer packaging and avoid over-fertilizing, which can damage your plants. Monitor your plants for signs of nutrient deficiencies (e.g., yellowing leaves) and adjust your fertilizing schedule accordingly.
How important is pruning for a continuous harvest?
Pruning is crucial for maintaining a continuous strawberry harvest. Regularly removing runners (the long stems that strawberry plants send out to propagate) redirects the plant’s energy towards fruit production rather than vegetative growth. Pinch off runners as soon as you see them emerging, unless you specifically want to propagate new plants. Also, remove any dead or diseased leaves to prevent the spread of problems and improve air circulation. After each major harvest, you can lightly prune the plants to encourage new growth and fruit production.
What if I live in a climate with harsh winters?
If you live in a region with cold winters, you’ll need to protect your strawberry plants to ensure their survival and continued productivity. Mulching heavily with straw or pine needles in the fall can help insulate the roots and protect them from freezing temperatures. You can also cover the plants with a row cover or a cold frame for added protection. In very cold climates, consider growing strawberries in containers that can be moved indoors during the winter months. Remember to gradually acclimate the plants back to outdoor conditions in the spring.
My strawberries are producing lots of leaves but not many fruits. What could be the problem?
Several factors could contribute to this issue. Over-fertilizing with nitrogen can promote excessive leaf growth at the expense of fruit production. Make sure you’re using a balanced fertilizer and not overdoing it. Insufficient sunlight can also hinder fruit production. Strawberries need at least 6-8 hours of sunlight per day to thrive. Poor pollination can also be a culprit. Ensure that bees and other pollinators have access to your plants. You can also hand-pollinate the flowers using a small brush. Finally, check for pests and diseases that could be affecting fruit production.
How do I deal with pests and diseases on my strawberry plants?
Regularly inspect your plants for signs of pests and diseases. Common strawberry pests include aphids, spider mites, and slugs. Diseases like powdery mildew and gray mold can also affect strawberry plants. Use organic pest control methods whenever possible, such as insecticidal soap, neem oil, or diatomaceous earth. Remove any infected leaves or fruit promptly to prevent the spread of disease. Ensure good air circulation around your plants to reduce the risk of fungal problems. Consider using disease-resistant strawberry varieties.
Can I use this method for strawberries grown in containers?
Absolutely! This method is well-suited for container-grown strawberries. In fact, growing strawberries in containers can make it easier to control the growing environment and manage pests and diseases. Choose a container that is at least 12 inches in diameter and has good drainage. Use a high-quality potting mix and fertilize regularly. Container-grown strawberries may require more frequent watering than those grown in the ground, especially during hot weather.
How long does it take to see results from this DIY trick?
The time it takes to see results will vary depending on the age and health of your plants, the growing conditions, and the specific techniques you’re using. However, you should start to notice a difference within a few weeks of implementing this method. You may see an increase in the number of flowers and fruits, and the harvest season may be extended. Be patient and consistent with your efforts, and you’ll be rewarded with a bountiful and continuous strawberry harvest.
Leave a Comment