

Toothbrush cleaning tips – sounds simple, right? But trust me, diving into this seemingly mundane task can unlock a whole new level of oral hygiene! We often overlook the unsung hero of our morning routine, but our toothbrush deserves some serious TLC. Think about it: it’s the tool we use to wage war against plaque and bacteria, yet it often ends up harboring more germs than we’d like to admit.
Historically, oral hygiene practices date back millennia, with ancient civilizations using twigs and other natural materials to clean their teeth. While we’ve come a long way since then, the fundamental need for a clean toothbrush remains unchanged. In fact, in some cultures, the ritual of cleaning and caring for personal items, including toothbrushes, is deeply intertwined with notions of self-respect and well-being.
Why is this DIY article so important? Because a dirty toothbrush can reintroduce bacteria into your mouth, potentially leading to gum disease, bad breath, and other health issues. Nobody wants that! I’m here to share some easy and effective toothbrush cleaning tips and DIY hacks that will keep your pearly whites sparkling and your mouth feeling fresh. From simple rinsing techniques to more in-depth sanitizing methods, I’ll guide you through everything you need to know to maintain a healthy and hygienic toothbrush. Let’s get started and make your toothbrush a true champion of clean!
DIY Toothbrush Sanitizing Station: Keep Your Smile Sparkling!
Hey everyone! I’m super excited to share this DIY project with you. We all know how important it is to keep our teeth clean, but what about our toothbrushes? They can harbor all sorts of bacteria, and let’s be honest, nobody wants that! So, I came up with a simple and effective way to sanitize my toothbrushes regularly, and I’m going to show you how to build your own toothbrush sanitizing station. It’s easier than you think, and it’ll give you peace of mind knowing you’re starting your day with a truly clean brush.
Materials You’ll Need
Before we dive in, let’s gather our supplies. Don’t worry, you probably have most of these lying around already!
* A small container (I used a cute ceramic mug, but a plastic cup or even a repurposed jar will work).
* Hydrogen peroxide (3% solution is perfect).
* Baking soda.
* Distilled white vinegar.
* Essential oils (optional, for a fresh scent – I love tea tree or peppermint).
* A small spoon or stirring stick.
* Water.
* A clean cloth or paper towels.
Step-by-Step Instructions
Okay, let’s get started! This is a super simple process, and you’ll have your sanitizing station up and running in no time.
1. Prepare Your Container: First things first, make sure your container is clean and dry. If you’re using a repurposed jar, give it a good wash with soap and water and let it air dry completely. This will prevent any unwanted bacteria from getting into your sanitizing solution.
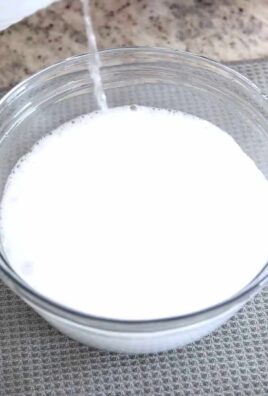
2. Create the Baking Soda Base: Pour about 1-2 tablespoons of baking soda into the bottom of your container. The amount will depend on the size of your container, but you want a good layer covering the bottom. Baking soda is a natural deodorizer and helps to neutralize acids, making it a great addition to our sanitizing solution.
3. Add the Hydrogen Peroxide: Slowly pour hydrogen peroxide over the baking soda. You’ll notice it starts to fizz – that’s totally normal! Add enough hydrogen peroxide to create a paste-like consistency. You don’t want it too runny, but you also don’t want it to be too thick. Aim for something similar to toothpaste.
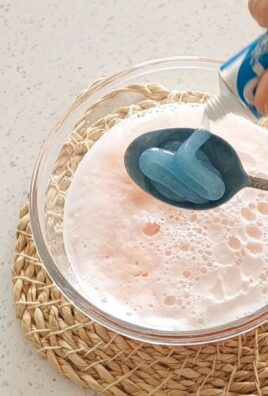
4. Incorporate the Vinegar (Optional but Recommended): This step is optional, but I highly recommend it! Adding a splash of distilled white vinegar will give your sanitizing solution an extra boost. Vinegar is a natural disinfectant and helps to kill even more bacteria. Just add a teaspoon or two and stir it in gently. Be prepared for a little more fizzing!
5. Dilute with Water: Now, we need to dilute the mixture a bit. Slowly add water, a little at a time, while stirring. You want to create a solution that’s thin enough to allow your toothbrush bristles to soak properly. The consistency should be similar to mouthwash.
6. Add Essential Oils (Optional): If you want to add a fresh scent and some extra antibacterial properties, now’s the time to add a few drops of your favorite essential oil. I personally love tea tree oil for its antibacterial benefits, or peppermint oil for a refreshing scent. Just add 2-3 drops and stir well.
7. Test the Solution: Before you start using the solution regularly, it’s a good idea to test it out on an old toothbrush. Dip the toothbrush in the solution for a few minutes and then rinse it thoroughly. Check to make sure the solution doesn’t damage the bristles or leave any residue.
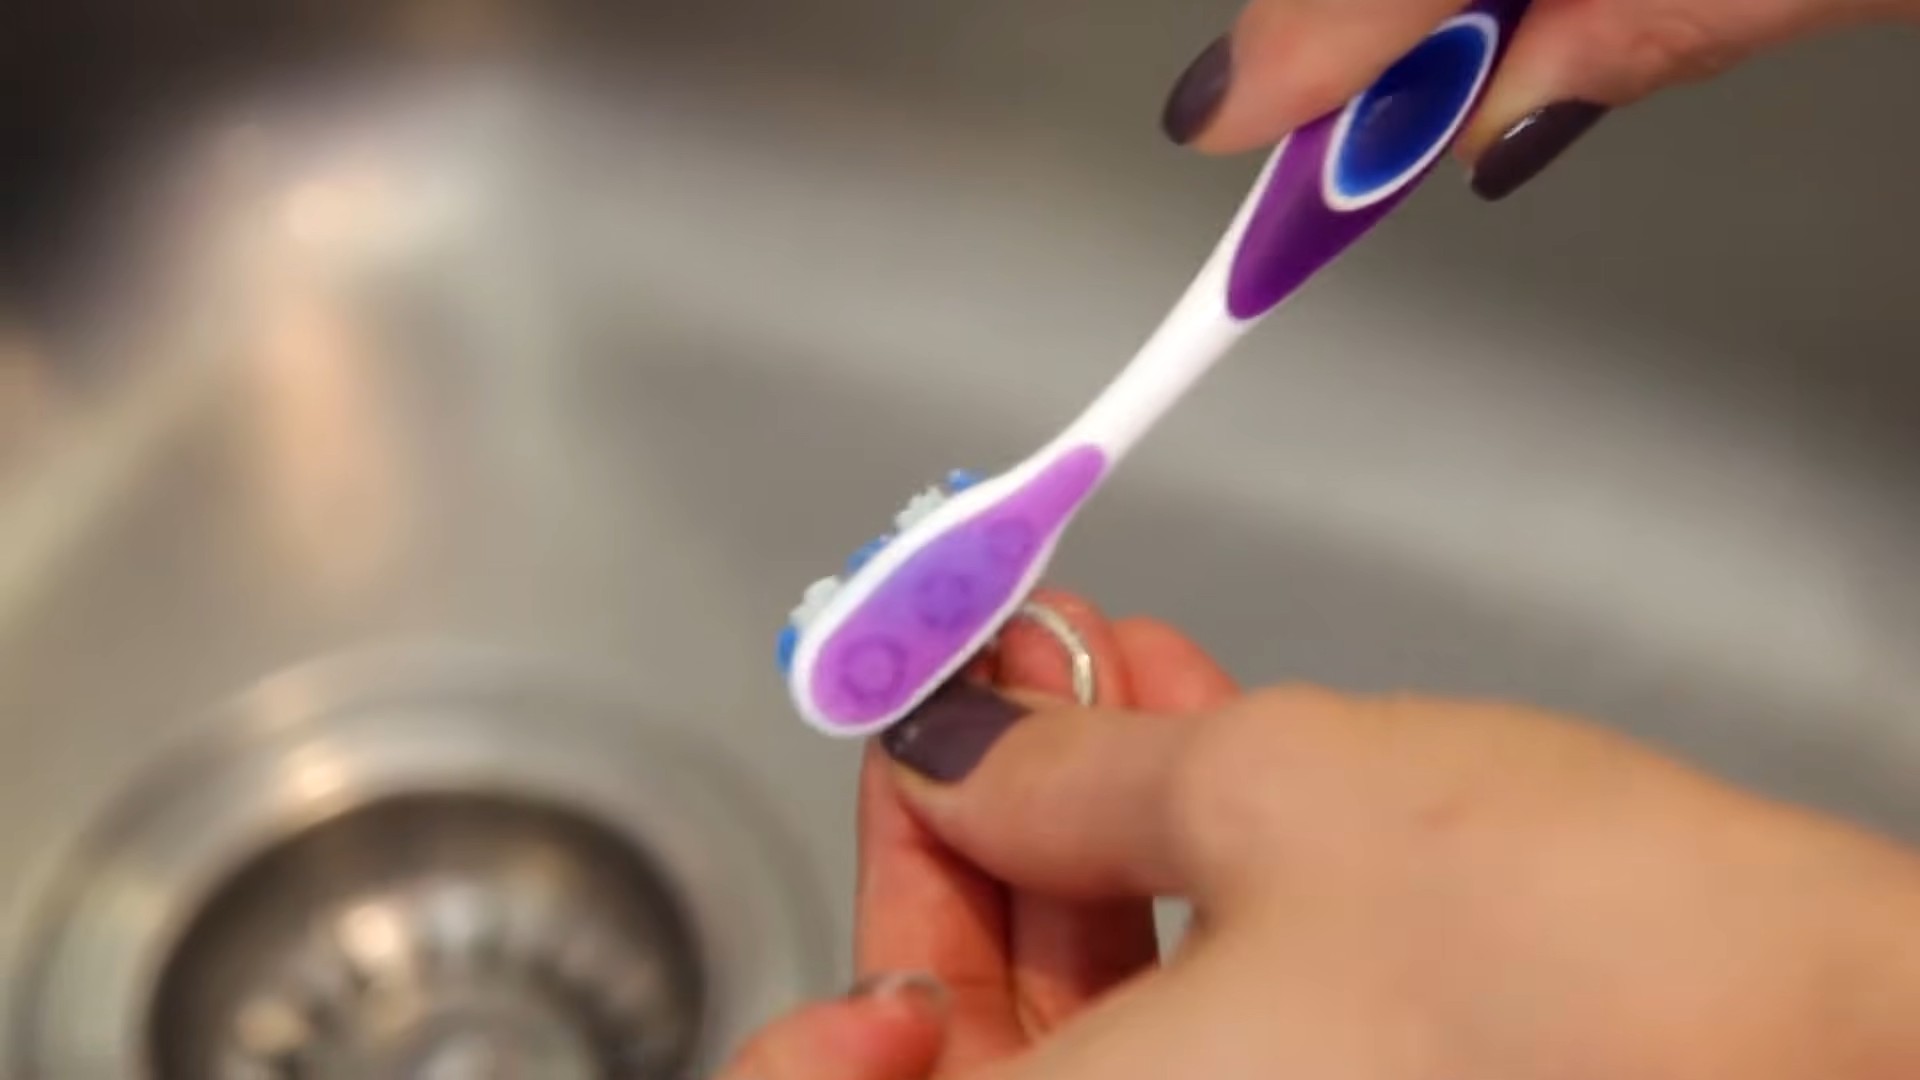
8. Sanitize Your Toothbrush: After brushing your teeth, rinse your toothbrush thoroughly with water to remove any toothpaste residue. Then, place the toothbrush head down into the sanitizing solution, making sure the bristles are fully submerged.
9. Soak for the Right Amount of Time: Let your toothbrush soak in the solution for at least 15-20 minutes. This will give the sanitizing agents enough time to kill any bacteria that may be lurking on the bristles. You can even leave it overnight for a more thorough cleaning.
10. Rinse and Dry: After soaking, remove your toothbrush from the solution and rinse it thoroughly with water. Make sure to remove any traces of the sanitizing solution. Then, shake off any excess water and store your toothbrush in an upright position in a clean, dry place.
Maintaining Your Sanitizing Station
To keep your sanitizing station effective, it’s important to maintain it properly. Here are a few tips:
* Replace the Solution Regularly: I recommend replacing the sanitizing solution every 2-3 days, or more often if it starts to look cloudy or discolored. This will ensure that the solution remains effective at killing bacteria.
* Clean the Container: Every time you replace the solution, give your container a good wash with soap and water. This will prevent any buildup of bacteria or residue.
* Monitor the Bristles: Keep an eye on your toothbrush bristles. If they start to fray or become damaged, it’s time to replace your toothbrush, regardless of how often you sanitize it.
* Consider a UV Sanitizer: For an extra level of sanitization, you might consider investing in a UV toothbrush sanitizer. These devices use ultraviolet light to kill bacteria on your toothbrush.
Why This Works: The Science Behind the Sanity
You might be wondering why this combination of ingredients is so effective. Let’s break it down:
* Hydrogen Peroxide: This is a mild antiseptic that kills bacteria and viruses. It’s a common ingredient in many household cleaners and is safe to use on your toothbrush.
* Baking Soda: As mentioned earlier, baking soda is a natural deodorizer and helps to neutralize acids. It also has mild abrasive properties, which can help to remove plaque and debris from your toothbrush bristles.
* Distilled White Vinegar: Vinegar is a powerful disinfectant that can kill a wide range of bacteria and viruses. It’s also a natural descaler, which can help to remove mineral deposits from your toothbrush.
* Essential Oils: Certain essential oils, like tea tree and peppermint, have antibacterial and antifungal properties. They can also help to freshen your toothbrush and leave it smelling clean.
Safety Precautions
While this DIY sanitizing solution is generally safe, it’s important to take a few precautions:
* Avoid Swallowing: Do not swallow the sanitizing solution. It’s not meant for internal use.
* Keep Out of Reach of Children: Store the sanitizing station in a place that’s out of reach of children and pets.
* Avoid Contact with Eyes: Avoid getting the solution in your eyes. If contact occurs, rinse thoroughly with water.
* Discontinue Use if Irritation Occurs: If you experience any irritation or allergic reaction after using the solution, discontinue use immediately.
Alternative Sanitizing Methods
While I love this DIY method, there are other ways to sanitize your toothbrush. Here are a few alternatives:
* Boiling Water: Submerge your toothbrush in boiling water for a few minutes. This will kill most bacteria, but it can also damage the bristles over time.
* Mouthwash: Soak your toothbrush in mouthwash for a few minutes. Choose a mouthwash that contains antibacterial ingredients.
* Dishwasher: Some toothbrushes are dishwasher safe. Check the manufacturer’s instructions before placing your toothbrush in the dishwasher.
Final Thoughts
I hope you found this DIY toothbrush sanitizing station helpful! It’s a simple and effective way to keep your toothbrush clean and your smile sparkling. Remember to replace your toothbrush regularly, even if you’re sanitizing it. The American Dental Association recommends replacing your toothbrush every 3-4 months, or sooner if the bristles are frayed or damaged. Happy brushing!
Conclusion
So, there you have it! This simple yet incredibly effective DIY toothbrush cleaning trick is a game-changer for your oral hygiene routine. It’s not just about keeping your toothbrush looking clean; it’s about eliminating harmful bacteria that can compromise your health. Think about it: your toothbrush is constantly exposed to the environment in your bathroom, picking up germs and bacteria with every use. Neglecting to properly clean it means you’re essentially reintroducing those unwanted guests back into your mouth.
Why is this a must-try? Because it’s easy, affordable, and significantly reduces the bacterial load on your toothbrush. A cleaner toothbrush means a cleaner mouth, which translates to healthier gums, fresher breath, and a reduced risk of oral health problems. This DIY method is a proactive step you can take to protect your well-being.
Beyond the basic method outlined, there are a few variations you can explore to tailor the cleaning process to your specific needs and preferences. For instance, if you’re concerned about particularly stubborn buildup, you can add a teaspoon of baking soda to the hydrogen peroxide solution. Baking soda acts as a mild abrasive, helping to scrub away debris without damaging the bristles. Another option is to use a diluted vinegar solution (white vinegar is best) as an alternative to hydrogen peroxide. Vinegar is a natural disinfectant and can effectively kill bacteria. Just be sure to rinse your toothbrush thoroughly after using vinegar to avoid any lingering taste. You can also use antibacterial mouthwash as a soaking solution, especially if you already have some on hand.
Consider investing in a toothbrush sanitizer, especially if you have a compromised immune system or are particularly concerned about germs. These devices use UV light to kill bacteria and viruses on your toothbrush, providing an extra layer of protection. Remember to replace your toothbrush every three months, or sooner if the bristles become frayed or you’ve been sick. No cleaning method can fully restore a worn-out toothbrush.
We strongly encourage you to try this DIY toothbrush cleaning trick and experience the difference for yourself. It’s a small change that can have a big impact on your oral health. Don’t just take our word for it – give it a try and see how much fresher and cleaner your toothbrush feels.
But the real magic happens when you share your experience! We’d love to hear about your results, any variations you tried, and any tips you discovered along the way. Did you notice a difference in the cleanliness of your toothbrush? Did you find a particular cleaning solution that worked best for you? Share your thoughts and insights in the comments below. Your feedback can help others discover the benefits of this simple yet effective DIY toothbrush cleaning method and improve their oral hygiene. Let’s create a community of healthy smiles!
Frequently Asked Questions (FAQ)
1. How often should I clean my toothbrush using this DIY method?
We recommend cleaning your toothbrush using this DIY method at least once a week. However, if you’ve been sick, it’s a good idea to clean it more frequently, perhaps even after each use, to prevent reinfection. Daily rinsing with water after each use is also crucial to remove food particles and debris. Think of it like washing your hands – you wouldn’t just rinse them with water and call it clean, would you? The same principle applies to your toothbrush. Regular cleaning helps to maintain a healthy oral environment.
2. Is hydrogen peroxide safe to use on my toothbrush?
Yes, hydrogen peroxide is generally safe to use on your toothbrush when used in a diluted form (3% solution, which is the standard concentration sold in stores). However, it’s important to rinse your toothbrush thoroughly with water after soaking it in hydrogen peroxide to remove any residue. Swallowing hydrogen peroxide can cause stomach upset, so avoid ingesting it. If you have any concerns about using hydrogen peroxide, consult with your dentist or doctor. You can also opt for alternative cleaning solutions like diluted vinegar or antibacterial mouthwash.
3. Can I use boiling water to clean my toothbrush?
While boiling water can kill bacteria, it’s not recommended for cleaning your toothbrush. The high heat can damage the bristles, causing them to become misshapen and less effective at cleaning your teeth. Damaged bristles can also irritate your gums. Stick to gentler cleaning methods like the hydrogen peroxide soak or diluted vinegar solution. Warm water is fine for rinsing your toothbrush after each use, but avoid using excessively hot water.
4. What if my toothbrush has visible mold or mildew?
If you see visible mold or mildew on your toothbrush, it’s best to discard it immediately and replace it with a new one. Mold and mildew can be harmful to your health, and attempting to clean a toothbrush with visible mold may not be effective. It’s also important to address the underlying cause of the mold growth, such as poor ventilation in your bathroom or storing your toothbrush in a damp environment. Make sure your toothbrush can air dry properly after each use.
5. Can I use this method to clean electric toothbrush heads?
Yes, this method is generally safe to use on electric toothbrush heads. However, be sure to detach the head from the handle before cleaning it. Avoid submerging the entire electric toothbrush handle in water, as this can damage the internal components. Follow the same cleaning instructions as you would for a regular toothbrush, rinsing the head thoroughly after soaking it in the cleaning solution. Check your electric toothbrush manufacturer’s instructions for specific cleaning recommendations.
6. How do I store my toothbrush properly to prevent bacteria growth?
Proper toothbrush storage is crucial for preventing bacteria growth. After each use, rinse your toothbrush thoroughly with water and allow it to air dry in an upright position. Avoid storing your toothbrush in a closed container or toothbrush holder, as this can create a moist environment that promotes bacteria growth. If you use a toothbrush cover, make sure it has ventilation holes to allow air to circulate. Store your toothbrush away from the toilet to prevent contamination from airborne particles.
7. Is it necessary to clean my toothbrush if I use mouthwash regularly?
Yes, it’s still important to clean your toothbrush even if you use mouthwash regularly. While mouthwash can help to kill bacteria in your mouth, it doesn’t necessarily eliminate all the bacteria on your toothbrush. Your toothbrush can still accumulate food particles and debris, which can harbor bacteria. Cleaning your toothbrush regularly complements your mouthwash routine and helps to maintain optimal oral hygiene.
8. Can I use dish soap to clean my toothbrush?
While dish soap is effective at killing bacteria, it’s not recommended for cleaning your toothbrush. Dish soap can leave a residue on the bristles that can be difficult to rinse off completely. This residue can alter the taste of your toothpaste and may even be harmful if ingested. Stick to gentler cleaning solutions like hydrogen peroxide, diluted vinegar, or antibacterial mouthwash.
9. How often should I replace my toothbrush?
The American Dental Association recommends replacing your toothbrush every three months, or sooner if the bristles become frayed or you’ve been sick. Frayed bristles are less effective at cleaning your teeth and can also irritate your gums. Replacing your toothbrush regularly ensures that you’re using a clean and effective tool for maintaining your oral health. Consider setting a reminder on your phone or calendar to replace your toothbrush every three months.
10. What are the signs that my toothbrush needs to be replaced?
There are several signs that indicate your toothbrush needs to be replaced. These include frayed or bent bristles, discoloration of the bristles, and a buildup of residue on the toothbrush head. If you’ve been sick, it’s also a good idea to replace your toothbrush to prevent reinfection. Pay attention to the condition of your toothbrush and replace it as needed to maintain optimal oral hygiene.

Leave a Comment