

Stainless Steel Cleaner DIY: Are you tired of battling fingerprints, smudges, and water spots on your beautiful stainless steel appliances? I know I am! It feels like no matter how much I wipe, they never truly shine. But what if I told you that you could achieve a streak-free, dazzling finish with ingredients you probably already have in your kitchen? This isn’t just another cleaning hack; it’s a way to reclaim the gleam and extend the life of your valuable appliances.
For generations, resourceful homemakers have relied on simple, natural solutions to keep their homes sparkling. Before the age of specialized cleaning products, ingredients like vinegar, baking soda, and olive oil were the go-to for tackling tough messes. This tradition of DIY cleaning isn’t just about saving money; it’s about connecting with a more sustainable and mindful approach to home care.
Let’s face it, commercial stainless steel cleaners can be expensive and often contain harsh chemicals that you might not want around your family or pets. That’s where this stainless steel cleaner DIY comes in! I’m going to share a simple, effective, and budget-friendly recipe that will leave your stainless steel looking brand new. Say goodbye to frustrating smudges and hello to a sparkling kitchen – all thanks to the power of DIY!

DIY Stainless Steel Cleaner: Shine Like New!
Hey there, fellow DIY enthusiasts! Are you tired of those stubborn smudges and fingerprints ruining the sleek look of your stainless steel appliances? Store-bought cleaners can be expensive and often filled with harsh chemicals. But don’t worry, I’ve got you covered! I’m going to share my favorite DIY stainless steel cleaner recipe that’s not only effective but also uses ingredients you probably already have in your kitchen. Get ready to make your stainless steel sparkle!
What You’ll Need
Before we dive in, let’s gather our supplies. This recipe is super simple, so you won’t need much:
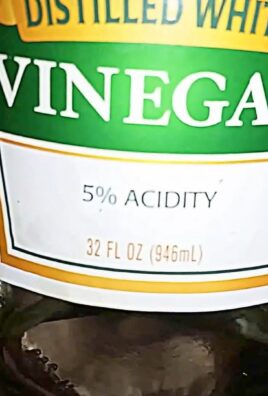
* **White Vinegar:** This is our main cleaning agent. Vinegar’s acidity helps cut through grease and grime.
* **Olive Oil:** This adds a protective layer and gives your stainless steel that beautiful shine.
* **Spray Bottle:** For easy application.
* **Two Microfiber Cloths:** One for cleaning and one for buffing. Microfiber is key because it won’t scratch your stainless steel.
* **Optional: Essential Oil (Lemon or Orange):** A few drops can help mask the vinegar smell and add a fresh scent.
Step-by-Step Instructions
Alright, let’s get cleaning! Follow these steps for sparkling stainless steel:
1. **Prepare Your Cleaning Solution:** In your spray bottle, mix equal parts white vinegar and water. For example, you can use 1 cup of white vinegar and 1 cup of water. If you’re adding essential oil, now’s the time! A few drops (5-10) will do the trick. I personally love lemon because it smells so clean and fresh.
2. **Spray and Wipe:** Lightly spray the vinegar solution onto the surface of your stainless steel appliance. Don’t over-saturate it; a light mist is all you need. Then, using one of your microfiber cloths, wipe the surface in the direction of the grain. Stainless steel has a grain, and wiping with it prevents streaks. Pay close attention to areas with fingerprints, smudges, or water spots.
3. **Buff with Olive Oil:** Now for the magic touch! Pour a very small amount of olive oil onto your second, clean microfiber cloth. I’m talking a *tiny* amount – about a teaspoon or less. You don’t want to leave an oily residue. Rub the cloth together to distribute the oil evenly.
4. **Buff to a Shine:** Gently buff the stainless steel surface with the olive oil-coated cloth, again following the grain. This will remove any remaining streaks and leave a beautiful, protective shine. You’ll be amazed at how much better it looks!
5. **Inspect and Repeat (If Necessary):** Take a step back and admire your work! If you see any stubborn spots or streaks, repeat steps 2-4. Sometimes, a second application is needed for heavily soiled areas.
Dealing with Stubborn Stains
Sometimes, you’ll encounter stains that are a bit more challenging. Here’s how to tackle them:
* **Baked-On Food:** For baked-on food on stainless steel cookware, try making a paste of baking soda and water. Apply the paste to the stain, let it sit for about 15-20 minutes, and then scrub gently with a non-abrasive sponge. Rinse thoroughly and dry.
* **Hard Water Spots:** Hard water spots can be tricky. Try soaking a paper towel in white vinegar and placing it over the water spot for about 30 minutes. The vinegar should help dissolve the minerals. Then, wipe clean and buff with olive oil.
* **Rust:** While stainless steel is rust-resistant, it can sometimes develop surface rust. You can try using a commercial stainless steel cleaner specifically designed for rust removal. Always test it in an inconspicuous area first to make sure it doesn’t damage the finish. Alternatively, a paste of baking soda and water, left on for a longer period (an hour or two), can sometimes help lift the rust.
Tips and Tricks for Sparkling Stainless Steel
Here are a few extra tips to keep your stainless steel looking its best:
* Always wipe in the direction of the grain. This is crucial for preventing streaks.
* Use microfiber cloths. They are gentle and effective at cleaning and buffing.
* Don’t use abrasive cleaners or scrub brushes. These can scratch the surface of your stainless steel.
* Clean up spills immediately. The longer spills sit, the harder they are to remove.
* Regular cleaning is key. Wipe down your stainless steel appliances at least once a week to prevent buildup.
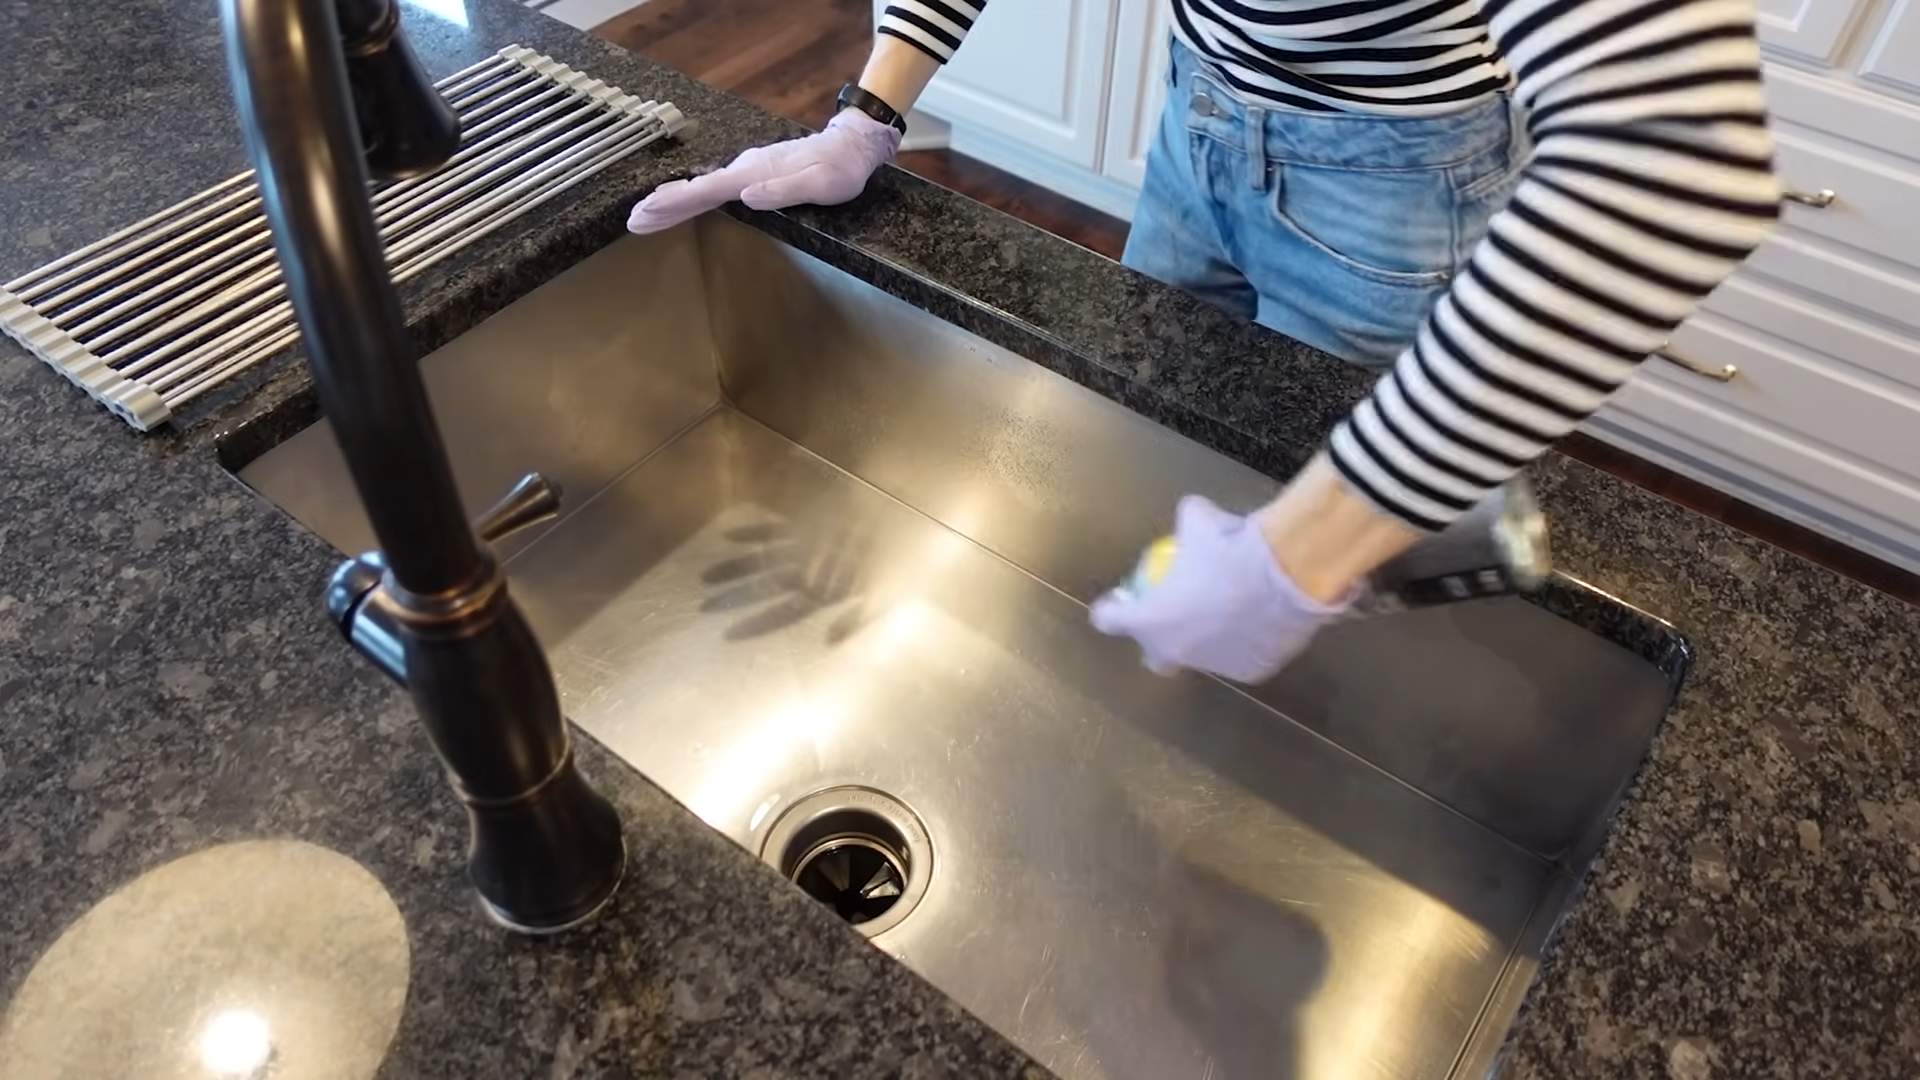
* For stainless steel sinks, you can sprinkle baking soda in the sink and then pour vinegar over it. Let it fizz for a few minutes, then scrub and rinse. This is a great way to deodorize and clean your sink.
* Consider a stainless steel polish. While my DIY cleaner works great, you can also use a commercial stainless steel polish for an extra layer of protection and shine. Just be sure to follow the manufacturer’s instructions.
* Test in an inconspicuous area first. Before applying any cleaner to your entire appliance, test it in a small, hidden area to make sure it doesn’t damage the finish.
* Avoid using steel wool. Steel wool is extremely abrasive and will scratch your stainless steel.
* Dry thoroughly after cleaning. Water spots can be a pain, so make sure to dry your stainless steel thoroughly after cleaning.
* Don’t forget the details! Pay attention to handles, knobs, and other small parts of your stainless steel appliances. These areas can often be overlooked but can make a big difference in the overall appearance.
* For fingerprints, sometimes all you need is a damp microfiber cloth. Try wiping the fingerprints with a damp cloth before resorting to the vinegar solution.
* Be patient! Sometimes, it takes a little elbow grease to get your stainless steel looking its best. Don’t give up if you don’t see results immediately.
* Store your cleaning solution properly. Keep your DIY stainless steel cleaner in a cool, dark place. It should last for several months.
* Label your spray bottle. Clearly label your spray bottle so you don’t accidentally use it for something else.
* Consider a water softener. If you have hard water, consider installing a water softener to prevent hard water spots on your stainless steel appliances.
* Use a squeegee in your stainless steel sink. After each use, squeegee the sides of your stainless steel sink to prevent water spots.
* Don’t use bleach. Bleach can damage stainless steel.
* Avoid prolonged contact with salty or acidic foods. These can corrode stainless steel over time.
Why This Works: The Science Behind the Shine
So, why does this simple DIY cleaner work so well? Let’s break it down:
* **Vinegar:** The acetic acid in vinegar is a mild acid that helps dissolve grease, grime, and hard water deposits. It’s a natural disinfectant and deodorizer, making it a great all-around cleaner.
* **Olive Oil:** Olive oil acts as a polish and protectant. It fills in microscopic scratches on the surface of the stainless steel, creating a smooth, shiny finish. It also helps repel water and prevent future smudges and fingerprints.
* **Microfiber Cloths:** Microfiber cloths are made of tiny, tightly woven fibers that are excellent at trapping dirt and grime. They are also non-abrasive, so they won’t scratch your stainless steel.
Safety First!
While this DIY cleaner is relatively safe, it’s always a good idea to take a few precautions:
* Avoid spraying directly into electrical components. If you’re cleaning a stainless steel appliance with electrical parts, spray the cleaner onto the cloth instead of directly onto the appliance.
* Ventilate the area. Vinegar can have a strong odor, so make sure to ventilate the area while you’re cleaning.
* Keep out of reach of children and pets. Although the ingredients are generally safe, it’s always best to keep cleaning products out of reach of children and pets.
* Wear gloves if you have sensitive skin. Vinegar can be irritating to sensitive skin, so wear gloves if necessary.
Enjoy Your Sparkling Stainless Steel!
And there you have it! A simple, effective, and affordable DIY stainless steel cleaner that will leave your appliances looking like new. I hope you found this guide helpful. Happy cleaning!
Conclusion
So, there you have it! Ditching those expensive, chemical-laden stainless steel cleaners and embracing this simple, effective, and budget-friendly stainless steel cleaner DIY method is a game-changer for your kitchen and beyond. We’ve walked you through the easy steps, highlighting the power of readily available ingredients like vinegar, baking soda, and dish soap. But why is this DIY approach a must-try?
Firstly, it’s incredibly cost-effective. You’re likely to already have these ingredients in your pantry, saving you money on specialized cleaning products. Secondly, it’s environmentally friendly. By avoiding harsh chemicals, you’re reducing your impact on the planet and creating a safer environment for your family, especially if you have children or pets. Thirdly, it’s surprisingly effective. This DIY cleaner cuts through grease, removes fingerprints, and leaves your stainless steel surfaces sparkling without streaks.
But the benefits don’t stop there. This DIY cleaner is also incredibly versatile. While we’ve focused on kitchen appliances and sinks, don’t hesitate to use it on stainless steel cookware, bathroom fixtures, or even outdoor grills (just be sure to rinse thoroughly afterward).
Looking for variations? Consider adding a few drops of essential oils, like lemon or tea tree, for a fresh, clean scent. For tougher stains, create a paste of baking soda and water and let it sit on the affected area for a few minutes before scrubbing gently. You can also experiment with different ratios of vinegar and water to find what works best for your specific needs and the type of stainless steel you’re cleaning. Remember to always test in an inconspicuous area first to ensure compatibility.
This isn’t just about cleaning; it’s about taking control of the products you use in your home and making informed choices that benefit your wallet, your health, and the environment.
We’re confident that once you try this stainless steel cleaner DIY method, you’ll be amazed by the results. It’s a simple, effective, and sustainable way to keep your stainless steel surfaces looking their best.
So, what are you waiting for? Gather your ingredients, put on your cleaning gloves, and get ready to experience the satisfaction of a sparkling clean kitchen, achieved with a homemade solution.
We’d love to hear about your experience! Share your before-and-after photos, your favorite variations, and any tips or tricks you discover along the way in the comments below. Let’s build a community of DIY cleaning enthusiasts who are passionate about creating a cleaner, healthier, and more sustainable home. Your feedback will not only help others but also inspire us to continue sharing valuable DIY solutions. Happy cleaning!
Frequently Asked Questions (FAQ)
Is this stainless steel cleaner DIY safe for all types of stainless steel?
While this DIY cleaner is generally safe for most stainless steel surfaces, it’s always a good idea to test it in an inconspicuous area first. Different grades of stainless steel can react differently to cleaning agents. Apply a small amount of the cleaner to a hidden spot, like the back of an appliance or inside a cabinet, and wait a few minutes. If you don’t notice any discoloration or damage, you can proceed with cleaning the rest of the surface. Avoid using abrasive scrub brushes or steel wool, as these can scratch the stainless steel.
Can I use this DIY cleaner on brushed stainless steel?
Yes, this cleaner is generally safe for brushed stainless steel. However, it’s even more important to follow the grain of the metal when cleaning. This will help prevent streaks and ensure a more even finish. Use a soft cloth and wipe in the direction of the brush lines. Avoid circular motions, as these can leave swirl marks. Rinse thoroughly and dry with a clean, soft cloth.
How often should I clean my stainless steel appliances with this DIY cleaner?
The frequency of cleaning depends on how often you use your appliances and how prone they are to getting dirty. For appliances that are used daily, such as refrigerators and stovetops, you may want to clean them once or twice a week. For appliances that are used less frequently, such as dishwashers or ovens, you can clean them as needed. Regular cleaning will help prevent the buildup of grease and grime, making it easier to maintain a sparkling clean finish.
What if I have hard water? Will that affect the effectiveness of this cleaner?
Hard water can leave spots and streaks on stainless steel surfaces. If you have hard water, you may want to use distilled water instead of tap water when making the cleaner. You can also add a little extra vinegar to the solution to help dissolve mineral deposits. After cleaning, be sure to dry the surface thoroughly with a clean, soft cloth to prevent water spots from forming.
Can I use this cleaner on stainless steel sinks?
Absolutely! This DIY cleaner is excellent for stainless steel sinks. It can help remove water spots, food stains, and soap scum. For stubborn stains, you can create a paste of baking soda and water and apply it to the affected area. Let it sit for a few minutes before scrubbing gently with a soft cloth or sponge. Rinse thoroughly and dry with a clean cloth.
How do I get rid of stubborn fingerprints on my stainless steel appliances?
Fingerprints are a common problem on stainless steel appliances. This DIY cleaner can help remove them effectively. For best results, spray the cleaner onto a soft cloth and wipe the surface in the direction of the grain. Avoid spraying the cleaner directly onto the appliance, as this can cause streaks. Dry the surface with a clean, dry cloth to prevent water spots.
Can I store the leftover cleaner for later use?
Yes, you can store the leftover cleaner in a spray bottle for later use. However, it’s best to use it within a few weeks, as the ingredients may start to separate over time. Be sure to label the bottle clearly so you don’t accidentally use it for something else. Shake the bottle well before each use to ensure the ingredients are properly mixed.
Is vinegar safe to use on stainless steel? I’ve heard it can be corrosive.
Vinegar is generally safe to use on stainless steel in diluted form. The acidity of vinegar can help dissolve mineral deposits and cut through grease. However, it’s important to dilute the vinegar with water to prevent it from damaging the surface. Avoid using undiluted vinegar on stainless steel, and never mix vinegar with bleach, as this can create toxic fumes.
What are some other natural cleaning alternatives for stainless steel?
Besides vinegar and baking soda, there are other natural cleaning alternatives you can use on stainless steel. Lemon juice is a great option for removing water spots and adding shine. Club soda can also be used to clean and polish stainless steel surfaces. Simply spray it onto the surface and wipe it clean with a soft cloth. Olive oil can be used to polish stainless steel and prevent fingerprints. Apply a small amount of olive oil to a clean cloth and buff the surface until it shines.
My stainless steel appliance has rust spots. Will this cleaner remove them?
While this DIY cleaner can help remove surface rust, it may not be effective for deep-seated rust. For rust spots, you can try using a paste of baking soda and water or a commercial rust remover specifically designed for stainless steel. Apply the paste or rust remover to the affected area and let it sit for a few minutes before scrubbing gently with a soft cloth or sponge. Rinse thoroughly and dry with a clean cloth. If the rust is severe, you may need to consult a professional.
Leave a Comment