

Growing Grapes at Home might seem like a task reserved for sprawling vineyards in Napa Valley, but I’m here to tell you that delicious, homegrown grapes are within your reach, even if you only have a small backyard or patio! Forget those expensive supermarket grapes – imagine plucking juicy, sun-ripened fruit straight from your own vine.
Grape cultivation boasts a rich history, dating back thousands of years to ancient civilizations in the Middle East. From the Egyptians who depicted grape harvesting in their tombs to the Romans who spread viticulture across Europe, grapes have been a symbol of abundance and celebration. Today, the tradition continues, and you can be a part of it!
Why should you embark on this DIY adventure? Well, beyond the sheer satisfaction of nurturing your own food, growing grapes at home offers numerous benefits. You’ll have complete control over the growing process, ensuring your grapes are free from harmful pesticides and chemicals. Plus, you can choose from a wider variety of grape cultivars than you’d typically find in stores, tailoring your harvest to your specific taste preferences. This article will guide you through simple yet effective DIY tricks and hacks to make growing grapes at home a rewarding and fruitful experience. Let’s get started!

Growing Grapes at Home: A Beginner’s Guide to a Bountiful Harvest
Hey there, fellow gardening enthusiasts! Ever dreamt of plucking juicy, sun-ripened grapes straight from your own backyard? Well, dream no more! Growing grapes at home is totally achievable, even if you’re a complete newbie like I was. It takes a little planning and patience, but the reward of fresh, homegrown grapes is absolutely worth it. I’m going to walk you through everything you need to know, from choosing the right variety to harvesting your delicious bounty. Let’s get started!
Choosing the Right Grape Variety
This is probably the most crucial step, so don’t rush it! The success of your grape-growing adventure hinges on selecting a variety that thrives in your specific climate.
* Consider your climate: Grapes need a certain number of “chill hours” (hours below 45°F) to properly set fruit. Research the chill hour requirements for different varieties and compare them to your local climate data. If you live in a warmer climate, look for low-chill varieties.
* Think about your purpose: Are you planning to make wine, eat them fresh, or make juice? Different varieties are better suited for different purposes. Table grapes are generally larger and sweeter, while wine grapes have a higher acidity.
* Disease resistance is key: Some grape varieties are more resistant to common diseases like powdery mildew and black rot. Choosing a disease-resistant variety will save you a lot of headaches (and fungicide!).
* Popular options:
* ‘Thompson Seedless’: A classic table grape, known for its sweetness and seedless nature. Does well in warmer climates.
* ‘Concord’: A popular juice grape with a distinctive flavor. Hardy and relatively easy to grow.
* ‘Niagara’: A white grape with a sweet, musky flavor. Good for juice and fresh eating.
* ‘Reliance’: A seedless red table grape that’s very cold-hardy.
* ‘Cabernet Sauvignon’: A classic red wine grape, best suited for warmer climates.
* ‘Chardonnay’: A popular white wine grape, adaptable to a range of climates.
I personally started with ‘Reliance’ because I live in an area with cold winters, and I wanted something easy to eat fresh. Do your research and pick a variety that suits your needs and your climate!
Preparing the Planting Site
Grapes need plenty of sunshine and well-drained soil. Here’s how to get your planting site ready:
* Sunlight is essential: Choose a location that receives at least 6-8 hours of direct sunlight per day. More is better!
* Soil drainage is crucial: Grapes hate wet feet! Make sure the soil drains well. If you have heavy clay soil, amend it with plenty of organic matter like compost or well-rotted manure.
* Soil pH: Grapes prefer a slightly acidic soil pH of around 6.0-7.0. You can test your soil pH with a home testing kit or send a sample to your local extension office for analysis.
* Clear the area: Remove any weeds, grass, rocks, or other debris from the planting area.
* Dig a hole: Dig a hole that’s twice as wide and just as deep as the root ball of your grape vine.
I spent a whole weekend amending my soil with compost before planting. It was hard work, but it paid off in the long run!
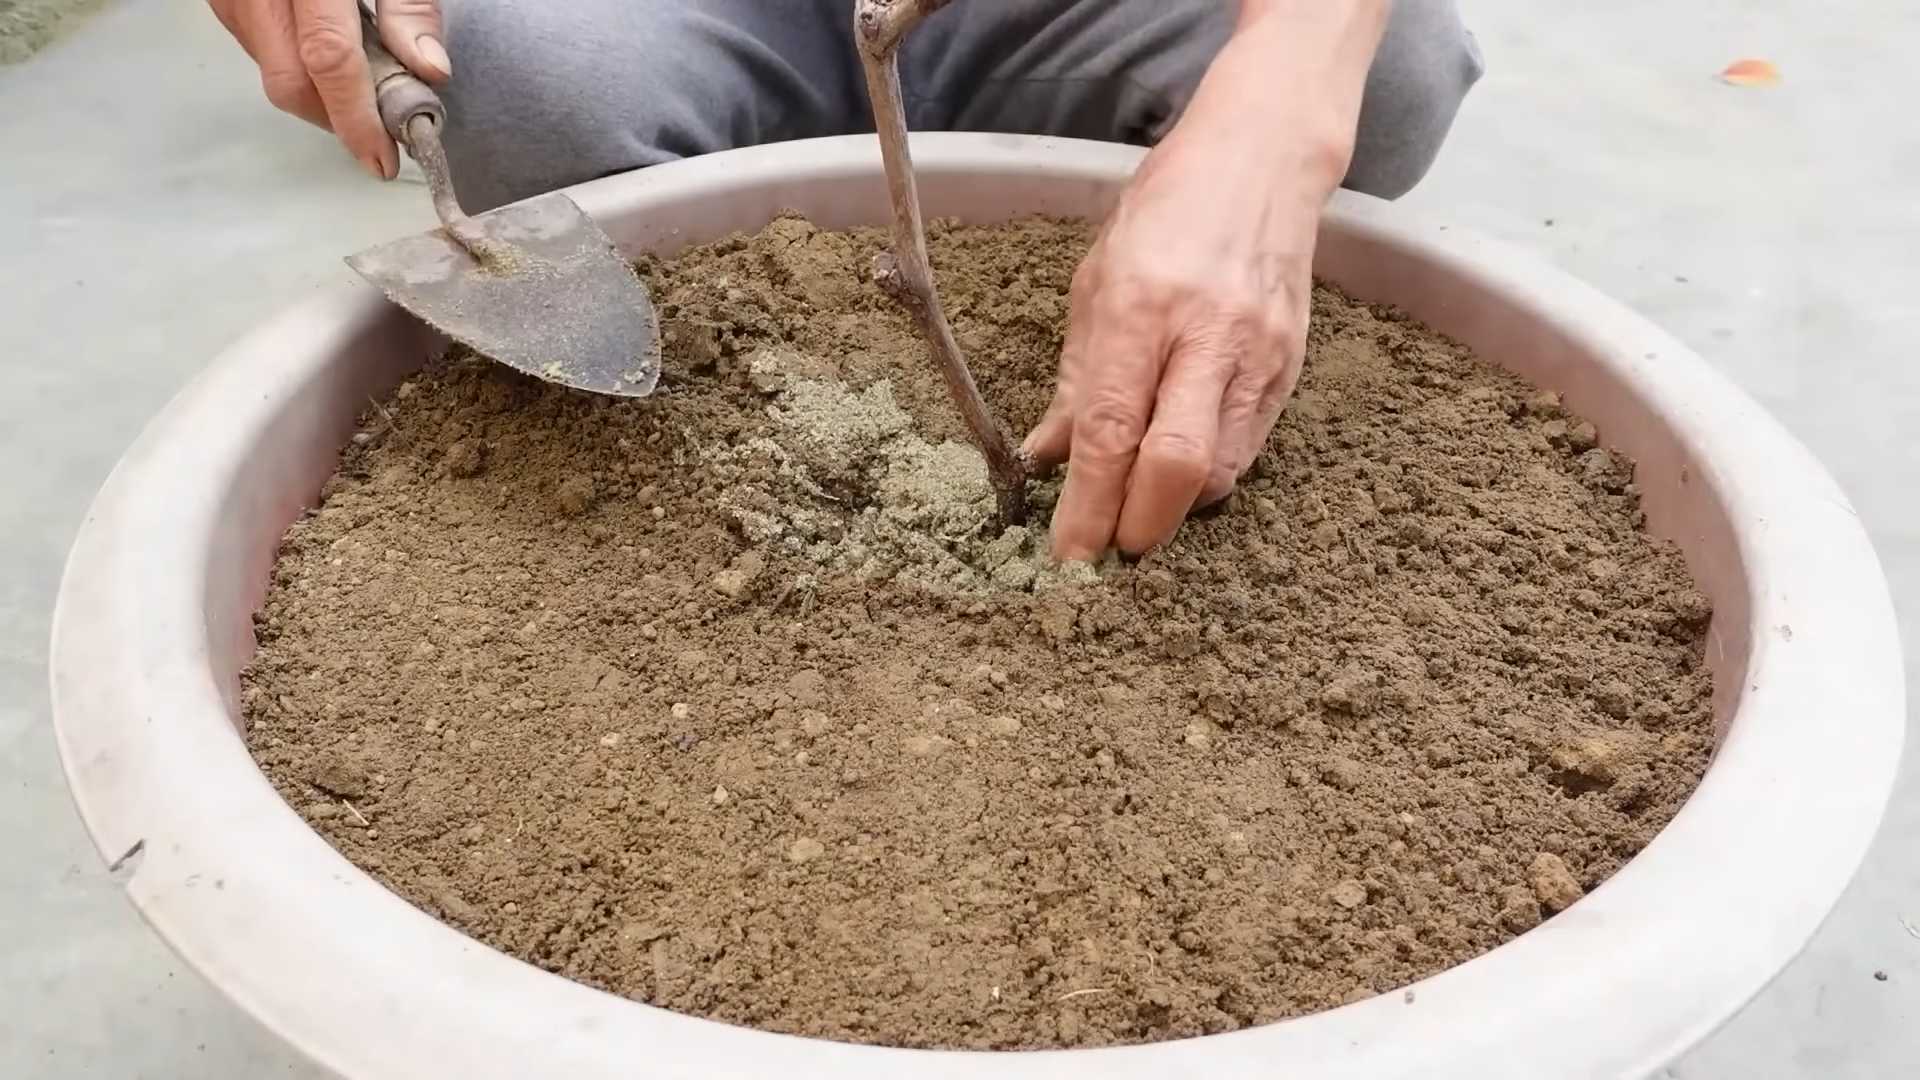
Planting Your Grape Vine
Now for the exciting part! Here’s how to plant your grape vine:
1. Carefully remove the vine from its container: Gently loosen the roots and tease them apart. If the roots are circling the pot, cut them to prevent them from girdling the plant.
2. Place the vine in the hole: Position the vine so that the top of the root ball is level with the surrounding soil.
3. Backfill the hole: Fill the hole with soil, gently tamping it down to remove air pockets.
4. Water thoroughly: Water the newly planted vine deeply to help settle the soil.
5. Mulch around the base: Apply a layer of mulch around the base of the vine to help retain moisture and suppress weeds. I use wood chips, but straw or shredded bark also work well.
6. Install a support system: Grape vines need a trellis or other support system to climb on. Install this at planting time to avoid disturbing the roots later.
I remember being so nervous when I planted my first grape vine! But following these steps made the process much easier.
Training and Pruning Your Grape Vine
Training and pruning are essential for shaping your grape vine and maximizing fruit production. This can seem daunting at first, but it’s really not that complicated once you get the hang of it.
* The Importance of Training: Training involves guiding the growth of the vine along your chosen support system. This helps to create a strong framework and ensures that the vine receives adequate sunlight and air circulation.
* The Importance of Pruning: Pruning is the removal of unwanted growth. It’s crucial for controlling the size and shape of the vine, promoting fruit production, and preventing disease.
First Year Training
The first year is all about establishing a strong trunk.
1. Choose the strongest shoot: Select the strongest, most upright shoot and remove all other shoots.
2. Tie the shoot to the support: Gently tie the chosen shoot to the trellis or stake, using soft twine or plant ties.
3. Pinch off side shoots: As the shoot grows, pinch off any side shoots that develop along the trunk. You want to encourage vertical growth.
4. Cut back in late winter: In late winter, before new growth begins, cut back the main shoot to about 2-3 feet. This will encourage the development of lateral shoots.
Second Year Training
In the second year, you’ll start to develop the arms (cordons) of the vine.
1. Select two strong shoots: Choose two strong shoots that are growing in opposite directions along the trellis wire. These will become the permanent arms of the vine.
2. Tie the shoots to the wire: Tie the chosen shoots to the trellis wire, training them horizontally.
3. Pinch off other shoots: Pinch off any other shoots that develop along the trunk or arms.
4. Prune in late winter: In late winter, prune the arms back to about half their length. This will encourage the development of fruiting spurs.
Subsequent Years: Pruning for Fruit Production
From the third year onwards, you’ll focus on pruning for fruit production. Grapes produce fruit on new growth that arises from one-year-old wood.
1. Identify fruiting spurs: Fruiting spurs are short, stubby shoots that grow from the arms of the vine.
2. Prune back to spurs: In late winter, prune back the previous year’s growth to leave only 2-3 buds on each fruiting spur.
3. Remove dead or diseased wood: Remove any dead, diseased, or damaged wood.
4. Thin out crowded areas: Thin out any crowded areas to improve air circulation and sunlight penetration.
Pruning can seem intimidating, but don’t be afraid to experiment! There are many different pruning methods, so find one that works best for you and your grape variety. I watched a ton of YouTube videos before I felt comfortable pruning my vines.
Watering and Fertilizing
Proper watering and fertilization are essential for healthy grape vine growth and fruit production.
* Watering: Water deeply and regularly, especially during dry periods. Grapes need about 1 inch of water per week. Avoid overwatering, as this can lead to root rot.
* Fertilizing: Fertilize your grape vines in early spring with a balanced fertilizer. Look for a fertilizer that’s specifically formulated for grapes or fruit trees. Follow the instructions on the fertilizer label carefully. Avoid over-fertilizing, as this can lead to excessive vegetative growth and reduced fruit production.
I use a slow-release fertilizer in the spring and supplement with compost tea throughout the growing season.
Pest and Disease Control
Grapes can be susceptible to a variety of pests and diseases. Here are some common problems and how to deal with them:
* Powdery Mildew: A fungal disease that causes a white, powdery coating on the leaves and fruit. Prevent powdery mildew by ensuring good air circulation and applying a fungicide if necessary.
* Black Rot: Another fungal disease that causes dark, sunken lesions on the leaves and fruit. Prevent black rot by removing infected leaves and fruit and applying a fungicide if necessary.
* Japanese Beetles: These pesky beetles can skeletonize the leaves of grape vines. Handpick them off the plants or use an insecticide if necessary.
* Grape Berry Moth: This moth lays its eggs on the developing grapes, and the larvae bore into the
Conclusion
So, there you have it! Growing grapes at home might seem daunting at first, but with the right knowledge and a little dedication, you can transform your backyard into a miniature vineyard. This DIY approach not only saves you money compared to buying grapes from the store but also allows you to cultivate varieties that perfectly suit your taste and local climate. Imagine the satisfaction of harvesting your own juicy, sun-ripened grapes, knowing you nurtured them from vine to table.
This isn’t just about growing grapes; it’s about embracing a sustainable lifestyle and connecting with nature. The process itself is incredibly rewarding, offering a tangible connection to the food you consume. Plus, homegrown grapes often boast a superior flavor profile compared to commercially grown ones, as they haven’t endured long transportation times or extensive processing.
Don’t be afraid to experiment! Consider different grape varieties suited to your region. Some popular choices include Concord grapes for their classic flavor and ease of growth, or perhaps a seedless variety like Thompson Seedless for snacking. If you’re feeling adventurous, try growing wine grapes like Cabernet Sauvignon or Chardonnay, although these require more specialized care and knowledge. You can also explore different training methods, such as growing your grapes on an arbor, trellis, or even a fence, depending on your space and aesthetic preferences.
Remember to pay close attention to your soil conditions and provide adequate sunlight and water. Regular pruning is also crucial for maintaining healthy vines and maximizing fruit production. Don’t get discouraged if your first harvest isn’t perfect. Growing grapes is a learning process, and each season will bring new insights and opportunities for improvement.
We strongly encourage you to give this DIY grape growing trick a try. It’s a fantastic way to add beauty and bounty to your garden while enjoying the delicious fruits of your labor. Once you’ve experienced the joy of harvesting your own grapes, you’ll never look at store-bought grapes the same way again.
We’d love to hear about your experiences! Share your photos, tips, and challenges in the comments below. Let’s create a community of home grape growers and learn from each other. Happy growing!
Frequently Asked Questions (FAQ)
What are the best grape varieties to grow at home?
The best grape varieties to grow at home depend largely on your climate and personal preferences. For cooler climates, consider varieties like Concord, Niagara, or Reliance. These are known for their hardiness and ability to withstand colder temperatures. In warmer climates, you have a wider range of options, including Thompson Seedless, Flame Seedless, and various wine grape varieties like Cabernet Sauvignon, Merlot, and Chardonnay. Research which varieties thrive in your specific USDA plant hardiness zone for the best results. Local nurseries and agricultural extension offices can provide valuable recommendations tailored to your region. Also, consider the intended use of your grapes. Are you planning to eat them fresh, make juice, or produce wine? This will influence your choice of variety.
How much space do I need to grow grapes?
Grape vines require a significant amount of space to thrive. Each vine typically needs at least 8-10 feet of spacing between it and other vines. This allows for adequate sunlight penetration and air circulation, which are essential for healthy growth and fruit production. The row spacing should be even wider, around 10-12 feet, to allow for easy access for pruning, harvesting, and other maintenance tasks. If you have limited space, consider growing grapes on a trellis or arbor to maximize vertical space. Dwarf or compact grape varieties are also available, but they still require adequate sunlight and well-drained soil. Remember to factor in the mature size of the vine when planning your planting layout.
How often should I water my grape vines?
Watering frequency depends on several factors, including your climate, soil type, and the age of the vines. Young grape vines require more frequent watering than established vines. In general, water deeply and less frequently, allowing the soil to dry out slightly between waterings. During hot, dry periods, you may need to water more often. Avoid overwatering, as this can lead to root rot and other problems. A good rule of thumb is to water when the top inch of soil feels dry to the touch. Use a soaker hose or drip irrigation system to deliver water directly to the roots, minimizing water loss through evaporation. Monitor your vines closely for signs of drought stress, such as wilting leaves or stunted growth.
When is the best time to plant grape vines?
The best time to plant grape vines is typically in early spring or late fall, when the vines are dormant. This allows the roots to establish themselves before the onset of extreme temperatures. In colder climates, spring planting is often preferred to avoid the risk of winter damage. In warmer climates, fall planting may be more suitable, as the vines have more time to acclimate before the hot summer months. When planting, choose a sunny location with well-drained soil. Dig a hole that is large enough to accommodate the root ball, and amend the soil with compost or other organic matter to improve drainage and fertility. Water thoroughly after planting, and mulch around the base of the vine to help retain moisture and suppress weeds.
How do I prune my grape vines?
Pruning is essential for maintaining healthy grape vines and maximizing fruit production. The timing and method of pruning depend on the variety of grape and the training system you are using. In general, grape vines are pruned during the dormant season, typically in late winter or early spring. The goal of pruning is to remove excess growth, shape the vine, and promote fruit production on the current year’s growth. There are several different pruning methods, including cane pruning and spur pruning. Cane pruning involves removing most of the previous year’s growth and leaving only a few canes with a specific number of buds. Spur pruning involves leaving short spurs with a few buds on the permanent framework of the vine. Research the specific pruning requirements for your grape variety and training system.
What are some common pests and diseases that affect grape vines?
Grape vines are susceptible to a variety of pests and diseases, including aphids, Japanese beetles, grape phylloxera, powdery mildew, downy mildew, and black rot. Regular monitoring of your vines is essential for early detection and treatment of these problems. Implement preventative measures, such as maintaining good air circulation, avoiding overwatering, and removing diseased leaves and fruit. If you encounter pests or diseases, consider using organic or natural control methods whenever possible. Insecticidal soaps, horticultural oils, and copper-based fungicides can be effective for controlling many common problems. In severe cases, you may need to use chemical pesticides or fungicides, but always follow the manufacturer’s instructions carefully.
How long does it take for grape vines to produce fruit?
Grape vines typically take 2-3 years to begin producing fruit after planting. The first year is focused on root development and establishing the vine’s framework. In the second year, you may see some flowers, but it’s best to remove them to encourage further vegetative growth. By the third year, you should start to see a significant amount of fruit production. The amount of fruit will increase as the vine matures. Proper care, including adequate watering, fertilization, and pruning, is essential for maximizing fruit production. Be patient and persistent, and you will be rewarded with a bountiful harvest of delicious grapes.

Leave a Comment